Configure MMS TIM on Android

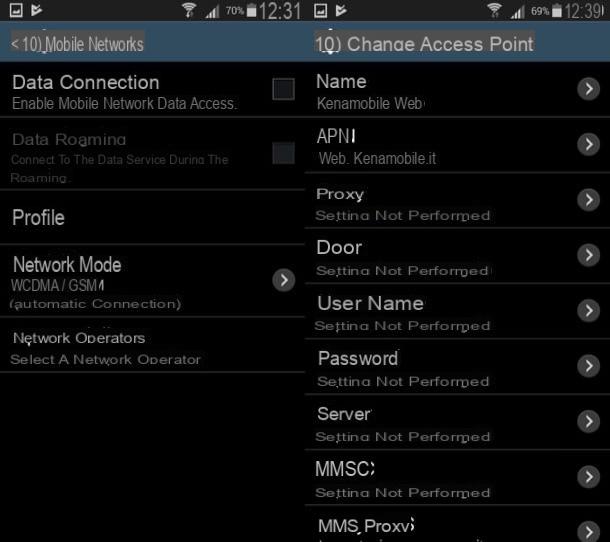
If you want to configure one Android smartphone to receive and send MMS with TIM you have to go to the menu of Settings (by pressing the gear icon located on the screen with the list of all the apps installed on the terminal). After that you have to select the item Other from the menu Wireless and ret and go on Cellular Networks> Access Point Names.
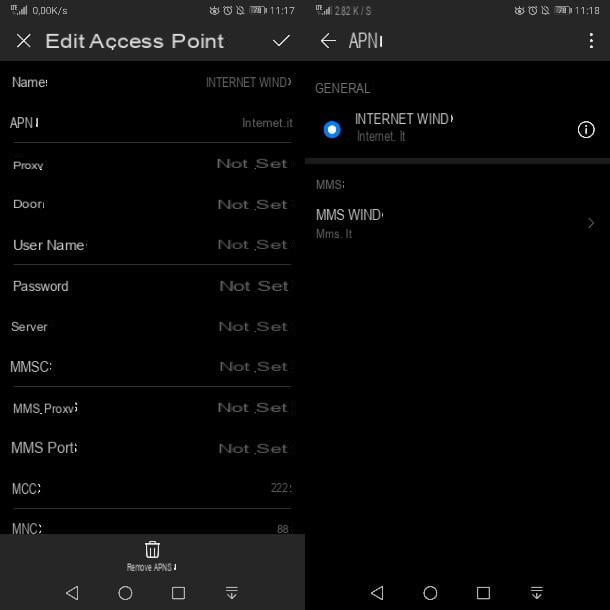
At this point, select the named access point iTIM or, if there is no access point with this name, press the button + (more) which is located at the top right and fill out the form that is proposed to you in this way.
- NAME: iTIM
- APN: unica.tim.com
- PROXY: not set
- BRINGS: not set
- USERNAME: not set
- PASSWORD: not set
- SERVER: not set
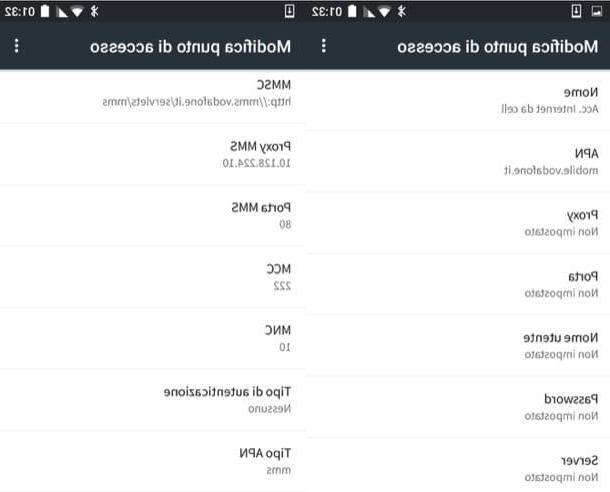
- MMSC: http://mms.tim.com/servlets/mms
- PROXY MMS: 213.230.130.89
- MMS PORT: 80
- MCC: 222
- MNC: 01
- APN TYPE: mms
- APN PROTOCOL: IPv4
- APN ROAMING PROTOCOL: IPv4
- BEARER: not specified
- MVNO TYPE: not set
Once the form is completed, press the button menu located at the top right (the icon with the three dots) and select the item Save give the menu check if you press.
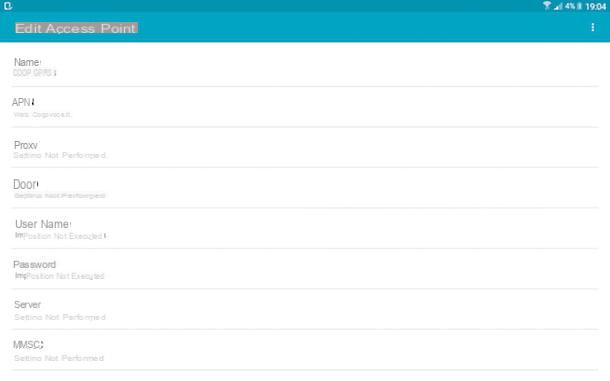
If you use a Android tablet equipped with support for the cellular line (therefore with support for data SIMs), the procedure to follow is quite similar to the one we have just seen for the configuration of the APNs on the cellphone.
The first step you need to take is to go to the menu Settings> Wireless and networks> More, after which you have to go up Cellular Networks> Access Point Names (Or Mobile networks> Profiles) and select the named access point iTIM.
If the iTIM access point is not already present, press the button + (more) which is located at the top right and fill out the form that is proposed to you with the information you find below.
- NAME: iTIM
- APN: unica.tim.com
- PROXY: not set
- BRINGS: not set
- USERNAME: not set
- PASSWORD: not set
- SERVER: not set
- MMSC: http://mms.tim.com/servlets/mms
- PROXY MMS: 213.230.130.89
- MMS PORT: 80
- MCC: 222
- MNC: 01
- APN TYPE: mms
- APN PROTOCOL: IPv4
- APN ROAMING PROTOCOL: IPv4
- BEARER: not specified
- MVNO TYPE: not set
Configure MMS TIM on iPhone and iPad

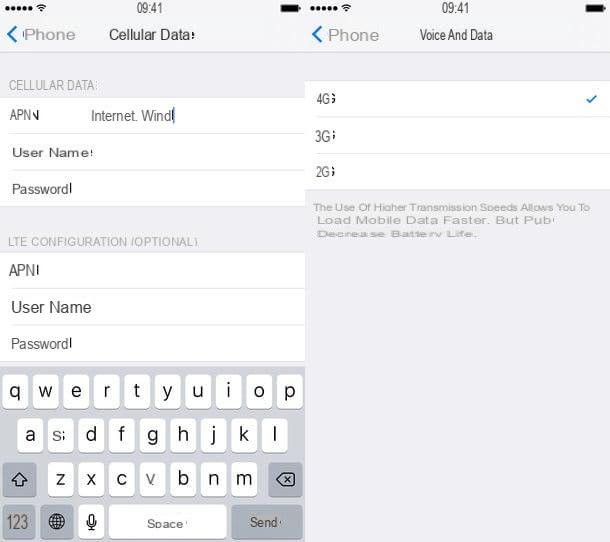
You have a iPhone? Then for configure MMS TIM you have to go to the menu of Settings iOS (by pressing the gear icon located on the Home screen), select the items Cellular> Cellular Data Network and fill in the form that is proposed to you with the following data.
- APN (cellular data): wap.tim.com
- APN (MMS): unica.tim.com
- MMSC: http://mms.tim.com/servlets/mms
- PROXY MMS: PM213.230.130.89:80
- Maximum MMS size: 614400
- APN (Personal Hotspot): ibox.tim.com
Make sure you have entered all the information correctly and presses on the item <Mobile located at the top left to save the changes.
On iPads, even those with Cellular support, it is not possible to receive MMS directly. However, it is necessary to correctly configure the APNs for Internet browsing via 3G / LTE network. To do this, you have to go to the menu of Settings iOS, select the item Cellular data from the left sidebar and set the field APN su ibox.tim.com.
If you encounter any difficulties in configuring TIM MMS on your smartphone or tablet, try to consult this page of the operator's website where there are instructions for configuring many different devices. All you have to do is select the brand and model of your device from the appropriate drop-down menus and press on the item relating to MMS configuration.
How to configure MMS TIM