Parameters to configure Alice mail

In order to consult the Alice Mail / TIM Mail mailboxes through an application or program dedicated to managing emails, it is often necessary to indicate, at the time of configuration, the server parameters to use to download, read and send messages.
As things currently stand, it is possible to use two different protocols: the first, called POP3, stores the changes made on the mailbox (reading and deleting messages, sent mail and so on) only in the app or program in use and does not store them on the server; for this reason, its use is not indicated if you consult your e-mail from multiple locations.
The second, called IMAPinstead, it synchronizes the changes on the server, thus updating the mailbox in all the applications and programs used to manage it. Therefore, I always recommend that you prefer the latter protocol, instead of POP3.
Having made this necessary clarification, below you will list i IMAP parameters to be used, when necessary, to configure e-mail software in order to manage e-mail boxes of the type @ alice.com, @ tim.com e @ tin.com.
IMAP parameters @ alice.com
- Username: the e-mail address, complete with @ alice.com;
- Incoming mail server: in.alice.com;
- Incoming Server Port Number: 143 with encryption method none / automatic;
- Outgoing Mail Server: out.alice.com;
- Outgoing mail server port number: 587 with encryption method none / automatic;
- Outgoing mail authentication: Yup.
IMAP @ tim.com parameters
- Username: the e-mail address, complete with @ tim.com;
- Incoming mail server: imap.tim.com;
- Incoming Server Port Number: 143 with encryption method StartTLS / TLS, or 995 with encryption method SSL;
- Outgoing Mail Server: smtp.tim.com;
- Outgoing mail server port number: 587 with StartTLS / TLS encryption;
- Outgoing mail authentication: Yup.
IMAP @ tin.com parameters
- Username: the e-mail address, complete with @ tin.com;
- Incoming mail server: imaps.tin.com;
- Incoming Server Port Number: 143 with encryption method StartTLS / TLS;
- Outgoing Mail Server: smtps.tin.com;
- Outgoing mail server port number: 587 with StartTLS / TLS encryption;
- Outgoing mail authentication: Yup.
Keep in mind that if the TIM Mail is not associated with a TIM line (ADSL, fiber or cellular), the relative mailbox can be consulted from an app or program only if you are connected to the Internet via a TIM network. Otherwise, access is only allowed via Webmail.
Note: some e-mail clients, especially those for smartphones and tablets, may not have a field explicitly dedicated to the connection port. If so, you can cope with the problem by adding the symbol ":" immediately after the server name and specifying the port following the same (eg. in.alice.com:143 or out.alice.com:587).
How to configure Alice Mail on smartphones and tablets
The way to go for configure Alice Mail / TIM Mail on smartphones and tablets it is extremely simple: it all boils down to starting your favorite email application and adding a new account, by entering the parameters previously seen in the appropriate form. Below I'll explain how to do it on Android and iOS / iPadOS.
How to set up Alice Mail on Android

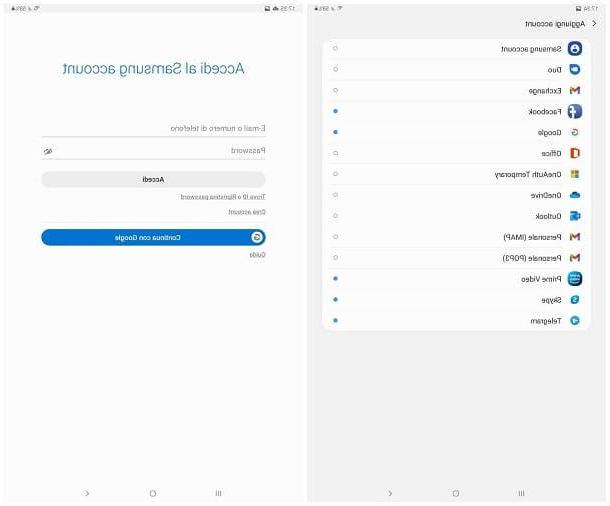
If yours is an animated device from Android, you can add the new email account directly from the system settings: following this operation, it will be available and ready for use in the default app used to manage emails (eg. gmail).
So, first of all, tap on the symbol ofgear located on the Home screen or in the Android drawer, so as to access the Settings of the operating system, press on the item Accounts / Accounts & Synchronization and tap the button Add account, located at the bottom of the next screen.
Pray, select the voice Personal (IMAP) or E-mail from the next menu, indicate yours email address in the appropriate field and tap the button Manual configuration, which is located at the bottom. Now choose you want to use the protocol IMAP, enter the Password of your account and, after pressing the button NEXT, specifies the server settings for the incoming mail and that for the outgoing mail, touching the button each time NEXT.
If you encounter problems in validating the settings (caused for example by an incorrect security protocol), tap on the item Change advanced settings that appears on the screen and enter, in the proposed form, also the port and security protocol to use.
If everything went well, within a few moments, the mailbox should be set up on the device. When this happens, tap the button NEXT and conclude everything by indicating the e-mail management parameters, if applicable: control frequency post office, using the account as default, sending notifications reception, automatic synchronization e download attachments. Finally, tap the button NEXT And that's it!
Following this operation, the mail account will be added to the operating system and will be usable within the default management app. If, on the other hand, you prefer to view the content of your Alice email in another Android email client, all you have to do is start it and, after opening its settings, tap the button for add a new account and follow a procedure similar to the one seen above.
How to set up Alice Mail on iPhone
Be il tuo è un iPhone, you can follow a procedure quite similar to the one seen above, to make Alice's mail available within the app Mail of iOS. Please note that the following steps are also valid for configure mail Alice on iPad.
To succeed in the enterprise, tap on the icon Settings iOS / iPadOS (the one depicting the symbol of a gear located on the Home screen or in the App Library of your device), tap the items Mail e Account and tap on the wording Add account.
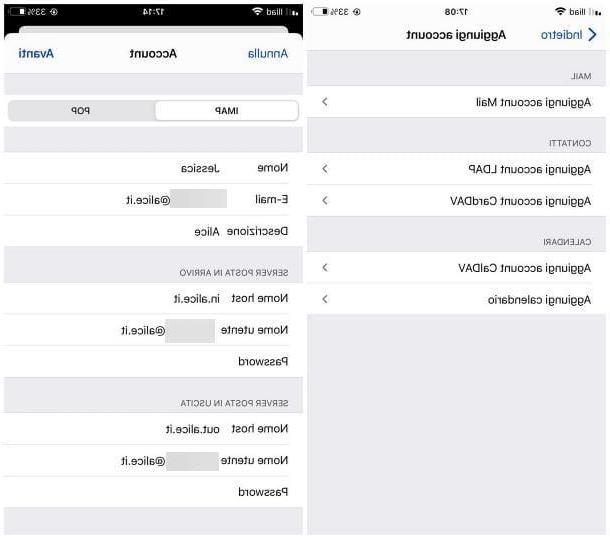
Now, touch the voice Other visible on the next screen, choose the option Add Mail Account and fill out the proposed form with the requested data: yours name (the one displayed for outgoing messages), yours email address Password to use to access it and, if desired, a description of the mailbox (eg Mail Alice).
Finally, tap the button NEXT located at the top right and wait a few moments for Mail to attempt to automatically retrieve the "credentials" of the servers for incoming and outgoing mail. If the operation is not successful, you will be offered a module dedicated to manual entry: tap on the tab IMAP and enter the parameters that I explained to you in the initial chapter of this guide in the appropriate boxes. When you're done, tap the button NEXT to proceed with checking the settings.
At this point, all you have to do is choose which items to synchronize with the newly added mail service (mail, contacts, Calendar etc.) and press the button Save, to top it all off. If you deem it appropriate, you can make sure that new emails are sent, by default, with the Alice / TIM account just configured: to do this, go to the menu Settings> Mail of iOS and tap the item Default account.
How to set up Alice Mail in Outlook
How do you say? You need specific guidance on setting up Alice's mail in the app Outlook available for Android, iPhone and iPad? Don't worry, it's very easy.
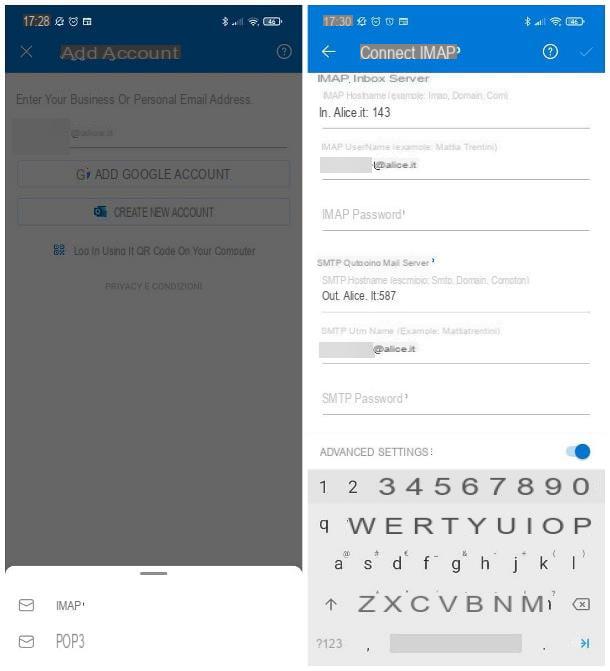
To begin with, start the aforementioned app: if it is the first time you add it, you will be automatically offered the procedure to add a new account; if, on the other hand, you want to add your Alice / TIM mailbox to an existing one, tap on your avatar visible at the top left and then on the icon depicting a envelope with + symbol, residing in the sidebar of the menu that appears.
Now, tap on the item Add an account resident in the panel that appears below, specify theemail address to be configured in the appropriate text box, touch the button Continue and indicates that you want to use the protocol IMAPby pressing the appropriate button.
At this point, enter the Password of the mailbox in the appropriate field, specify the name to be displayed in outgoing messages in the appropriate field and, if desired, indicate a Description for the account. Finally, tap the button ✓ / Sign in that appears at the top, to try to automatically configure the incoming and outgoing mail servers.
If you make a mistake, move up OFF the relative levetta alle Advanced Settings and fill out the next form indicating the parameters that I explained to you in the initial section of this guide. Finally, tap the button ✓ / Sign in, to complete the configuration of the mailbox, and complete everything by touching the button Later.
If you need an extra hand in completing the steps I told you about in this section, my Outlook setup guide might come in handy. If you prefer to use any other application used for managing e-mail instead of Outlook, you can configure it by following a procedure rather similar to the one seen a little while ago.
How to set up Alice mail on the computer
Even in the case of the computer, Alice's mail can be configured to be managed through any e-mail program. Below I'll explain how to do it Windows 10, its MacOS and, finally, through the software Outlook.
How to set up Alice Mail with Windows 10
To configure an Alice / TIM mailbox in the program Windows 10 Mail, do this: First, open the aforementioned application by calling it from the menu Home Windows (the icon in the form of pennant located in the lower left corner of the screen), click on thegear placed at the bottom left and then on the item Manage accounts, visible in the menu that appears.
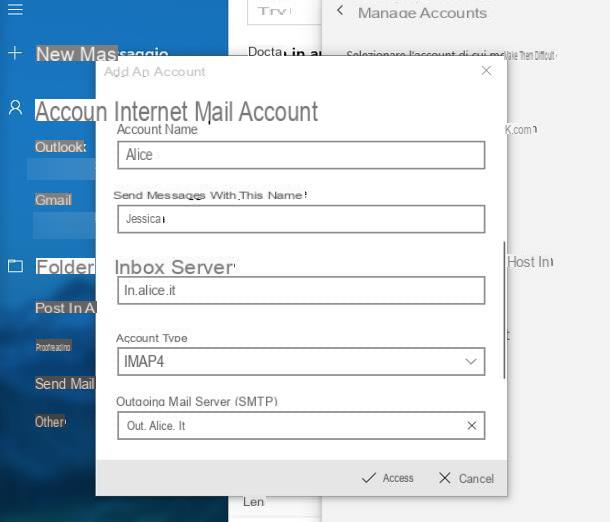
Pray click on your button Add account, select the voice Advanced configuration located in the next window and choose the option Internet mail.
Now, fill in the fields displayed on the screen with the required information: address e-mail, username e Password to access the mailbox, account name e display name for sending outgoing mail. Finally, set the drop down menu Account type su IMAP 4 and fill in the data relating to incoming mail server and to that for the outgoing mail, following the instructions I gave you in the opening chapter of this guide.
Per finire, click on your button Log in and wait for the mailbox to be made available within the application (you can select it from the left sidebar). That's all!
How to set up Alice Mail on Mac
To configure Alice in email Apple Mail, open the aforementioned application by invoking it from Dock, click on the menu Mail> Add Account ... located in the top menu bar, put the check mark next to the wording Other Mail account ... and click on the button Continue.
Now, enter the you don't know,email address to configure and the Password to access the mailbox within the text boxes displayed on the screen, click the button Log in and wait for Mail to try to automatically configure the mailbox.
Should the operation fail, click on the button Continue, in order to view the form dedicated to manually entering the parameters for the servers, and fill in everything following the instructions I gave you in the initial chapter of this guide. When you are done, click on the button Log in and, after specifying the elements to synchronize with the Mac (Mail, Calendars, Contacts and so on), press the button Save, finally.
How to set up Alice Mail in Outlook
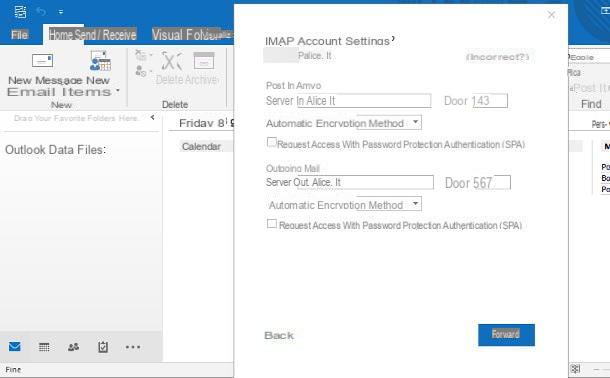
If, instead of the default Windows and macOS programs, you prefer to use the mail client Outlook (part of the Microsoft 365 suite), proceed as follows: first open the program, click on the tab Fillet located at the top left and then on the button Add account, visible inside the panel that appears.
Now, enter yours email address in the appropriate field, click on the button Connect and, when prompted, enter the Password in the e-mail box and click the button again Connect, in order to automatically acquire the IMAP account settings and finish configuring the mailbox.
If the automatic detection fails, you can add the server parameters manually: then start the creation of a new account as I showed you a little while ago and, after entering your Alice email address, click on the item Advanced options and put the check mark next to the wording Allow advanced account setup.
Now, click on the icon of IMAP located in the screen that appears later, enter the Password of your mailbox, click on the button Connect and, when the screen appears There was a problemclick on your button Change account settings and enter the parameters relating to the incoming and outgoing mail servers, which I indicated in the first chapter of this guide, in the appropriate fields.
If, instead of Outlook, you prefer to use another e-mail program (eg. Thunderbird), all you have to do is access its settings and follow the wizard to add a new account, generally very similar to the one I showed you a little while ago.
How to configure mail Alice