How to register desktop PC
You want to find out how register your PC desktop but you don't know what tools to use on Windows and how to use it? Then go ahead and read. Find indicated (and explained) right below what I believe to be the best programs in the category. Good job"!
Xbox
Stai using a PC with your installato Windows 10, I am happy to inform you that to record the PC screen you do not necessarily have to install new software on your computer. Everything you need is already included in Windows! The most recent edition of the operating system from Microsoft, in fact, integrates the screen recording function in the pre-installed application Xbox, which, as easily understood, was designed to record gameplay videos (but nothing prevents it from being exploited for other purposes).
To take advantage of the functionality in question, however, you must make sure that your computer meets the relevant ones minimum requirementsthe required. To be precise, it must be equipped with one of the following graphics cards (if you don't know how to check which graphics card is installed on your PC, you can read my tutorial dedicated to the topic to find out how to proceed).
- AMD Radeon HD 7700 series
- AMD Radeon HD 7700M series
- AMD Radeon HD 8500 series
- AMD Radeon HD 8500M series
- AMD Radeon R7 / R9 series or later
- NVIDIA GeForce 600 or later
- NVIDIA GeForce 800M or later
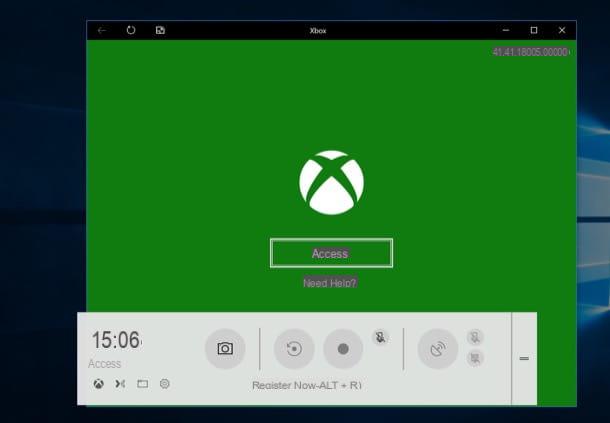
After making sure that your PC has the right technical characteristics to take advantage of the screen recording function of the Xbox application, start it by clicking on the Start button (I cheer with the pennant Windows on the taskbar), search for the term xbox in the search box and click the relevant result displayed in the list.
Once the application window appears on the desktop, use the key combination Win + G on the computer keyboard to call up the screen recording function. When you see the window appear asking if it's a game, click the button It is a game.
Once this is done, you will see a toolbar appear at the bottom of the screen. Therefore, press on the button Register now (l'icona del gray rod) on it and desktop registration will start immediately. When you want, you can stop it by clicking on the button Stop recording. Easier than that?
OBS
Are you not using Windows 10 or are you looking for a valid alternative to using the Xbox application described in the previous lines? In that case, I can't help but suggest you test OBS (acronym for "Open Broadcaster Software"). Haven't you ever heard of it? Strange, he is very famous. However there is no problem, let's fix it right away.
It is a completely free and open source software, running on all versions of Windows (from Windows 7 onwards) and thanks to which it is possible to create desktop recordings, possibly including the video stream of the webcam. There is also the possibility of broadcasting the footage of the desktop in streaming (very useful for video game gameplay).
To download the program on your computer, connect to its official website and click on the button Windows. Once the download is complete, open the .exe file obtained and, in the window that appears on the desktop, first click on the button Yes and on the buttons Next, I Agree, Next, install e Finish to complete the setup.
Now you need to start OBS and set it to register your computer's desktop. It is not difficult. First, click on the button OK to accept the terms of use of the software and on the button Si to start the automatic configuration procedure, then follow the on-screen instructions.
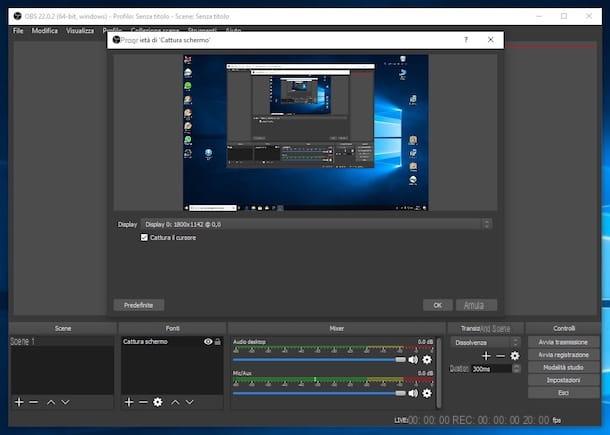
At this point, select the item output from the menu on the left and click on the button Shop by Department placed next to the item Registration path to indicate the location on your computer where the generated output file will be saved. Then, select the format in which you want to save the final file using the drop-down menu Registration form and confirms the choices made by pressing on the buttons Apply e OK bottom right.
Once this step is also completed, you must communicate to OBS the video source to be used for filming. Then click on the button [+] located under the heading References, select the option Screen capture from the menu that appears, click on the button OK in the window that opens, choose whether to include the mouse pointer in the recordings by placing or removing the check mark from the item Capture the mouse cursor and click your bottone OK.
Now, choose whether to limit screen recording to a single area or to the entire desktop, by moving and adjusting the selection rectangle in the center of the main OBS window and adjusting the audio volume using the indicators attached to the section mixer (below), next to the icons of thespeaker.
Then start the recording by pressing the button Start recording, attached to the section Controls, bottom right. When you want, you can stop it by clicking on the button Stop recording.
If in your video you also want to include a box with the webcam in real time, before starting the recording of the desktop click again on the button [+] placed under the heading References, select the option Video cattura device from the menu that appears and click on the button OK. Subsequently, adjust the settings for use of the function through the additional window that opens and define the size and position of the video taken from the webcam by moving and adjusting the relative selection rectangle.
How to register Mac desktop
Stai using MacOS and then you would like to know how to register the Mac desktop? No problem, I'll explain it to you right away. Below you will find the tools you can use to perform this type of operation using an Apple-branded computer. It's child's play, don't worry.
Quick Time Player
If you don't want or can't download new programs on your Mac, I'm happy to inform you that to register your desktop you first have the option of using Quick Time Player, the multimedia player integrated in macOS which, perhaps not everyone knows, also offers a very convenient function useful for carrying out the operation that is the subject of this tutorial.
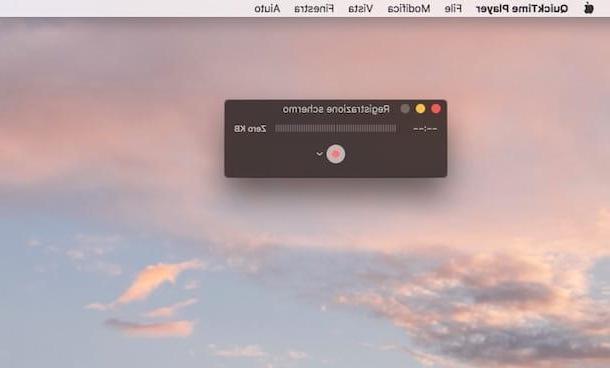
You ask me how to use it in this way? I'll explain it to you right away. First, launch QuickTime Player by clicking on its icon (the one with the "Q") present in the folder Other of Launchpad. Alternatively, you can invoke the program via Spotlight, Crab or dalla cartella Utilities> Applications say macOS.
Next, select the item Fillet present on the menu bar (top left) and click on the wording New screen recording. In the window that opens, click on the symbol of down arrow and, from the menu that appears, indicate the type of audio input and choose whether to display mouse clicks during recording.
If you also want to include a frame with the webcam shot in the recording, also select the option Always on top from the menu Vista.
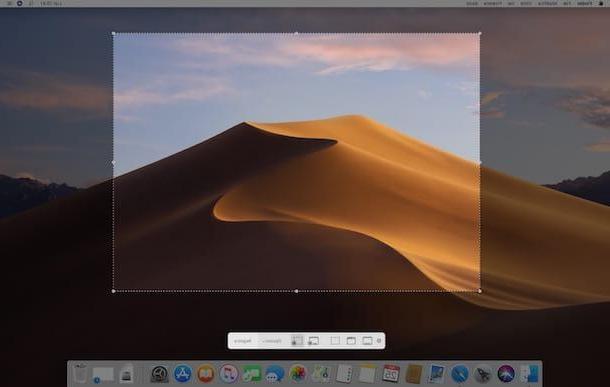
When you want, you can start the desktop recording by clicking on the button REC (the icon with the red dot) and choosing whether to record the entire computer screen, by clicking anywhere on the screen, or whether to capture only a portion of the desktop, making a selection with the cursor and pressing the button Start recording.
When you see fit, you can stop recording by clicking on the button Stop (l'icona del small square inside the circle) located in the status menu, in the upper right part of the screen. Later, you can preview the recording made by clicking the button Play.
If the preview satisfies you, save the movie made by clicking on the item Fillet attached to the menu bar and then selecting the option Export as. Then select one of the output resolutions among those available, indicate the location in which to save the video and, finally, click on the button Save.
Screenshot
Another "stock" macOS tool that you can use to record the desktop is the application Screenshot, as long as you have one installed on your Mac macOS version equal to or later than 10.14. The application in question, in fact, not only allows you to capture screenshots, as can be understood from the name itself, but also to create screen recordings in a simple and fast way.
To do this, all you have to do is use the key combination cmd + shift + 5 on the computer keyboard and choose whether to record the entire Mac screen or just a portion of it by pressing the buttons respectively Record the entire screen (the one with the window and the dot) or Record your selection (the one with the dashed rectangle and the dot) placed on the toolbar that appears below.
Next, click on the button Register to start the acquisition. When you want, you can stop the screencast by clicking on the button Stop present in the status bar (top right). By default, the video will be saved on your desktop (or, anyway, in the default folder where screenshots are saved).
Furthermore, always after the end of the recording, you will be shown a thumbnail of the movie in the lower right corner of the desk and by clicking on it you can cut the video, share it online or delete it, using the appropriate icons located at the top right of the new window that opens.
If you want to change the output position of the screen recordings and make further customizations to the operation of the screenshot, before starting the recording press the button options placed on the toolbar and make your choices from the menu that appears.
OBS
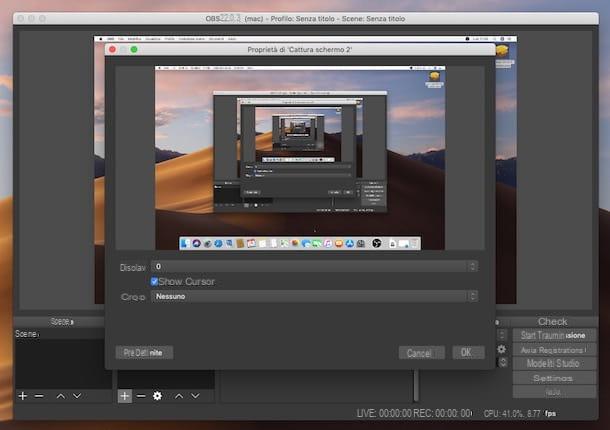
OBS, the program mentioned in the previous lines indicating the systems available to record the desktop on Windows, is also available for macOS and has practically the same operation as the version for Microsoft's operating systems. If you want to use it on your Mac, I'll immediately explain how to do it.
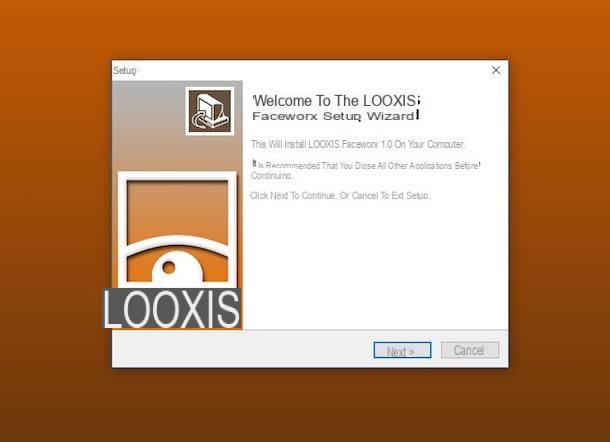
First, connect to the application's website and click on the button macOS 10.11+, in order to start the download of the program. Once the download is complete, open the package .pkg obtained and, in the window that appears on the desktop, click on the button Continue twice in a row. Then press on the button Install, type the Password of your user account on macOS (the one you use to access the operating system) and complete the OBS installation process by first pressing the button Install software and on the one with it written Close.
At this point, start OBS by invoking the application from the Launchpad, through Spotlight, Crab or via the folder Applications on your Mac, click the button OK in the window that opens on the screen, to accept the conditions of use of the program, presses the button Si to start the software configuration wizard procedure and follow the instructions that are proposed to you to complete it.
Once this is done, you can finally start using the program by proceeding in the same way to the Windows version. The steps to be taken and the functions available do not differ.
How to register desktop