How to create a folder on Android mobile
If you use one Android smartphone, there are many methods you can use to create folders. You can take advantage of the File Manager pre-installed on your device or other solutions available on the Play Store or third-party stores. In the next few lines I will describe how to do both in the first and in the second case, in the event that the integrated file manager is not for you.
Applications
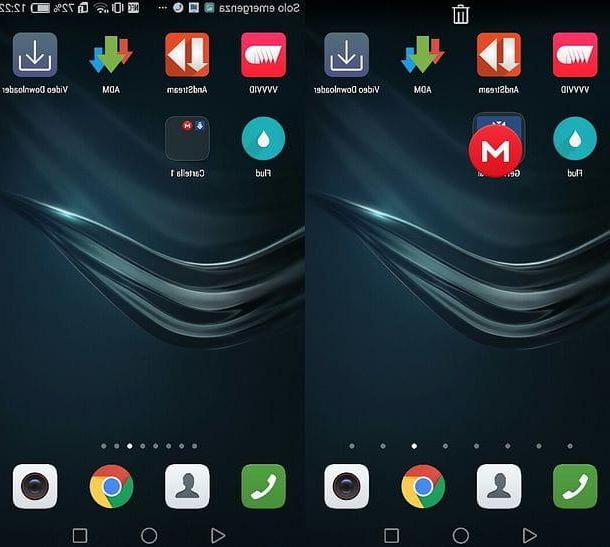
If you want create a folder with apps installed on your device, all you have to do is access the Home screen or drawer (the menu where all the apps are), do a prolonged tap icon of first application you want to add to a folder and drag it to that of one second app that you want to include in the same folder: the folder it will be created automatically and you can rename it as you see fit.
Afterward, you will simply have to drag and drop the icons of the other apps you want to add onto the folder icon. For more details, I invite you to consult my tutorials on how to create folders on Huawei) and Samsung.
Default file manager
You have decided to try using the default file manager installed on your smartphone? Very good! It is, in fact, a rather convenient solution that allows you to create folders without having to download anything and, consequently, reduce the steps to reach the final result.
Ready to proceed? First, unlock the phone, go to the Home screen and look for the File manager “Standard” installed on your device. If you can't find it, it might be in the application menu (The drawer) where all the apps are present. Additionally, the file manager may have different names depending on the brand of phone you use; the most common are usually File manager (on Huawei devices) e archive (in Samsung devices).
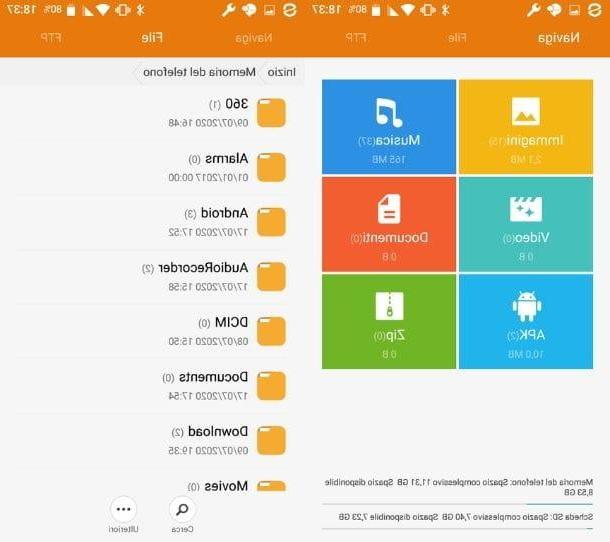
Once found, tap on its icon and, in the new screen that has opened, select the item Fillet o Local (always based on the brand you use) and choose whether to manage the files in the internal memory or those present in the SD card, by tapping on the relevant item in the list.
Now comes the most interesting part. To create a folder, all you have to do is press the button with i three dots and tap on the item New folder. Done? Great, now give a name to the folder just created, typing it in the appropriate field, and press the button OK, to confirm. In the list of folders already present in that specific section you will see the one you have just created appear, positioned in alphabetical order.
Now you just have to add the files you want inside it. Again, this is a very easy operation: you just have to select them with a long tap in the File manager, tick all the ones you want to move and press the button Copy. If you prefer to remove them from the old folder so that they are only present in the new one, press the button instead Transfer / Move.
At this point, you just have to reach the folder you just created, tap on it and press the button Paste. After waiting for a couple of seconds, you will see all the files you have decided to transfer appear. Simple, isn't it?
Google files
It may happen that the “stock” file manager does not meet the expectations of those who use it. If you too find yourself in this situation and you have noticed that the file manager of your smartphone is not for you, I want to recommend another application that you can use to create folders on your device.
It is Google files, a free file manager developed by the search engine giant, useful for to order inside the smartphone, catalog the contents, keep an eye on it memory space and take advantage of the different backup functions offered by the service.
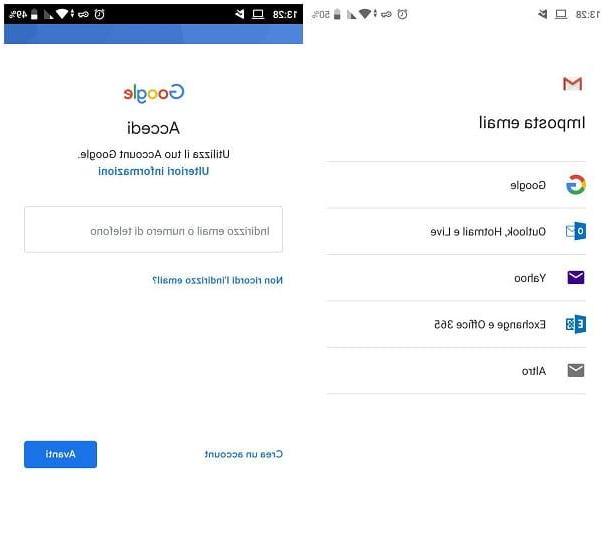
Did I intrigue you? So now I'll explain how to download the app and start using it. First, unlock your device and tap on the icon Play Store (the ▶ ︎ symbol colored). Once open, type in the search bar "Google files", select the app from the results and tap the button Install. If you use an Android device without Play Store, for example a Huawei device with AppGallery, you can download the application from an alternative store.
With the application open, all you have to do is proceed with the initial configuration. Then tap the button Continue, to accept the terms of use of the app, and then on Allow twice in a row, allow Files to access the content on your smartphone. Now everything is ready and you can start creating your new folders using this manager.
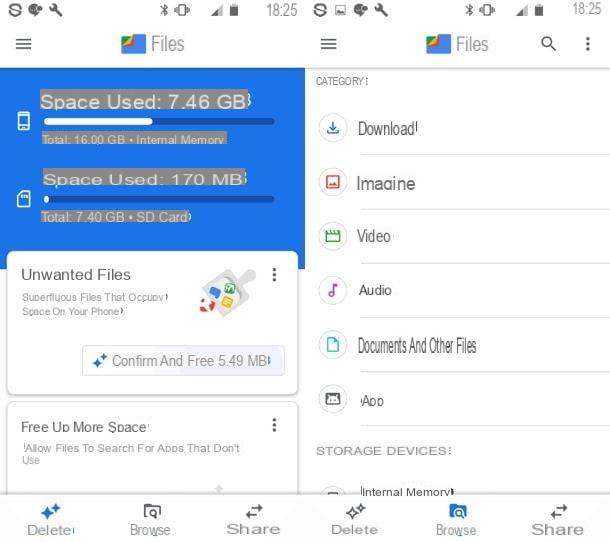
From the home screen, then tap the button Shop by Department, in the center of the menu located at the bottom. Then scroll down the page until you find the item Storage devices: under it you can choose whether to manage the space in the internal memory or on the SD card. Tap on the option you want and, in the new screen that has opened, press the icon with i three vertical dots (top right). From the appeared menu then select the item Add new folder, give a name to the folder you just created and tap the button Create Folder.
To add the files to the folder you just created, go back to the menu Shop by Department and search for the files to move (by going to Internal Memory or on SD card, based on their location). In the new screen that has opened, then make a long tap on the file to be allocated to the new folder: to select more than one, put the check mark on all those you want to move.
At this point, press the icon with i three vertical dots (top right) and, from the menu that is proposed to you, select the item Copy to or that Move to (choosing the second option the files will not be duplicated). Finally, it indicates whether to allocate them to the Internal Memory or to SD card, premi sull'icona della folder you just created and tap the button Move here. The files will be copied or transferred immediately.
How to create a folder on iPhone
You want to create and manage your folders on iPhone? Then I am pleased to inform you that this is a simple operation that you can perform using the tools included in your "iPhone by".
Applications
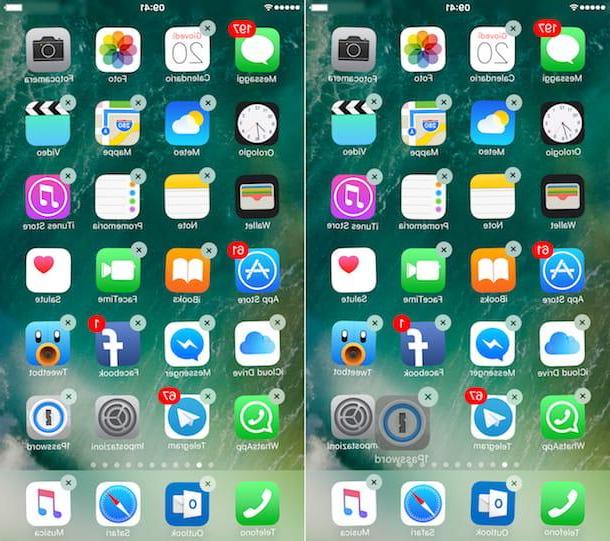
If you want create a folder with apps on iPhone, all you have to do is access the Home screen and run a prolonged tap on the icon of any app, until the context menu disappears and all the icons on the screen begin to “dance”. Alternatively, on the most recent versions of iOS, you can also do a long tap on a point on the Home screen without icons.
At this point, drag the first application you want to add to your folder on the icon second app you want to insert in the same folder and this will be created automatically. Therefore assign a name to the folder you just created and drag the icons of the other applications you want to include into it.
I point out that you can also select multiple apps together, by holding down the icon of one of them and then making a single tap (with another finger) on the icons of the others. For all the details, read my tutorial on organizing apps on iPhone.
Su iOS 14 and later there is also a screen, called App library, after the Home screen, which automatically groups all the apps on the phone into folders. Grouping is automatic, so there is no need to manually create such folders.
Fillet
Fillet, the file manager installed on all iOS devices from version 11 onwards, allows you to easily manage files and folders, a bit like the Finder on macOS or File Explorer on Windows.
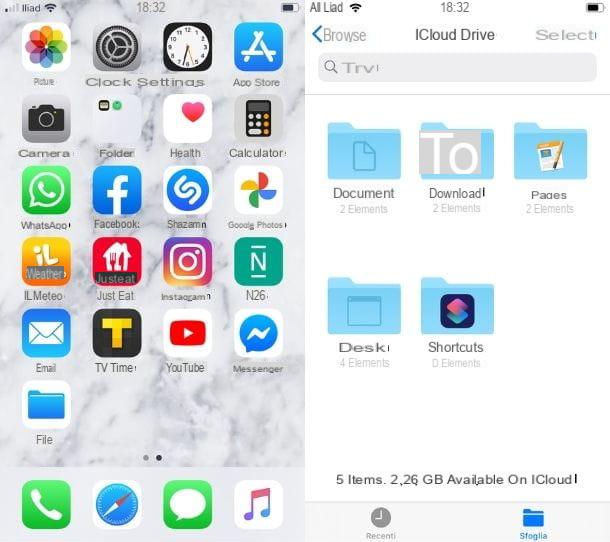
To start using it, unlock your iPhone and go to the Home screen. Now, select the app icon Fillet, characterized by a blue folder on a white background. If you don't find it, you may have mistakenly deleted it, but you can safely download it again via theApp Store.
Now, from the main screen, tap on Shop by Department in the menu below. In this way you will be able to access all the positions on which it is possible to go to trade. You will be able to choose whether to create a new folder in iCloud Drive, Apple's cloud storage space, or directly on iPhone.
Once you've selected the space, all you have to do is do a prolonged tap anywhere on the screen. A small horizontal menu will open. At this point, you just have to press on the item New folder, give it a name by typing it in the space provided and, once done, click on the item end. The new folder will be added to those already present. You can repeat the procedure as many times as there are folders you want to create.
To move the files to the new folder, instead, proceed as follows: tap on Positions to go back, select the folder from which you want to take the files, press on the item Select (top right) and tick all the items you want to move. At this point, tap on the icon folder from the bottom menu and select the destination folder. Then tap on the item Copy And that's it!
Do you want some more information to create folders on your iPhone? Then I suggest you also read my dedicated guide, in which I also told you about Readdle's Documents, an excellent alternative file manager for iOS / iPadOS to which you can contact if Apple's default file manager does not satisfy you.
How to create a secret folder on mobile

want create a secret folder to make sure that the files inside are away from prying eyes? There are several ways to accomplish this. Now I show you how to create a folder on your phone and password protect it quickly and easily with apps designed for this purpose.
Android
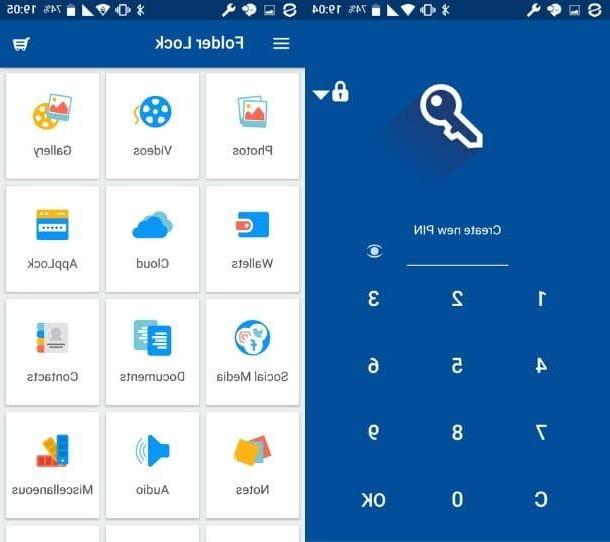
A terminal was used Android, you can create secret folders with the app folder Lock, useful for protecting different types of files by using a PIN. This is an extremely intuitive and easy to use app, available in free version and PRO version (€ 4,49). The latter eliminates all advertising banners and allows access to advanced functions such as synchronizing files to the cloud and using the stealth mode.
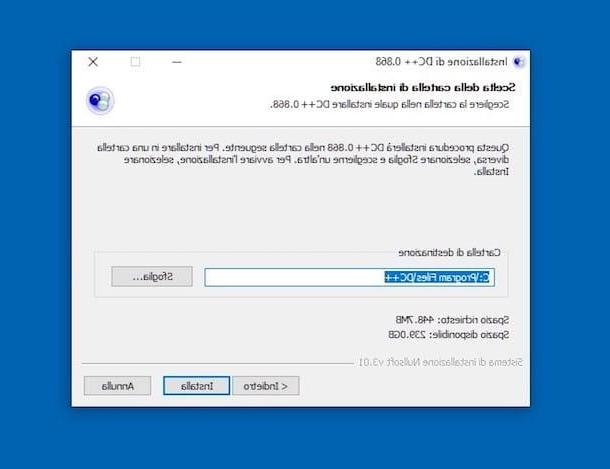
To download it, go to Play Store (the symbol ▶ simbolo colored) and, in the search bar at the top, type "Folder Lock". Then select the app from the search results and press the button Install. At the end of the operation, however, tap the button apri or on the application icon added to the Home screen / drawer to launch it.
If you use an Android device without the Play Store, for example a Huawei device with AppGallery, you can get the application by contacting one of the many alternative stores available.
When the application is running, press the button Allow twice in a row, so that it can have access to the files. At this point, all you have to do is enter the PIN you want to use, press the button OK and confirm it by typing it again.
From the home screen of the app, then select the file category you want to protect and transfer them to a folder already present by default (or alternatively create a new one by pressing the button capacitor positive (+) lead, giving it a name and pressing the button Yes). At this point, click on the icon with the padlock and the file or folder will be protected by the previously selected password.
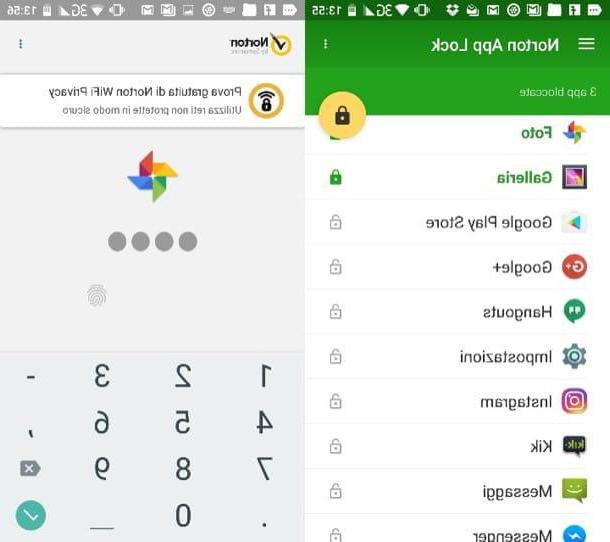
Another solution that I want to tell you is called Norton App Lock, a free digital security app, made by the well-known cybersecurity brand Norton, useful for blocking through lock sequence o code access to the apps you want to protect.
Its peculiarity is that it allows you to block access to entire applications, without having to encrypt each folder individually. In short, you can block access to the entire file manager to ensure that all its contents are protected from prying eyes.
Once you have downloaded and launched the app, accept its terms of use by pressing the button I agree and start. Then authorize the movement above other apps by pressing the button OK. In the new screen that has opened, then move the lever to continue with the initial setup.
Done? Well, now tap the button Configuration and, in the screen where you were redirected, look for the entry Norton App Lock Service: tap on it, move the lever and finally press the button OK.
Now the initial setup is done and you have enabled the app. All you have to do is select yours lock sequence (or alternatively a numeric code), confirm it, and select yours Google account to recover your password in case you forget it. Once this is done, press the button OK and subsequently on Continue.
On the main screen you will only have to tap on theapp you want to block (whose name will turn green). Each time someone tries to open it, they will need to enter the pattern lock or code.
iPhone
iPhone it does not allow you to directly enter passwords to protect all types of folders. However, there is a solution that allows you to create folders with photos and videos protected by a password. It is about Private Photo Vault, an app available in free version e PRO (€ 7,99). The latter allows you to create an unlimited amount of albums, eliminates advertising banners and allows the transfer of photos from PC to iPhone wirelessly.
To download it, go to Home screen on your iPhone and tap on theApp Store (the blue one with an "A" in the center). Then select the tab Search (below), type the name of the app in the search space and, once found among the results, tap the button Ottieni / Installa. Then verify your identity via Face ID, Touch ID or Apple ID password and open the application by pressing the appropriate button or its icon on the Home screen.
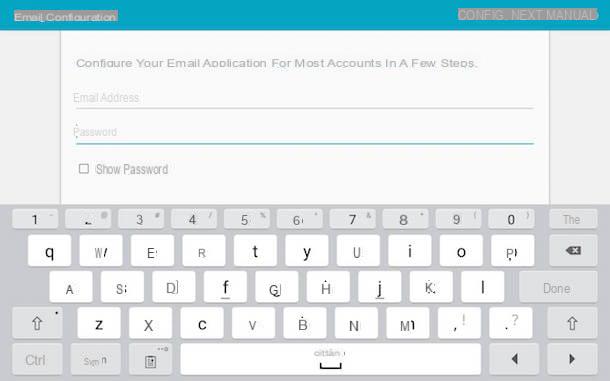
Once the application is open, proceed by tapping the button Start. Now set a pass code to use whenever you decide to access the app and a email address to retrieve the code in case it is forgotten. At the end of this procedure, press the button twice NEXT and subsequently on I agree. All you have to do is accept the terms, by tapping on the relevant button and start using the app.
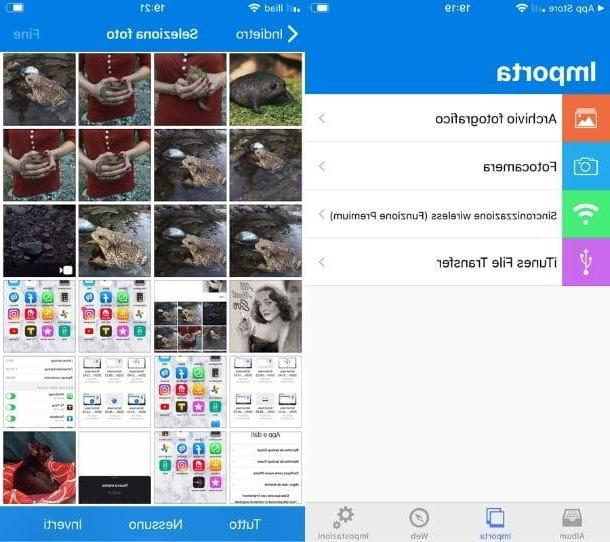
From the main screen, then tap on the icon capacitor positive (+) lead, to create a new album, enter the name and Password you want to use to protect it, then fill in the field Verifica re-entering the password to confirm it.
The new folder is now protected. To insert photos or videos, open it (by entering the relative password), press the button capacitor positive (+) lead, choose whether to import photos from archive (so from the iOS Photos app) or from the Camera (i.e. a photo to be taken in real time) and that's it.
Once selected or taken, the photos will be imported directly into the new folder and deleted from the Photos app and iCloud.
If, on the other hand, you want to block access to a specific app, you can use the function Usage time of iOS for block access to apps, protecting it with a password. To take advantage of it, just go to the menu Settings> Screen Time> App Restrictions of your iPhone and follow the onscreen instructions: for all the details, read my tutorial on how to password protect apps on iPhone.
How to create a folder on the phone