Create free panoramic photos on your PC
As I mentioned at the beginning of the post, there are numerous solutions that allow you to create panoramic photos for free via PC: now I'll list some of the most interesting and I'll explain how they work.
AutoStitch (Windows / macOS)
Autostitch is a free application for Windows and macOS that allows you to automatically merge a series of photos, in order to obtain a panoramic image. Use the spherical projection technique to create 360 x 180 degree panoramas. Other techniques, such as those of cylindrical and planar projection, are only available in commercial variants of the program, which can be obtained for a fee (eg Autopano Pro for Windows, macOS and Linux).
To download the version Windows of AutoStitch, connected to the official website of the program and click on the link Windows placed next to the item Download the free demo version. If you are using a computer still equipped with a 32-bit version of the Microsoft operating system, click the link For 32-bit Windows users here is the older Win32 demo version. A Macinstead, click on the link Mac OSX.
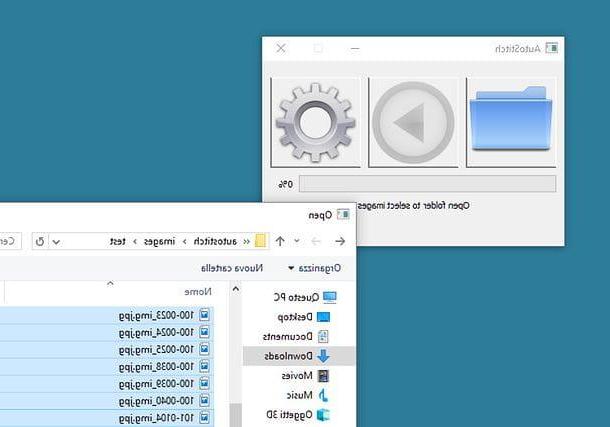
When the download is complete, if you are using a Windows PC, open thezip archive which contains AutoStitch, extract the contents to a folder of your choice and run the executable autostitch.exe. A MacInstead, open the AutoStitch dmg package, copy the program to the folder Applications and start the latter by right clicking on its icon and selecting the item apri from the context menu (this operation is only necessary at the first start, to bypass macOS restrictions on applications from non-certified developers).
Now the steps to take are the same on both Windows and macOS. Then click on the icon of folder, select the images that make up your panorama and press the button Open / OK. Within a few seconds, the panorama image will be saved to your desktop and displayed in the default software that is used for viewing images on your computer.
If you want, you can adjust the AutoStitch settings by clicking on thegear icon and acting on the fields in the window that opens: Output size to specify the dimensions (in width, height or percentage) of the image to be obtained, Blending options to choose the technique that the program should use to merge the photos or Advanced options to set the maximum amount of memory to use and the quality of JPG files to be obtained.
Please note: if you are using a 32-bit version of Windows, you have to follow a slightly different procedure to merge the photos with AutoStitch: you have to go to the menu File> Open located at the top, select the images that make up the panorama and press the button OK
Hugin (Windows / macOS / Linux)
Hugin is a free, open source and multi-platform software (compatible with Windows, macOS and Linux) that allows you to create panoramic photos in a way that is perhaps not too intuitive in the early days, but certainly effective. It automatically optimizes the images involved in the process and uses three different blending techniques: that straight, ideal for architectural landscapes, as it allows to keep the roofs and walls of buildings aligned (even if it tends to stretch the more peripheral photographs compared to the central photo); that cylindrical, which allows to avoid the stretching of the images (since each source image is projected on a surface so that the occupied area is as close as possible to the original area) or that equirectangular where each source image is calculated to represent a certain viewing window in space (when possible, some photos are also merged above and below to obtain a spherical panorama).
To download Hugin on your computer, connect to the official website of the program and click on the item Get Hugin Now located in the central orange box. Once the download is complete, if you use a PC Windows, launch the executable Hugin-2018.0-win64.msi e, nella finestra che si apre, fai click sul pulsador Next. Then put the check mark next to the item I accept the terms in the License Agreement and complete the setup by clicking on first Next twice in a row and then on install, Yes e Finish.
If you use a MacInstead, open the dmg package which contains Hugin, copy the program to the folder Applications macOS and start the latter by right clicking on its icon (contained in the folder Hugin) and selecting the voice apri from the context menu (this operation is only necessary at the first start, to bypass macOS restrictions on applications from non-certified developers).

Now, start Hugin (if on Windows you don't see the program icon on your desktop or in the Start menu, go to C: Program FilesHuginbin and launch the executable hugin.exe) and click on your button Close to access its main window. Then click on the button Upload images located at the top left and select the photos that must make up your panorama.
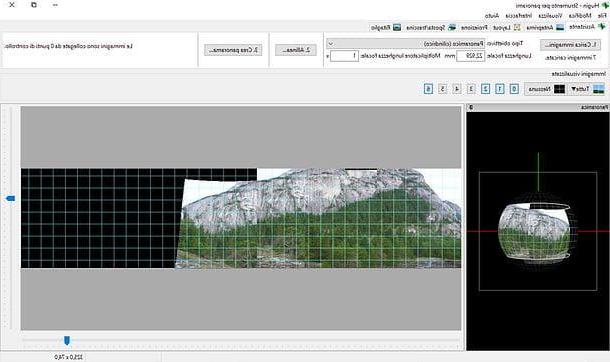
Once you have selected your photos, select the type of goal used to take them (eg. Normal / Straight o Panoramic / Cylindrical) from the drop-down menu, indicates the horizontal field of view (HFOV), focal length or crop factor in the appropriate text field and click on the button OK. If you are not sure how to adjust these settings, try to change them later using the appropriate menus and text fields located at the top of the main program window (in the Assistant).
Now, go to the tab Move / Drag and use the mouse to rearrange / move the images that make up your panorama, then go back to the tab Assistantclick on your button Align and wait a few seconds for the program to process the image.
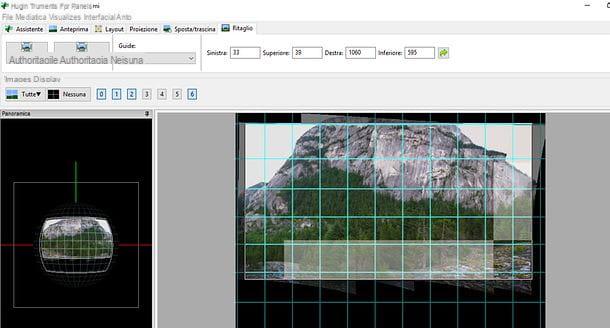
When the operation is completed, if you think it appropriate, go to the tab Move / Drag by Hugin to center / straighten the image or tab clipping to crop it and save the final result by clicking on the button Create panorama of the card Assistant. You will be able to choose width e height of the output image, typing them in the appropriate text fields, and you can activate or deactivate options such as Correct exposure / Low dynamic range, Fusion of the display from the stacks e Merged display from any format (putting or removing the check from the latter).
If any step is not clear to you and / or you want to learn more about how Hugin works, consult this page of the official website of the program, which contains many useful tutorials.
Image Composite Editor (Windows)
If the above program seems a little too difficult to use, give it a try Image Composite Editor: a free software, developed by Microsoft exclusively for Windows PCs, which allows you to combine panoramic photos in a very simple way. To get it, connected to its official website, scroll the page to the bottom and click on the icon globe located under the heading 64-bit Image Composite Editor (ICE) if you use a 64-bit operating system or under the heading 32-bit Image Composite Editor (ICE) if you are using a 32-bit operating system. On the page that opens, press the button Download to start the download.
Once the download is complete, start the executable ICE-xx-for-64-bit-Windows.msi e, nella finestra che si apre, fai click sul pulsador Next. Then place the check mark next to the item I Agree and complete the setup by clicking on first Next three consecutive times and then on Yes e Close.
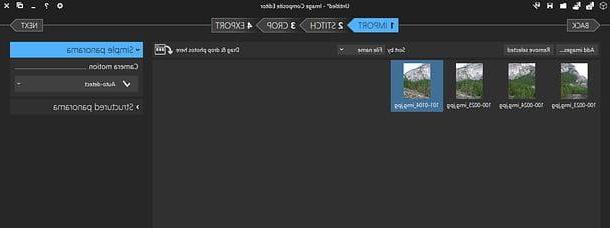
Now, to create panoramic photos with Image Composite Editor, click the button New Panorama From Images located at the top left of the main program window, select the photos you want to merge and click on the button apri.
Once this is done, if you are trying to merge a simple panorama (i.e. formed by a rectilinear trend), use the mouse to move the thumbnails of the images that compose it (so that they have the right order) and click on the button Next. If, on the other hand, you need to combine a structured panorama (which perhaps also has images above and below), click on the item Structured panorama present in the right sidebar and use the table located under the item layout, plus fields Columns e Rows, to specify the number of columns and rows that make up the panorama and the position of the images in it. Then use the mouse to change the order of the thumbnails and click on the button Next to move forward.
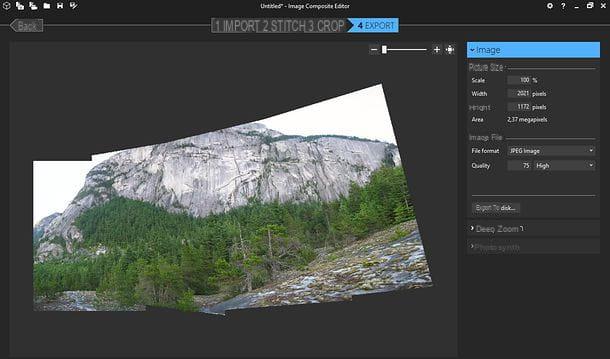
At this point, wait for the image to be merged, rotate it (if you deem it necessary) using the tools that are offered to you by Image Composite Editor, crop it (if you deem it necessary) and save the final result by clicking on the button Export to disk present in the right sidebar.
If you want, you can adjust the size and format of the output file using the fields in the right menu.
Photoshop (Windows / macOS)
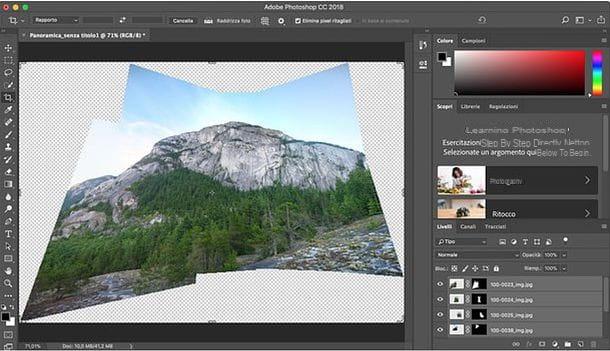
Were none of the solutions mentioned above able to satisfy you 100%? Then I think you'd better try Photoshop, the famous Adobe photo editing program which, however, as easily understood, after a first free trial period (lasting 7 days), is subject to a fee.
I explained to you how you can use Photoshop to merge photos and create panoramic images in my tutorial on how to make panoramic photos with Photoshop.
Create free panoramic photos on smartphones and tablets
As comfortable and easy to use as they are, the applications I have recommended so far - and more generally the software for PCs that take care of merging photos in post-production - are less effective than the Panorama function now included in all smartphones and tablets.
Opening theCamera app of your smartphone (or your tablet) and activating the Panorama function, you can in fact move during the shot and create panoramic images that do not have so much to envy to those made with professional equipment (especially if you take into account the compactness of a mobile phone and the simplicity with which you can take panoramic shots with it).
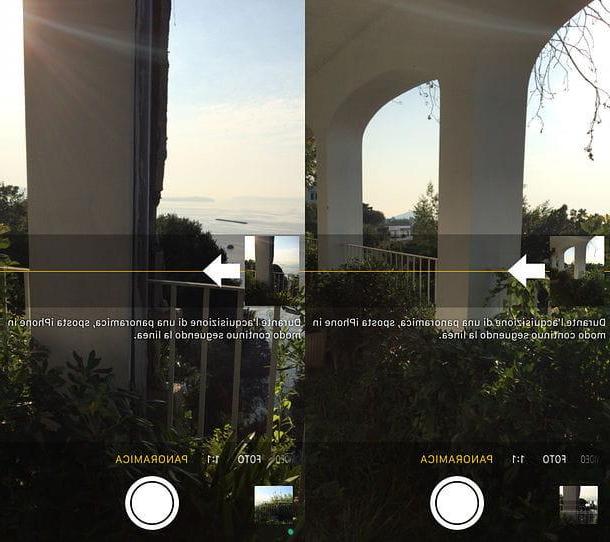
To take a panoramic photo with iPhone o iPad, launch the app Camera present on the home screen, select the item View at the bottom (scroll through all the available options if you don't see it right away) and press the circular button placed in the center to take your shot, slowly moving to the right in the surrounding environment. Try to keep your hand steady and at the same height at all times, and follow the on-screen directions to avoid going too fast. When you have framed the whole panorama, press the button Stop located below to save the final result in the app Gallery of iOS.
A terminal was used Android, since the Google home operating system is available in various versions and is customized differently by the hardware manufacturers, the procedure to activate the Panorama mode may differ slightly from the one I'm going to illustrate. In any case, usually just launching the app Camera, access its main menu by swiping from left to right and select the item panorama from the screen that opens. The rest of the procedure is useless to explain: just press the circular button placed in the center and slowly move to the right. When you are satisfied with the result, you press the button Stop and the result is automatically saved in the Android Gallery.
How to create panoramic photos for free