How to create free virtual tours on PC
If you agree, I'd say take action immediately and see how to create free virtual tours on PC with some services suitable for the purpose. They are all very simple to use and allow you to create experiences that can be used with all the main VR headsets. To use them, of course, you will need to have 360 ° panoramic photos to use as the basis of your tours: I explained how to do them in a tutorial dedicated to the theme.
Lapentor
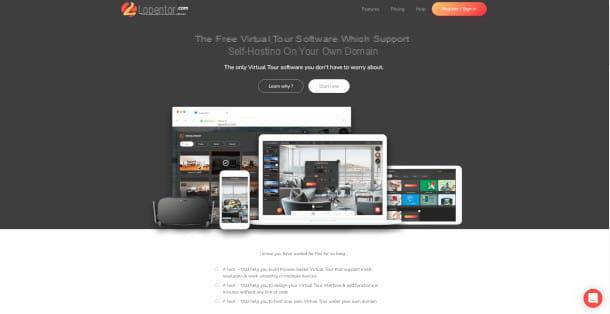
The first service I want to tell you about is Lapentor, a hosting site dedicated to creating and saving virtual tours using the environment Krpano as a starting point to build, manage and share your project with more people. The service is free in its basic version, which allows users to manage up to 3 projects simultaneously. You can then pay a subscription of $ 15 a month to unlock additional features, such as removing the limit of projects or the ability to customize your work environment with themes and plug-ins.
To take advantage of Lapentor, connected to the main page of the service and click on the button Register / Sign In to open the login screen. If you plan to register using your email, click on Don't have account? Register, enter your username, email and then the password, and then complete the operation by clicking on the button Create Now. Once this is done, check your inbox and look for the email containing the activation link to confirm and finish the registration operation. Alternatively, you can link your Google and Facebook accounts. In this case, access will happen instantly.
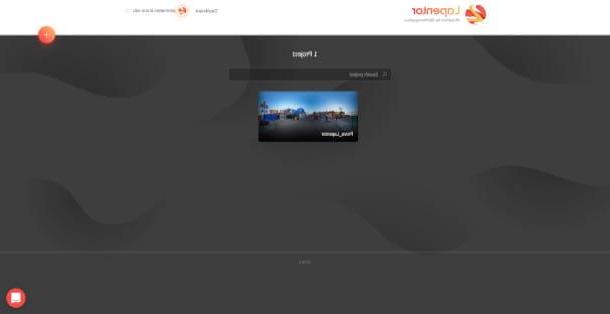
At your first access, you will be greeted by a screen without content, with a large orange button in the center which, once pressed, will allow you to create a new project. So choose a name for your project and click on the button OK to access the Lapentor editor.
The first thing you will be asked will be to upload a 360 ° photo by clicking on the button Upload Pano or by dragging the file directly. Lapantor supports the following files: JPG, PNG and TIFF. It also allows for direct upload of files from Dropbox.
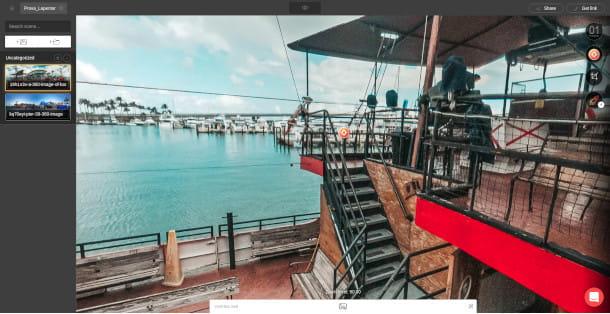
Once the image is uploaded, click on the option make sphere and choose whether to render the image in mode Standard or in Multiresolution, a mode able to give priority to the section of the image that the user sees at that moment over the others, in order to make the tour more fluid and efficient. All rendered images will be placed in the menu dedicated to scene management, on the left, from which you can not only upload new images, but also remove them, replace them e rearrange them. It is also possible create folders, to categorize the various panoramas you are going to upload into groups.
On the right, however, you will find the menu dedicated to all those tools necessary for creating a virtual tour. By moving the mouse cursor towards the orange button, you will open the sub-menu dedicated to hotspot, or the points of interest that I would like to highlight. Through this tool it is possible move between scenes, play audio and video files, show pictures, descriptions, Articles e web pages.
To place a hotspot on the image, drag icon of the point of interest you prefer and place it where you prefer. Everything is managed through a menu that will open on your right and will allow you to manage the contents and aesthetics of the selected hotspot.
The next icon is dedicated to view management of the tour, which allows you to set the starting view of the view, establish its limits in terms of field of view and zoom and finally use the spherical view distorting the image with a wide angle effect. By clicking on the rocket icon you will open the menu dedicated to plug-in management to be installed.
Using the bar at the top of the page, you can change the project settings, choosing whether to change the name, the publication settings or the description to be displayed to visitors. You can also view a preview of the tour by clicking on the icon Preview in the shape of an eye. Finally, by clicking on the button Share you can share the project via social networks, with a shareable link or via QR code. Visitors will have to do nothing but click on the link or use an app to read the QR code you will share
DiveIn Studio
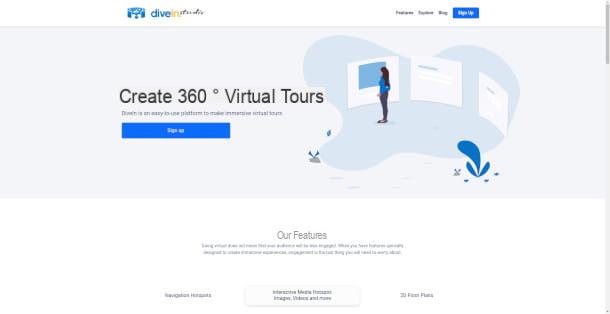
If you are looking for a more direct virtual tour platform, then DiveIn Studio is the site for you. DiveIn Studio focuses on offering its users a virtual experience and a simple editor, with within it the most popular functions at this juncture. The free version of DiveIn Studio allows you to manage only one project at a time, but it is still possible to make a subscription starting from 10 euros per month to remove this limitation.
Using DiveIn Studio is very simple. First of all, connected to the official website of the service and click on the item Sign Up to access. In case you want to log in with your email address, click again on Sign Up, enter your email, password, your name and surname and then click on Create. Alternatively, you can also log in using your Google or Facebook accounts. In this case, before completing the login, you will be asked to enter yours name e last name, and then complete the operation by clicking on the button Continue.
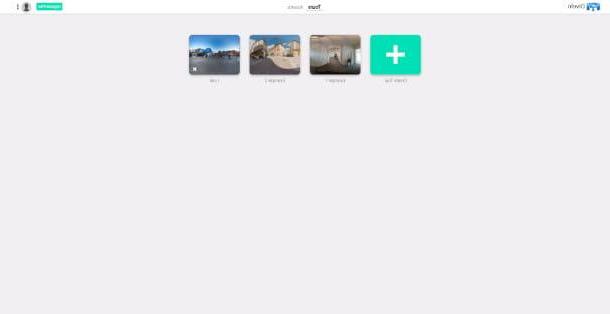
Once you enter the Dashboard of DiveIn Studio, you will find yourself in front of two tours that, serving as an example, will give you a general idea of the functions of the service. Then click on the button Create Tour to access the editor. Before proceeding with the creation of your virtual tour, remember to upload your 360 ° photo by clicking on the button Add New Scene positioned at the top.
As mentioned above, DiveIn Studio offers a fairly narrow selection of tools, but at the same time optimized for the quick creation of your virtual tour, making the editor easy to use and able to offer instant results.
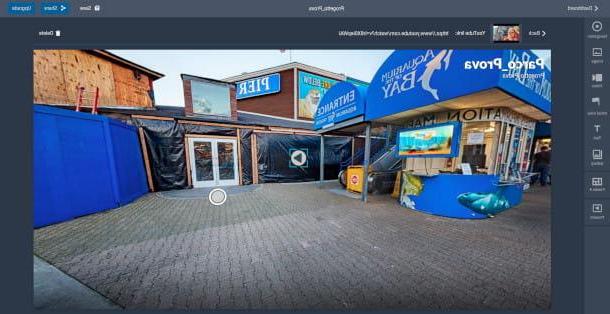
By clicking on the item Navigation it is possible to change the scene, thus passing from one 360 ° photo to another; Image allows you to place infographics; Video embed YouTube links making them instantly viewable; Initial View set the starting view of the tour; Text allows you to add writings, while Gallery allows users to view an album of images.
By clicking on the item Panels, you can also set pop-up options, such as those to embed the compass, a Description of the tour, your own planimetry it's a logo to embellish the general presentation.
clicking on Title, located at the top right of the tour view, you can change the name not only of the scenes, but also of the entire project.
When you are satisfied with the result, you can click on the option Save, to save your progress, and on that Share, to generate the link to share to view the complete tour. As for Lapentor, share with your friends and customers the link which, once opened, will allow access to the complete tour.
Other solutions to create free virtual tours on PC
Within this guide I have provided you with several tools that, depending on your needs, will allow you to create a virtual tour without any particular problem. But if you are still not convinced and would like to compare different options, here is a small list of viable alternatives to experiment with.
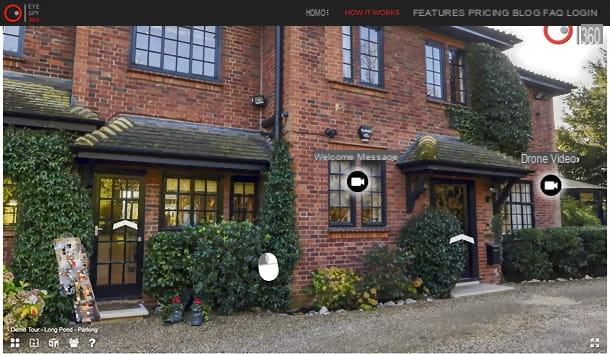
- EyeSpy360 - online platform dedicated not only to the creation of online tours, but also to branding services and 3D floor plans. After the first access, it is possible to request the creation of the first tour for free, to then evaluate whether or not to make a manual subscription of $ 20 per month.
- Martipian - HTML creation tool completely free and compatible with both your browser and your computer by downloading the script.
How to create free virtual tours on smartphones and tablets
So far I have shown you virtual tour creation services that can be used from any computer operating system. However, you know, the life of a real estate agent is full of unexpected events and access to a PC is not always guaranteed. What if I told you I'm about to explain how to create free virtual tours on smartphone tablets?
VR Maker (Android / iOS / iPadOS)
VR Maker is an application developed by iStaging and downloadable on Android (also on alternative stores for devices without Google services) and iOS / iPadOS which, unlike the services listed above, offers an editor with reduced functionality, flanked by immediate compatibility with the various VR viewers for smartphones , how Google Cardboard.
To download VR Maker on Android, connect to the Google Play Store page dedicated to the application directly from your device and press the button Install. On iOS / iPadOS, on the other hand, go to the application page in the App Store, press the button Get and confirm your credentials with Face ID, touch ID or through your Apple ID password.
Once the download is finished and the application is started, you will find yourself in front of the initial login screen, which will ask you to enter the credentials linked to your iStaging account, also giving you the opportunity to register if you do not have one. Enter your email, password and country code (e.g. city code). As explained above, wait for the validation email to arrive to activate your account. Once activation is confirmed, log in using the credentials provided above.
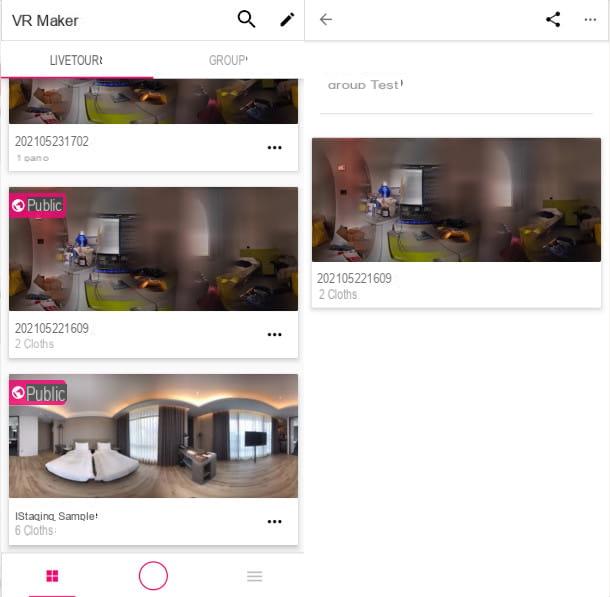
Once logged in, you will enter the Dashboard by VR Maker. The latter is divided into two sections: Livetour, where you can create, change o share a project; And GROUP, to be able to catalog your works by creating groups.
Pressing on the item Create LiveTour, you will be asked to give a name to the project and decide whether to make it public or not (via the box Public). Then give a definitive confirmation by pressing the button Save.
Once this is done, you have to upload 360 ° images by pressing the button + located at the top right and choosing whether to create a 360 ° image using the camera of your smartphone or tablet (with the possibility of adapting images to lenses such as the Torras and Mercury), import a photo from your gallery, or connect the app with external cameras such as theInsta360.
Once you have uploaded your photo, press again on the photo, wait for the end processing e press once again on the photo to access the VR Maker editor.
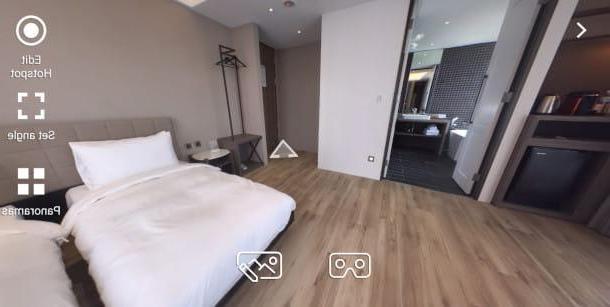
Inside the editor you can manage the arrangement of the hotspots by clicking on Edit Hotspot, setting theicon displayed on the screen e the scene to be changed by pressing on the point of interest. Pressing on the option Set angle you can establish the point of view with which the virtual tour will start, while with the command Panoramas you can manage the scenes currently loaded in the project.
By pressing on the icon in the shape of VR display, you will enter the virtual reality mode and test the tour on a real viewer. Finally, by pressing on the icon in the shape of painting with a brush you can modify the 360 ° image by adding filters, modifying the color gradation or by drawing on the image using a brush.
Returning to the dashboard dedicated to the project, by pressing the icon in the shape of pen you can change not only the name of the project, but also the order of the loaded scenes.
When you are satisfied with the final result, press the icon dedicated to the functions of sharing to share the tour link via social networks or within messaging apps such as WhatsApp e
Telegram. As in the cases previously illustrated, visitors will only have to click on the link you sent them to instantly access the virtual tour. Simple isn't it?
Other solutions to create free virtual tours on smartphones and tablets
If you are still not satisfied and are looking for more solutions to create a free virtual tour on smartphones and tablets, here are a handful of alternative apps, easy to install and try.
- Matterport (Android / iOS / iPadOS - application that, through the connection to a 360 ° camera, allows the creation and management of the contents and the plan of your virtual tour.
- Viewmake (https://play.google.com/store/apps/details?id=com.viewmake.app">Android) - platform for creating free virtual tours compatible with the main virtual reality viewers on smartphones currently in circulation .
- Zillow 3D Home (iOS / iPadOS) - tool for creating virtual tours with which to create, manage and share your projects without using external devices.