FotoJet
FotoJet is another useful online service that you can use to create photo collages. It can be used for free, requires no registration and, unlike other similar services, does not apply a watermark to projects.
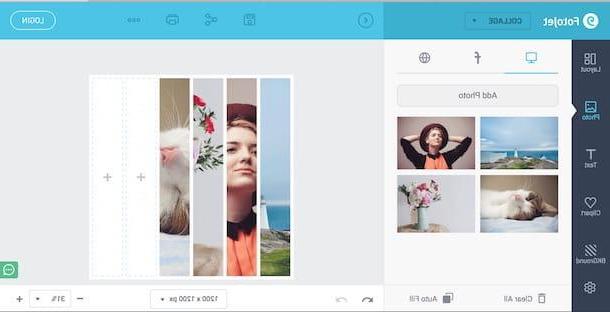
To use FotoJet, first connect to its home page and click on the button Make a Collage (down). Next, select one of the available templates by choosing from the following categories: Classic Collage, in which there are simple collages that you can customize to your liking; Creative Collage, in which there are quite creative collage templates in which and are present Misc, in which there are somewhat amusing collages.
After choosing the template you like best, select one of the items you see in the left menu to edit the collage: layout, to choose its layout; Photo, to upload photos to add with a simple Drag-and-Drop; Text, to add text to it; Clipart, to add stickers and icons to your project or background, to change its background.
As soon as you are satisfied with your work, click on the symbol floppy disk to save the collage on your computer and, from the drop-down menu that opens, indicate the name to give to the collage. Finally, select the download format (JPG o PNG) and click on the green button Save.
In the window that appears on the screen, click on the button Save for free now and then on the link download here. You will then be able to download the collage from the web page that opens in the browser you are using by clicking with the right mouse button and clicking on the item Save immagine from the drop-down menu that appears.
Photovisi

Another online service that I recommend you try is Photovisi, a semi-free solution thanks to which create a photo collage online it becomes a breeze for anyone, even for those who are not experts in graphics or technology in general. All you have to do to use it is to connect to its official website, choose the template to use, select the photos to include in the collage and that's it. The free version of Photovisi, however, has some limitations: you can only download low-resolution images and a watermark is applied to the collages. To break down these limits it is necessary to subscribe to a Premium subscription of $ 4,99 per month.
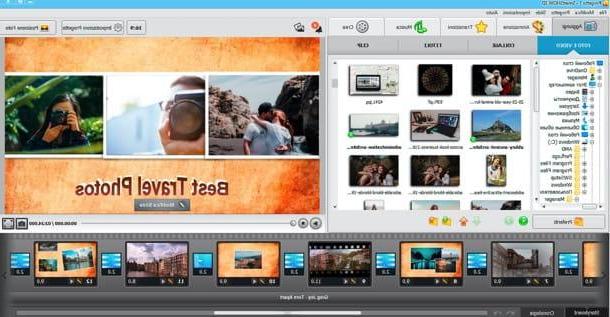
All clear? Well, then let's get started. To use Photovisi, first connect to its main page and click on the yellow button Start creating it to start the wizard through which you can make a photo collage. Then select one of the many templates among those available and wait for it to load in the browser you are using.
At this point, click on the button Add Photos and, on the page that opens, select the source from which to take the images to be used for the collage: My computer, to choose a photo among those saved on your PC; Web images, to search for pictures on the Internet; Facebook, to select one of the images you posted on your Facebook profile or Instagram, to choose a photo among those posted on the well-known photo social network.
After selecting the images, you can also add other elements to the collage by clicking on one of the buttons that appear on the screen: Add Shape, to add a decoration to the collage; add Text, to add text or Change background, to change the background color of the collage.
After you have finished working on the collage, click on the blue button Continue and wait for Photovisi to load your work. Once the upload is complete, click the link Low-resolution download and wait for the collage to download to your PC. If you wish, you can also share the collage on Facebook, Twitter or via e-mail using the special functions offered by the service.
canva
Another online service that you can't help but try is canva, which can be used free of charge upon registration. Unlike Photovisi, Canva has no particular limitations, except for the use of some graphic contents that are paid for (usually you can buy them for the modest sum of 1 dollar).
To use canva, connected first to its main page and click on one of the options placed in the box First time on Canva? Subscribe! in such a way as to indicate the reason for which you intend to use the service. Then register using your address email or your account Google.
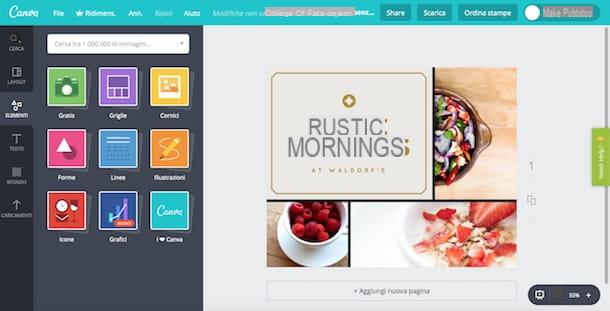
After registration, presses the green button Create a project (top left) and click on the option Photo collage (you should spot it in the section Recommended for you). In the new tab that opens in the browser, choose one of the Canva templates located on the left (under the heading Canva layout) and replace the sample photos with the ones you want to add to the photo collage.
To upload new photos to Canva, click on the entry Uploads (left), click on the green button Upload your images and upload the ones you plan to use for your project. Then drag each image to the point of the collage you prefer and that's it.
After uploading the photos that will make up your collage, customize it by changing the background or adding other graphic elements by clicking on one of the options you see on the left: Elements, to add shapes, lines, frames, illustrations, icons and so on to the project; Text, to add text or Background, to change its background color.
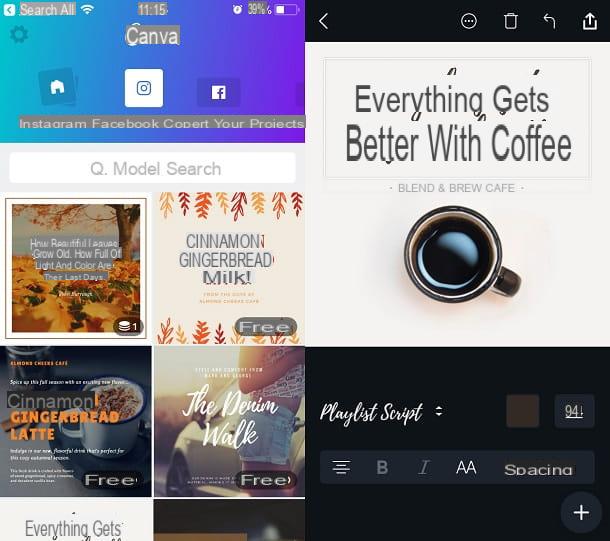
As soon as you are satisfied with your work, save the collage by clicking on the button Download (above) and selecting one of the formats available for download: JPG, PNG, PDF, etc. Did you see how easy it was to make an online collage with Canva? Well, know that the service is also available in the form of an app for Android and iOS devices to create collages on the go.
Magnifier Collage
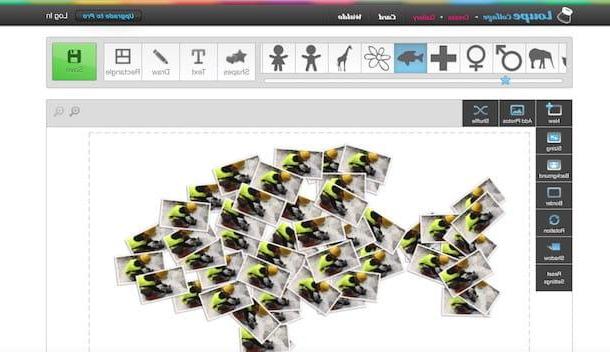
Magnifier Collage is another online service that I invite you to take seriously, especially if you want to make fun and original collages using animal shapes or shapes of letters, numbers and various symbols. Before explaining how to use Loupe Collage, however, I would like to tell you that the free version of the service has some limitations: it allows you to download low-resolution images and the collages are marked with a watermark. To break down these limits, you have to subscribe to the Pro version of Loupe Collage which, at the time of writing, costs $ 5 a month.
To use Loupe Collage, linked to its main page, click the yellow button Add Photos and upload the photos you intend to include in your work by taking them from your PC (by clicking on the button Upload), from a cloud storage service, from a social network (by clicking on the button Your Photos) or from the Internet (by clicking on the button Web). As soon as the images you have selected for your collage are uploaded, click on the green button Done located at the bottom right.
Next, click on the button Shapes and select one of the many shapes available for the realization of your collage. By clicking on the button TextInstead, you can give your collage the shape of a word while clicking the button Draw you can make the collage take on a shape drawn by you freehand. If you want, you can also use the classic mosaic shape by clicking on the button Rectangle. In short, you are spoiled for choice!
To act instead on the images that make up the collage - modify their edges, apply shadows and so on - use the tools located on the left: sizing, to change the size of the images; background, to change the background of the collage; Border, to change the color and thickness of the edges of the images; Rotation, to change the orientation of the collage; Shadow, to apply a drop shadow or Reset Settings, to restore the initial settings.
When finished, click on the green button Save (top right), give the collage a title by typing it in the field Title, enter a description in the text field Description and click the button again Save. On the web page that opens in the browser, click on the green button Download and then click on the entry Low resolution or, if you prefer, choose one of the sharing options available to share your masterpiece with other users. Easier than that ?!
How to make photo collages online