BirdFont (Windows / macOS / Linux)
Are you looking for free software that allows you to create fonts easily? If so, I suggest you give it a try birdfont: an open source program that is very easy to use. It is completely free when used for non-commercial purposes, otherwise it requires a $ 5 deposit. After downloading it, just start the creation of a new font and then proceed with the realization of the letters and other characters that you want to include in it. It is available for Windows, macOS and Linux.
Before explaining how BirdFont works, let me guide you through its installation: connect to the program's website and click on one of the links in the section Find the right version, depending on the operating system in use on your computer (eg. Windows 10 and later: birdfont-3.6.2-free.exe to download the software on Windows 10, Mac OS 10.12 and later: birdfont-3.6.2-free.dmg to download it on macOS and so on).
When the download is complete, if you are using Windows, open the file .exe just downloaded, click on the button Yes and then on the buttons Next, install e Close. If you are using a Macinstead, open the file.dmg just downloaded and drag the program icon to the folder Applications of macOS. At the first start of the software on macOS you will also have to "override" the restrictions applied by Apple to programs from non-certified developers: to do this, right-click on the BirdFont icon, select the item apri from the menu that appears and that's it.
After installing and starting BirdFont on your computer, click on the button SIL Open Font License in order to start the creation of fonts (which can be released under SIL Open Font, a type of free and open source license designed specifically for the distribution of new fonts). At this point, press the icon depicting a sheet located at the top left and double-click on one of the characters that are shown on the screen to customize it.
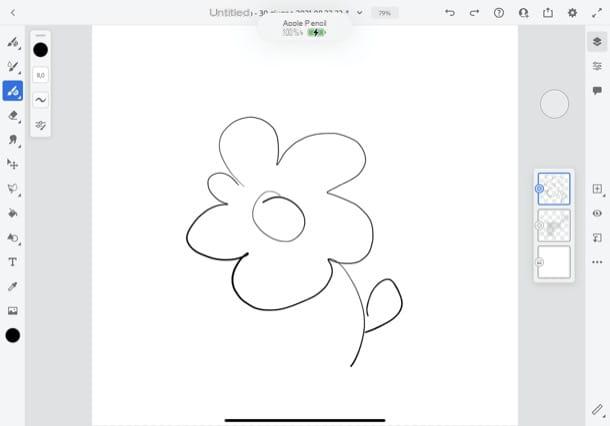
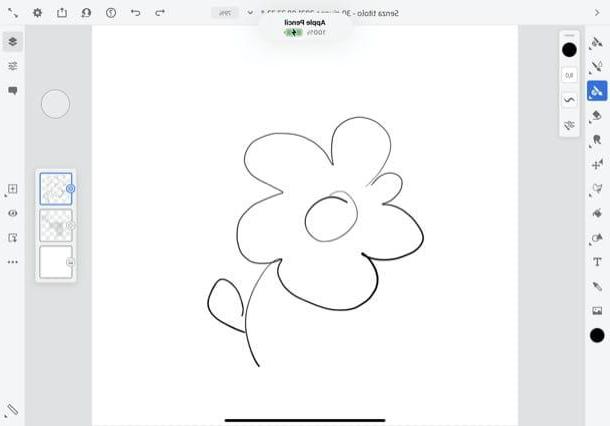
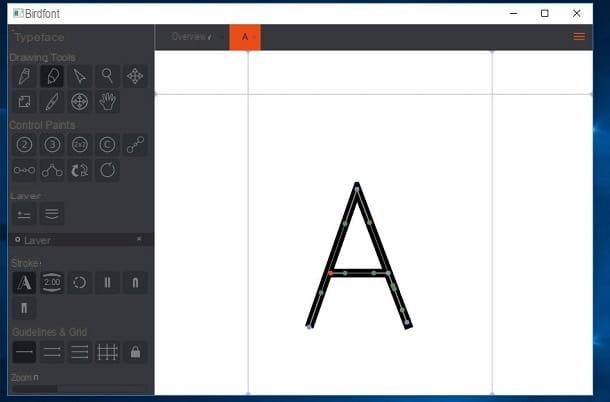
In the window that opens, you will see the BirdFont editor. Then use the tools located in the left toolbar to build the first character of the font: in the section Drawing Tools you can find useful tools for drawing the character; in the section Control Points there are some options that allow you to act on the various points of the character; in the section Layers you can add and possibly remove levels; in the section Guidelines & Grid you can customize the look of the BirdFont editor by adding and / or removing guidelines and so on.
If you want, you can even import an image into your project: to do this, click on the button (≡) located at the top right, click on the item Import and Export in the menu that appears and then select one of the options available to import new files (eg. Import SVG file to import an SVG file, Import SVG folder to import a folder of SVG files, etc.).
When you have completed the creation of all the characters that make up your font, you can proceed with its export: click on the button (≡) located at the top right and, in the menu that opens, click on the items File> Save to save the changes made to the font, or to the entries Import and Export> Export Fonts to export it (after having previously saved it). Admit it: using BirdFont wasn't that difficult, was it ?!
Adobe Illustrator (Windows / macOS)
Another solution for making custom fonts that you may seriously consider is Illustration, the professional illustration and vector graphics software developed by Adobe.
Being a software aimed especially at illustrators and professionals working in the world of typographic art, Illustrator is subject to a fee: to use it, in fact, it is necessary to subscribe to a subscription plan for the service. Adobe Creative Cloud, which starts at € 24,39 per month. If you wish, you can still try the free trial version of Illustrator for 7 days and eventually decide whether to subscribe or not.
After you have downloaded Illustrator from the Adobe website, you will notice quite a few similarities between the user interface of this program and Photoshop (very famous professional photo editing software, also developed by Adobe): the drawing toolbar, for example example, it is located on the left; while the section that allows you to manage the properties of the elements present in the project and the levels is located on the right.
As you may have noticed, however, Illustrator does not offer an ad hoc function through which to create custom fonts. To proceed, in fact, you will have to contact some third-party plugins, such as the very famous Fontself, an add-on that allows you to transform the characters drawn with Illustrator into fonts fully compatible with the OpenType format. Unfortunately, Fontself is also not free: it costs 49 euros.
After you have downloaded and purchased Illustrator and the Fontself plugin, you can finally proceed with the creation of the fonts of your font. In this regard, I suggest you take a look at the Illustrator user guide and the video tutorials you find on the Adobe website, especially if you are not very familiar with this graphics software.
FontStruct (Online)
Do the solutions I have proposed so far seem a bit too complicated to use? So why don't you try FontStruct? It is a free online service that can be used directly in the browser which is really simple to use, thanks to its user friendly interface.
To create new fonts with FontStruct, connect to its home page and click on the yellow button Start Now. Then fill out the form that is proposed to you indicating yours username, An address e-mail valid and the Password you intend to use to login to the service. Finally, check the item I agree with the terms of use and click on the button Sign Up.
FontStruct will send to the email address you provided a message containing a link: click on it to confirm the subscription and then log in to the account by clicking on the item Sign In and entering your login details.
Once logged in, click on the button FontStructor placed at the top, give a name to the font you want to create in the text field Name your design and then click on the button Start FontStructing to start creating your new project.
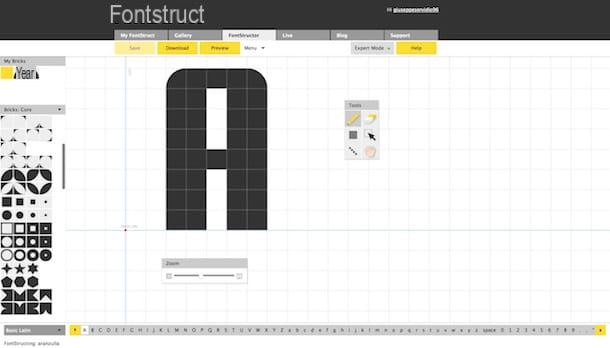
Now you can finally proceed to create the font using the tools provided by FontStructor: then click on the symbol of pencil located in the box Tools, choose the shape of the drawing tool in the box Bricks (located on the left) and start drawing the character inside the work grid (the character you are creating is the one highlighted at the bottom, in the list of characters).
As soon as you have completed the first character (for example the letter A), move on to the next one, and so on, until you complete all the set of characters available (capital letters, small letters and punctuation marks). When you have finished making all the characters, click on the button Save to save the created font and then on Preview to preview it.
On the page that opens in the browser, type a test sentence in the field Type to see your FontStruction in action and, if you are satisfied with the result, click on the button Download and then Save to download the font to your PC. Easier than that ?!
Fonts (Android)
You want to create fonts on your device Android? I suggest you try Fonts, a free application that allows you to create handwritten fonts and / or customize existing ones. Its "clean" and frills-free interface makes it really easy to use: seeing is believing!
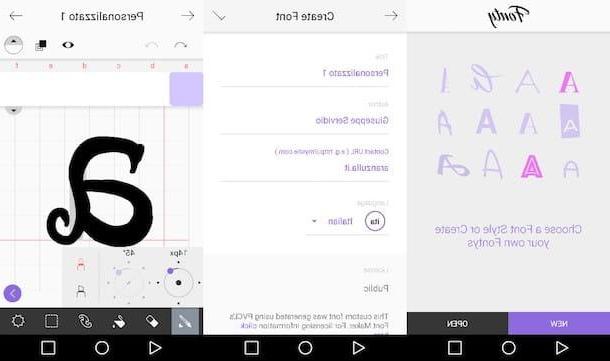
After downloading and running Fonty on your device, you will be asked if you want an existing style or if you want to create your own. Press, therefore, on the button New to create a font from scratch or on the button Open to import an existing font or modify one of those included in the app.
Then, fill out the form you see on the screen. Therefore, enter the name of the font in the text field Title, your name in the field Author, select the language the character belongs to from the appropriate field and so on. To move on to the actual creation of the font, press the symbol (✓) located at the top right.
In the screen that opens, draw the font on the squared sheet that appears on the screen following the guidelines of the example font. If you wish, you can also change the characteristics of the tools made available by the app: by pressing the icon of brush you can change the characteristics of the latter by tapping on the symbol of rubber you can change the size of the eraser and so on.
As soon as you have finished drawing the first character of the font, move on to the next one by pressing on the symbol (>) placed recessed on the right. When you have completed the creation of all the characters of the font, press the symbol (→) located at the top right and, on the next screen, test the font created by typing any text. If you are satisfied with the result, export your font by pressing the button Share and then choosing one of the sharing options from those available (eg. Email, Save to Drive, Etc.).
Fontise (iOS)
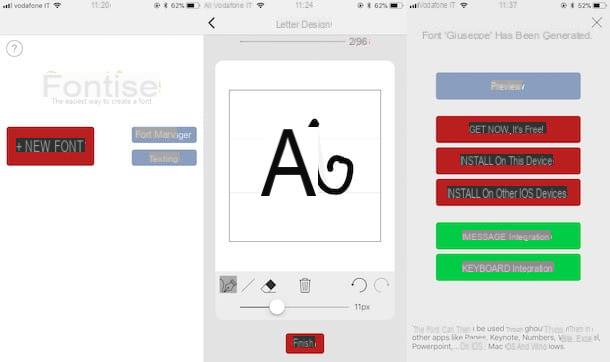
You would like to make custom fonts on your device iOS? Fontise could be the solution for you: it is a free application that allows you to create custom fonts to export and use without problems on multiple platforms, including Windows and macOS.
After downloading and starting Fontise on your iPhone or iPad, press the button (+) New Font present in the main screen of the app, select the language in which to create the font (unfortunately the your language support is not available) and draw by hand all 96 characters that make up the font. If you wish, you can change the size of the brush by moving the cursor located on the adjustment bar next to the item [N] px.
To delete a stroke you made by mistake, press the symbol of rubber; to draw a straight line, tap on the symbol of oblique line and to delete the whole drawing, click on the icon dustbin. To go to the next character, however, hold your finger on the upper right corner of the virtual sheet and swipe from right to left.
As soon as you have finished creating the characters, tap the red button Finish located at the bottom and, on the next screen, type the name of the font in the text field Font name. Then press the button Home, wait for the font to load and then choose the device and platforms on which to install the font (eg. Install on this device, to install on your device; Install on other iOS devices, to install it on other iOS devices or Get Now, it's free, to import the font to the PC in . Ttf).
Install the created fonts
Once you've finished creating your custom fonts, you'll be eager to use them on your PC. First, however, you need to install them: if you have difficulty a install the created fonts, follow the steps below.
- Su Windows, click here Home, go to Control Panel, click on the item Appearance and personalization and then click on the item Characters. Finally, drag the font you want to install into the window Characters And that's it.
- Su MacOS, start the program Book Font (located in the folder Other of Launchpad), click the button capacitor positive (+) lead located at the top left, select the font in format . Ttf you want to add (or the folder where the characters of the created font are saved) and then click on the button apri.
- Su Android, install one of the apps that allow you to change fonts and use them to customize the system default font. I told you how in my tutorial on how to change fonts on Android.
After installing the font, it may be useful to restart your computer to see the changes applied. If you have problems installing the created fonts, I suggest you take a look at the tutorial where I explain in more detail how to proceed.
How to create fonts