How to configure the Kodi language

After installing and starting Kodi, you got a big scare because you noticed that the program is in language English: don't worry, you can translate it into your language in a few simple steps!
translate Kodi into your language, click on the small button (I.e. located at the top of the main software screen, then select the icon Interface Settings and, in the next panel, move to the item Regional. Then click on the option Language located in the right part of the window and select the item city from the list that is shown on the screen.
To complete the procedure and set your language for the keyboard layout as well, click on the items Regional e Keyboard layout, scegli l'opzione city in QWERTY (or any other arrangement you wish) from the list that is shown on the screen and, finally, presses the button OK.
For Kodi 16, the previous version of the program, the steps to take are slightly different: on the main screen, scroll to the control bar until you find the entry System, select it, click on the items Appearance e International, scegli l'opzione city from the list that is proposed to you and confirm your choice with a further click. From this moment on, all (or almost) the voices of Kodi will be in your language.
How to set up a profile in Kodi
The next step immediately after setting up the language in Kodi is creating a personal profileThis is a very important operation, especially if you intend to share your Kodi installation with other people. Thanks to this feature, in fact, each Kodi user can have his own general settings and customizations on add-ons and libraries, which he can recall simply by selecting his account.
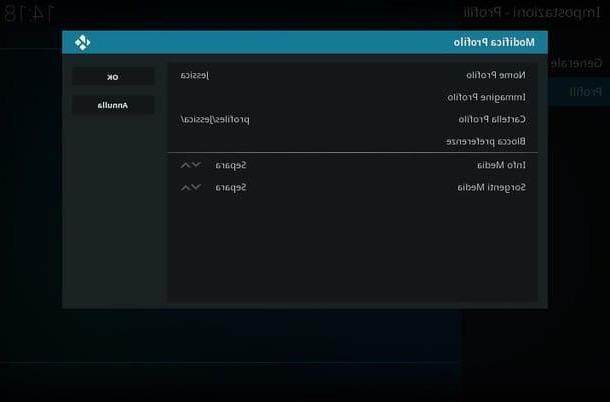
So, to create a personal profile, click on the button (I.e. present in the main screen of Kodi, then click on the icon Profile Settings, then on the voice Profile and icon Add Profile. At this point, type the name you want to assign to your profile in the box Profile Nameclick your Picture profile to set an avatar and, to protect any changes with a Password, click on the item Lock Preferences, by pressing the button Yes and again on the voice Master Lock.
At this point, select one of the available options (numeric password, key sequence o text password), inserted the Password you want to use to protect your profile, click on the button OK, re-enter your password and click the button again OK. Once the previous operation is completed, press the button again OK and choose whether to create the new profile starting from the current settings (by clicking on the button Copy default) or from the default settings of the program (by clicking on the button instead Start over). Repeat this for all users you intend to add.
Successively click on your voice General located on the left, move the switch Show login screen on startup su Active if you want Kodi to ask which profile to use at startup, or click on the item Automatic login at startup to choose the profile that should be loaded by default. Once this operation is complete, if necessary, enter the Master Lock password set previously to save the settings and that's it.
It was used Kodi 16, you can reach the voice Profile selecting the item System located in the control bar and then clicking on the option profiles. The rest of the settings are very similar to those of the latest software version.
How to set up Kodi skin and theme
Does the look of Kodi seem flat to you and would you like to give it a little more color, perhaps with that touch of style that certainly doesn't hurt? Rest assured, customizing the program interface is extremely simple thanks to skin and themes made available by both the development team and the user community.
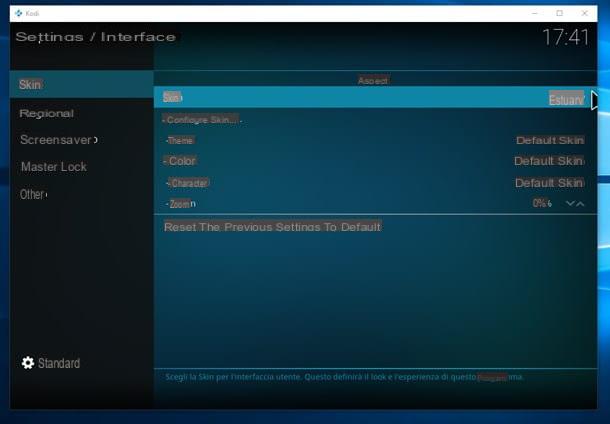
To proceed, click the button (I.e. of Kodi, then on the icon Interface setting, on the item Skin (located in the left part of the window) and then on the option Skin placed in correspondence with it, in the second part of the panel. Then click on the button Other…, select a skin from the list that appears, wait for it to be applied automatically and press the button Yes to confirm the changes.
At this point, you can further customize the appearance of the skin thanks to the voices Theme, Color and Fonts and, if applicable, change the way menus, icons, background elements and more are displayed by clicking on the item Configure Skin ....
Stai using Kodi 16, you can reach the section Skin moving on to the item System of the control bar, then clicking on the buttons Settings, Appearance and finally by moving to the section Skin located in the left panel.
How to set up Kodi add-ons and repositories
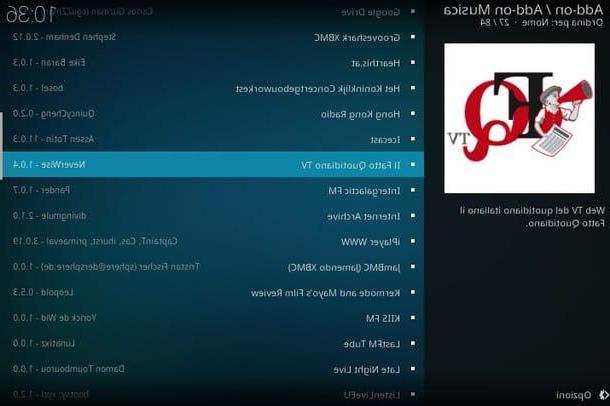
As I mentioned earlier, the potential of Kodi can be truly boundless: this result is achieved thanks to the presence of add-on, small add-ons that can be installed in the “main” program to expand it with functions e features extra not present at the time of first installation.
These add-ons are typically designed by developer communities and added to a detail Repository already present in the program, divided by category (audio, appearance, games, video, images, weather, subtitles and so on). However, there are gods additional repositories, created and managed by people independent of the Kodi team, which contain many other add-ons ready to use. Finally, the program also allows the "manual" installation of packages containing add-ons downloaded from third-party Internet sites, and not contained in the repositories.
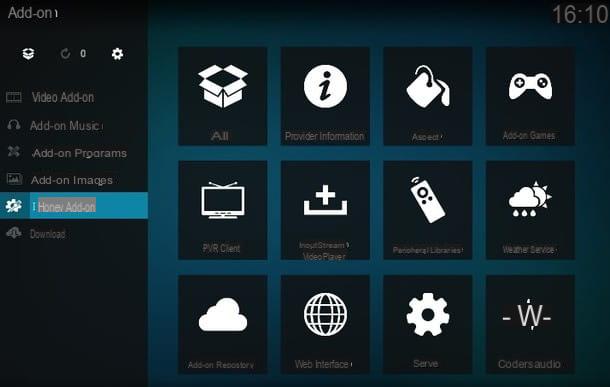
Having said that, let's get to the point: to access the section dedicated to Kodi add-ons, press the button Add-on located on the main program screen, click the button Download and selects the category of add-ons to download. For example, you can add compatibility to some console controllers by clicking on the items Add-on Games e Controller profiles, selecting the controller you want to add (eg. Genesis Controller) and clicking on the button Install.
For Kodi 16instead, you have to go to System> Settings, select the item Install from repository, choose the most appropriate category, click on the add-on icon and finally on the button Install. A notification will notify you when the installation is completed.
Some add-ons, immediately after being added, require a specific configuration for correct operation: once the installation is complete, you can access the add-on configuration options by clicking on the button Configure of the panel dedicated to it, which you can reach by clicking on the add-on icon located within the section My Add-ons.
If you want to add new repositories to Kodi, click on the button (I.e. resident in the main screen of the software, then on the icon Fillet (For Kodi 16, select the items System> File Management from the main program screen), double-click the entry Add source located in the left panel, select the item , type the address of the repository in the appropriate text box, presses the button OK, assign a name to the repository and press the button again OK: from this moment, you can install the add-ons present in the newly configured repository with the procedure described above.
As I already mentioned, you can also install additional packages via files downloaded from the Internet (in .zip format) but, for security reasons, you must first activate the installation from unknown sources. To do this, click on the buttons (I.e. e System, select the voice Add-onsposta su Active the switch at Unknown sources and confirm the operation by clicking on the button Yes. Kodi 16 doesn't need this step.
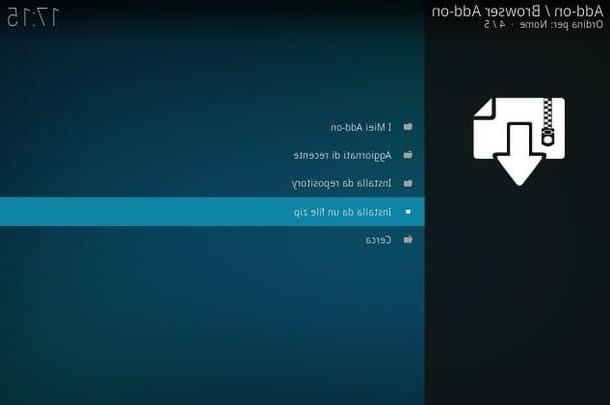
To install the add-on from the .zip file, return to the main Kodi screen, click on the button Add-on, then on the button in the shape of box placed in the upper left and on the entry Install from a zip file (on Kodi 16, you can achieve the same result by clicking on the items System> Settings > Add-on, then twice on the entry (..) located at the top and on the option Install from a zip file). Finally, follow the on-screen instructions to browse your device memory and select the previously downloaded .zip file.
How to set up the Kodi media library
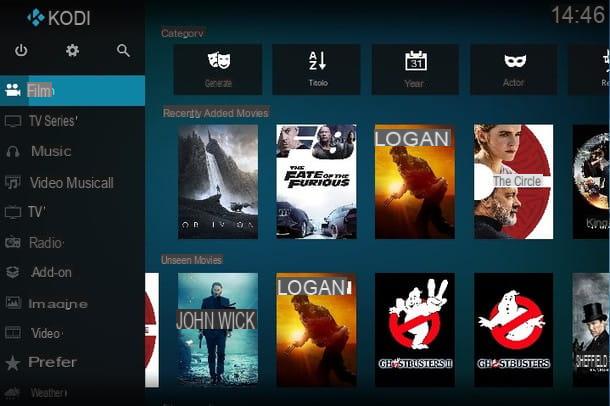
The main purpose of Kodi is to "transform" the PC (or other devices on which it runs) into a multimedia centerThe time has come to add your collections of images, music and video files to Kodi, so that the program can index, organize and make them available to you in a single click.
So, to add your movies to the Kodi media collection, click on the item Videos located on the initial screen of the program and then on the button Insert file section (on Kodi 16, you can achieve the same result by selecting items Video> File).
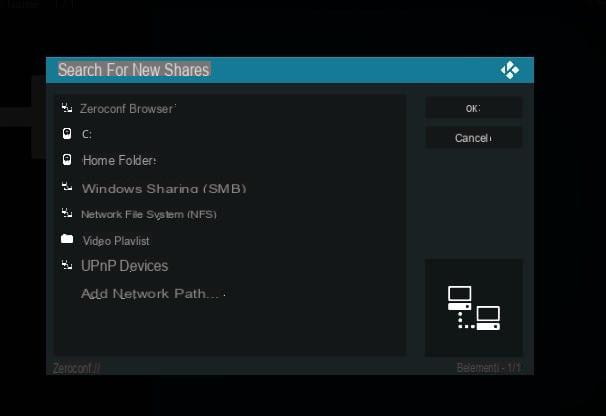
Then click on the item Add Video ..., pigia sul pulsating Explore and select the item that best suits the location of the files you want to add (you can use the Zeroconf manager to add files stored in memory, the SMB sharing to get files from a NAS or network server, you can add a disk NFS, a whole playlist, a device UPnP or a custom network path), then follow the on-screen instructions and complete file selection.
Once you return to the entry screen, click on percorso just inserted, presses the button OK and on the voice Enter a name for this Media source, assign a name to the source (eg. "Movie from network disk"), press twice on the button OK, then on the rumors This Directory Contains e Videos and finally, click on the buttons OK e Yes. You can add as many media sources as you want to the category by following the same instructions.
After completing the procedure, you can access the list of movies added to Kodi by simply clicking on the side item Videos (or its pulsating Videos control bar on Kodi 16) and view all video files by clicking on the item instead Video.
Following the same procedure, you can configure the other multimedia libraries of the program: TV Series, Images and Music Videos. To play a content, simply click on its icon located in the appropriate section of the library. Easy, right?
Other Kodi Settings
If you have come this far, it means that you have learned the basics of how to set up kodi according to your needs. In addition to giving you my most sincere congratulations, I want to invite you to take a look at the rich panel as well Settings of Kodi, useful for configuring the work environment and adapting it even more to your needs.
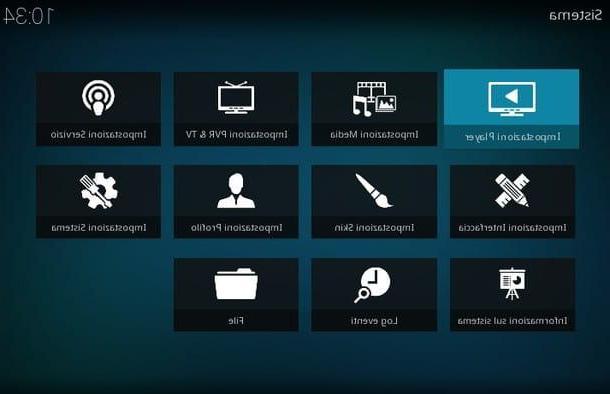
To access it, click on the button (I.e. located on the Kodi home screen and carefully look at the proposed screen: each icon identifies a section and, within them, you can change the various settings by clicking on the relevant items, speaking on switches, selecting them from drop down menu proposed or by typing the information requested in text fields. Below I give you an overview of the breakdown of these sections.
- Player Settings - this section contains options related to internal multimedia player by Kodi. From here it is possible to activate or deactivate the automatic playback of the videos, set the duration of the time jumps obtainable by pressing the button Skip, increase or decrease the update frequency, choose the subtitle language, the delay for the synchronization audio / video and much more.
- Media Settings - in this section you will find the options for displaying multimedia contents in the screens of the program. From here you can add / remove sources from the libraries, act on the icon display mode, activate / deactivate the previews, choose the remote from which multimedia information is retrieved, enable or disable automatic library updates at startup and many other options.
- PVR & TV settings - here you can decide the options regarding the management of IPTV (channels, on-screen controls, digital guides, etc.) and the recording of digital content PVR. This section is especially useful when Kodi is used to watch TV on PC.
- Service Settings - in this section you can define the details about the services for the use of the contents. For example, you can activate or deactivate theweb interface and control via app, configure the services UPnP, DLNA, weather e AirPlay, and other types of similar services.
- Interface Settings - as you have already learned, from here it is possible to define all the graphical aspects of Kodi, from skin to the language, passing through the screensaver, Master Lock and startup behavior.
- Skin Settings - this section contains the configuration and behavior options related to skin currently in use (animations, automatic scrolling, display of information in real time, background images and so on). Typically, each skin has highly customized settings.
- Profile Settings - as seen above, this section is about configuring user profiles added to Kodi.
- System settings - from here it is possible to define in detail the behavior of Kodi: for example, you can decide to start it in full screen or in window, configure the output device for audio and that of entering commands (mouse / keyboard, joystick, remote control, etc.), the parameters of Internet access (like proxies, for example), the settings for the energy saving, for installing and updating add-ons and for the event recording (logging).
- System Information - this screen contains all the information relating to the device on which Kodi is running (operating system, memory and processor use, network status, IP address, disk status, running time and so on).
- Event Log - in this section it is possible to access the list of events recorded by the program (if the recording was activated by System Settings> Logging).
- Fillet - from here you can access a internal browser, useful both for browsing files on the network or on the device and for adding new repositories.
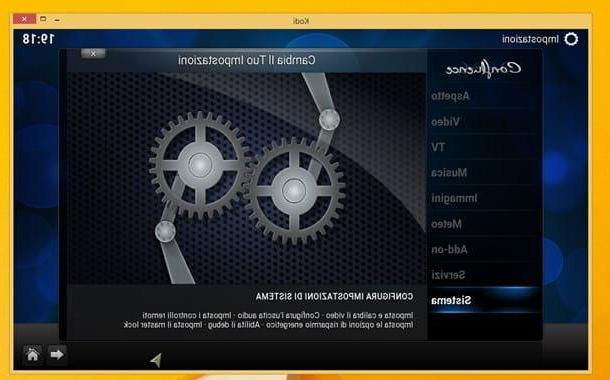
Kodi 16's Settings screen is also very well stocked, and can be accessed via entries System> settings. The sections, however, are organized in a slightly different way than what we have seen above: below is a general overview.
- Appearance - here are all the settings for configuring the appearance of Kodi (skin, language, file list, screen saver and possibly energy saving).
- Video - this is the section that contains the settings for managing the video library, for playing videos and for subtitles.
- TV - this panel shows all the settings relating to the use of Kodi as an IPTV player (OSD, electronic guide, playback / recording of channels and so on).
- Music - in this section, you can access the settings relating to the management of the music library (display, playback of the songs and behavior for the playback of Audio CDs).
- Images - from here you can customize the behavior of the mode presentation from the Kodi photo library.
- weather - from here you can choose the weather service for viewing the forecast.
- Add-on - is the add-on management screen: from here it is possible to download them from the repositories or install them from .zip archives, as seen above.
- Services - through this section, you can configure Kodi for access to network services, by setting the device name, the behavior of UPnP, DLNA e AirPlay, control options via web interface or third-party app.
- System - from here it is possible to set aspects such as full screen or window display, video calibration, audio outputs, control devices, energy saving and event recording.
As if all this were not enough, the Kodi settings panel also "adapts" to the type of user who uses it: at the bottom of the screen, in the left panel, it is possible to set the display of the settings in three different modes, which list below.
- Standard - activated by default, this mode shows the most well-known and used items, panels and menus.
- Advanced - this mode shows more detailed Kodi configuration settings.
- Expert - this is the mode that shows all, absolutely all, the settings available in Kodi.
- Base - is a mode suitable for beginners, which shows only the basic settings.
To switch from one view to another, simply click on the items ⚙ Standard, ⚙ Advanced, ⚙ Expert o ⚙ Base, located at the bottom left for each section. Finally, the voice is almost always available in each setting screen Restore previous settings to default, which allows you to restore all the settings contained in the section you are in to their initial values.
In short, you are dealing with a panel that adapts to all needs and "levels" of experience and which, among other things, allows you to restore multiple settings to their initial state at a time, in a single click: what more could you ask for ?!
How to set up Kodi