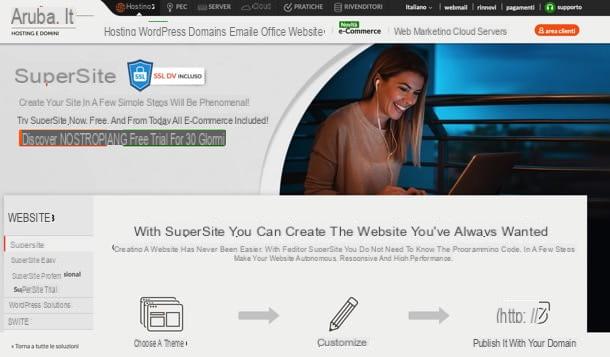
Shopify plans

Prima di enter the live of the tutorial and spiegarti how to create an ecommerce with Shopify, it seems only right to give an overview of the plans offered by the service and their characteristics. Granted that it is possible open a free e-commerce for 14 days (or more, for example 90 days, in the promo periods) without entering any payment data, the plans that you can subsequently subscribe are the following.
- Basic Shopify - includes everything you need to launch a new store for $ 29 / month. Includes an ecommerce website with a blog; unlimited products; 2 staff accounts; 24/7 assistance in English; the ability to take advantage of various sales channels such as marketplaces and social media (the availability of sales channels may vary depending on the country); manual creation of orders; the possibility of integrating discount codes; free SSL certificate and abandoned cart recovery. It also includes fraud analysis and provides for the following commissions: 1,9% + € 0,25 on commissions on online payments with European credit cards; 3,6% + € 0,25 on fees on payments made online with international / Amex credit cards and 2,0% on additional fees with all payment providers other than Shopify Payments.
- Shopify - to take your shop to the next level, it costs $ 79 / month. Includes all the benefits of the Basic plan, with 5 staff accounts; the possibility of inserting gift vouchers and reporting. It also includes fraud analysis and provides for the following commissions: 1,8% + € 0,25 on commissions on online payments with European credit cards; 3,4% + € 0,25 on fees on payments made online with international / Amex credit cards and 1,0% on additional fees with all payment providers other than Shopify Payments.
- Advanced Shopify - with all the most advanced features to expand your business, it costs $ 299 / month. Includes all the benefits of the Shopify plan, with 15 staff accounts; advanced reporting and shipping rates (shows rates calculated with your account or through other apps for shipping during check-out). It also includes fraud analysis and provides for the following commissions: 1,6% + € 0,25 on commissions on online payments with European credit cards; 3,2% + € 0,25 on fees on payments made online with international / Amex credit cards and 0,5% on additional fees with all payment providers other than Shopify Payments.
All plans also provide Unlimited secure hosting, free unlimited bandwidth and the ability to purchase a domain name, use a free myshopify.com or take advantage of an existing domain name. More info here.
How Shopify Works
At this point, I'd say you're ready to take action and find out how to create an ecommerce with Shopify. Here, then, is how to create a store and how to best manage it on this platform.
To make the tutorial, I used the web version of Shopify for computers, however, be aware that Shopify is also available as an app for smartphones and tablets. It is compatible with both Android and iOS / iPadOS and allows you to create and manage ecommerce in a convenient way as it happens on a computer. The choice is yours.
Create the shop

To open your ecommerce on Shopify, all you have to do is connect to the official website of the service, type yours email address in the appropriate text field and click on the button Start your free trial. As already mentioned, you can create your shop for free without entering payment data until the end of the trial.
On the page that opens, type the Password you want to use for your store and the name of your shop, in the appropriate text fields, and press the button Create your shop to move forward. Within a few seconds you will be offered another form.
Specify, therefore, if you have already started selling, what your current income is e if you are creating a store for a customer; fill in any new fields that appear and click on the button NEXT (or your Salta, if you don't want to answer these questions).
Afterwards, type theaddress to receive payments, by filling in the appropriate prospectus you see on the screen (also complete with telephone number), and click the button Enter the shop to access your new ecommerce, which you can start setting up and managing right away by following the instructions below.
Manage the shop
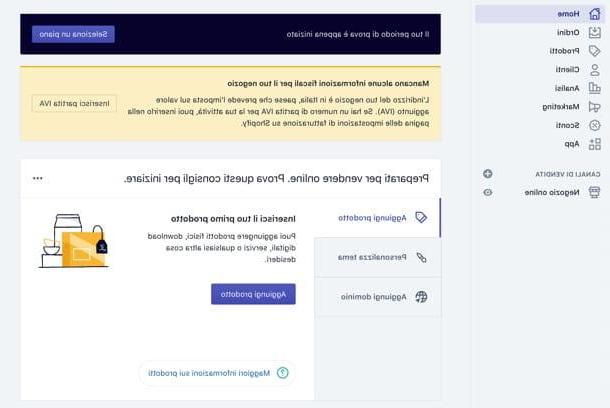
At the first access, in the section Home of the Shopify management panel, you will find very useful information to prepare to sell online. For example, you may be asked to enter any missing tax information (It is. the VAT part).
In the box Get ready to sell online. Try these tips to get started you will find, instead, quick links to perform the operations necessary to set up your ecommerce: add products, customize the theme, add a domain and so on.
Products and orders
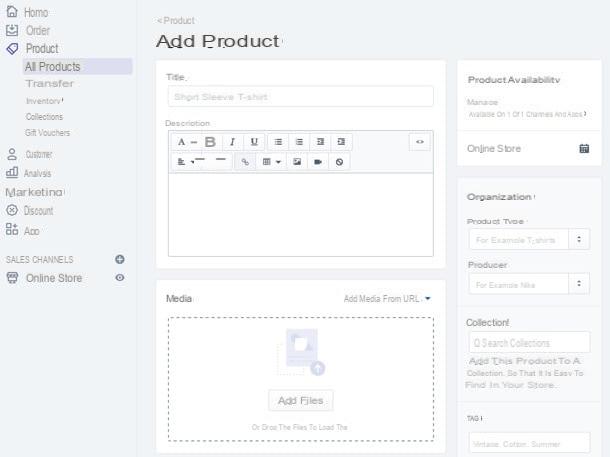
To proceed with adding the products, click on the button Add product. Alternatively, select the item Products from the side menu and click on the button Add product. This will open the form for adding new products.
In fields Title, Description e Media you must add, respectively, the name of the product, its description and photos / videos that represent it. By scrolling down the page, you can find the fields Prices (to enter price, comparison price, cost per item and choose whether to apply taxes on the product), Inventory (to indicate SKU, barcode, quantity and choose whether to monitor quantity and continue selling when out of stock), Shipping (to specify if it is a tax product, indicate its weight, country of origin and HS code) e variants (to be used if the product has multiple options, such as different sizes or colors).
In the right sidebar, however, you will find the box Product availability, to indicate in which sections of the site to make the product available, and the box Organization, which allows you to indicate the type of product, manufacturer, collections in which to include it (in order to make it more easily traceable in the store) and tags. When you have finished filling out everything, click on the button Save, to save the product and add it to your ecommerce.
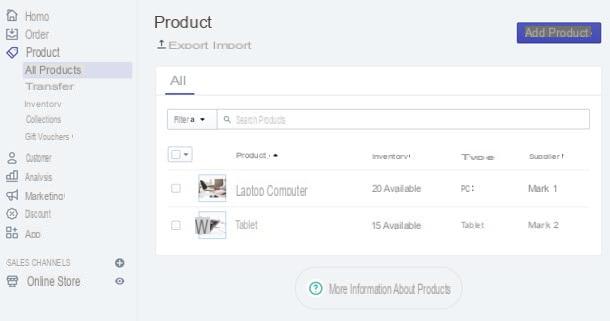
Later, you can edit your products simply by selecting the items Products> All products (o Collections, to browse them based on the collections they belong to) from the Shopify side menu and clicking on the name of the product to modify. In the section Products you also find handy search filters and buttons Export e Import which allow, respectively, to export the products present in the store in XLS and CSV files and to import CSV lists of already existing products.
By selecting, instead, the item Inventory from the left sidebar you can access the inventory of your store containing the list of available products, in order to monitor and change the quantities arriving and available. Here, too, are search filters and buttons Import ed Export, to import and export product lists.
Going up Transfers (still in the side menu) you can manage inventory transfers, filtering them based on custom criteria and viewing them based on their status: pending, partial and completed. To add a new one, just click on the button Add Transfer and fill in the form that is proposed to you.
In CollectionsInstead, you can create and manage product collections, i.e. categories in which to insert the products of your ecommerce on a manual basis (thus directly choosing which ones to insert) or intelligent, setting automatic rules based on title, type, supplier, price, product tag and so on. To create a new collection, just click on the button Create collection and fill in the form that is proposed to you. To change one, simply select it from the page instead Collections.
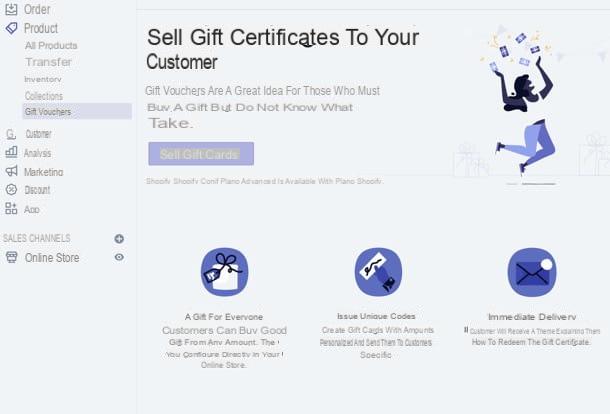
Finally, there is the section Gift Vouchers (always accessible from the side menu) which allows you to create and manage gift vouchers for your e-commerce customers (provided you have subscribed to a Shopify plan that allows them to be used).
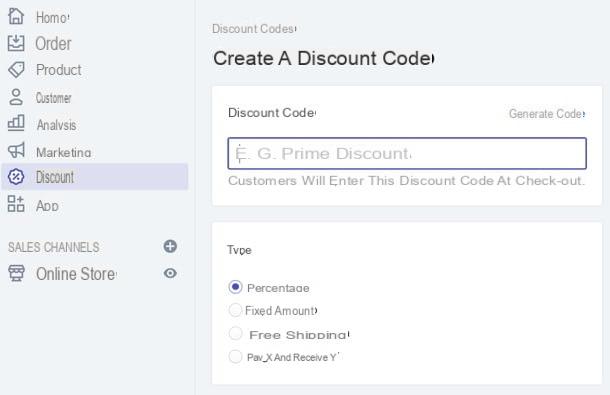
In addition to gift vouchers, you can also set up discount codes, to allow your customers to save on purchases made in your store. To create a discount code, select the item discounts from the left sidebar and click on the button Create a discount code. You will then be able to set the code and choose whether to apply it on a percentage, fixed amount, shipping, etc. and whether to make it effective on an entire order, on collections or on specific products.
The possibility of creating should also be emphasized automatic discounts, to be applied automatically at check-out and on the cart: you can manage automatic discounts in the appropriate tab in the "Discounts" section.
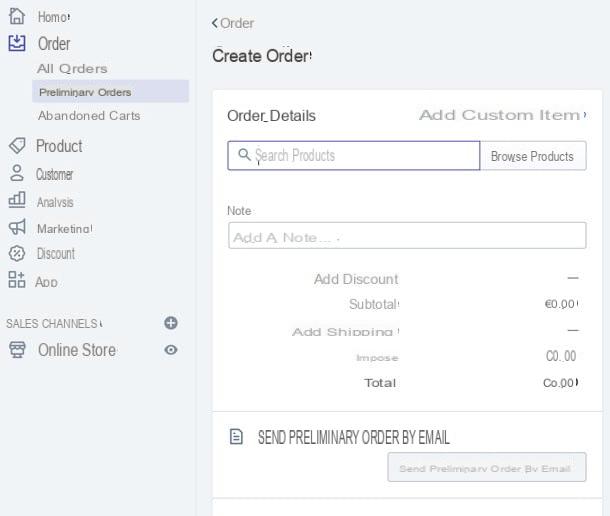
Once your shop is launched, you will be able to manage orders received by clicking on the appropriate item in the Shopify side menu. This will open the page containing the list of all orders, with the possibility of filtering them based on customized parameters, create new orders (by clicking on the appropriate button) and browse them based on their status: open, unpaid and so on. To view the details of an order, simply click on its reference code.
If you want to create a preliminary order, however, all you have to do is click on the item Preliminary orders present in the left sidebar, press the button for create a new order and fill in the form that is proposed to you. Then selecting the item Abandoned carts from the side menu you can view and manage the list of abandoned carts, i.e. the carts of customers who have added items to their shopping cart without completing the check-out.
About customers: know that you can manage the list of your customers, import it from a CSV file and manually add new customers to your ecommerce database by simply selecting the item Clients from the Shopify side menu.
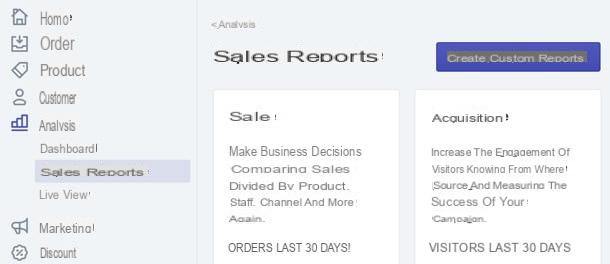
To monitor the statistics of your shop, however, you can count on the section Analysis (always accessible from the side menu), which allows you to have a general overview of the trend of the store (Dashboard), generate sales report and view sales data in real time (Live view).
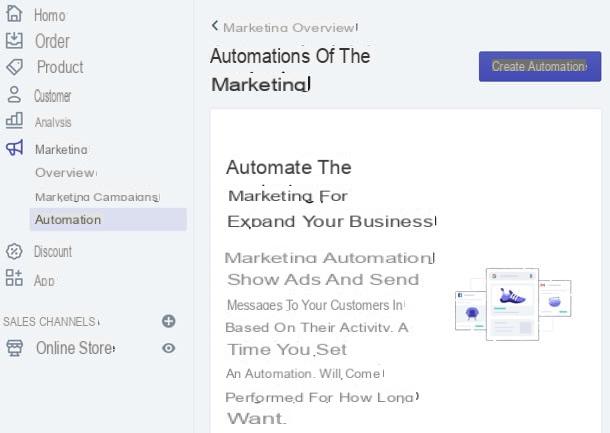
I advise you, then, to study the tools in the section well Marketing Shopify, which allow you to configure ecommerce integrations with Facebook Marketing e Google Shopping (In View), create marketing campaigns (via Facebook, email campaign, SMS, Snapchat and more) and configure automations.
Marketing automations show ads and message customers based on their business. To create one, select the appropriate item from the left sidebar, press the button Create automation and choose the type of activity to automate (eg Google campaign, email or SMS).
You can find other tools and services to promote your business through the apps in theShopify App Store, accessible by selecting the item App from the left sidebar and clicking on the button Visit the Shopify App Store, top right.
Once you have identified the app you are interested in, select it and click on the button Add app, to add it to your shop.
Appearance and pages
After adding products to your ecommerce, you can move on to customizing the theme and shop pages for customers to see.
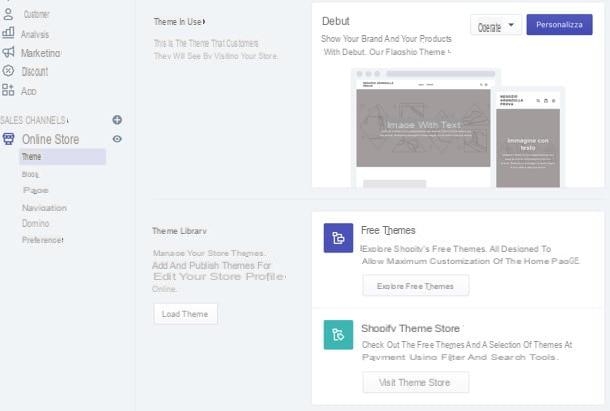
Select, though, the voice Online shop from the left sidebar and, to choose the theme to use, access the section below: Temi. From here, by clicking on the appropriate buttons, you can browse through many free themes, access the Theme store Shopify with paid themes or upload a theme from your PC.
Once you have chosen the theme you like best, select it and, if available in several variants, indicate the one you prefer for your ecommerce; then click on the button Add to theme library, to add it to your library and wait a few seconds.
As soon as the theme appears in the Themes section of your ecommerce, to use it publicly, all you have to do is click on the item Actions relative to it, then on Public and confirm.
To change the aesthetic characteristics of the chosen theme and customize the composition of the pages of your shop, click on the button Customize related to the theme in use and then use the editor that is proposed to you to apply the desired changes.
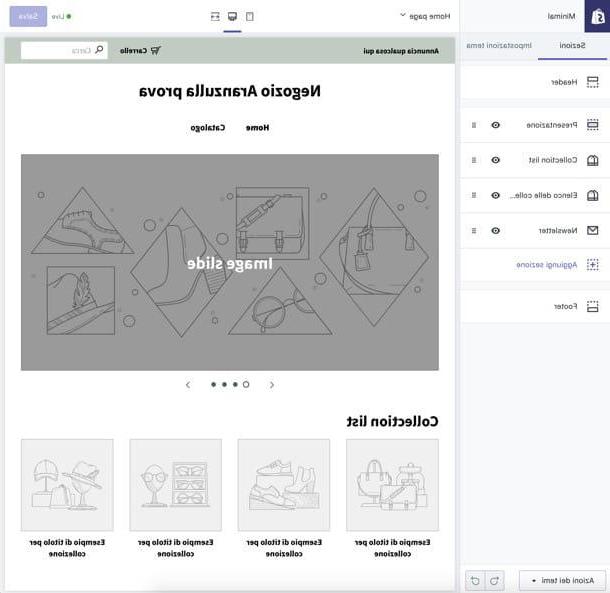
By selecting a page (eg. Home Page) from the drop-down menu located at the top left - or by simply browsing the site preview - you can view all the sections that make up the site, listed in the left sidebar. At this point, you can reorder the sections with the mouse and add new ones.
Instead, by moving to the tab Theme settings (top left) you can edit layout, colors e fonts store, customize the favicon (i.e. the icon to be displayed in the browser), the links of the SOCIAL MEDIA and the images to use in the check-out. Once you have applied the desired changes, click on the button Save, top right.
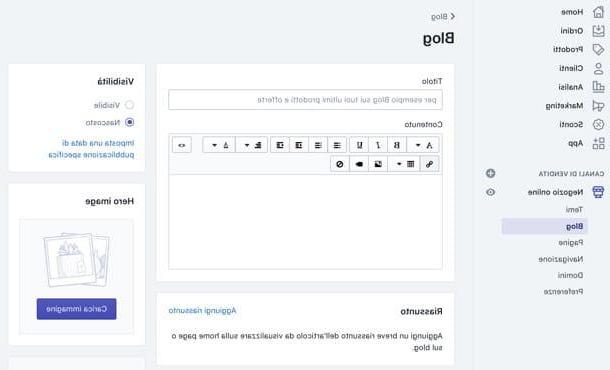
To create new pages and manage the blog content, however, you must select the items respectively Pages e Blog from the Shopify side menu and proceed with the creation of the content you want to offer to your customers, using the appropriate buttons.
I remind you that, at any time, you can view a live preview of your store by clicking on theeye present accanto alla voce Online shop in the left sidebar.
The section Navigation instead it allows you to customize the site menus (eg. Menu footer e Main Menu), with the possibility of adding new items / links, while the section Domini allows you to manage domains related to ecommerce, buying new ones, transferring them and connecting an existing domain.
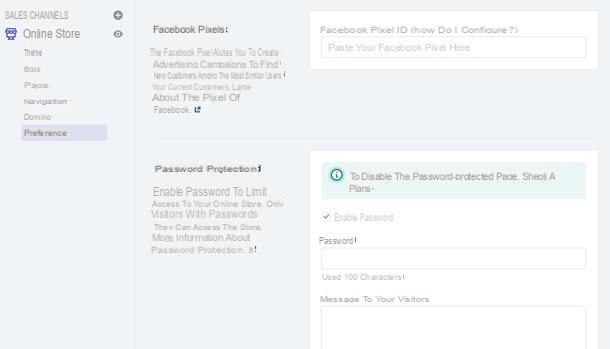
Infine in Pref Renze you can adjust various settings of your online store, such as title and meta description, settings related to Google Analytics e Facebook Pixel and password protection: if you don't remove the default password, customers will only be able to access your store by entering the right keyword, so I recommend that you disable this limitation. Once you have changed your preferences, click on Save, to make them effective.
You can find other tools and services to boost your ecommerce inShopify App Store, accessible by selecting the item App from the left sidebar and then clicking on the button Visit the Shopify App Store.
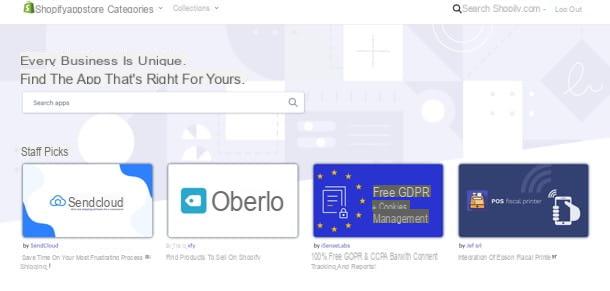
Once you have identified the app of your interest (there are really many to choose from, such as those dedicated to shipments and the legislation GDPR Compliance), select it and click on the button Add app, to add it to your shop.
For more information
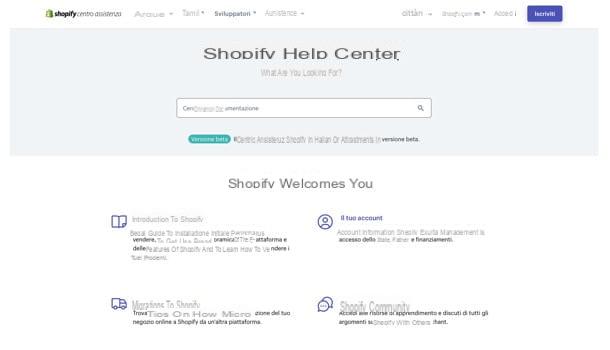
If you need more information about Shopify and how it works, check out the Shopify Help Center which includes informative articles on the first steps to take within the platform, ways to sell, setting up and managing the store, and much more.
Also, if you need direct help, you can click on the button Contact Shopify Support, below, and choose whether visit the community Shopify, where other Shopify merchants share their experiences and knowledge, or if send an email to the Shopify staff. You will surely find the answers you are looking for.
Article created in collaboration with Shopify.
How to create an ecommerce with Shopify