DVDStyler (Windows / macOS / Linux)
The first solution that I recommend you to try for build an interactive DVD è DVDStyler, a DVD authoring software that allows you to build DVD menus from fully customizable templates. It's open source, cross-platform (compatible with Windows, macOS, and Linux), and it's 100% free.
To use DVDStyler, you must first download it to your computer. Then connect to its official website and click on the link located next to the operating system you use: DVDStyler-3.0.4-win32.exe, if you have a Windows PC with 32-bit architecture; DVDStyler-3.0.4-win64.exe, if you have a 64-bit Windows PC; DVDStyler-3.0.4-MacOSX.dmg, if you have a Mac and so on.
Once the download is complete, open the file you just downloaded and follow the simple wizard to proceed with the actual installation of the program. If you use a PC Windows, then click the button Yes, select your language cityno and click on the button OK. Then click on the button NEXT five consecutive times and on the buttons Install e end to conclude the setup.
If you use a Macinstead, drag the DVDStyler icon into the folder Applications say macOS, click on destroy the program icon and select the voice apri from the menu that appears (this operation, to be carried out only at the first start of DVDStyler, is necessary to "override" the restrictions applied by macOS to software from non-certified developers). Then select your language cityno from the box that opens and click on the button OK.
As soon as DVDStyler is started, you will see a welcome window, through which you can create a new project. In the window in question, then type the title of your DVD in the text field Disc label, indicates the disk capacity (ex. DVD-5 4.7 GB o DVD-9 8.5 GB) through the drop-down menu located next to the item Disk capacity, select all the other parameters related to the audio and video format of your project and when you have finished setting them all, click on the button OK.
In the window Select a theme for the DVD menus, type the disc title in the text box Caption, select one of the themes among those proposed (perhaps with the help of the categories on the left) and click on the button OK. If none of the proposed themes is to your liking, click on the button No theme: you can make one from scratch giving space to your imagination.
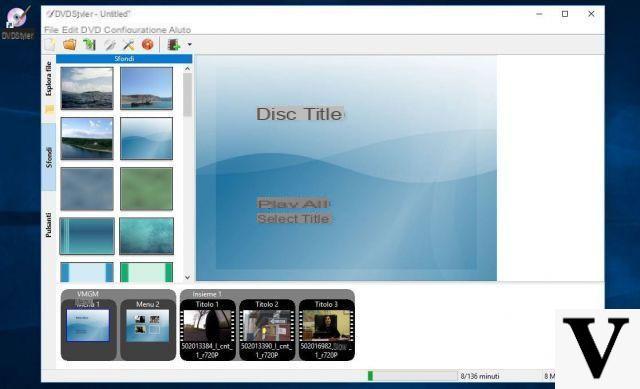
After making the choice of the theme to use for your DVD menu, you will find yourself in front of the DVDStyler editor. Then click on the icon of film with the symbol capacitor positive (+) lead to import the videos to be included in the project and on the voice Wallpapers located on the left sidebar to change the DVD background. To apply a background to the menu you are making, instead, double-click on it.
If you wish, you can add buttons to the DVD menu other than those already present by default. To do this, click on the item buttons located in the left sidebar and drag the button inside the menu, to the point you prefer. To change the properties of a button, double-click it and customize its actions and appearance from the window Property. If you want to change the appearance of other elements on the DVD, double-click on them and change their appearance via the window Property.
As soon as you are satisfied with your work, save the project by clicking on the item Save from the menu Fillet, or burn the DVD by clicking on the entry Write DVD ... (l'icona del orange disc) from the menu Fillet.
ConvertXtoDVD (Windows)
ConvertXtoDVD is another solution that can come in handy for making interactive DVDs. As its name suggests, it allows you to easily convert video to DVD and create customized menus. You can try ConvertXtoDVD for free for 7 days: after the trial period, you have to buy the full version of the program, which costs 44,99 euros.
To download ConvertXtoDVD on your PC, connect to its official website and click on the green button Free download. When the download is complete, open the file .exe just downloaded, click on the button Yes, select your language cityno and click sul pulsating OK. In the window that opens, complete the setup by following the instructions on the screen: then click on the button NEXT, check the item I accept the terms of the license agreement, click the button again NEXT twice consecutively, select your preferred video format (you can change this setting at any time), click on the button NEXT three more consecutive times and then click on Install. Then click the button one last time NEXT and then end.
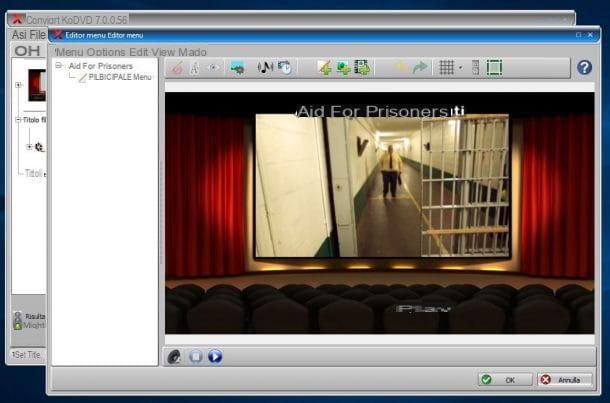
As soon as ConvertXtoDVD starts, click on the green button capacitor positive (+) lead to upload the videos to include in the project (if you prefer, you can do this by simply dragging a file into the window) and then click on the button Edit menu. Now, click on the button Create new theme (if you want to create a menu from scratch) or choose one of the templates in the box Use an existing theme: Select the theme from the drop-down menus located next to the items Structure e Subject and by clicking on the button Select theme to use the theme or Advanced editing to customize it to your liking.
If you have decided to customize the chosen theme, use the tools present in the ConvertXtoDVD editor: then click on the pen to customize the selected elements; click on the "A”To change the appearance of the text in the menu; click on theeye with prohibition symbol to hide the selected items and so on. As soon as you are satisfied with your work, click the button OK.
To save your project, click on the floppy disk, while if you want to burn DVD with custom menu directly, click the button Converted located at the bottom and wait for the operation to be completed.
DVDFab DVD Creator (Windows / macOS)
Another software you can consider is DVDFab DVD Creator: it is a complete program, rich in numerous features and at the same time easy to use. It is not free: to use it, you need to subscribe to a subscription plan that starts at $ 49 per year. However, you can download an evaluation version that can be used free of charge for 30 days.
To download the trial of DVDFab DVD Creator, connected to the official website of the program, click on the item Creator located at the top right and, from the menu that opens, click on the item DVD Creator. On the page that opens, after selecting the operating system in use (Windows o Mac), click on your button Try It Free.
Once the download is complete, if you are using a PC Windows, open the file .exe just downloaded and follow the guided procedure that is proposed to you: then click on the button Yes, Then options (below) and, in the expanding menu, make sure there is a tick next to the item I accept the end user license agreement (if you wish, you can uncheck the contribution option to improve the program by sending anonymous data). Then click on the item Install, wait for the procedure to be completed and click on the item starts.
If you use a Macinstead, double-click the file pkg just downloaded, click on the button Continue three consecutive times, click the button Accept to accept the conditions of use of the program and press the button Continue. Then click on the button Install, type the Password of your user account on macOS and then click on the buttons Install software e Close.
At this point, in the window that opens, you will be asked if you want to buy the program or try it for 30 days: click on the button Race to start the trial. Next, click on the item Crea (top), then on the button Create DVD that appears on the left and presses the button (+) Add to import videos for use in the project.
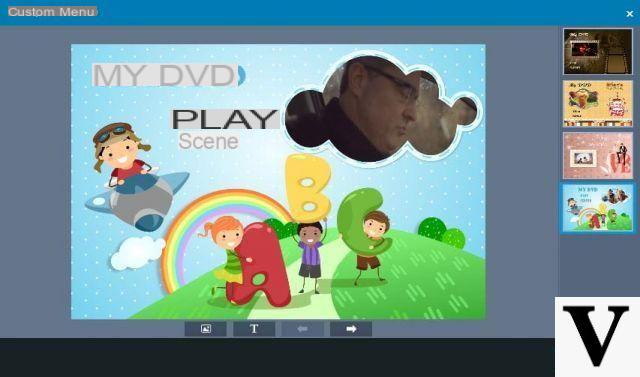
At this point, click on the button Advanced Settings (the button depicting a wrench located next to the "i“) And, in the window that opens, select the properties regarding the menu and video playback. Then click on the blue button Personalized menu (in order to create the menu for your DVD) and, in the window Personalized menu, select one of the themes located on the right. Then customize the menu using the buttons located at the bottom to add images, writings and buttons.
As soon as you are satisfied with the result, click on the button OK (both from the "Advanced Settings" window and from the "Custom Menu" window) and, finally, select one of the options located at the bottom to choose the path and format in which to save the project. Now you can finally click on the button starts and start burning the diskette. You will be able to view the progress of the work through the window Activity queue manager.
Other programs to build an interactive DVD
Haven't the solutions I talked about in this tutorial particularly convinced you? Check out these workarounds - I'm convinced you won't be disappointed at all.
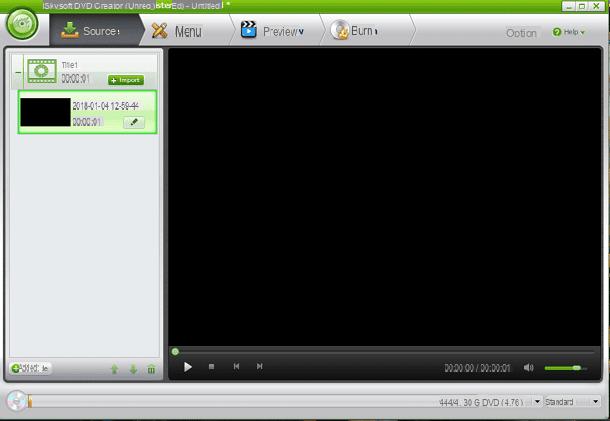
- iSkysoft DVD Creator (Windows / macOS) - it is a paid program (costs $ 39,95 in the Windows version and $ 49,00 in the Mac version) characterized by a "clean" and minimal interface, which allows you to create interactive DVDs in a easy and fast. You can try the iSkysoft DVD Creator trial for a limited trial period.
- DeepDVD Movie (Windows) - if you are looking for a program that is easy to use, DeepDVD Movie may be the solution for you. Also in this case we are in the presence of a paid solution: the program costs $ 24,95, but you can test it for free 30 days.
Other solutions that may interest you are present in my post on DVD Authoring programs. If, after making your interactive DVD, you want to “pack” it with a custom-made cover, read the tutorial where I show you how to make DVD covers so you know how to proceed.
How to build an interactive DVD