Preliminary information
Before we delve into the heart of this guide, let me give you a few preliminary information that will help you to proceed better.
First of all, I want to tell you that GIMP is not exactly the most suitable program for creating logos, as it does not offer the possibility of creating images in vector (i.e. that they do not lose quality when they are zoomed out or zoomed in to infinity).
For the aforementioned reason, therefore, it would be better to resort to solutions of another kind, such as Inkscape (which I told you about in this other guide) or the more professional Illustrator. The fact remains, however, that if you simply want to "experiment" the world of graphic design, without getting who knows what results, you can safely use GIMP. You have to choose, taking into account what has just been said.
How to download GIMP

The first thing you need to do to be able to make a logo with GIMP is, of course, to download the program, if you haven't already done so. Do not know how to download GIMP? Let's fix it right away! First, go to the GIMP website and click the red button first Download x.xx.x and then on the button Download GIMP x.xx.x directly located on the right, immediately after the entry GIMP for Windows o GIMP for macOS (depending on the operating system in use on your PC).
Once the download is complete, open the file you obtained from the GIMP site and follow the instructions that appear on the screen to complete the installation procedure. Up Windows, for example, you need to open the .exe file you got and then you have to click on the buttons Yes, OK, Install e end.
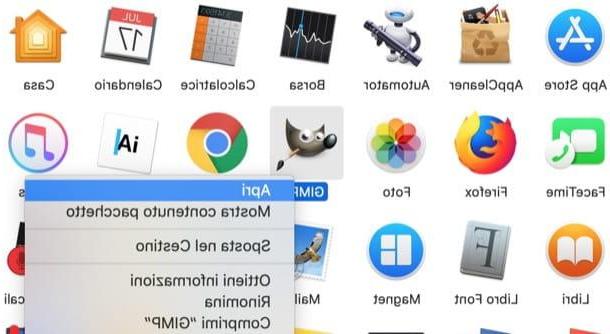
A Macinstead, you simply have to drag the icon of GIMP in the folder Applications macOS, right-click the program icon and select the item apri twice in a row. This procedure must be done only at the first start of GIMP and serves to "override" the restrictions that Apple imposes on software that comes from non-certified sources.
Should you see the message "There is no macOS package yet, sorry. Please check back later " sotto the dicitura GIMP for macOS, it is evident that the latest version of GIMP has not yet been released for macOS. You can still install a previous release of GIMP by going to this other page.
For more information and details on how to download GIMP, I suggest you consult the guide where I proceeded to address the topic in more depth.
How to create a logo on GIMP
Now is actually the time to take action and learn how to create a logo on GIMP. In the next paragraphs, you will therefore find all the steps you need to follow to succeed.
Create transparent logo with GIMP
Let's see, first of all, how to do it create a transparent background logo with GIMP.
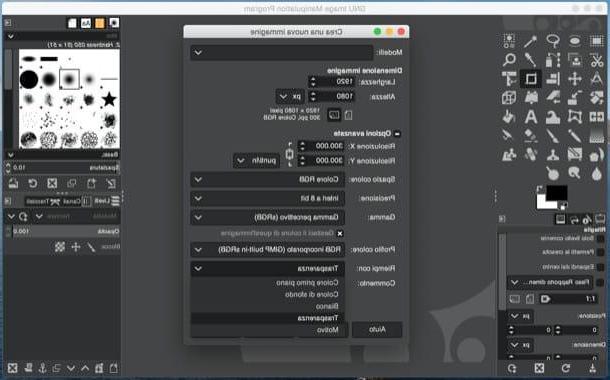
After starting the program, select the item New from the menu Fillet, top left, and create a new, fairly large image (eg. 800 600 pixels x) that has a transparent background. To set the transparency of the background, click on the item Advanced options present in the window for creating a new image and set the item Transparency give menu to tendin Fill with.
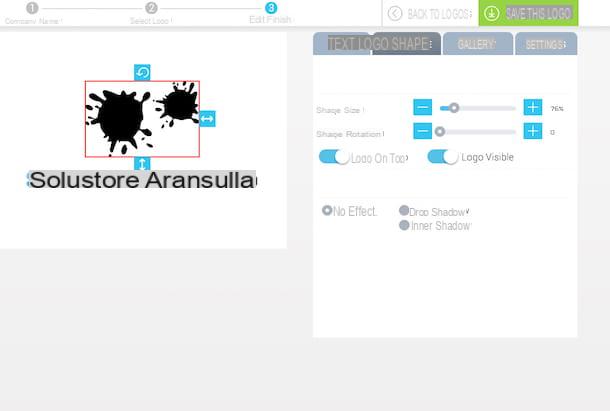
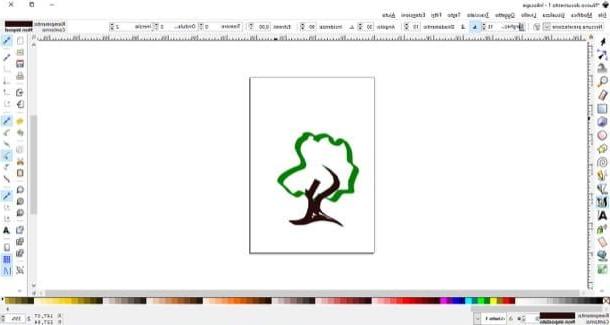
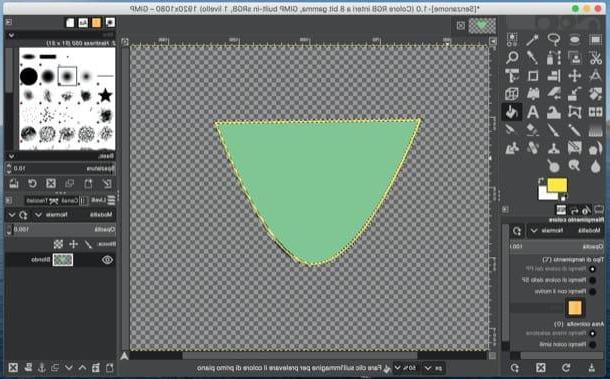
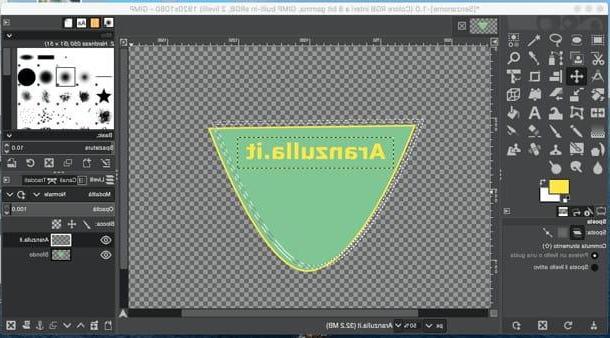
At this point, you need to create the basic shape of your logo using the tools in the toolbar located on the left side of the window. You can use a classic ellipse, by selecting the appropriate tool in the GIMP toolbar (on the left side of the screen), or create a sort of shield, using the path tool: to get this particular shape, mark a point at the top left and one at the top right of the image (on the same line), then hold down the key Ctrl (your Windows) or cmd (on macOS) and drag the border down to get the shape of a “U”. Finally, press the key Submit on your computer keyboard and you will get a shield-shaped selection.
At this point, color the elliptical selection or "shield" you just drew using the color fill or the gradient tool and, if you want, proceed to create a border for your logo by selecting the item Board from the menu Select of GIMP.
Then set the size of the border you want to get (5 or 10 pixels should be fine) and color the border too, using the color fill, a brush or the gradient tool.
To insert some writings inside the logo, however, all you have to do is activate it text tool of GIMP and choose the font you prefer to use. P.
To physically insert the text, on the other hand, you have to click on the point where you want to insert it, type the text of your interest on the keyboard and then use the box Text appeared at the bottom left, to select the font of your interest, the colour of the character and so on.
At the end of the work, when you are satisfied with the result, you can save your logo by simply selecting the item Export from the menu Fillet of GIMP.
Then choose the folder in which to save the image, the file format to use using the appropriate drop-down menu at the bottom right (select PNG o GIF to keep the background transparent) and click the button Export, to complete the operation.
Create vector logos with GIMP
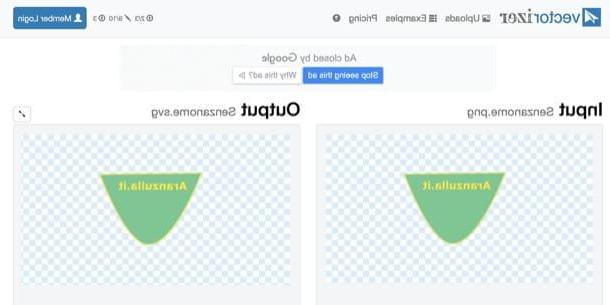
As I told you, due to its limitations, GIMP does not allow create a vector logo. However, it is possible to contain the problem by resorting to some third-party service, such as the portal vectorizer.io which, as can be guessed from its name, offers the possibility to vectorize logos and images by operating from the browser.
To use it, go to its main page, click on the button Upload Images and select the image related to the logo you want to vectorize. Afterwards, open the menu Presets, select the style that best suits you among those available (eg. Clipart, Tatoo, etc.) and possibly customize the parameters relating to the colors that must make up the vector image, using the buttons and menus visible on the screen.
Finally, click the button Download placed under the vector image preview (on the right), in order to start downloading the logo in SVG, And that's it.
Create 3D logos with GIMP
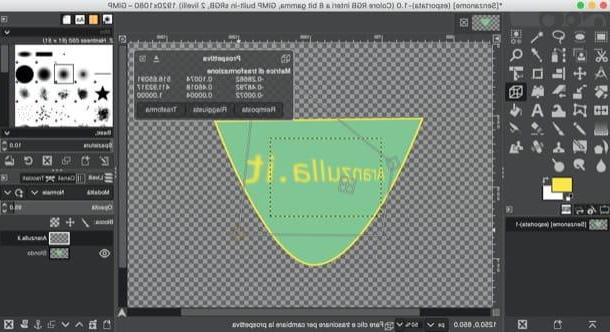
Would you like to make yours three-dimensional logo? Well, with a few tricks it is possible to do this too. Do you want me to give you some examples? Maybe you can add shadows to the logo and / or make the writings three-dimensional by distorting them, skewing them, etc.
If you want to create a shadow for your logo, create a new level by selecting the appropriate item from the menu Subscription GIMP and select the filter Cast shadow (or possibly one of the other filters of your choice) via the menu Filters> Light and Shadow. In the window that opens, you will be able to choose the color, extent and opacity level of the shadow.
Also as regards the typed text it is possible to customize it by adding a 'shading (as seen above with the logo border) or distort it in various directions using the tools bows e perspective.
If necessary, you can also create a curved writing: I explained how to do it in my tutorial on how to curve a writing with GIMP. In this way, you can give a 3D touch to the logo created in GIMP.
How to create a logo with GIMP