How to create a free social network
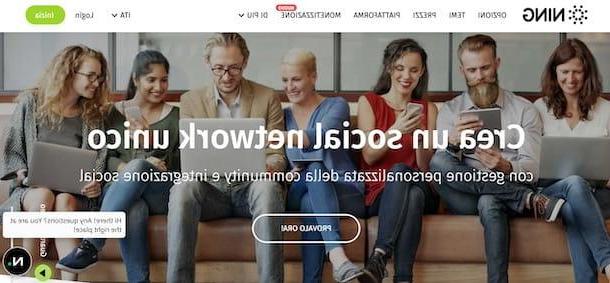
Among the first solutions for create a social network that you can consider is there Ning. If you have never heard of it before, it is a service that allows you to design your own social network without knowing any programming language. You can use it for free for 14 days, after which you need to activate one of the available subscriptions.
To activate the free Ning trial and start creating your social network, connected to the main page of the service, click on the button Start, top right, and enter the required data in the fields Name and surname ed Email. Then specify the category of your interest using the drop-down menu Choose your network theme, enter the URL of your social network in the field Create your network URL, put the check marks to accept the terms of use of the service and declare that you are at least 16 years old and click on the button Registration, to create your account.
In the newly opened page, choose the payment method you prefer to use between credit / debit card e PayPal, enter the data in the appropriate fields and choose one of the available subscriptions.
- Basic: allows you to create small social networks with up to 1.000 users and with a storage space of 1 GB. It costs 27 euros / month or 22 euros / month with annual billing.
- Performance: offers all the features of the Basic plan, with a storage space of 10 GB and the ability to "host" up to 10.000 users. It costs 55 euros / month or 45 euros / month with annual billing.
- Ultimate: it is the ideal solution for those who need to create a large-scale social network. In fact, it allows you to register up to 100.000 users and offers a storage space of 500 GB. In addition, it also offers the Live Chat function. It costs 99 euros / month or 82 euros / month with annual billing.
Once this is done, click on the button To complete, to activate the free Ning trial and start building your social network. It will be useful to know that you will not be charged any costs during the trial period and that you can deactivate the trial at any time.
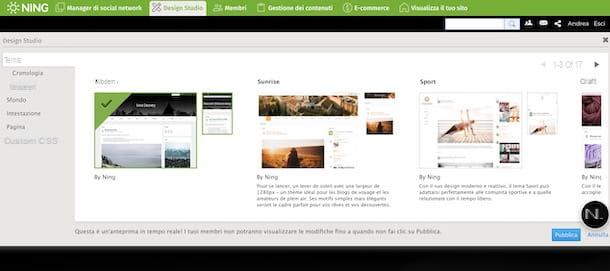
At this point, you can already view your social network, created automatically using a ready-to-use template based on the information provided during registration. To customize the look and feel, select the option Design Studio located at the top, and choose one of the templates available in the section Temi. Alternatively, you can customize the graphic appearance of your social network as you see fit, by acting in the sections Background, Heading, Page e Custom CSS.
Clicking, invece, sulla voce Social network manager, you can create the pages and sections of your social network (Site and pages), manage its main settings (General Settings), customize the chat (Chat) and much more. Also, in the section Members, you can invite users to join your social network, view and manage registered members, while selecting the option Content Management you can apply moderation and spam filters.
It will be useful to know that at the end of the free trial of Ning, the subscription chosen during registration will automatically be activated. If you do not intend to continue using the service, you can deactivate the automatic renewal at any time: to do so, connected to the main page of Ning, select the option My networks visible in the sidebar on the left, click on the item Cancel trial period and follow the instructions shown on the screen.
How to create a social network with WordPress

If you are wondering if it is possible create a social network with WordPress, you will be glad to know that the answer is positive. In fact, there are special plugins that allow you to "transform" a site created with the famous CMS into a real social platform.
Before suggesting you some plugins of this kind, you must know that WordPress is also a great solution for those who are planning to create a social network and earn. In fact, on the sites created with this CMS it is possible to easily monetize the contents both through the insertion of advertising banners (eg those of the Google AdSense circuit) and through other forms of monetization (eg the Amazon affiliate program). In this regard, my guide on how to monetize a site may be useful.
That said, the first plugin to create a social network on WordPress that I would like to recommend is BuddyPress, a free tool with paid functionality that allows you to create forums and social platforms. By installing this plugin, users will be able to register, customize your profile, to boot private conversations and many other features typical of social networks, such as the ability to create and join groups e connect with other users.
Among the strengths of BuddyPress there is also the possibility of implementing other features by installing additional plugins that integrate completely with BuddyPress. For example, with iFlyChat, a free plugin also available in a paid version, it's possible I will create a chat room for users registered on the social network.
PeePso is another valid solution to create a social network with WordPress. In addition to integrating well with any WordPress theme, associating the plugin in question to its theme PeePso: Gecko ($ 99), you can "transform" your site into a real social platform in the style of Facebook.

Finally, among the plugins that you can consider, I also point out WP Symposium Pro, compatible with any WordPress theme and also for multilingual sites, and Membership, a free tool (with paid functionality) that allows you to create an online community with registration functions, private messages, friendships and notifications in real time.
Regardless of the plugin you have chosen to transform your site into a social network, all you have to do to start using it is to access the Dashboard WordPress, click on the item Plugin, in the sidebar on the left, and press the button Add new.
In the new screen that appears, enter your chosen plugin name in the field Searching for plugins, wait for the search results and click on the button Install now related to the plugin of your interest. Once the installation is complete, click on the item activate, to activate the tool in question and start using it to create your social network. In this regard, my guide on how to use WordPress may be useful.
If, on the other hand, you have not yet created your site with the famous CMS, first identify what you think is the best hosting for WordPress and register your domain. Next, customize your website by choosing one of the ready-to-use WordPress themes and proceed to install one of the plugins I suggested in the previous paragraphs. Do you prefer to create a social network with WordPress at no cost? In that case, you can either install WordPress locally or rely on one of the free hosting services. To find out more, I leave you to my guide on how to create a site with WordPress.
How to create a social network in HTML

If you are going to I will create a social network da zero in HTML, I advise you to consider this solution not only if you have an excellent knowledge of the language in question but if you are also able to program in CSS, a language that allows you to create style sheets and determine the look and feel of your site, e JavaScript, a real programming language that allows you to dynamically manipulate the page and, if necessary, make it interactive.
That said, if you know the languages just mentioned, to create your social network you can use one of the HTML programs that allow you to create a site locally and, subsequently, upload it to a Web space.
If, on the other hand, you are not familiar with the world of programming, I suggest you opt for one of the solutions I indicated in the previous paragraphs. However, if you want to learn the basics of HTML and learn how to create simple pages, you can check out my guide on how to create an HTML page.
How to create a social network app

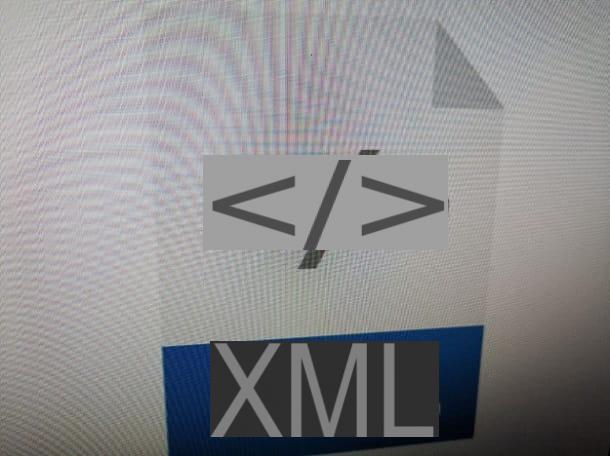
Be your intention è create a social network app you must know that to develop any application it is necessary to know the reference programming languages for the platform of your interest. This means if you want to create an app Android it is essential to have experience with languages Java e XML, while for iOS / iPadOS it is necessary to know the language Swift, created by Apple in 2014, or that Objective-C, previously used on the platforms of the Cupertino colossus.
If you are able to program in one of these languages, all you have to do is download one of the application development software to your computer. For example, to create an app for Android devices you can download for free Android Studio, while to develop apps for iPhone and iPad (but also for Mac, Apple Watch and Apple TV) you can use Xcode, available at no cost on the Mac App Store.
If, on the other hand, your intention is to create a cross-platform application (i.e. available for both Android devices and iPhone / iPad) you can use an independent development program, such as Corona SDK o Unity.
Regardless of the software used to develop the app for your social network, another fundamental step that you must take into consideration is the distribution of the application itself.
If you need the latter to be available on the Google store, connect to the site Google Play Console and create your developer account, so you can publish it on the Android Play Store (the operation has a cost of 25 dollars). If, on the other hand, you want to load the app of your social network for iOS / iPadOS, then on theApp Store, you must subscribe to the Apple Developer Program which costs $ 99 / year. For the walkthrough, I'll leave you to my guide on how to develop an app.

How do you say? Don't know any programming language to create an app for your social network? If so, you can read my guides on how to start programming, how to learn Java, and how to program in Java.
Alternatively, you can rely on services that allow you to develop an app without putting your hand to code. Among these there are MIT App Inventor, a free service for building Android apps, and AppsBuilder, a platform that allows you to develop apps for Android and iPhone / iPad devices.
In the latter case, it is necessary to subscribe to one of the available subscriptions starting from 9 euros / month with a 14-day free trial. For more information, I leave you to my guide on how to create free apps.
How to create a social network