Preliminary operation
Before getting into the tutorial and going to find out how to create bootable USB, there are some preliminary operations that you need to do to make sure everything runs smoothly.
First of all, you must make sure that you have at hand the "material" necessary to carry out the operation described in this guide.
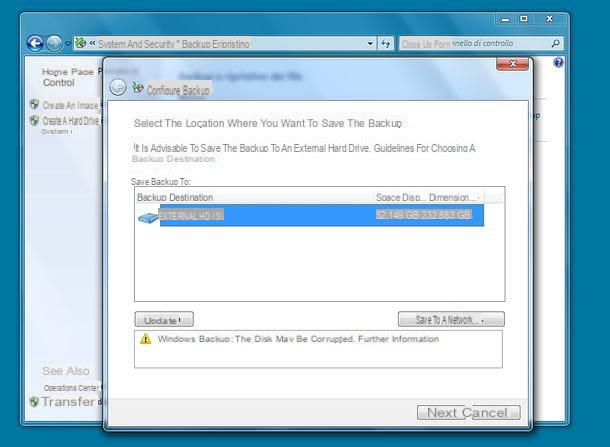
- A USB stick of at least 4GB - to create a bootable USB stick with Windows, macOS or Linux you must have a pendrive with at least 4GB of free space (if you don't have one yet and want to receive some "tips" on which to buy, read my guide to purchase dedicated to pendrives). Also make sure that the pendrive to be used is empty or that in any case there are no important files on it, as it will be necessary to format it to make it a bootable drive. If the pendrive is full and you want to avoid losing any data present on it, you can consider making a backup of your data, as I explained to you in my guide on the subject.
- A good Internet connection - considering that you will have to download the operating system installation files to copy onto the USB stick and considering that these are very “heavy” files, having a stable and fast enough Internet connection is essential. Obviously, I am referring to a connection for the landline and not pay as you go. To test the speed of your line, you can follow the instructions contained in my tutorial dedicated to the subject.
- Correct BIOS / UEFI configuration - to use the USB sticks created following this tutorial, you will need to correctly set the BIOS / UEFI of the computer. For example, to install Linux and older versions of Windows (as in the case of Windows 7 32-bit) on a recent UEFI-based computer, you will need to go to the latter's settings and disable the function called "Secure Boot" which prevents unsigned software from running. In other cases, however, you will have to activate the mode called “legacy BIOS” which simulates the use of the old BIOS on UEFI-based PCs (UEFI is an evolution of the BIOS if you don't know it). Also, in the unfortunate event that the operating system installation stick fails to boot, you will need to enter the BIOS or UEFI settings and set the USB port as the primary boot drive. For further information on all these procedures, consult my tutorial on how to enter the BIOS: there you will find everything explained.
How to create bootable USB Windows
At this point, I'd say we're there: we can finally take action! First, let's find out how to create bootable USB windows. Find information on the most popular versions of the Microsoft operating system right below.
How to create bootable USB Windows 10
If you have the need to create bootable USB Windows 10, all you have to do is download the Media Creation Tool. It is a free software developed by Microsoft that automatically downloads the files for the Windows installation and copies them to a USB stick.
To obtain the Media Creation Tool, connected to the Microsoft website, click on the button Download the tool now and wait for the program download to complete. Keep in mind that to download the program it is essential to connect to the Microsoft site with a Windows PC, as using other operating systems the download of the Windows 10 ISO file is proposed.
Once the download is complete, insert the pendrive you want to use, start the .exe file obtained a moment ago and, in the window you see appearing on the desktop, click on the button Yes. Then wait for the preliminary operations to create your bootable USB stick with Media Creation Tool to be completed.
At this point, click on the button Accept located at the bottom right, wait a few moments, select the option Create installation media (USB flash drive, DVD or ISO file) for another PC and his bottone award NEXT.
Verify, therefore, that language, edition e architecture Windows 10 are compliant with what you intend to download. If not, uncheck the box next to the option Use the recommended options for this PC and use the drop-down menus at the top to select the options you prefer.
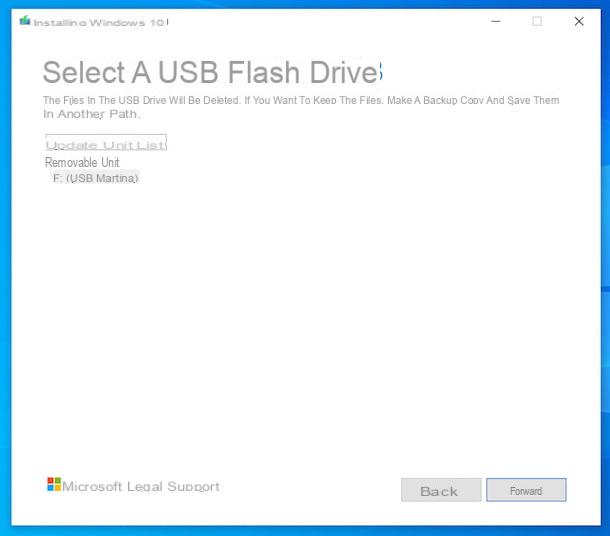
Then click on the button NEXT, scegli l'opzione USB flash drive, click the button again NEXT and select il name (or the drive letter) of the USB key. Finally, click the button again NEXT and wait for Windows 10 to be first downloaded from the Internet and then copied to the stick.
Once you have created your USB stick with the Windows 10 installation files, you can use it on any PC for install the operating system, proceeding as I explained in my guide on how to install Windows 10. Naturally, the copy of the software will be activated with a product key.
If you don't have one yet, I recommend you contact Mr Key Shop: a site managed by a company with offices in the city and England, which buys and resells 100% original licenses for Windows, Office and antivirus unused by businesses and corporations. This allows you to save a lot on the official prices of the aforementioned licenses (in full compliance with the relevant European regulations).
In addition to the savings, Mr Key Shop also offers the advantage of sending the licenses away within minutes email It offers garanzia soddisfatti or rimborsati. On the site you will find licenses at great prices for Windows 10 Home, Windows 10 Pro and licenses of upgrade to Windows 10.
How to create bootable USB Windows 8
You would like it create bootable USB Windows 8? Well, you can do this by resorting to the use of Rufus, a small free application and also available in a no-install version, which allows you to create bootable USB drives for all the most popular versions of Windows (and to directly download the ISO images of Windows 10 and Windows 8.1), as well as than for the main Linux distros.
To download Rufus to your computer, visit the program's website and click on the link Rufus x.xx Portable che trovi in corrispondenza della sezione Download.
Once the download is complete, connect the pendrive you intend to use to one of the free USB ports on your PC, then open the .exe file obtained a moment ago and, in the window that appears on the desktop, click on the button Yes. Successively, I awarded the bottone again Yes to check for updates.
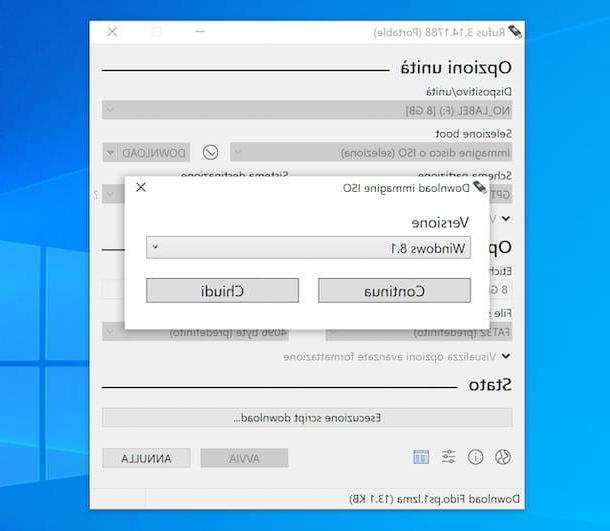
Then proceed to select your pendrive from the drop-down menu Device / unit on the main screen of Rufus, then select the item Disc or ISO image from the drop-down menu located next to the item Boot selection, click here arrow next to the menu on the right, choose the option from the latter Download, click on the relevant button and, through the additional window that appears, select Windows 8.1 give menu to tendin Version and click sul bottone Continue.
Next, it indicates the relase,edition language and l 'architecture of the operating system to be downloaded, selecting the options of your interest always through the appropriate menus and clicking on the button from time to time Continue. In conclusion, click on the button Download.
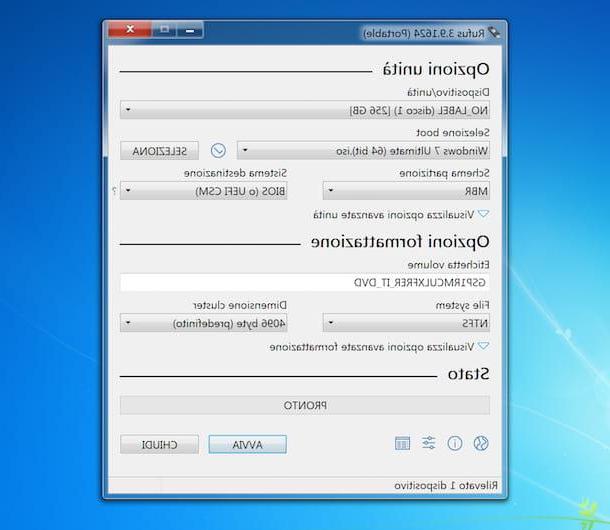
After completing the above steps, the Rufus parameters should change automatically to suit Windows 8. To avoid problems, however, I recommend that you check that the items are selected. MBR in the section Partition scheme e NTFS in the section File System (otherwise you can do it yourself). Finally, click on the button starts and wait for the procedure to create bootable USB with Rufus completed.
After creating the bootable USB flash drive with Windows 8, you can use it for install the operating system on any computer, following the installation procedure that I showed you in my tutorial on how to install Windows 8. To activate the operating system and use it without restrictions, you must have a product key valid, which you can buy at affordable prices on the already mentioned Mr Key Shop. Read more here.
How to create bootable USB Windows 7
Also for create bootable USB Windows 7 you can turn to the use of Rufus, but you have to worry about getting the ISO file operating system (if you don't already have it, of course).
To do this, linked to this page of the Microsoft site, type the product key of your copy of Windows 7 in the field under the heading Enter the product key and click sul pulsating Verifica to proceed with the download. If you do not yet have a product key to download and activate the operating system, you can buy Windows 7 at very affordable prices on the aforementioned Mr Key Shop. Read more here.
Once you have the operating system image file, plug it into one of the free USB ports on your computer pendrive you want to use for create bootable USB from ISO, then download, start and configure Rufus as I have already explained to you in the previous step.
In this case, however, after selecting the item Disc or ISO image from the drop-down menu located next to the item Boot selection in the Rufus window, you need to be careful to click on arrow next to the menu on the right, choose the option from the latter Select, to press the relative button and to select the ISO file of Windows 7. Then proceed with the creation of the bootable drive as I have already explained to you and that's it.
Once you have created your bootable USB stick with Windows 7, you can install the operating system on any PC, as I showed you in my tutorial on how to install Windows 7.
How to create bootable USB Mac

Now let's move on to the Apple side and let's find out how to make USB bootable Mac. To do this, you can act from the command line, via the terminal. In this way, you can create a bootable USB stick with macOS, by downloading it in advance, as I explained to you in my guide on how to install macOS Bis Sur.
So, plug the pendrive you want to use, then open the Terminal by selecting the relevant icon (Quella with the nether finest in the riga di codice) found in the folder Other of Launchpad.
In the window that appears, type the command diskutil list followed by pressing the key Submit on the keyboard, so you can see the list of all the drives connected to the computer and make a note of theidentifier of your USB key, the one you find shown in correspondence with the column Identifier.
Next, issue the command sudo / Applications / Install macOS nameOS.app/Contents/Resources/createinstallmedia --volume / Volumes / pendrive (replace at the end pendrive the identifier of the USB key in your possession and to that nOME the name of the version of the operating system you are interested in), type the administration password on the computer, confirm the execution of the operation by pressing the key Y on the keyboard and grant the terminal i permits needed to access the external volume.
The pendrive will then be initialized, after which the copy of the macOS files on it will start. At the end of the procedure you will see a special message appear indicating the thing, the USB key will be made bootable and you can use it to reinstall macOS on your current computer or on another Mac, proceeding as I explained to you in my tutorial on the subject.
How to create bootable USB Windows 10 from Mac

If necessary, you can also use your Mac for create bootable USB Windows 10 from Mac. It's a real breeze, you have absolutely nothing to worry about!
To do this, you must first find the ISO file of the operating system, proceeding as I explained in my guide on how to download ISO Windows 10 and always act from the terminal. How? I'll explain it to you right away!
First, plug it into one of your Mac's free USB ports pendrive you want to use, then call up the Terminal window and take note of theidentifier of the key, as I have already indicated to you in the previous step.
At this point, type the command diskutil eraseDisk MS-DOS "SISTEMAOPERATIVO" MBR / dev / pendrive (taking care to replace at the end pendrive the indicator of your USB stick and that OPERATING SYSTEM the name of the Windows version) followed by pressing the key Submit on the keyboard, in order to proceed with the formatting of the key.
Next, type the command hdiutil mount ~ / Folder / file.iso (taking care to replace when finished Folder the location where the ISO file of your interest is and at the end file.iso the name of the ISO file) to mount the ISO file and do a create bootable windows 10 usb from ISO using the command rsync -vha –exclude = sources / install.wim / Volumes / ISOIMAGENAME / * / Volumes / OPERATING SYSTEM (replacing at the end IMAGENAMEISO the name of the ISO image and that OPERATING SYSTEM the name of the Windows version).
In conclusion, use the command wimlib-imagex split /Volumes/ISOIMAGENAME/sources/install.wim /Volumes/SISTEMAOPERATIVO/sources/install.swm 3000 (replacing at the end IMAGENAMEISO the name of the ISO image and that OPERATING SYSTEM the name of the Windows version) to divide and copy the install.wim file on the USB key and use the diskutil unmountDisk / dev / pendrive command (taking care to replace at the end pendrive the indicator of your USB stick) to unmount the USB drive.
Caution: you will not be able to install Windows on a Mac if yours is a Mac equipped with an Apple Silicon chip (eg M1). You will only be able to do this if you have a Mac with an Intel processor.
How to create USB bootable Ubuntu
In conclusion, it seems only right that you also illustrate how to create bootable usb ubuntu, which is one of the most popular Linux distros. To do this, use the utility Boot disk creator, already included in the system and specifically designed for this purpose.
But first worry about finding the ISO file of the operating system of your interest, following the instructions that I have already given you in the previous lines regarding Windows and consulting this other guide of mine regarding Ubuntu.
Next, plug it into one of the free USB ports on your computer pendrive you want to use and start the Create Startup Disk tool by selecting the appropriate one icon (Quella with the USB pendrive) that you find in the screen visible after clicking on the button Show applicazioni on sidebar on Ubuntu.
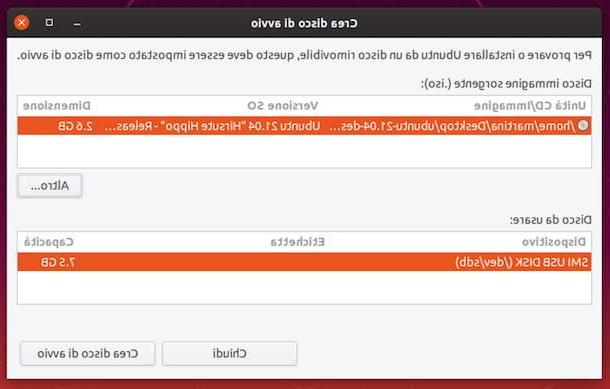
In the window that appears on the screen, click the button Other and choose the ISO file of the operating system to copy to the pendrive, then select your pendrive from the list attached to the section Disc to use and click on the button Create startup disk to start the procedure.
How to create bootable USB