Windows 7 backup
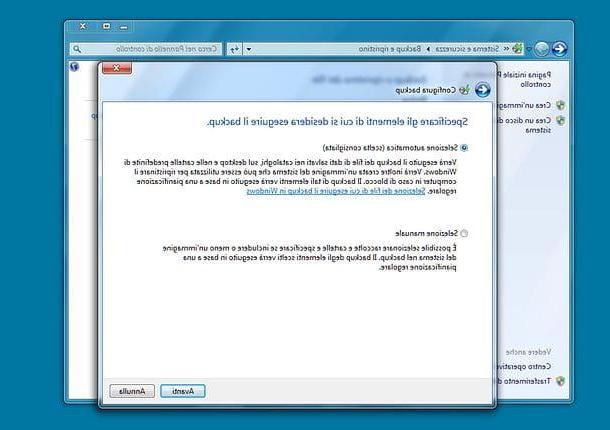
To set a Windows 7 backupclick on your button Home (the flag icon located in the lower left corner of the screen) and select the item Control Panel from the menu that appears. In the window that opens, locate the entry System and security e clicca sull'opzione Back up your computer located below it to access the built-in Windows backup utility.
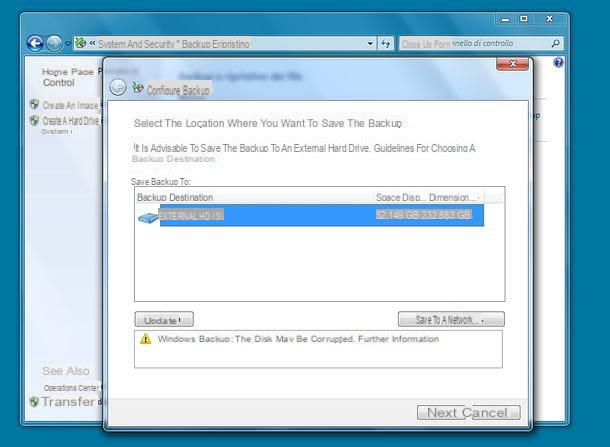
Now, click on the entry Configure backupselect l 'external hard disk you want to use to backup your data and click on the button NEXT. As easily understood, the disk must have a sufficient amount of free space, an amount equal to at least the capacity of the disk on which Windows 7 is hosted would be recommended.
So choose whether to let Windows do one automatic selection files to be included in the backup (in this case, the backup will include the data saved in the Pictures, Videos and Music collections, on the desktop and an image of the system will be created to be used to restore the computer in case of a crash) or if make a manual selection of the data to be saved. Personally, I recommend the first option, but the choice is up to you.
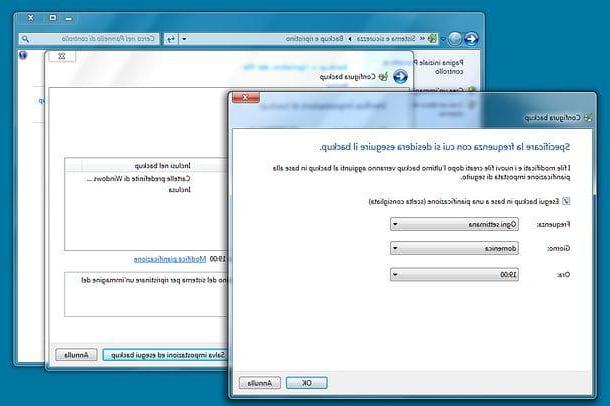
Clicca, quindi, sul pulsating NEXT, check that the settings you have chosen are shown in the backup summary (e.g. backup of all users and creation of asystem image) and, if you want, click on the item Edit schedule to choose how often Windows will have to automatically backup your data.
By default, the backup is performed every Sunday at 19.00, but if you want you can also set a type schedule daily o monthly with customized times and days using the drop-down menus that are proposed to you on the screen. Once you've made your choices, click on the buttons OK e Save settings and backup to start creating your backup.
If you are asked to format the disk, accept, but know that doing so will erase all the data on it.
The first backup could take quite a while. To follow its progress, go to the section System and security> Backup and restore of Control Panel Windows 7 and click on the button Show details which is next to the wording Backup in progress.
You will be shown a screen with a progress bar, the percentage of completion of the backup and a description of the operation in progress (eg. Creating a system image). If you want, from the same window you can also stop the backup pressing the appropriate button.

Once you have set up your automatic backup, in case of second thoughts, you can change the settings related to it by returning to the Control Panel Windows 7 and selecting items System and security e Backup and restore.
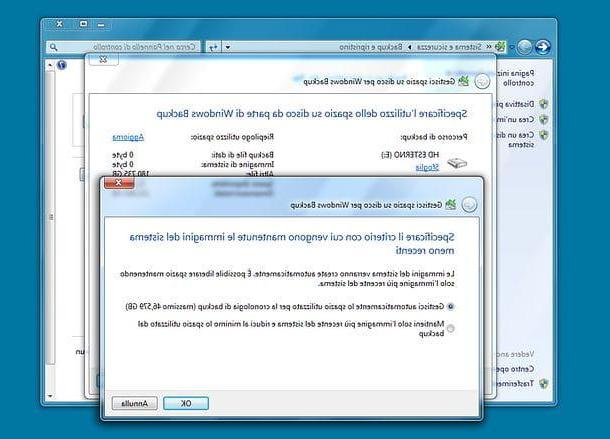
At this point, to change the automatic backup schedule, click on the item Change settings which is in the field Planning. To manage disk space, instead, click on the entry Manage space and, in the window that opens, presses the button View backup to view the list of backups made or on the button Change settings to choose how to optimize space management in relation to system images: you can choose whether automatically manage the space used for backup history (thus keeping, if possible, multiple system images) or if keep only the most recent system image minimizing the space used by the backup.
If you want, from the menu Backup and restore of the Control Panel you can also command the execution of a new data backup (without waiting for the automatically scheduled activities) by clicking on the button Back up, while if you prefer to create a single backup without activating the schedule, follow the instructions you find in the next chapter of this guide.
System image
If you want to create a single system image, without activating the schedule and therefore without taking advantage of the automatic backup system of Windows 7, go to Control Panel, then select the options System and security e Backup and restore and click on your voice Create a system image you see on the left side of the screen.
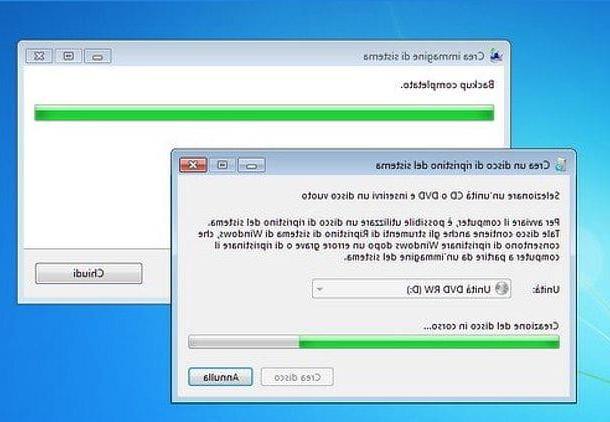
At this point, select the external hard drive on which you want to create a system image via the drop-down menu On a hard drive click her cousin NEXT and then Start backup to confirm your choice and start creating the backup. If you want, by putting the check mark next to the appropriate item, you could also create a backup of the PC divided over several CDs or DVDs, but it seems to me a rather inconvenient solution to practice (also because it is easier for diskettes to be damaged than hard external drives).
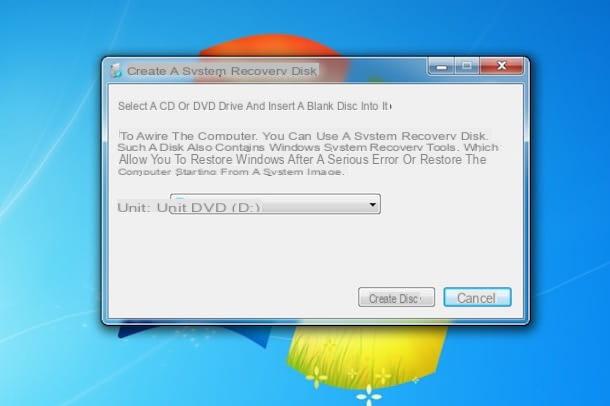
At the end of the procedure (the duration depends on the amount of files to be saved), Windows will ask you to create a recovery disk of the system necessary to recover all the functions of the PC in case of "disasters". Then insert a blank CD / DVD into your computer and accept the request by clicking on the button Yes.
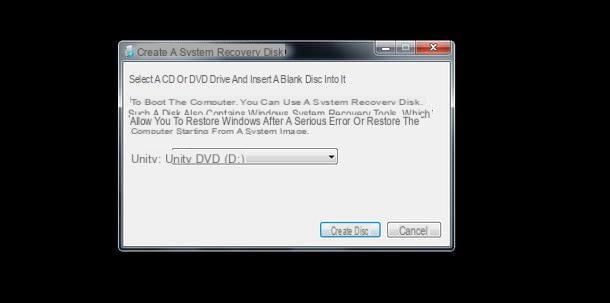
In the window that opens, select the CD / DVD burner drive from the drop-down menu Unit and click on the button Create disc to start creating the recovery disk (it will take a few minutes).
Recovery disk
If you already have a Windows 7 backup and just want to create a bootable CD / DVD to use in case of need (i.e. if your computer crashes), go to Control Panel Windows and first click on System and security, Then Backup and restore and, finally, on the voice Create a system repair disc present in the left sidebar.
Then insert the disk you intend to use for the operation into the PC burner and follow the same instructions I gave you in the previous chapter of the tutorial.
Reset Windows 7
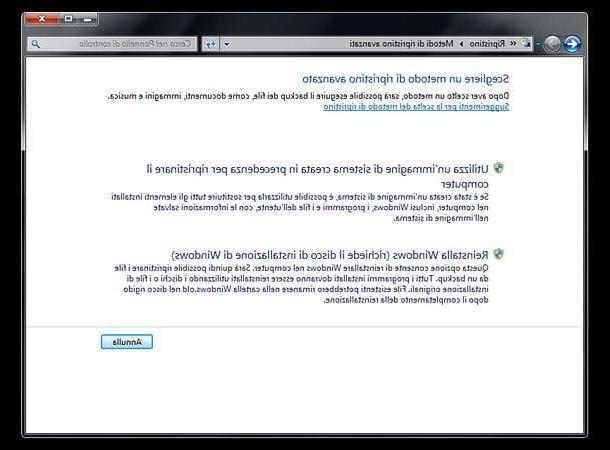
Done! You now have a Windows 7 backup and a bel recovery disk ready to use in times of need. To restore asystem image on Windows 7, go to the Control Panel click her cousin System and security and then Backup and restore, Reset your system settings or your entire computer e Advanced recovery methods.
In the window that opens, click on the item Use a previously created system image to restore your computer and follow the wizard that is proposed to you to restore the system.
To use the recovery disc, insert the previously burned CD / DVD into your computer, reboot your system and, when prompted, press any key on your keyboard to launch the recovery wizard. If you can't boot your computer from the floppy disk, make sure the BIOS (o UEFI) is set to “see” the CD / DVD drive as the primary boot drive. Find out how to do this in my tutorial on how to enter the BIOS.
In case something goes wrong and your backup doesn't work, you can format your PC and install a new copy of Windows by following the directions in my tutorial on how to format Windows 7.
Other solutions to backup Windows 7
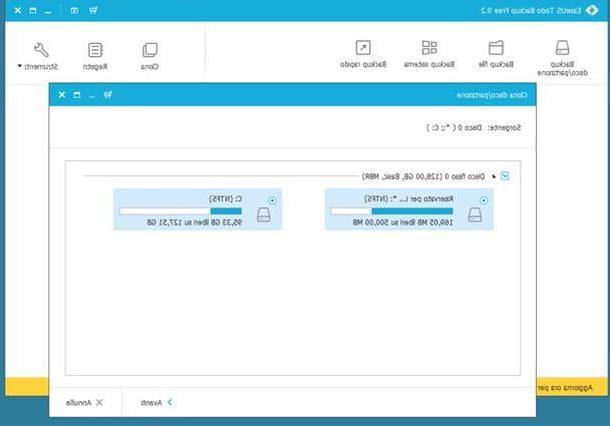
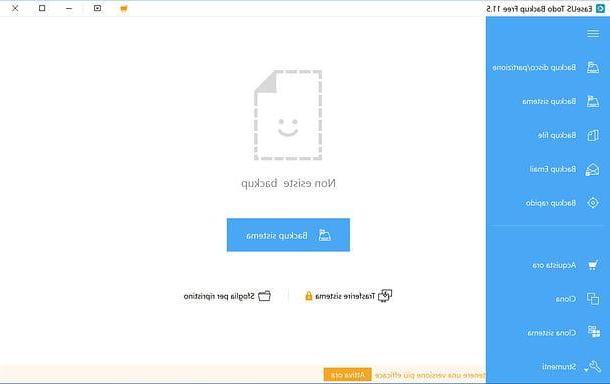
If you are not satisfied with the solutions included “standard” in Windows 7, know that you can create a full backup of your PC (including operating system) by relying on free solutions such as EaseUS Todo Backup, Clonezilla and Macrium Reflect: these are programs to be installed on your computer or to be started from a key or DVD that allow you to create perfect copies of disks and partitions and restore all data if the need arises.
If you want more information on the programs in question and how they work, know that I told you about them in detail in my tutorial on how to clone a hard drive: read it and I bet you will find solutions that will do for you.
How to backup Windows 7