Come creare server Minecraft for free
Before explaining in practice how to create a server for minecraft, I would like to point out that Minecraft is available in two distinct versions: that Java for PC and that Bedrock, instead, available for Windows 10, mobile devices and consoles. The procedure to follow differs depending on the version of the game you are using, so make sure you follow the correct procedure for the one you have installed on your device. Find everything explained below.
How to create Java Minecraft servers
If you are wondering how to create a server in minecraft for pc, you probably refer toJava edition of the game. Well, the procedure requires some attention, but in reality by following the instructions that I am going to give you you should not have particular problems in achieving your goal.
Before starting with the indications, it is important to make some clarifications: building a server for the Java version of Minecraft is not that complex, but it can involve some "headaches". In fact, I recommend to proceed only if you are familiar with the PC world and networks, as you could potentially also "open the doors" to any problems in terms of safety.
Also, keep in mind that even if there are no specific official requirements, using, for example, a classic laptop and a Wi-Fi connection may not be the best idea for a server. Indeed, the latter needs to performance of a certain level, so the advice is to use a gaming PC connected to the router via Ethernet (of course you also need a good basic internet connection).
For the rest, I remind you that maintaining a server can be an operation that is not exactly the most pleasant and you could therefore "get bored". In this context, I remind you that there are some online hosting portals that allow you to purchase services related to Minecraft server. You pay, but by doing so you will "delegate" to others the task of always keeping the server online (which is anything but obvious).

How do you say? Are you aware of what has just been explained but do you still want to create a server and keep it online by yourself, for free? In this case, the first thing you need to do is make sure that Java is configured so that you can use it directly from the command line. To check that this is possible from Windows, tap on search bar present at the bottom left, type "Prompt" and open the Command Prompt.
If you have already installed Java, then type the command java -version and press Submit. If a updated version, you have everything ready. In any case, I always recommend that you connect to the official Java portal and click on the button Accept and start free download, in order to download the latest version available.
Once you get the jre- [version] -windows- [version] .exe, open the latter and first press the button Yes e poi quello Install. Wait, therefore, for the system to complete the operation and click on the button Close. In some cases, to make Java work correctly from the command line, you have to go to act on the environment variable PATH, as I explained in this tutorial.
As for, however, MacOS, just open the terminal (you find it in the folder Other of Launchpad), use the java -version command and give Submit, to check if Java is already installed and updated. In any case, I advise you, for safety, to connect to the official Java website and update to the latest version.
Once you have configured Java correctly, connected to the official Minecraft portal, click on the link minecraft_server. [version] .jar, in order to download this last file (you may be asked to press the key Preserve).
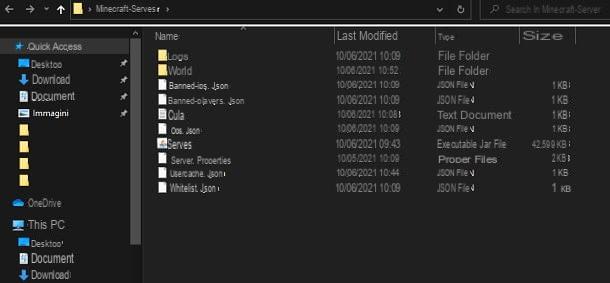
At this point, move the server.jar file on the desktop, create a folder, also on the desktop, called Minecraft-Server, move the server file in here, april il Command Prompt (Windows) or the terminal (macOS) and use the cd Desktop / Minecraft-Server command, giving Submit to confirm.
Now the time has come start the server, also using thegraphic interface. To do this, just type the command java -jar server.jar and press the key Submit keyboard. In case there is a JNI error, you could solve by installing another version of Java, for example that 16.0.1 accessible from the official portal (just download the appropriate setup file and follow the instructions that appear on the screen).
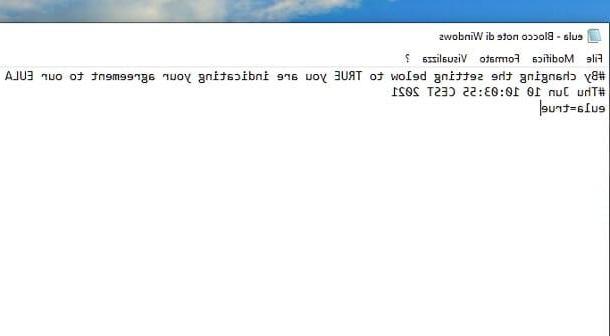
Perfect, now you will be prompted to accept the EULA, which is the end user license agreement. To do this, open the folder Minecraft-Server you created earlier: you will notice that the file was created automatically eula.txt. Open, therefore, the latter with any text editor and changes the wording to false to true, then saving the file. In any case, you can read the EULA on the official Minecraft portal.
Back, therefore, to Command Prompt / Terminal and use the previous command again, which is java -jar server.jar. You may be prompted to press the button Allow access to guarantee the programautorizzazione to use the Internet connection. If everything has been done correctly, you will see the appear on the screen server window.
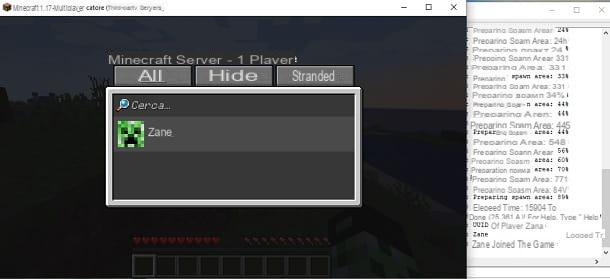
Here are all the statistics of the case, as well as of the indicazioni related to what happens in the virtual room. Perfect now you have successfully created your server: if you want to verify that it is active, just start Minecraft, press the button Multiplayer, click the button Direct access, to type localhost and click the button Enter the server. Great, now you will log into your server and be able to play.
If you want to use your virtual room for invite friends and play online with them remotely, you must provide them with yours public IP address, so they can connect in the same way you did (but by entering your IP address instead of "localhost"). I remind you that you can find your public IP address by connecting to the WhatIsMyIPAddress website (more information here).
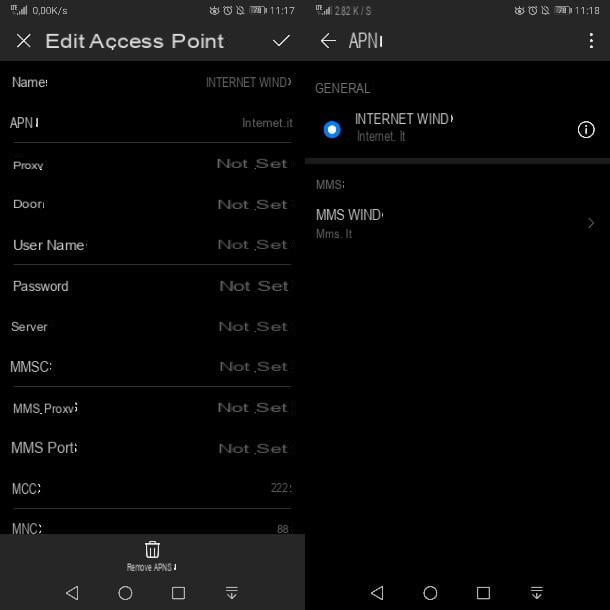
In case your friends find connection problems, probably means some port forwarding is needed, that is opening the router ports, which is necessary to allow the operation to take place correctly. Specifically, the port used by Minecraft is that 25565 (TCP).
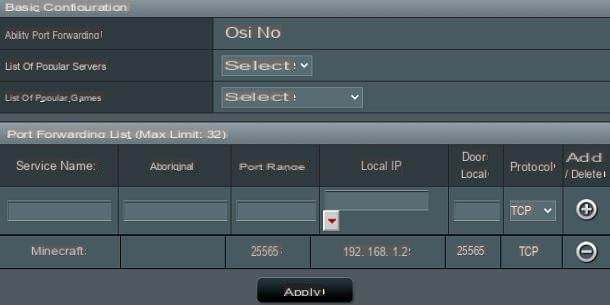
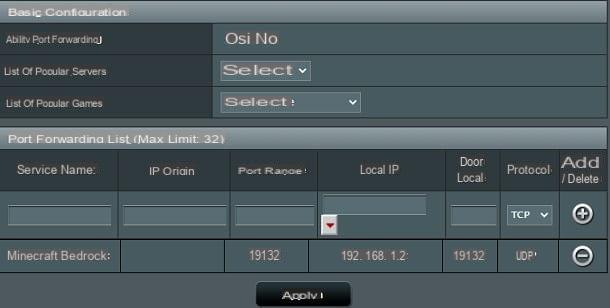
It is difficult for me to give you precise indications, as each router has its own configuration portal. However, to give you a concrete example, in a ASUS model usually just go to the configuration portal (generally, the latter is accessible by typing an address between 192.168.1.1 e 192.168.0.1 in the browser and typing username e Password: for more information read my tutorials on how to enter the router and how to find the router password), by pressing on the tab relating to the WAN and select the option Virtual Server / Port Forwarding.
After that, a Service Name (i.e. to the door opening rule), for example Minecraft. As port range you have to enter 25565, as local address the computer's IP address, such as local port value it 25565 and how protocol value it TCP. Finally, you have to press the buttons + e Apply to set the "rule" and that's it.
For the rest, there are actually many other ways to create a Minecraft server for the Java version. In this case I have explained to you how to create a vanilla server, that is, not modified in any way with respect to the provisions of the developers. However, as I explained in my guide on how to create a plugin for Minecraft, there are also many other solutions that you might be interested in learning more about.
Also, if you are wondering how to create a server with Hamachi, which is a program that allows you to set up a VPN, you need to know that the community generally discourages doing this. It is in fact an “outdated” method, which was used a lot in the past, but which actually requires a few more steps. Simply, I think it is not worth it, as now also claimed by many users.
In any case, for any problem with the server or to learn more, you can always refer to the Minecraft Wiki in English, an inexhaustible source of information relating to the Mojang title. Just do some research within that portal to find solutions to any specific problems (the variables involved are many).
How to create Minecraft Bedrock servers
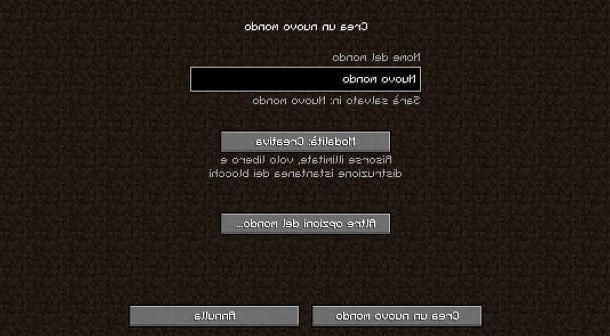
How do you say? You have been playing Minecraft since Bedrock version, available on Windows 10, mobile devices and consoles? No problem, I'll explain immediately what you can do in this case to create a server. However, the method described in this chapter is only valid for Windows.
In fact, you must know that, in this case, the feature was only recently launched. In fact, while the possibility of creating servers in an official way for the Java version has been active for a long time, the tools to carry out this operation for the Bedrock edition are still in preliminary version.
This means that you may encounter some problems or anyway performance not exactly the best if you want to go this route, since it's all still in alpha version. In any case, if you are wondering, for example, how to create a server for minecraft for ps4 o how to create a server for Minecraft PE on smartphones and tablets (which is actually now only called Minecraft), this is the part of the tutorial for you.
In fact, I remind you that the Bedrock edition of the game is available for Windows 10, mobile devices and consoles. Before starting with the directions, you must know that it is recommended to have a computer with at least 1GB of RAM, a version of the 64-bit operating system it's a Intel or AMD processor almeno Dual-core. In addition, it is necessary to have one Windows 10 version equal to 1703 or higher.

In any case, to proceed, connected to the official website of the game, check the box I agree and press pulsating DOWNLOAD, presents in the box relating to Windows. By doing so, you will get the bedrock-server- [versione] .zip.
Then extract the contents of the ZIP file into any folder, then launch the file bedrock_server.exe (You may be prompted to tap on the item first Further information and then on the button Run anyway).
Count that at this stage some antivirus may ask you if allow or menor the application to perform the operations it needs to function. In this case, to continue using the file correctly, you usually have to press the key Allow (the exe was downloaded from the official Minecraft site, so Mojang guarantees security).
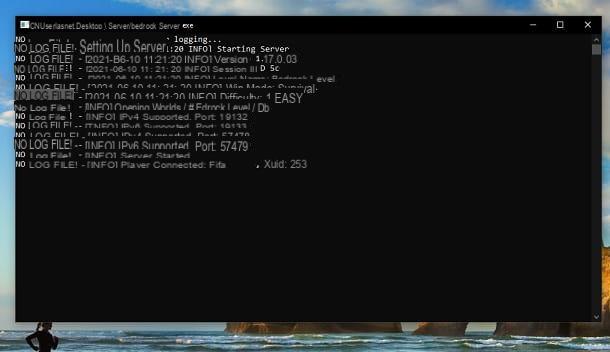
Perfect, now a terminal: if everything has been configured correctly, you will see the writing Server started. Great, now your virtual room has been created. To check that everything is configured correctly, I recommend opening the Bedrock version of Minecraft, press the button Play, tap on the tab Server & Hosting, scroll down the page and press the button Add server.
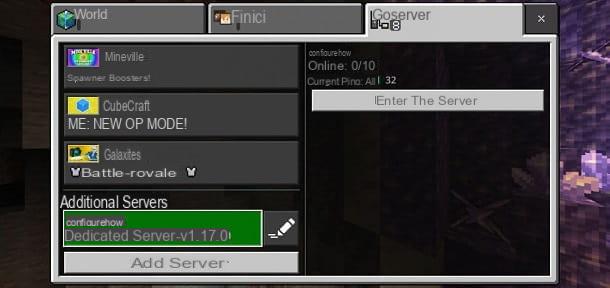
Enter, therefore, a server name (what you want) and yours public IP address (you can access it by connecting to this website from the computer from which you set up the server), leave the port number (19132) and tap the button Play.
For the rest, if you have any doubt regarding server management and more, I recommend opening the file bedrock_server_how_to.html present inside the ZIP you downloaded earlier. In fact, this file contains all the indicazioni appropriate (in English).
In addition to this, you may also be interested in consulting the chapter of the guide dedicated to the Java version, as the question of port forwarding is clearly also valid for Bedrock servers (in this case the port to open is the 19132 UDP).
Finally, since you are a fan of the Mojang title, I would recommend that you take a look at the page of my site dedicated to Minecraft, where you can find many other tutorials dedicated to this video game.
How to create a Minecraft Aternos server
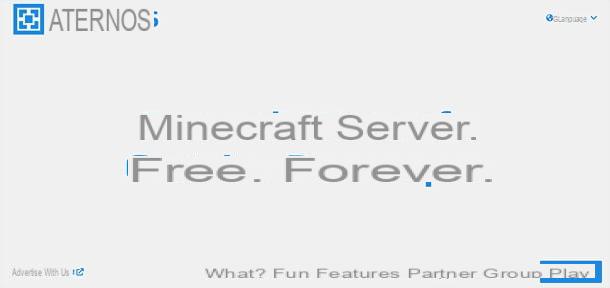
There are also solutions on the web that facilitate the creation of servers for Minecraft. One of the most popular is definitely Aternos, which allows you to create free servers to be used mostly for mini-games, with the possibility of installing plugins and mods as well.
The service is free and, to use it, just create an account and follow the quick instructions on the screen. However, since this is a no-cost service, you have to be careful about privacy: as you can read here, in fact, various user data can be collected.
My advice, therefore, is to focus on manually creating a server or evaluating the use of paid, more professional services. Anyway, if you want to know more about how to create a Minecraft Aternos server, you can read the official guide of the service in question.
How to create Minecraft servers