Create folders on iPhone with Files
Let's start by trying to figure out how to manage folders on the iPhone by taking advantage of Fillet, the new application made available by Apple on its iDevices starting from iOS 11 through which it is possible to create (as well as manage) folders on iCloud Drive and any other supported services as well as apps and, in some special cases, even locally on the device.
To use it, all you have to do is go to the home screen of your iPhone and press the File application icon (the one with the white background and the blue box).
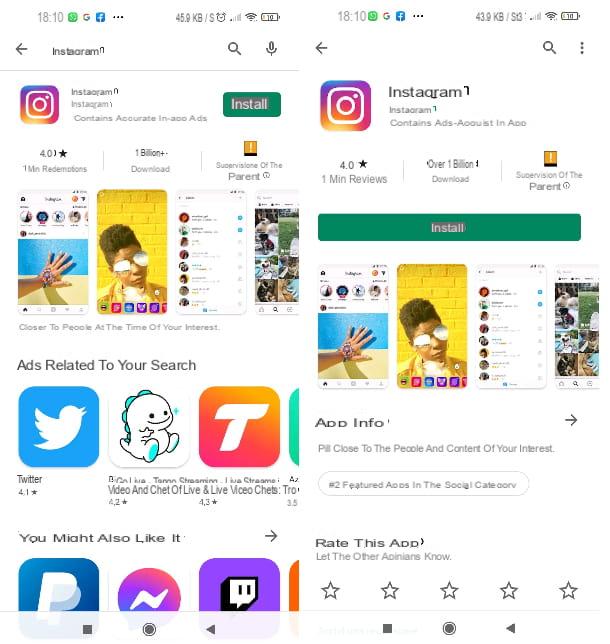
If you can't see the Files icon most likely it's because you mistakenly removed the app. To fix this, you can download it again from App Store by tapping on its icon (the one with the blue background and the "A" printed in the center), pressing on the item Search which is at the bottom of the screen that has opened and typing Fillet in the search field at the top. Then stop on the first result on the list, press the relevant button Ottieni / Installa and enter your Apple ID password or, if enabled, use Touch ID to unlock the download. Then stop on the button apri to open the application immediately.
Once you see the main File screen, you will find yourself in front of its main interface. At the section Positions find all positions accessible through the application. Basically the app only allows you to access iCloud Drive but if the apps of other services and cloud storage are also installed on your iPhone, you can also use Files for their management.
At the section Tag instead you will find all the various tags available that can allow you to access the marked elements more quickly, while at the top there is the field Search which, as you can easily guess, can allow you to quickly search among all the files and folders available. Pressing on the voice instead Recent present below you can quickly access all recently viewed files without having to waste precious time looking for them.
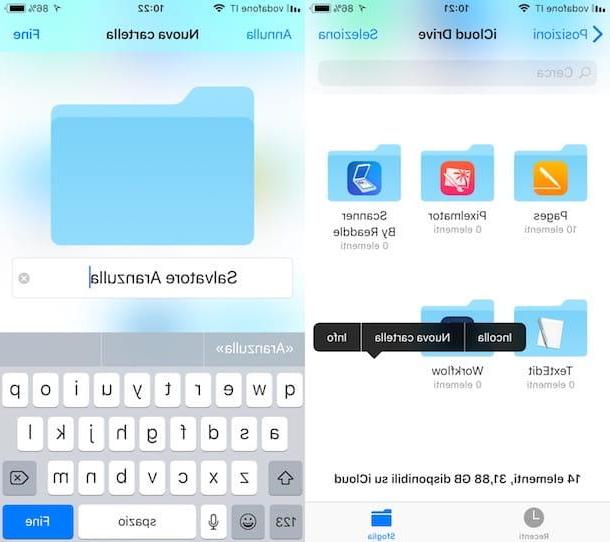
As for the creation of the folders, first of all go to the position in which you are interested in going to act then press and continue to hold down in any empty point of the same and select the item New folder from the menu you see appear. In the screen that will subsequently be shown to you, type the name you want to assign to the folder you are about to create in the appropriate field and then step on the item end top right. Et voila! Obviously you can repeat the procedure in question as many times as there are folders you want to create.
After generating the folders you can move them or move the files inside them by going to the position where they are, by tapping on the item Select at the top right, selecting the various elements on which you wish to intervene, then on the symbol of folder in the toolbar at the bottom, on the target position from the screen that is subsequently shown to you and finally on the item Move top right.
You can also duplicate the folders (with all their contents) by selecting them as I explained earlier and then tapping on the icon with the two squares and the "+" symbol which is located at the bottom.
Have you created a folder but want to delete it or do you want to remove the files inside it? You can do this too, of course. To delete one or more folders or one or more files inside them, go to the reference position, press on the item Select which is at the top on the right, select the folders on which you want to act and then press the symbol of basket which is below. If you want, you can also simultaneously select all the folders or all the files that are inside them by tapping on the item first Select and then Tutto top left.
Then consider that on Mac you have activated the synchronization of documents and desktops with iCloud you will find the relative folders, Documents e Desk, in iCloud Drive. Also, if you create a folder on Mac, Windows or via the web in iCloud Drive, you can also access it later via the Files app. The same goes for files you add to newly created folders or to existing ones from another location
However, keep in mind that although File also allows you to access files saved in other apps and services, the interface, in this specific case, could be the proprietary one with the usual functions and the usual management mode. It depends on whether the reference application has been updated and whether it supports integration with File or not.
Create folders on iPhone with Documents
If, on the other hand, you want to manage the folders of your iPhone just like those of a computer and / or if on your "iPhone by" there is an older version of iOS and therefore the File app is not available, I can't do anything else if not recommended to install Readdle documents.
Readdle Documents is a file manager that allows you to have a sort of Finder (or Explorer) on the iPhone. It is completely free and supports many types of files: it allows you to view and manage Office documents, PDF files, photos, videos, zip archives and more. It also integrates with cloud storage services such as iCloud, Dropbox and Google Drive and allows you to download files from the Internet thanks to an internal browser.
To download Documents to your iPhone, open the App Store, search for the term Documents inside and first presses the button Get located next to the application icon (in the search results) and then on Install. You may be asked to type in your Apple ID password or to verify your identity by placing your finger on the Touch ID sensor.
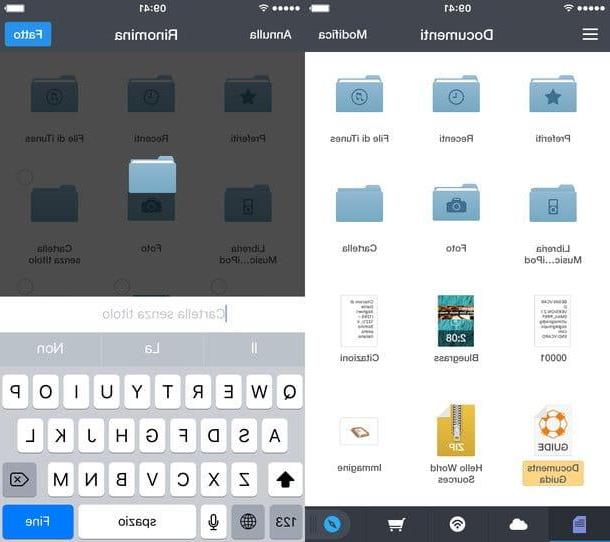
At the end of the installation, start Documents and you will find yourself in the presence of a real file manager with some folders and sample files. To open a folder or document just tap on its icon, to rename it instead just press on its name.
And to create new folders, how do you do it? Nothing simpler. Press on the button Modification you see at the top right, select the icon of folder with "+" symbol that appears at the top left and type the name you want to assign to the folder. Then press the button Done and the mission will be accomplished.
At this point, if you want to copy a file inside a folder, hold down your finger on its icon and drag it to the folder icon. That's all! If you use an iPhone with 3D Touch technology support, be careful not to exert too much pressure with your finger, otherwise the file will not be selected, a full screen preview will be shown.
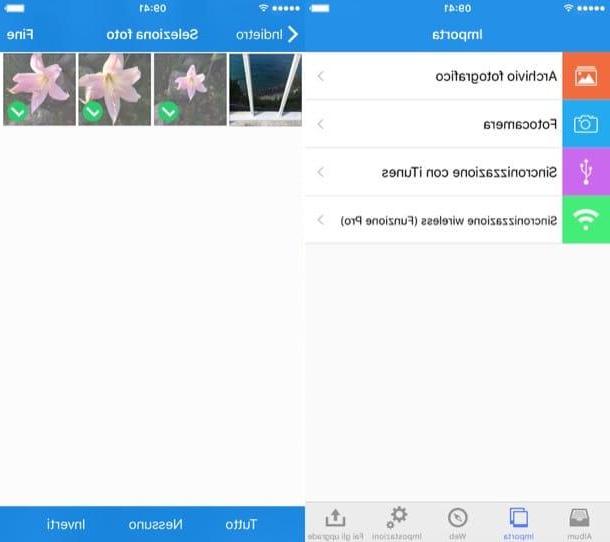
As mentioned above, Documents also allows you to view and manage files hosted on cloud storage services. To take advantage of this function, press the icon of network you see at the bottom center (the round icon with the Wi-Fi cleats inside) and select the item Add account from the screen that opens. Then choose the cloud storage service to integrate into the application (eg. dropbox, OneDrive o Google Drive) and log in using your account details.
If you need to, you can also transfer files from computer to iPhone. All you have to do is connect the iPhone to the PC, open iTunes and select the phone icon that appears at the top left. After that you have to click on the item App present in the left sidebar, select the icon Documents in the box File sharing and drag the files to be transferred to the "iPhone by" in the box Documents. The files are stored in the folder ITunes files.
Alternatively, you can go to the Documents settings (by pressing the ad icon hamburger at the top left and selecting the item Settings from the bar that appears on the side) and activate the Wi-Fi drive to transfer files from PC to iPhone via browser, by connecting to the address that will appear on the screen of the "iPhone by".
Would you like to keep your documents safe at all times? In this case you can activate the Documents lock with a password or Touch ID. How you do it? Simple, go to the application settings, select the item Generali and activate the option Code lock. Then type the password you want to use to lock the application in the fields Access key e Confirmation And that's it. If you want to activate Touch ID unlocking, activate the option as well Enable Touch ID.
Create secret folders on iPhone for photos and videos
And if you want to create iPhone folders to put in photos and videos to keep away from prying eyes, try Private Photo Eval. It is an application that allows you to hide photos and videos by protecting them with a password or Touch ID. It allows you to import files directly from the iOS Photos app, PC, camera (for real-time shooting or video), and other devices with wireless support. It is available in two versions: a free one that allows you to create up to two secret albums and a paid one (€ 4,49) that allows you to create an unlimited number of albums and supports the just mentioned transfer of photos to your PC wirelessly. .
Private Photo Evalu's interface is so intuitive that explaining how it works is almost superfluous. At the first start of the application you must set the code to be used to access the files contained in it, then pressing on the item Import at the bottom you can choose whether to import photos and videos from camera, album (then from the iOS Photos app), computer (via iTunes file sharing) or wireless and the album in which to save the import (which you can create in advance by going to the section Album of the app and pressing the button "+" top right). When the procedure is completed, tap on end.
After importing photos and videos in Private Photo Evaluation, to permanently delete them from the iOS Photos app, press the button Delete twice in a row in response to the warning that appeared on the screen, then click on OK and go to the app Gallery, select the album Recently deleted and delete images (or videos) from there by first pressing on Select and then Delete everything.
In case of second thoughts, to bring the photos or videos back to the iOS roll, open Private Photo Evaluation, press on the item Album who knows below, then on the name of the reference album, on the wording Modification at the top right select the photos to “restore”. Then presses on the command Export which stands at the bottom and selects Camera Roll.
Finally, I would like to point out that if you have an iPhone model equipped with a Touch ID sensor, you can activate the unlocking of the application through fingerprint recognition. To do this, press the icon ofgear which is located at the bottom right of the main screen of the app, click on Passcode settings, enter the code currently in use and bring up ON l'interruttore che trovi accanto alla dicitura TouchID.
Insert folders inside other folders
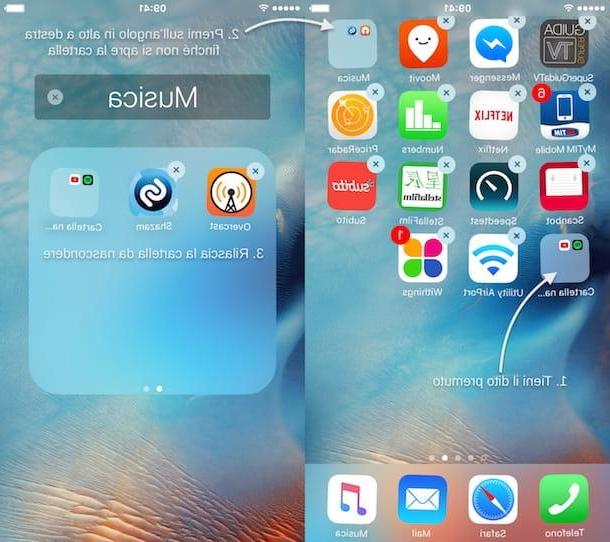
Would you like to put folders inside other folders on your iPhone home screen? This function is not provided by iOS, but thanks to a small bug in the Apple operating system it is still possible to obtain the desired result. Let me be clear, this is a "trick" that could stop working at any moment; furthermore, the folders inserted inside other folders are automatically brought back to the home screen when the iPhone is turned off for the first time, but if you want to try it… try it! This is the procedure you need to follow.
- Create the folder to hide inside another folder;
- Insert the applications of your interest in the newly created folder;
- Create the folder in which to keep the folder you just created. This step is optional, skip it if you want to put your folder inside an already existing folder;
- Place the folder to "hide" at the beginning of the fourth line of icons on any page of the iPhone home screen;
- Place the folder in which to insert the folder to be “hidden” at the end of the first row of icons, on the home screen page where you have also inserted the other folder;
- Press on the Home button of the iPhone to disable the home screen editing mode;
- Keep your finger pressed on the folder to "hide" until it begins to "dance";
- Press on the top right corner of the folder in which to insert the previously selected folder, wait for it to open and release the folder to "hide".
If any step of the procedure is not clear to you, try to consult my tutorial on how to hide iPhone apps in which I told you about it in more detail.
How to create iPhone folders