Create iPhone ringtones via computer
Do you want to create ringtones for your iPhone and do you have a computer at your disposal? Well, then you can easily do this by turning to iTunes. Alternatively, although only for what concerns the cutting of the ringtone, you can contact iRinger, a third-party instrument designed for this purpose. To find out more, keep reading, you will find everything explained in detail below.
With iTunes / Music
As an advance at the beginning of the article, to create ringtones for your iPhone you have the opportunity to take advantage iTunes, the multimedia player from Apple that, as you surely already know, also allows you to manage iOS devices. On Mac it is pre-installed (you can find the icon on the Dock bar), while on Windows it must first be downloaded (as I explained to you in my tutorial on how to download iTunes).
If you use a Mac equipped with macOS 10.15 Catalina or later, instead of iTunes you have to use the application Music, which since this version of the operating system has taken the place of iTunes.
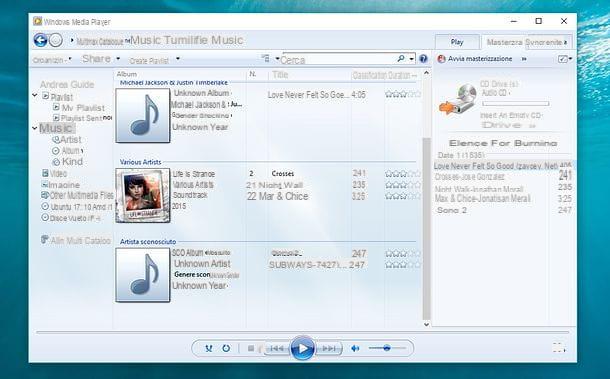
To begin with, then connect your iPhone to your computer using the appropriate cable and wait for iTunes to open automatically (if this does not happen, open the program yourself by clicking on its icon). Then go to the card library of the section Music iTunes and import the audio file you want to use as a ringtone by dragging its icon directly into the program window.
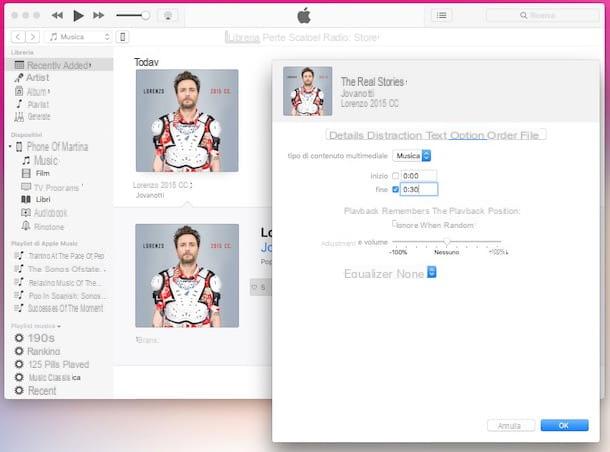
Now you need to shorten the audio file so that it has a maximum duration of 40 seconds, which is that of a ringtone. To do this, right-click on the file name and then click on Information from the menu that opens. Then select the card options in the window that opened on the screen, check the items start e end and indicates in the appropriate fields the start and end points of the part of the audio file to be transformed into a ringtone. Then click on OK per salvare I modified it.
Then select the song from the iTunes library, click on the item Fillet in the program menu bar, select Converted and click on Create AAC version. In case the option is not available, you must first click on the item iTunes (your Mac) or your Modification (on Windows) at the top left, choose Preference ..., open the tab Generali, click on Import settings ... and then AAC encoder give menu to tendin Import using:. To confirm all changes, remember to click on OK.
Then right click on the name of the ringtone and choose Show in Finder (on Mac) or Show in Windows Explorer (on Windows) from the menu to open the folder where it was saved. Then right click on the file and select Rhinomine from the menu that appears to change the extension from m4a a m4r. He then confirms the changes made.
Now, go back to your iTunes library and delete the ringtone you just created by right clicking on it choosing the option Delete from library from the menu. When performing these steps, be careful to select the option Keep File / Keep Document when asked if you want to delete the file so as not to remove the original one as well.
With iRigner
If you do not prefer to use iTunes to cut the piece of audio file to use as a ringtone as seen together above, you can contact iRinger. It is a third-party software, free and usable without having to install, which allows you to start from an audio file in MP3 format, to identify a "detachment" and turn it into a ringtone for the iPhone. It's a bit dated and the project is no longer supported by developers but still works great. Furthermore, the use of the program is quite simple and quick: you just need to have the song to turn into a ringtone! Let's see in more detail how it works.
Go to the program download page on the Softonic.com website, click on the button Download present at the top and then on that Alternative Download that you find below to download iRinger to your computer. When the download is complete, double-click on the .exe file you just obtained and click on Yes / Run.
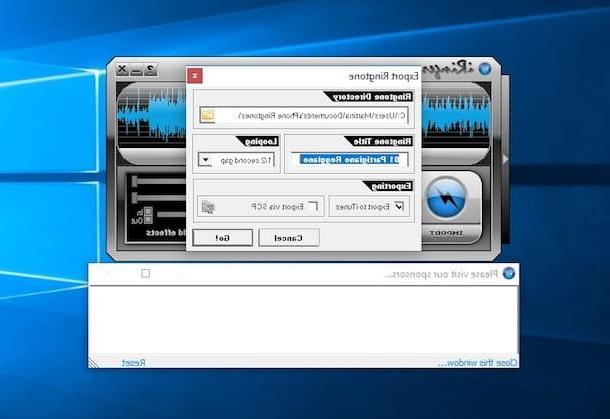
In the main window of the program that will open on the desktop, click on the button Import to select the audio file to be turned into an iPhone ringtone. At the end of its import, you need to identify the audio out that will be transformed into a ringtone.
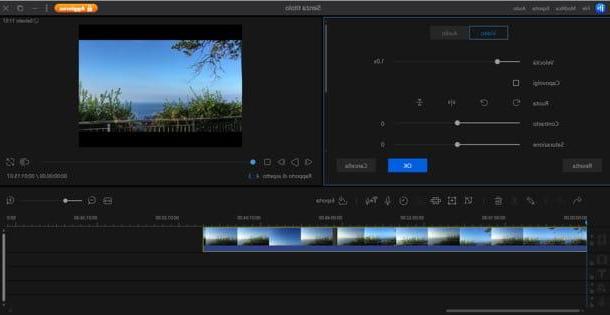
To do this, hold down the left mouse button on the “waves” of the audio track to drag them left or right until you find the perfect ringtone. To adjust the speed, the volume level and the fade effect, use the bars at the bottom right, while to apply effects click on the item No Effects: Click here to add effects (which is always at the bottom, on the right) and use the commands you see appear on the screen.
To play the ringtone, click the button Preview. When you have found the audio out to use for the ringtone for your iPhone, click on the button first Export and then on the button Go! to create and import it into iTunes.
If a message appears on the desktop when you import the audio files to be used for creating the ringtone indicating that the format is not supported or you are having trouble starting the program, run iRinger in Windows XP compatible mode ( if your version of Windows is different from Windows XP, of course).
To do this, right click on the software icon, select the item Property from the menu, click on the tab Compatibility, check the box Run the program in compatibility mode for: and choose from the menu below Windows XP (Service Pack 3). Then confirm the changes made by clicking first on Apply and then OK. The next time the program is restarted, everything should be fully functional.
Import the ringtones
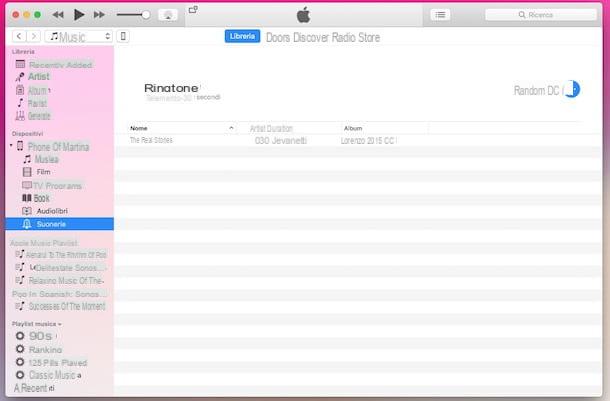
Now, regardless of whether you chose to use iTunes only or iRinger, the ringtone you created has been added to the iTunes ringtones list. So to import the ringtone on your iPhone, click on the name of the iPhone (eg. iPhone in ) on the left sidebar of iTunes, select Ringtones from the menu that opens and drag the created ringtone file to the right part of the iTunes window! Et voila!
It was used macOS 10.15 Catalina or later, you must use the Finder (l'icona del smiling face present on Dock bar) in place of iTunes, by selecting the name of yours iPhone from the left sidebar, by going to the tab Generali and dragging the .m4r file of the ringer in it.
Then remember to correctly disconnect the iPhone from the computer by pressing the button Eject which appears by placing the cursor on the device name in the iTunes / Finder window.
Please note: It is not possible to create ringtones with songs synced through Apple Music subscription as they are DRM protected files.
Create ringtones directly from iPhone
If you do not have a computer at hand or in any case if you do not want or cannot use iTunes, you can create ringtones for iPhone using Garageband for iOS, the famous Apple app for producing and editing music. The application is actually also available for Mac but in this tutorial of mine I want to focus on the view for mobile devices to put you in a position to create personalized ringing tones without necessarily having to go through the computer.
With Garageband
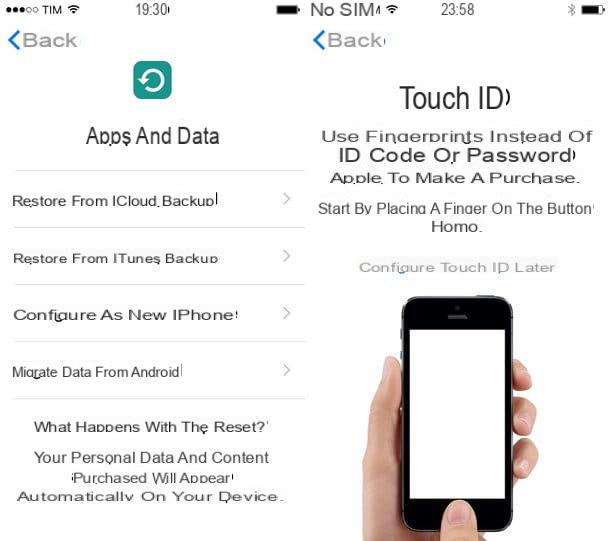
To use Garageband for the purpose in question, the first fundamental step you need to take is to download and install the app on your device by connecting to the dedicated section on the App Store and then tapping the button Ottieni / Installa. Then type in the password for your Apple account or confirm the download using Touch ID or Face ID (depending on what your device supports).
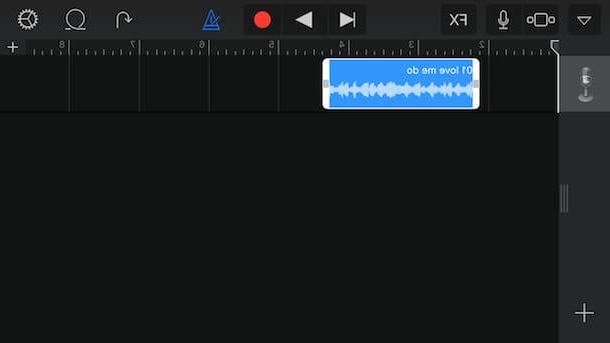
When the download is complete, open the app by pressing on its icon on the home screen and then select the audio file you want to turn into a ringtone by pressing on the voice Shop by Department attached to the application screen. Then stop on the track of the song that appeared on the screen and move the right and left cursor to define the portion of the audio file to be used as a ring tone. If you want to listen to a preview, just tap on the button Play up.
Import the ringtones
Once you have obtained the desired final result, press the button depicting a freccia rivolta verse il basso which is at the top left and selects the item My songs give the menu that appears.
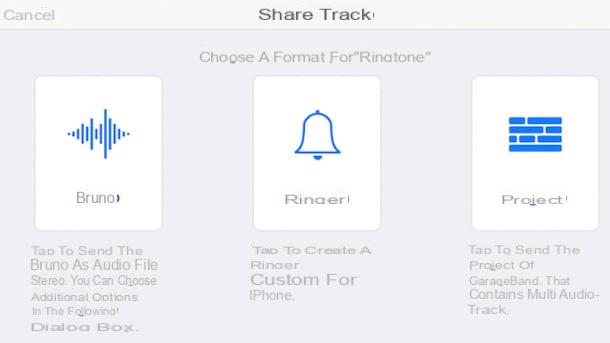
Also done this, stage on the voice Select at the top right, presses the preview of the newly created project, select the icon of sharing (The square with arrow) at the top left and choose the option Ringtone to set the audio file as a ringtone.
Set ringtones on iPhone
By following the instructions I gave you in the previous lines, you were able to create custom ringtones for your iPhone and now you would like to understand how to set them on the iDevice? No problem, I can also explain this to you, it's very easy.
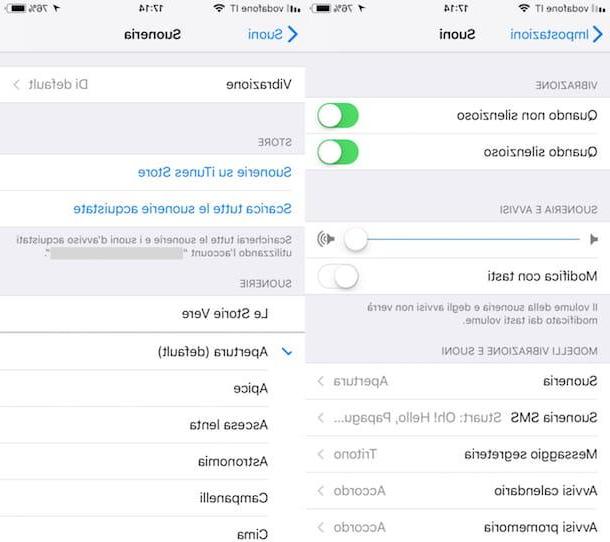
To set a custom ringtone on the iPhone all you have to do is grab your Apple smartphone, unlock it in order to access the home screen, press the icon of Settings (the wheel ofgear), enter the menu Sounds and haptic feedback> Ringtone and select the name of the ringtone from the list that is shown to you. The changes made will be applied immediately.
If, on the other hand, you want to set the custom ringtone previously created only for a given contact in the phonebook, access the app Contacts (the one with the symbol dal phonebook) present on the home screen, identifies the reference contact, presses on it, step on the wording Modification top right, then up Ringtone and choose your ringtone from the list that is shown to you. Then stop on end twice in a row to confirm and apply the changes.
Please note: The ringtones created by you or in any case those that are not “standard” are separated from the latter in the list of call waiting tones on the iPhone by a gray line and are shown to you first.
How to make iPhone ringtones