FontStruct (Online)
A delle prime soluzioni che ti consiglio di provare per create custom fonts è FontStruct: a free online service that is extremely simple to use. To use it, go to its home page and click on the yellow button Start Now. Then fill out the form that is proposed to you with yours username, yours e-mail and Password you want to use to access the service, then put the check mark on the item I agree with the terms of use and click sul pulsating Sign Up to register.
Within a few seconds, you will receive a message to the email address indicated above: click on the link inside it to confirm the registration and, on the page that opens in the browser, click on the item Sign In to log in with your access data.
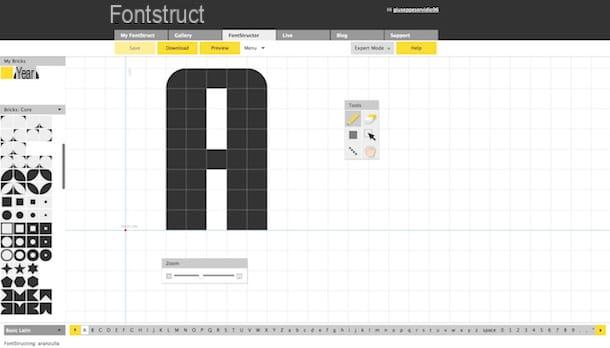
Ad accessso effettuato, click on your button FontStructor located at the top, give a name to the font you want to create in the text field Name your design and click sul pulsating Start FontStructing to start creating your custom font.
You should now be in front of the FontStruct workspace, where you will have to draw every single character. The font you are working on is the one highlighted in white in the font list at the bottom. Then click on the drawing tool (the icon of the pencil located in the box Tools), select the shape of the tool to draw in the box Bricks (located on the left) and start drawing the character within the work grid.
To fix any "smudging", click the tool rubber located inside the box Tools and make any necessary corrections. When you are satisfied with the work done on a character, click on the next letter that is present in the list of characters located below and, as soon as you have finished making all the characters, click on the button first Save to save the created font and then on the button Preview to preview it.
In the web page that opens, type some text in the field Type to see your FontStruction in action, so you can see your font in action, and click the button Go Back to return to the work area. As soon as you are satisfied with the final result, click on the button Download and then on the button Save to download the font to your computer.
YourFonts (Online)
A top online service that can come in handy for creating custom fonts is YourFonts. The peculiarity of this service is to allow the creation of fonts with your own handwriting. Unfortunately it is not free: to use fonts made with YourFonts, you need to make a purchase of 9,95 euros.
If you accept these limitations, connected to the official page of YourFonts, click on the button Print template and, on the next page, click the link Template as PDF document A4 to download the table in which you will write the characters of your custom font by hand. On the page that opens, click on the icon of arrow or the floppy disk to download the template to your computer and then print it.
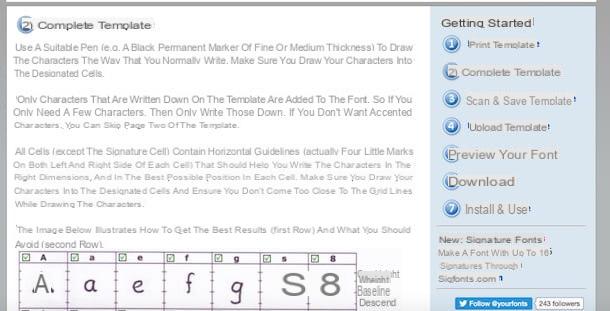
After printing the character grid, click on the button Complete Template located at the bottom and follow the instructions you see on the screen to fill in the grid (essentially you will have to write each character of the font by hand) and then click on the button Scan & Save Template.
At this point, you will need to bring back the grid you have just completed in digital format. To do this, scan the document with a scanner, using a definition of at least 300 DPI, and save the result as a PNG or JPG file. If you don't know how to scan a document, feel free to read the tutorial where I explain how to proceed.
Once the scan is done, click on the button Upload Template, enter the font name in the text field Font Name, click here Choose file located at the bottom, select the document you want to upload and then click on the button Upload.
Now, wait for YourFonts to process the file you uploaded and generate the font with your handwriting. When the process is complete, you will see a preview of the font. If you are satisfied with the result and are willing to buy the newly created font, click on the button Download and follow the instructions on the screen to proceed with its installation.
BirdFont (Windows / macOS / Linux)
If you want create custom fonts quickly and easily, I recommend you try birdfont: a free and open source software (for non-commercial purposes, otherwise you have to pay 5 $) available for both Windows and macOS and Linux. To use it, just start it, select the option relating to the creation of new fonts and create the letters and other graphic symbols that will make up the font.
To download BirdFont on your computer, then connect to the program's website and locate the link located in the section Find the right version corresponding to the version of the operating system in use on your PC (eg. Windows 10 and later: birdfont-3.6.2-free.exe, to download the program on Windows 10 or Mac OS 10.12 and later: birdfont-3.6.2-free.dmg, to download it on macOS).
To complete the installation on Windows, open the file .exe just downloaded from the BirdFont website, click on the button Yes and then click on the buttons Next, install e Close. If, on the other hand, you use a Mac, open the file.dmg just downloaded and move the program icon to the folder Applications of macOS. Then right click on the BirdFont icon and click on the item apri from the menu that opens in such a way as to "bypass" the restrictions applied by macOS to software from non-certified developers (this operation must be done only when the software is first started).
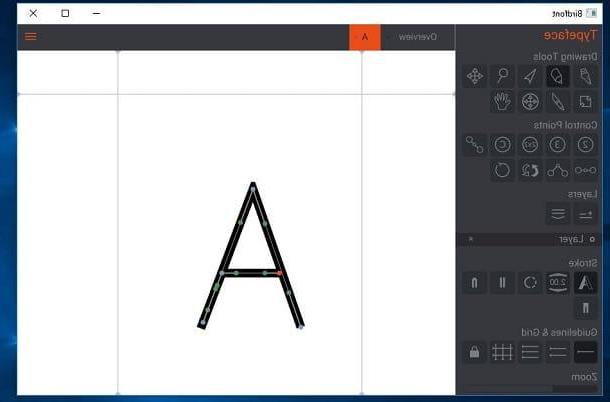
After installing and starting BirdFont on your computer, click on the button SIL Open Font License to create fonts to be released with SIL Open Font license. Then press the button in the shape of sheet located at the top left, in order to start creating a new font, and double-click on one of the characters that are shown on the screen (you can choose between letters, numbers, punctuation marks, etc.) to start building every single character of your custom font.
In the window that opens, use the tools located in the left sidebar to create the font: in the section Drawing Tools there are tools with which you can draw the character; in the section Control Points you can find the options necessary to act on the various points of the character; via section Layers you can add and / or delete layers and so on.
If you need to import an image into your project, for example to "trace" a font that you have drawn on paper, click on the button (≡) located at the top right; in the menu that opens, click on the item Import and Export and then select one of the available options to import files, for example Import SVG file, to import an SVG or Import SVG folder to import a folder containing SVG files.
As soon as you have finished your work and created all the characters of the custom font, click the button (≡) located at the top right and, in the menu that opens, click on the items File> Save, to save the changes made to the font or Import and Export> Export Fonts, to export it (to use this function, of course you must have already saved the font).
Illustrator (Windows / macOS / Linux)
Didn't the free solutions I mentioned in the previous paragraphs satisfy you? Well, then you should start thinking about turning to Illustration, the professional software developed by Adobe thanks to which it is possible to create numerous graphic works, including the creation of fonts.
Being a solution designed for professionals working in the world of graphic design, Illustrator is for a fee: you can download and use it for free for 7 days, but then you need to subscribe to the monthly subscription to the service. Adobe Creative Cloud to continue using it. At the time of writing it is possible to subscribe to three types of subscription: the annual plan with monthly payment, from € 24,39 per month; the prepared annual plan, which costs 292,57 euros per year and the monthly plan, which costs 26,59 dollars a month.
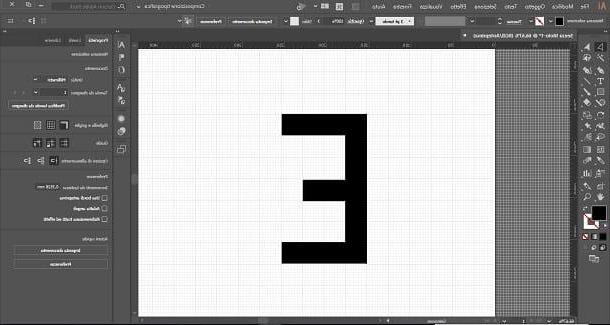
Once you have downloaded Illustrator from the Adobe website, you will notice a certain similarity between the interface of this program and Photoshop: on the left there is the toolbar containing the various drawing tools through which you can create every single character of your custom font , while on the right there is the section that allows you to manage the levels, the properties of the elements present in the project and so on.
To create fonts with Illustrator, however, you will have to resort to installing some third-party plugins. One of the most famous and used by professional typographers is Fontself, an add-on (compatible with Illustrator and Photoshop) that costs 49 euros and allows you to transform in a few minutes the characters designed with Illustrator into fonts compatible with the OpenType format.
If you find it difficult to use Illustrator, perhaps because it is the first time you interface with the vector graphics program developed by Adobe, I suggest you consult the user guide and video tutorials that you find on the website of the Californian software house. I am sure that thanks to these resources you will be able to better understand the functioning of the program and thus you will be able to exploit its full potential.
How to install the fonts created
Once you have created your custom fonts using the solutions mentioned above, it is now time to install them on your computer. If you don't have a clue how to install the fonts created, follow the "tips" contained in the next lines.
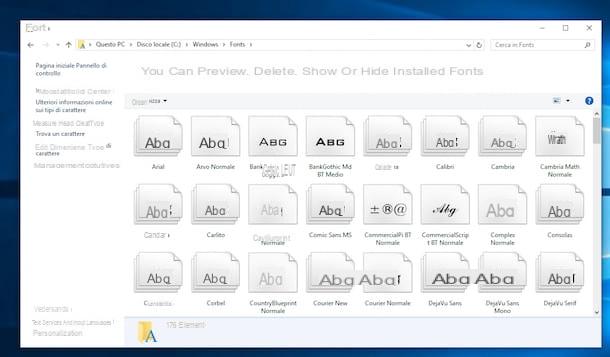
- Su Windowsclick on your button Home, go to the Control Panelclick sulla voce Appearance and personalization and, on the next screen, click on the item Characters. Next, drag inside the window Characters the font you intend to install and the system will automatically do the rest.
- Su MacOSinstead, it starts the application Book Font present in the folder Other of Launchpad, click on the pulse capacitor positive (+) lead located at the top left, select the font in . Ttf you want to add or the folder where the characters of the font you created are saved and then click on the button apri.
If after the procedures I have just indicated the font should be unavailable, restart your computer in order to solve the problem. For more details on how to install fonts, read the article I just linked to.
App to create custom fonts
Do you want to create fonts directly from your smartphone or tablet? Try one of the following app to create custom fonts and you will see that you will be pleasantly impressed.
- Fonts (Android) - allows you to easily create handwritten fonts and even customize existing ones by adding stickers and other decorations.
- Fontise (iOS) - this is a free application that allows you to create fonts quickly and easily. Fonts made with Fontise can be exported and used on multiple platforms and applications, including Windows and macOS.
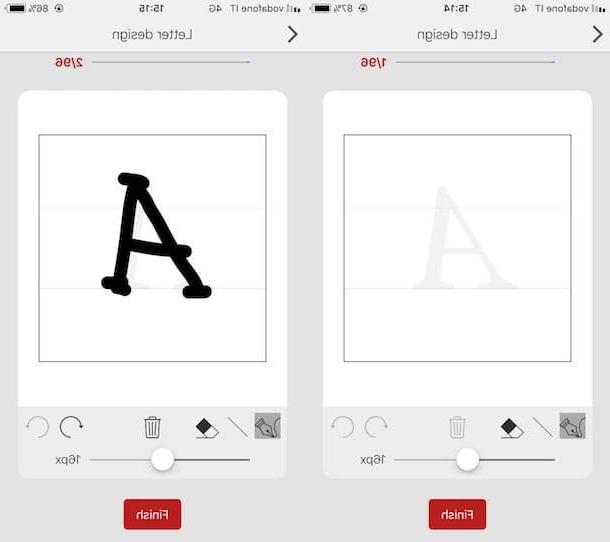
- iFontMaker (iOS) - is a custom designed font maker for the iPad, the tablet produced by Apple. iFontMaker allows you to create fonts in less than 5 minutes and then install them on your computer and use them for your work. It costs € 8,99.