Index:
- DVDStyler (Windows / macOS / Linux)
- DVDFab DVD Creator (Windows / macOS)
- Other programs for creating DVD menus
DVDStyler (Windows / macOS / Linux)
If you intend to make a DVD in an amateur way, surely you will have come up with the idea of including menus, such as those you find in the DVDs you buy frequently.
Among the programs that I intend to point out, useful for your purpose, there is DVDStyler. This software is downloadable for free both on Windows and on other operating systems, such as macOS and Linux.
To download this program you will simply have to go to the DVDStyler official website and get it from the section Downloads.
In this guide I will cover the installation and use of this software for Windows operating systems. In this case, click on the entry DVDStyler-3.0.4-win64.exe, if your computer has 64bit architecture, or DVDStyler-3.0.4-win32.exe, if it is has 32bit.
Once you have downloaded the program, double click on it and then click on the button Yes, when prompted for Windows User Account Control. Then select the language cityno and click sul pulsating Ok. Then click NEXT five consecutive times and then on Install e end to finish the installation process and start DVDStyler.
As soon as you have started the program, you will be asked to create a new project. You will then have to enter the title to assign to your DVD. The title is what will appear when you insert the DVD into the DVD player. Then type a title of your own imagination in the field Disc label which is related to the project you intend to carry out.
Then select, through the drop-down menu, the Disk capacity, referring to a choice between the indicated values. If you are making a DVD in a classic format, then you should select the value 4.7GB, then there are Dual-layer DVDs, which have a 8.5GB. When you have set the required parameters on the screen, click on the button Ok.
In the next window that appears, you will need to enter the disc menu name instead, using the text box Caption. Then select one of the themes that is closest to the content of the DVD you want to create and then click on Ok. If you don't want to select any themes, click the button No theme.
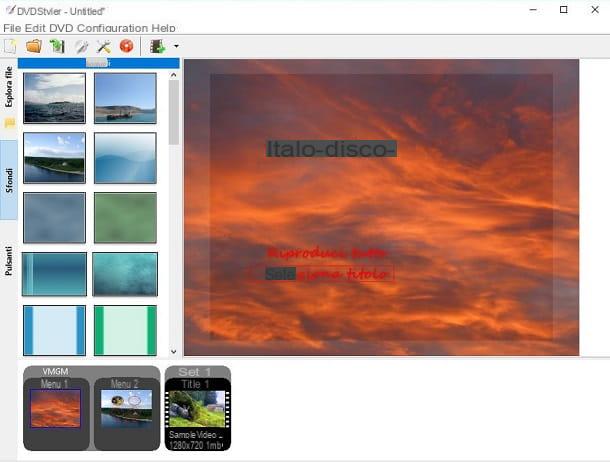
You are now inside the menu design area of your DVD: click the button with the symbol of a film, flanked by a [+], and select all the video files you want to include in your project. Once you've selected them, click the button apri, to import them into the project.
All the videos you upload will automatically be placed in the menu section related to Chapters. Click on the menu preview at the bottom left and double-click on one of them. You will see areas that contain a preview of the videos you have imported. By double clicking on one of them, you will be able to access the button settings. You can then change some parameters, including the preview image itself.
If, on the other hand, you click on the preview of the first page of the menus, you can change the font, size and many other parameters by double clicking on each text. You can also add new buttons by clicking on the tab on the left buttons. If you want to replace each menu's background image instead, click the tab Wallpapers.
When you are satisfied with the result, you can save your project via the button Save, located on the toolbar at the top, and then burn it, by clicking on the button with thered disk icon.
DVDFab DVD Creator (Windows / macOS)
If you are looking for a more complete program than the one I told you about in the previous paragraphs, then I can recommend DVDFab DVD Creator.
This software, however, is a payment; in fact, it requires the purchase of a license to use it. Its price is not excessive but you can, first of all, evaluate its potential by downloading the evaluation version. If you decide to buy it, I advise you to visit the DVDFab website often, where there are periodically offers.
If you are interested in evaluating this software, then I suggest you download the evaluation version from this link, which leads to the Official DVDFab website.
From the menus at the top, go to the section Creator and select DVD Creator. You will then be directed to the trial version download page. Then click on the wording Windows o Mac and then click Try it free.
By downloading this program on a Windows computer the installation will require a configuration. Consequently, once the download of the installation file is finished you will have to double-click on it to start the installation of the same.
Click on Yes, at the end of Windows User Account Control, and then click on the tab options. Then customize your installation, choosing the installation path and removing or not the tick on sending anonymous data for software improvement. Then click on Install in the center of the screen to begin installation.
When installation is complete, click the button starts. A window will then appear asking you if you want to purchase the program or try it for 30 days. Since I guess you want to evaluate its features first, click the button Race.
From DVDFab main interface, click the button Crea and select the creation mode by choosing between DVD o Blu-ray, by clicking on the wording Create DVD. Then click the button Add to import your video files to the project.
The imported videos will be shown one below the other on the DVDFab main screen. Click onsettings icon that you find next to the button Information (symbol [i]). From this panel that will open to you, you can type the label to be assigned to your disc, filling in the field Volume label. Then select the type of DVD media you are using for burning; you can choose between DVD5 (4,7GB) or DVD9 (8.5GB).
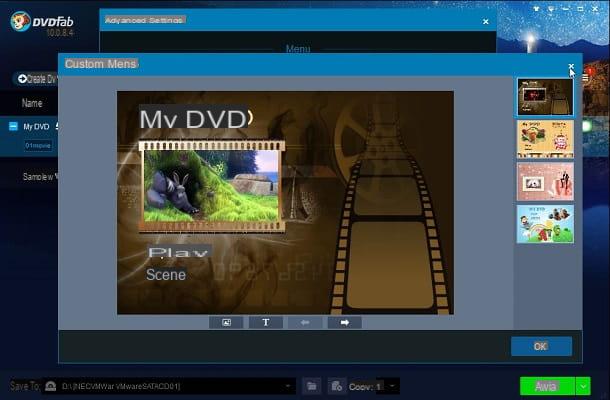
If you want to customize your DVD menu, then click the button Personalized menu. In the new window, you can interact with all menu items. You will then be able to edit the texts (including fonts, font size and color) and change the background images of the menus; you can also change the position of the navigation buttons if you see fit.
When you've made all your changes, click the button Ok on both two windows. You are now ready to create your DVD. From the bar at the bottom, near the wording Save in, select if you want to burn it directly to physical media or if you want to save it on your PC, as an ISO file or as a DVD format file.
After selecting the export method, click the green button below starts. A progress preview window will open.
When the export is complete in all its phases, you will be notified with a sound.
Other programs for creating DVD menus
The programs that I pointed out to you in the previous paragraphs are certainly for you. But maybe you would like to have a wider choice and therefore have the opportunity to discover other software to try and / or use.
There is no problem: as always, I would like to point out a list of some programs that you could use in place of those I have pointed out to you; in this way I am more than sure that you will succeed in your intent to make DVDs with menus.
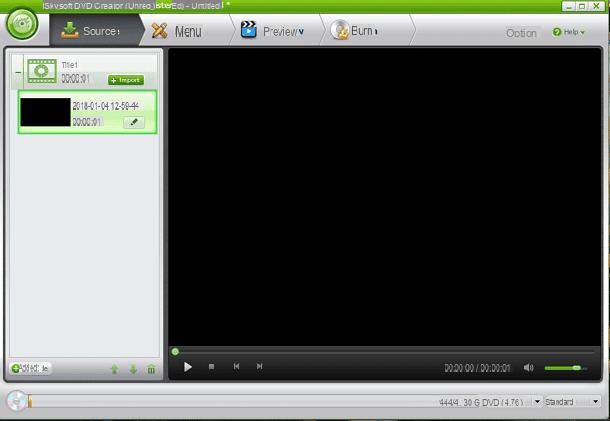
- iSkysoft DVD Creator (Windows / macOS) - This program is only available to payment, but with the option to download one free evaluation version, so as to test all its features. The program can be downloaded from the iSkysoft official website.
- ConvertXtoDVD (Windows) - Another program that may be useful to you is ConvertXtoDVD. As the name suggests, this software allows you to convert any video into a DVD format, to be played in your home DVD player. It is a program however a payment, but it also allows you to download one free evaluation version lasting 7 days, via the official website.
- DeepDVD Movie (Windows) - If you are looking for an easy-to-use program, then I recommend DeepDVD Movie. This software, downloadable from its official website, is a payment, but you can test it so you can get an idea if it's right for you. There free trial version has access to all features and you can test it for 30 days.