Saal Digital
Now I want to talk to you about Saal Digital: a well-known company founded in Germany more than 30 years ago and active in over 10 European countries specializing in the production of photo books and other high quality photographic projects, such as photo frames, fine art prints and calendars.
In addition to the high quality of the prints, Saal Digital photo books are appreciated for the numerous formats available, the panoramic binding, the possibility to choose between 4 types of Premium photo paper and over 10 types of cover, as well as for the excellent value for money: you can also request here a welcome voucher of 20 euros applicable to all photobooks.
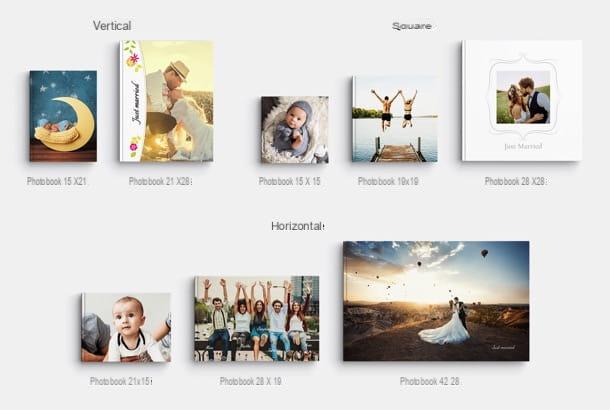
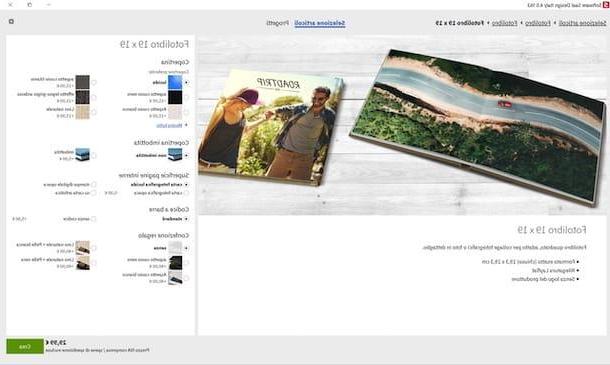
Going more specifically, Saal Digital allows you to create vertical photo books in 15 × 21 and 21 × 28 formats, square photo books in 15 × 15, 19 × 19 and 28 × 28 formats e horizontal photo books in 21 × 15, 28 × 19 and 42 × 28 formats by directly loading a PDF on the site or using the software Saal Design which, available for free for Windows and macOS, allows you to create beautiful photo books in just one minute using convenient ready-to-use templates.
Also noteworthy is the range of Professional Line Photo Books: a product designed specifically for the most demanding customers who want an exclusive photo shoot or portfolio, or even a home decor item. The Professional Line Photo Book is available in numerous formats and with a wide selection of Premium covers, among which the methacrylate version stands out.
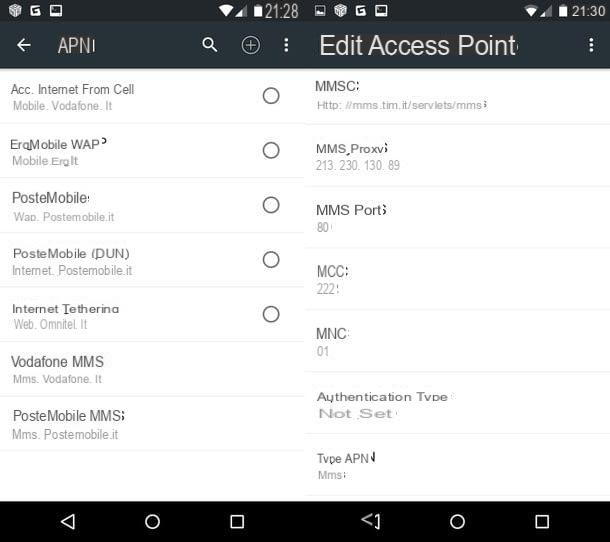
On the Saal Digital website there is also aarea for professionals, with articles and useful tips on how to best optimize the printing process. Among these, the possibility of downloading i ICC color profiles to Adobe Photoshop e Adobe Lightroom, intended for any type of media on which you want to print your photos, in order to color-proof before printing the photo book and make sure you get a 100% faithful color rendering.
That said, I'd say it's time to take action. To get the software Saal Design and start creating your photo book, connected to the Saal Digital website, scroll the page almost to the bottom and click on the button Download Software Saal Design. When the download is complete, if you are using Windows, start the .exe file obtained and, in the window that opens, click on the buttons Yes, Install e Close, to conclude the setup. If, on the other hand, you are using a Mac, april il package .dmg you obtained and drag the icon of Saal Design in the folder Applications of the computer: that's it!
At this point, launch the software Saal Design and click on the option to create a Photobook; then select the type of photo book to be made (eg. Photobook, EXTRA photo book o Professional Line photo book) and the format in which you intend to make it (eg. 15 × 15 o 15 × 21).
On the next screen, use the right sidebar to select the type of cover that you intend to use for the photo book (Glossy, white leather, linen natural ** etc.), choose whether to use one padded cover or not and indicate your preferences regarding full page surface, barcode e gift box.
Fatto ciò, click on your button Crea and choose how to design your photo book: via a blank template to be customized manually; through the procedure Photo book in one minute, which allows you to obtain a photo book ready for printing in just one minute (with the possibility, then, to make any changes); or through Automatic layout, to let you help with the automatic positioning of the images and then make any changes to the template. Personally, I found the One Minute Photo Book procedure very convenient, but clearly it's up to you to choose.
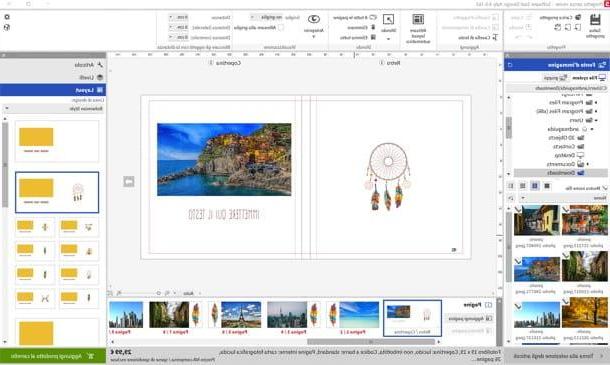
Once you have selected the creation mode that you think best suits your needs, choose the model of photo book and the photo you want to include in it, then press the button Conclude located at the bottom right. Then choose the number of pages from which the photo book must be composed and use the editor that appears on the screen to make all the changes you want.
It's all very intuitive: on the left is the navigator to add any new photos from the PC folders; at the top is there toolbar to manage the project, add text boxes, view thepreview of the photo book, manage the distances etc.; in the center is theworking area main with the caries pages of the photo book, while on the right there is the panel to manage layout, levels e article.
When you are satisfied with the result, click on the button Add product to cart (bottom right), set your preferences for cover, full page surface, barcode e gift box and press again Add product to cart.
Finally, type the name that you want to assign to the project (in order to retrieve it and possibly modify it through the specific tab of the Saal Design software) and proceed to payment, by clicking on the appropriate button and following the instructions on the screen. The credit / debit cards of the circuits are accepted MasterCard e VISA and the accounts PayPal.
For more information, I invite you to consult the Saal Digital website and request a 20 euro welcome voucher to create your photo book. If you have any doubts about the operation of Saal Design, you can visit this page with the video tutorials dedicated to the program.
Photobox
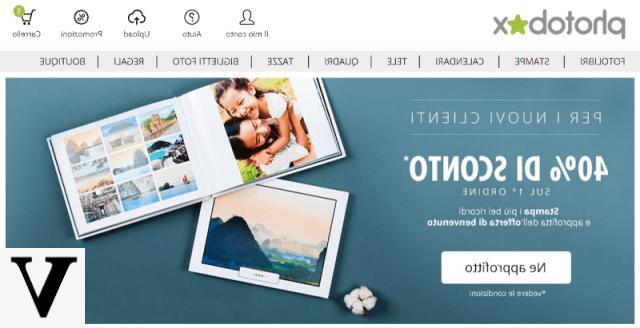
One of the most used Internet sites for creating photo albums or photo books is PhotoBox. The PhotoBox website offers its experience and its services dedicated to digital printing with various possibilities.
In addition to creating a photo album, PhotoBox allows you to develop photos starting from digital, with any size. You can print passport photos for ID cards, print photos to make posters and even enlarge a photo. Among the other noteworthy services offered is the possibility of printing photos on mugs, printing photos on canvas and creating paintings.
Would you like to print a photo album? You can do it comfortably online, using the service offered by PhotoBox. As you can see by connecting to its official website, PhotoBox offers more than one solution for creating photo albums, wanting to satisfy different types of needs.
Make and buy a version photo book Classic, using PhotoBox, costs € 39,95 for a 26-page book printed on professional A4 paper (29 × 22 cm). To make a photo book with A3 pages instead, you can choose the Prestige XL photo book from 59,95 €.
PhotoBox, however, offers many daily offers also designed for new customers. This will allow you to save on purchases made through the site. In some periods, discount codes are available on the website to be applied to obtain discounts of up to 50%. Before making a purchase on PhotoBox, my advice is to go to the section Promotions to see all the active offers of the week. You will see for example how the possibility is offered get 30% discount on all products on the site. PhotoBox also offers discounts on individual products, but also personalized offers, after registering for the official newsletter.
To start creating your photo album, using PhotoBox, just go to the section Photobooks and click the entry for the type of photo book you want printed. You can choose the photo book Classic, Premium, with Flexible covers and the one belonging to the Special Collection.
To create a traditional photo book, click on the item Classic. Then choose the size of your photo book from Prestige A4 (A4 size) or Prestige XL (A3 format). The photos will be printed on professional photo paper and the order will be processed as soon as possible. When you have chosen, press the green button See the book. To confirm your choice and start creating the book, press the button twice I create my book which you will find in the following screens.
To create your personalized photo book you will clearly need to have the photos at hand, as you will be required to import them on the website, uploading them from your PC. Alternatively, PhotoBox allows you to import photos by uploading them from a social network, such as Facebook, Instagram, Flickr, Dropbox or Google Plus.
To start creating your photo book on PhotoBox, select the book theme from the side drop-down menu and press the button Create Now. As anticipated, if now you have to upload photos for the first time, you can do it from your PC and also through social networks. If the photos to be printed are on your PC, click on the entry Upload photos at the item From your Computer, alternatively click on the entry Upload photos at the item From your social networks.
Once you've selected all the photos to import, start creating your photo book by dragging the uploaded photos from the left pane to the right pane. When you are done importing all the photos, press the button Create the Photo Book.
On the next screen, you will have a choice to make with two possibilities: let the PhotoBox website automatically create your photo book (button I discover my photo book) or modify every single element and page, being able to choose to customize the pagination and layout, adding texts and illustrations (button Manual creation). Don't worry, if you select the first item, you can change your mind at any time. In fact, you can apply all the changes you want, in any case accessing the complete customization screen that you can see if you click on the item instead Manual Creation.
When you're done customizing your photo book, click the button To sort to access a further final confirmation screen. Before confirming your order you can add further customizations. For example, you can choose the type of paper to use, the format of the photo book and possibly select other items concerning packaging and finishing. Once you have made all the changes, and you want to definitively confirm the order, press the button again To sort.
Girl
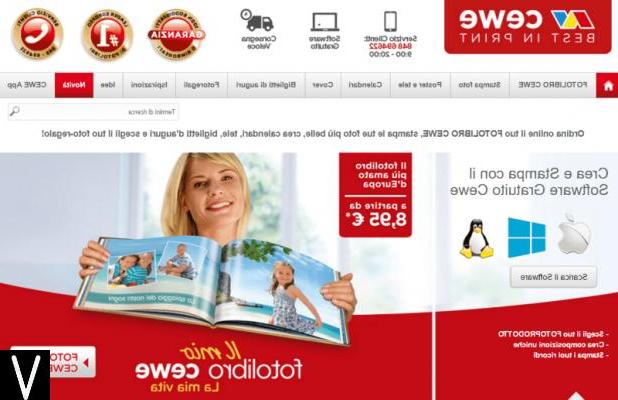
To create a personalized photo book, the Cewe.com site is equally valid, which allows you to create a photo album using software available for Windows, Mac and Linux, but also via an application for mobile devices. In this way you will be able to create your photo book directly from your smartphone, thus avoiding the most tedious steps of transferring photos to your PC.
In addition to the personalized photo book, the most interesting feature of Cewe is undoubtedly the presence of a very varied catalog of products and, consequently, a price list for all budgets. There is in fact the possibility to print single photos, calendars, covers, greeting cards and there are also many ideas designed to celebrate every holiday with a photo or an album. You can also place an order by uploading photos via an online tool or via the aforementioned software for PC, Mac and Linux. You can even use your smartphone to create your photo album by downloading the appropriate application available for Android and iOS operating systems.
Cewe also offers the possibility of tracking the status of an order placed, thus being able to check the delivery status in real time. Furthermore, prices and delivery times for each product are indicated in detail in a specific section of the site, where it is possible to consult the price list for each individual product that can be purchased.
There is no standard price for the creation of a photo book through the Cewe.com website. It starts from a minimum of € 8,50 for the creation of a Mini photo book (size 15x10cm), which includes up to 74 pages to enrich with photos, and it goes up to Panoramic XXL Photo Book, with a maximum price of € 105,95. Prices include VAT, but shipping costs are excluded and you will need to check them when placing your order.
If you want to create a personalized photo book, using the Cewe.com PC software, my advice is to first take a look at the section Tutorial. In fact, the Cewe website also thinks of less experienced users, providing numerous and very detailed video tutorials that will help and guide step by step to the creation of the personalized photo book.
If, on the other hand, you do not want to install programs or applications for mobile devices, you can still easily create your personalized photo album, using the online service made available. Also in this case a very complete and feature-rich tool is offered that will guarantee you ample customization possibilities. Using the Cewe.com online service to create a personalized photo book is just as simple and intuitive; inside you will find a tutorial that will guide you step by step, you can't go wrong.
Esselunga
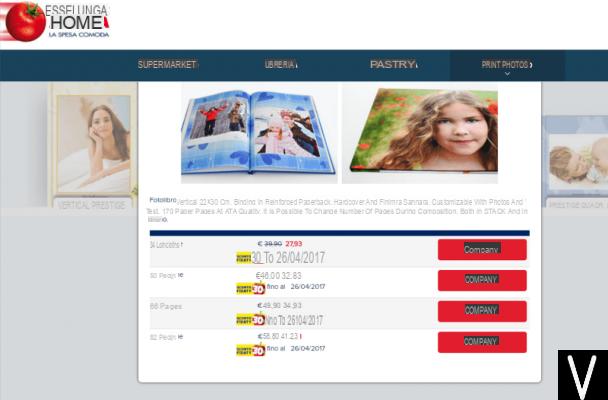
If you live in the center or north of the city and would like to create a photo album, my advice is to take a look at the Esselunga website. The famous supermarket chain deals professionally with the provision of services dedicated to digital printing, including the creation of personalized photo albums.
The main feature of the digital printing services offered by Esselunga is the possibility to create and place the order online and then collect the finished product directly in the store closest to you. If you go to the popular grocery store often, you can collect your photo album in the special department, thus avoiding the cost of shipping.
Esselunga also offers discounts for its customers in possession of a Fidaty Card, which is mandatory in order to access the section of the website dedicated to digital printing.
If you do not have one, just register on the official Esselunga website to receive the Fidaty card directly at home; alternatively you can get it for free even by going to the store.
For the creation of a photo album, Esselunga prices start at full price from € 39,90 for a 34-page album, up to € 58,90 for an album consisting of 82 pages.
Article created in collaboration with Saal Digital.
How to create photo albums