Configure DNS on modem
Do you want to configure DNS by acting directly on the modem in such a way as to avoid making changes to the settings of each device in your possession? Well, that sounds like a great idea! To configure DNS on modem proceed as follows. Open your favorite web browser and connect to the address 192.168.0.1 oppure all'indirizzo 192.168.1.1 to access the device management panel. If you can't access the modem management panel with neither of these two coordinates you can try to consult my tutorial on how to find router IP address to find out how to find the correct address of the device.
Please note: On modems supplied directly by telephone operators it is not always possible to configure DNS since all the parameters necessary for surfing the net have already been made available automatically by the provider.
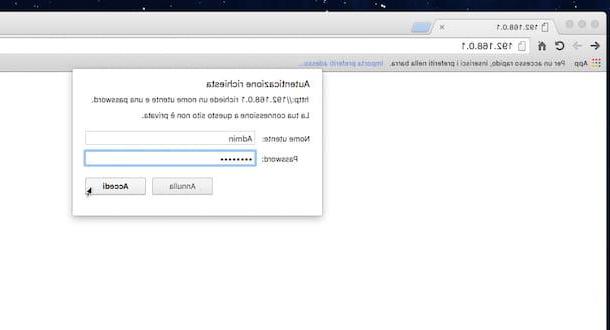
Then fill in the login form that is shown on the screen by typing your username and password to access the device settings. If you haven't changed them, usually the combinations to use to login to the modem settings are admin / admin or admin / password. In case of problems or if you want to get more information about it you can consult my tutorial on how to find out the modem password.
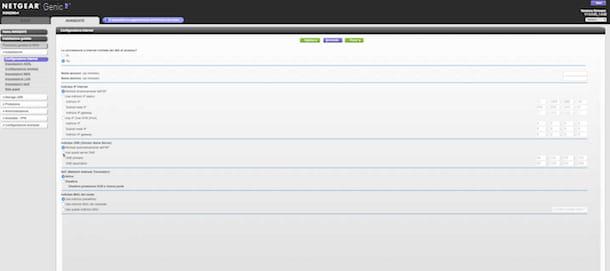
Now that you have logged into the modem management panel, go to the connection status section and try to locate the items DNS 1 o Primary DNS e DNS 2 o Secondary DNS. The numerical digits present in correspondence with these indications are none other than the addresses of the DNS servers currently used by your Internet connection.
Then check the box corresponding to the item Use questi server DNS or in any case the one indicating your desire to configure DNS, fill in the fields relating to the two DNS servers with customized addresses and then click on the button Apply, OK o Save in order to confirm and apply the changes. Keep in mind that after configuring DNS on the modem it may restart, if so do not worry, everything is normal.
Configure DNS on a computer
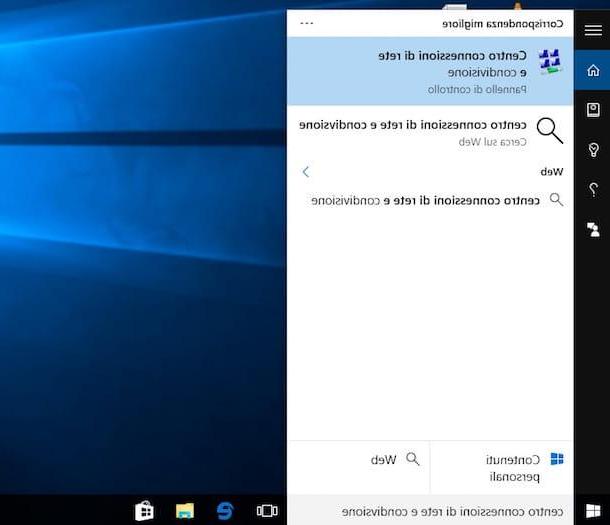
If you have a PC with su installed Windows and you are interested in understanding how to configure DNS the first steps you need to do are to press the button Home, to type in the search field that is shown to you network connection and sharing center and click on the first displayed result.
In the window that will be shown to you at this point, click on the name of the connection in use (ed. Wireless network connection), presses the button Property and then double click on the entry Internet Protocol versione 4 TCP / IPv4 present nell'elenco The connection uses the following elements in the center of the umpteenth window that opens.
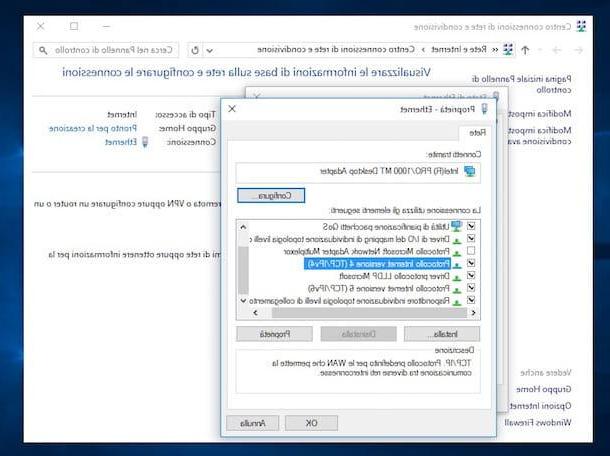
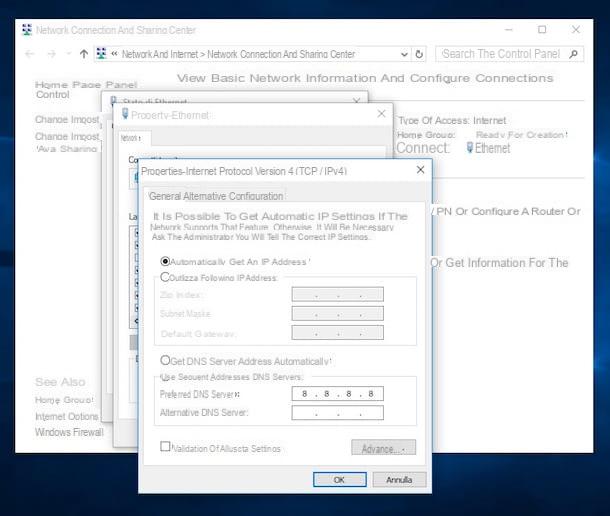
Now add a check mark on the box next to the item Use the following DNS server addresses, type in the DNS server address for the nei campi Preferred DNS Server e Alternative DNS Server and confirm the changes by pressing OK in such a way as to use DNS servers other than those assigned directly by your telephone provider through the modem.
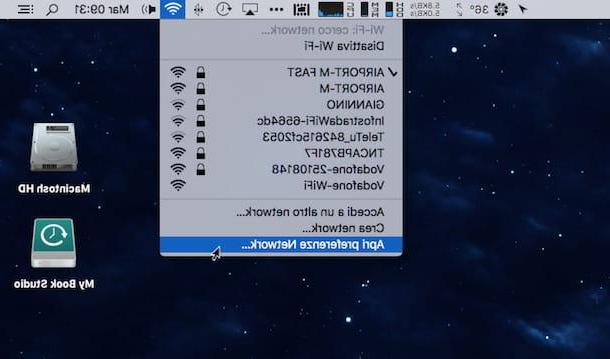
If you are using a Mac and you are interested in understanding how to configure DNS on your computer the first step you have to take is to click on the network icon located next to the system clock and press on the item Apri Preferenze Network ... annessa to the menu che ti comes mostrato.
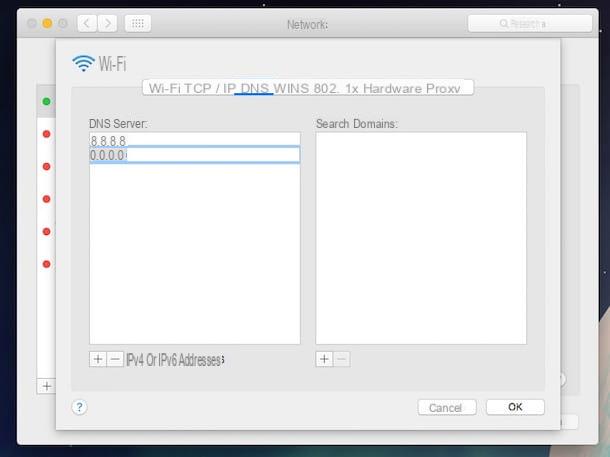
In the window that will open on the desktop, click on the connection in use (eg. Wi-Fi o Ethernet) and presses the button Advanced which is located at the bottom right. Afterwards, go to the tab DNS and click on the button + lower left.
Now type the address of the primary DNS server and that of the secondary DNS server you intend to use then save the changes by clicking first on OK and then Apply in such a way as to use DNS servers different from those assigned directly by your telephone operator via modem.
Configure DNS on smartphones and tablets
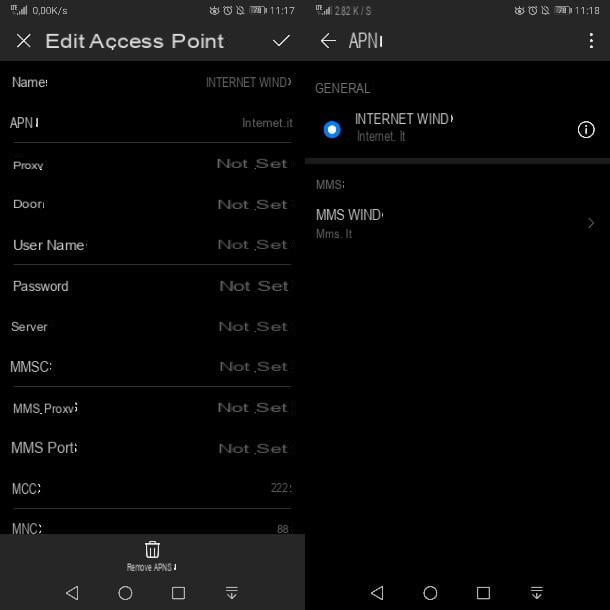
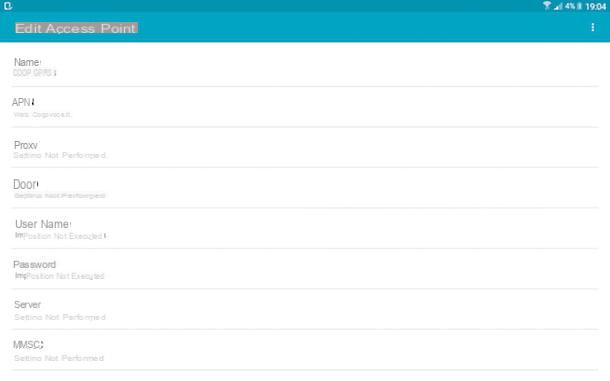
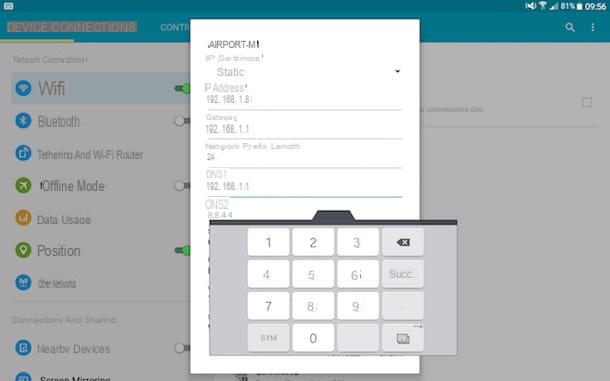
If you use a smartphone or tablet Android and you want to understand how to configure DNS, know that to do this you will first need to assign a static IP address to the device when you are connected to a wireless network. To do this, access the device screen where all the apps are grouped, presses on Settings, select the voice Wi-Fi and keep your finger pressed for a few seconds on the name of the wireless connection you are connected to. Choose the item now Modify config. say challenge from the menu to compare, apponi il segno di spunta accanto alla dicitura Show opzioni advance, scorri lo schermo verso il basso e seleziona l'opzione Static from the menu IP settings. Finally, scroll down the screen once again, set the DNS servers you intend to use in the fields DNS 1 e DNS 2 e pulsing sul pulsating Save.
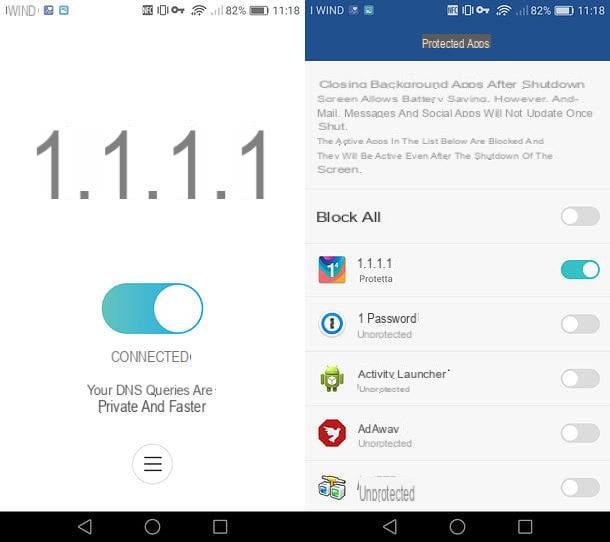
Keep in mind that the procedure for configuring DNS on Android smartphones and tablets that I have just indicated is valid only and exclusively in the case of connections made via a wireless network. If you are interested in configuring DNS even if you are using a data connection, know that you can contact Cloudflare's application 1.1.1.1, which allows you to install a VPN profile through which to convey requests for address resolution to Cloudflare's DNS servers. , even under the data network.
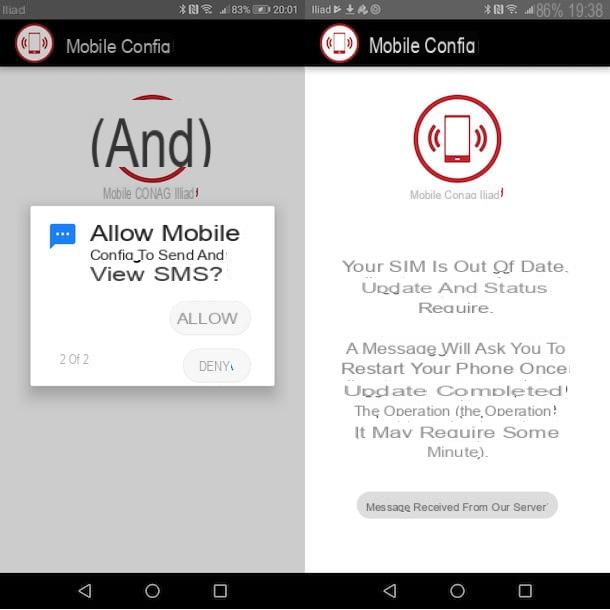
To use the app in question, install it via the Play Store, launch it, skip the presentation screens and press on first Install VPN Profile and then OK for two consecutive times. Then move up ON the lever to activate Cloudflare's DNS use and add the application to the list of “protected apps” to prevent it from being disabled when the phone screen turns off. To do this, you need to go to the menu Settings> Advanced Settings> Protected Apps of Android and move on ON the lever relating to the application 1.1.1.1 (be aware that the steps to be taken may vary slightly depending on the device and the version of Android in use).
If you do not want to use Cloudflare's DNS, you must resort to the use of special third-party apps that require the procedure of rooting. To know precisely all the steps to be performed you can follow the instructions I have provided you in my guide on how to change DNS on Android.
Be, invent, possiedi a iPhone or a iPad and you do not know how to configure DNS, the first step you need to take is to access the home screen of the device, press the icon of Settings and select the item Wi-Fi from the newly displayed screen. Next, tap on i located next to the name of the connection in use.
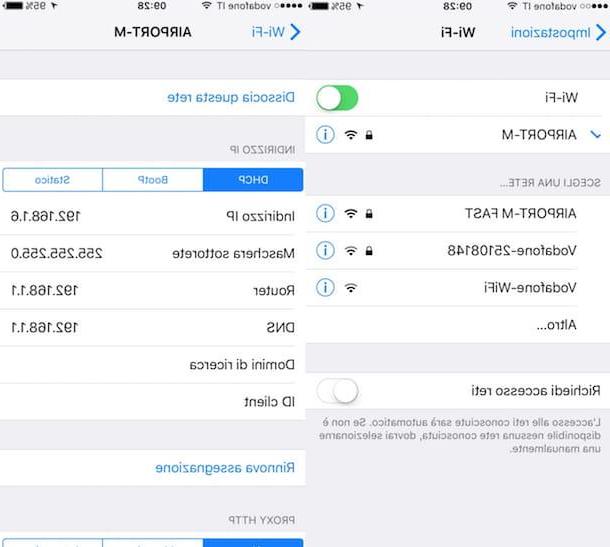
Finally, delete everything in the field located next to the item DNS then type the addresses of the DNS servers you want to use separating them from each other with a comma.
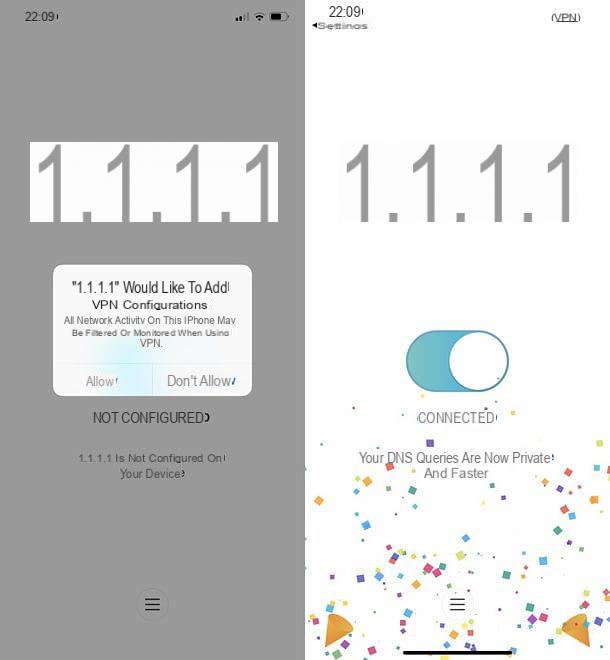
The above procedure applies only to Wi-Fi connections. To also change the DNS used for the 3G / 4G network, you need to install the Cloudflare app 1.1.1.1, which installs a VPN profile through which all address "translation" requests are sent to the DNS servers of this well-known service (which then prevents the use of other VPN services).
After downloading the app 1.1.1.1 from theApp Store, to start using Cloudflare's DNS servers, all you have to do is start the latter, skip the presentation screens and move to ON the lever in the center of the screen. Then accept the installation of the VPN profile by pressing the button Allow and typing il unlock code of your device and that's it.
For more details you can check out my guides on how to speed up the internet on iPhone and how to change DNS on iPad.
How to configure DNS