Libero Mail app
The easiest way to take advantage of Libero Mail on Android terminals is to download the official application of the service. The Libero Mail application for Android is completely free and allows not only to send and receive mail from Libero.com accounts, but also to manage the correspondence of Virgilio Mail, Gmail, Yahoo !, Outlook.com and other mail services. electronic via IMAP / POP3.
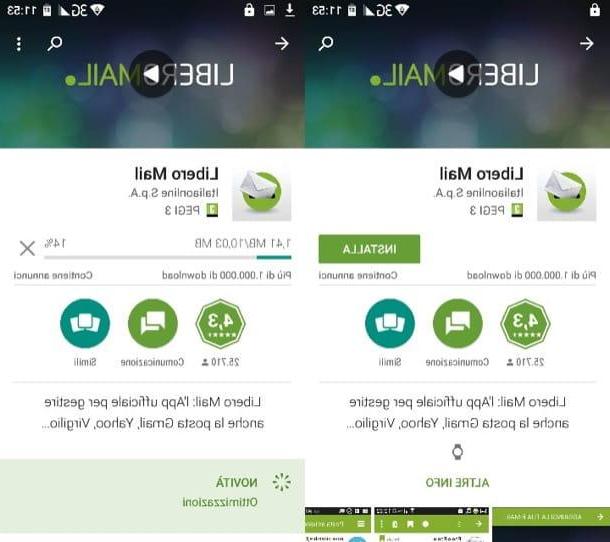
To download the official Libero Mail application on your smartphone or tablet, start the Google Play Store (the shopping bag icon with the "play" symbol in the center) and use the search bar at the top to find free mail. Therefore, press on the app icon present in the search results and press the buttons in sequence INSTALL e ACCEPT to download it to your device.
When installation is complete, start Libero Mail, press the logo of Free and fill out the form that is proposed to you by typing your free email address.com and the password needed to access it.
Once logged in, you will be asked if you want to add other email addresses to manage in the Libero Mail app. So choose whether to configure other accounts or to refuse by pressing the button Done.
If, later, you want to add other Libero Mail accounts or other email accounts to the app, you can do so by pressing the ≡ button located at the top left, selecting the button capacitor positive (+) lead that appears from the side and following the procedure that is proposed to you. At the end of the process you will be able to manage the emails of all your accounts (both incoming and outgoing) using the same app, that is Libero Mail.

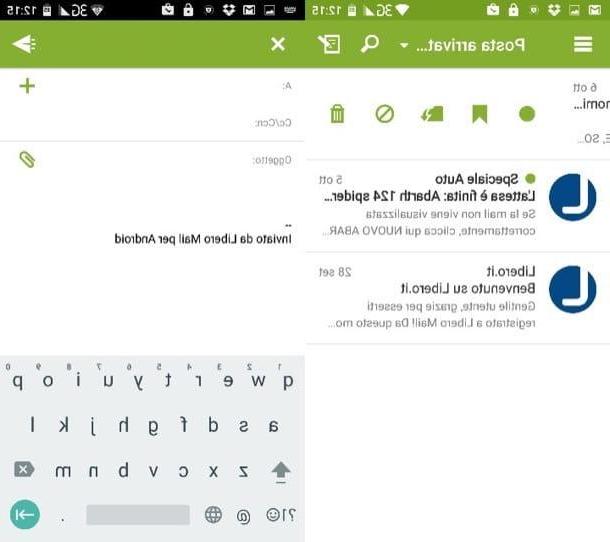
Perfect! Now you are ready to read all the messages in your Libero.com mailbox and send new ones. From this point of view there is not much to explain: everything works as in a traditional mail client (even if in fact it is only an interface for Web Mail and it does not work if there is no active Internet connection) .
By pressing on the title of an email you can read its content, while by swiping from right to left you can bring up the icons to delete the message, mark it as unread, add it to important messages, forward it or mark it as spam.
To start composing a new email, however, almost needless to say, just press the icon of sheet located at the top right and fill in the form that appears on the screen.
If you want to set up filters for automatic message organization, you want to change the signature to add to emails or want to change other settings of the Libero Mail app, press the button ≡ located at the top left and select the icon of thegear from the bar that compares di lato.
This will open the Libero Mail settings menu through which you can change all the app settings. It's all very intuitive, I assure you.
Configure Libero Mail in other Android apps
Do you want configure Free mail on Android to use the service with a traditional mail client, such as MailDroid, Microsoft Outlook or the Email app included “as standard” in the operating system of the green robot? Then try to configure the software in question using the "coordinates" listed below.
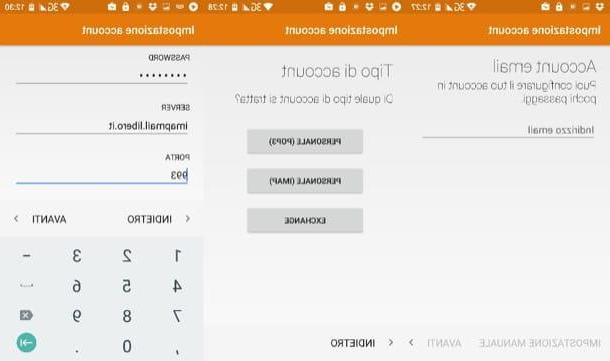
- Incoming mail server (IMAP): imapmail.libero.com
- 993 port
- SSL
- Outgoing mail server (SMTP): smtp.libero.com
- 465 port
- SSL
- Requires authentication.
- Name: [your name]
- Account Name or Username: Libero Mail e-mail address (e.g. [email protected]).
- Email address: Libero Mail e-mail address (e.g. [email protected]).
- Password: the password of your Libero Mail account.
If, for example, you want to set up Libero Mail in the app Email of Android, you have to start the latter and start the configuration of a new account by pressing the icon first ≡ which is located in the upper left and then on the items Settings e Add account.
In the screen that opens, then type your free email address.com in the appropriate text field and press the button Manual setting which is located at the bottom left. Then "tap" the button Personal (IMAP), fill in the forms that are proposed to you using the parameters that I have previously recommended and that's it.
As you have surely noticed, with the above settings you will use Libero Mail via the protocol IMAP, which has been designed to be used on multiple devices at the same time and in fact automatically synchronizes incoming and outgoing messages on all devices on which it is used.
In theory, you could also use the POP3 protocol, but I do not recommend it as it is now obsolete. It is designed to work on only one terminal at a time and deletes all messages from the server once they are downloaded locally (on your phone, tablet or computer). For more information on how the IMAP and POP3 protocols work for Libero Mail, see the Libero official support page where everything is explained.
If you are unable to correctly configure your Libero Mail mailbox on a mail client for Android, try connecting to the web version of the service (possibly from your computer) and check if there is any problem with your account. The address may have been suspended (i.e. temporarily blocked due to violations of the rules of the service) or there may be momentary problems with the servers. Alternatively, the two-step verification. If two-step verification is enabled on your account, you must log in to Libero Mail using an application-specific password and not the general password of your account. For more info, visit this web page.
How to configure Libero mail on Android