What is a Wi-Fi repeater
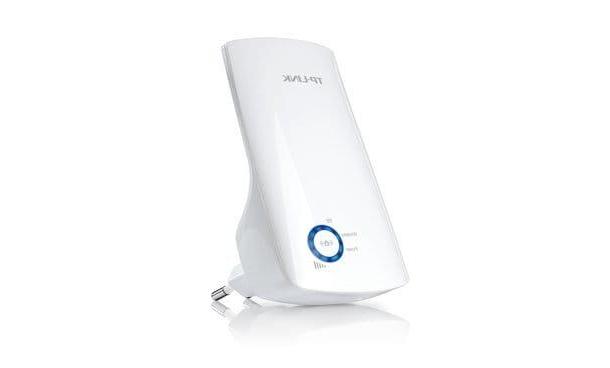
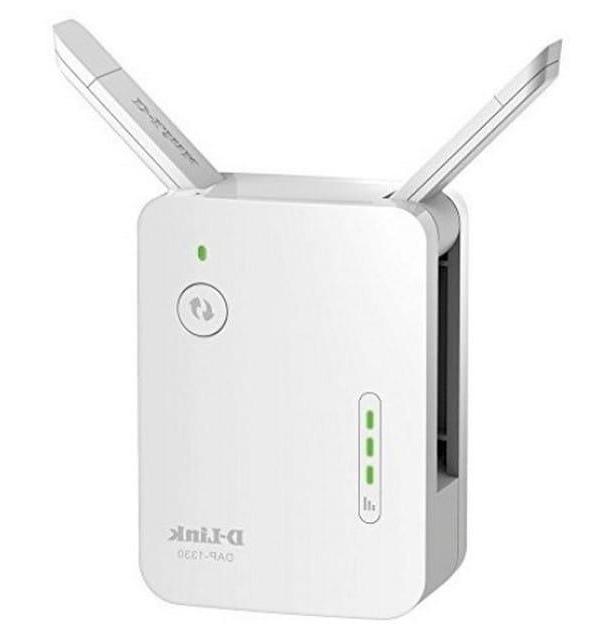
Before proceeding, it is a good idea to further clarify your ideas on how a Wi-Fi repeater. A Wi-Fi repeater is a small wireless device, which can be connected to an electrical outlet, capable of “hooking up” to the wireless network generated by the router and in turn creating a new one.
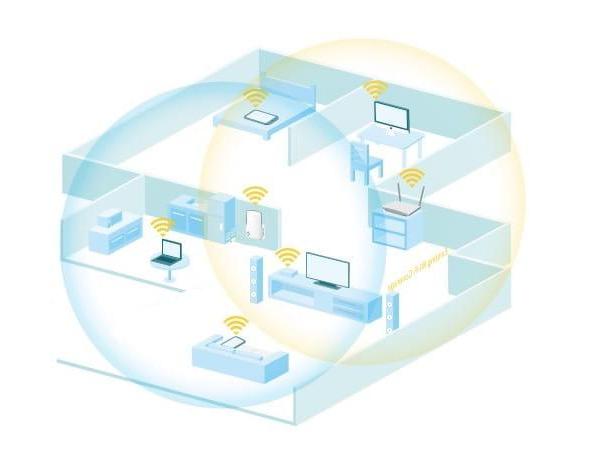
This network, in fact, acts as an "extension" of the network created by the antennas of the main router, thus covering a much wider area than the original one: to do this, the repeater uses the antennas it has available to receive and re-transmit the signal, thus acting as a sort of "bridge" between the devices connected to it and the router.
Technically, the repeater is managed by the modem / router as if it were any connected device (thus obtaining an IP address, just like all the other devices), but the subnet created by the extender will be able to manage additional devices, creating a configuration technically defined as "cascade": if you remember well, I also talked about it in my article on how to connect two Wi-Fi routers to the same ADSL line.
The characteristics of Wi-Fi repeaters differ from model to model: there are extenders with a more or less wide range of action, capable of supporting only the 2.4 GHz band or also combining the 5 GHz band, with or without USB connectivity / audio jack and so on. I have given you an accurate overview of the specific technical characteristics of these devices in my in-depth study on how Wi-Fi repeaters work.
From the point of view of performance, the speed offered by a Wi-Fi repeater mainly depends on its position: the closer the original signal of the modem / router is and without interference, the better the quality of the signal generated by the extender, the greater the performance of the devices connected to it.
In very simple words, by connecting a Wi-Fi repeater in an area where the original router has a weak signal, the browsing speed achieved by the devices connected to the extender will not be exciting, despite the repeater offering its full signal (this happens because the original signal is not of such intensity that it can be replicated without further loss).
On the contrary, strategically placing the extender where the original router signal just starts to lose strength (for example, when it “takes” 3 or 4 out of 5 notches), coverage is effectively extended, maintaining performance approximately equal to approximately 70-80% of the original network maximum transmission speed. By doing so, network coverage can be guaranteed even in those points where the router is unable to do its duty.
If you are reading this guide for preventive purposes and you are still undecided on which extender model to buy, do not hesitate any longer and take a look at my guide to the best Wi-Fi repeaters: I am absolutely sure that you will find what best suits your needs.
There are also commercially available gods mesh systems (Eg. Netgear Orbi o Google WiFi) which are composed of a router and satellites, which act as "repeaters". With mesh systems it is possible to have a single network, with the same SSID and the same access key, in which there is no hierarchical order among the various nodes of the network: this ensures greater performance than classic Wi-Fi repeaters and avoids the problem of disconnections. I told you about these systems in more detail in my buying guide dedicated to routers, while today I will focus on traditional Wi-Fi repeaters.
How to set up a WiFi repeater

Now that you have fully understood the functioning of a Wi-Fi repeater and you have understood where to place it, it is time to understand how to correctly configure it. Before starting, I want to clarify a fundamental point: there are many devices of this type on the market, from different manufacturers, with interfaces and procedures that may seem very complicated at first glance.
In reality, the basic scheme for connecting a Wi-Fi repeater is very simple and is applicable to any device - you just need to know where to put your hands! Unfortunately, in this case, I cannot provide you with precise instructions for all the extender models on the market: as I have already told you, however, it is sufficient to understand the steps to be taken to be able to replicate the procedure on all interfaces (which, in many cases , differ from each other in a few respects). For your information, I will refer to the Wi-Fi range extender in this guide TP-LINK TL-WA855RE.
Initial configuration
The first step to take is definitely to connect the repeater you have chosen to the main Wi-Fi network, after having carefully chosen its position based on the criteria I explained earlier. Once the location is established, plug the extender into the power outlet and wait a couple of minutes for it to fully boot up.
At this point, you can proceed by taking two different paths: the first is to connect via a button WPS, the second is to proceed "manually" after accessing therepeater configuration interface.
Use the WPS button
Almost all Wi-Fi repeaters on the market offer the possibility to quickly connect to the main network through the button WPS (or wireless protected setup): by doing so, there is no need to enter the configuration panel, since, thanks to this technology, the repeater is able to automatically create and configure the extended network, receiving the necessary information directly from the router .
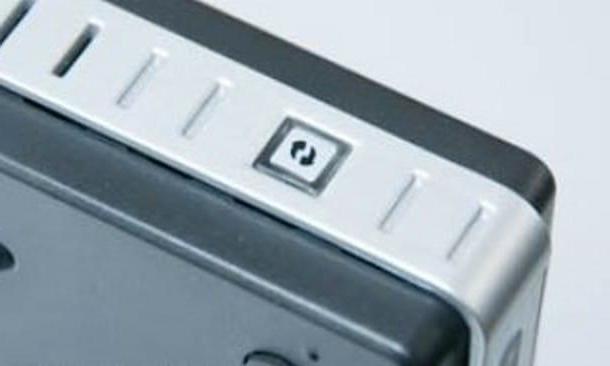
To do this, first locate the button on your main router WPS (which should show up with the WPS wording or be marked with two circular arrows) and hold it down for at least two seconds.
At this point, the router's WPS LED should start flashing, indicating that it is ready to perform pairing procedures: all you have to do now is press the button WPS located on the repeater and wait for the router LED to first become solid, and then turn off completely. If all goes well, the repeater automatically connects to the main network, configure the name of the extended network by adding the suffix _EXT to the name of the latter (eg. NetOfHome_EXT) and uses the same passkey configured on the original router.
If the pairing via WPS is not successful, you can temporarily move the extender closer to the main router and repeat the procedure, and then return it to the position you had chosen once everything is complete. If even in this way you are not able to complete the configuration, I suggest you refer to the "manual" configuration procedure illustrated below.
Use the configuration panel
If you are unable or unwilling to take advantage of the WPS functionality, you can configure the repeater using any computer with Wi-Fi or an Ethernet port. Many repeaters have one at the first start free wireless network to connect to to carry out the first configuration: you can recognize it immediately, since the name of the aforementioned network coincides with the model of the chosen device. If the network is not present, you can connect the repeater to the PC via an Ethernet cable and, once the procedure is complete, you can disconnect it to position it where you like best.
In any case, whatever method you have chosen for the connection, start the browser that best suits you and type in the address bar theIP of the repeater, which you can find specified on its back or in the user manual. In general, you can try one of the following addresses.
- 192.168.0.1
- 192.168.0.254
- 192.168.1.1
- 192.168.1.254
Once you have identified the right IP, you should see the login screen for the configuration panel: normally, the first time, it is sufficient to use the word admin both as username and password, however I advise you to check the default credentials of your device in the manual of your device.
Once in the configuration panel of the router, I recommend that you look for the button Quick Setup (o Wizard, o Guided Procedure o Quick settings), so you can define the first settings very quickly, with a foolproof wizard.
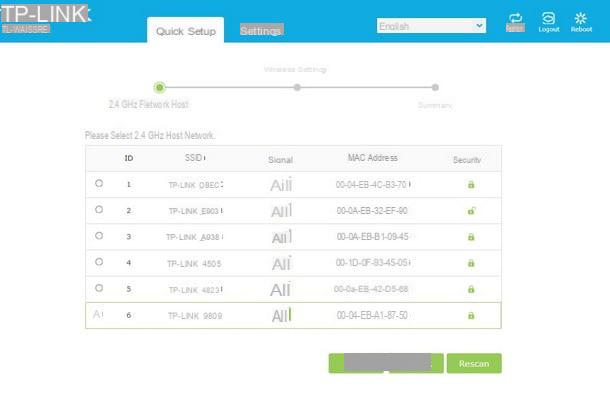
Once the Quick Setup is started, the repeater will automatically start searching for the detectable Wi-Fi networks nearby: identify the one generated by your router, click on it and, on the next screen, enter the network key necessary and presses the button Next / Next I will continue.
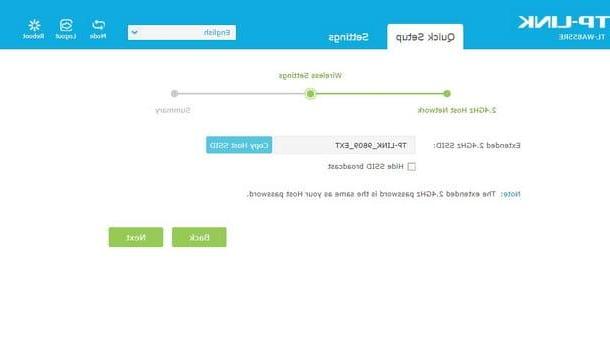
Subsequently, the repeater will give you the name of the extended network (which, as I have already told you, is composed of the name of the main network followed by the suffix EXT) and will notify you that the password of the extended network is identical to that of the main network: if you wish, at this stage you can change both the password (not all repeaters allow it) and the name of the extended network, remembering however that the latter it does not have to be identical to that of the original network.
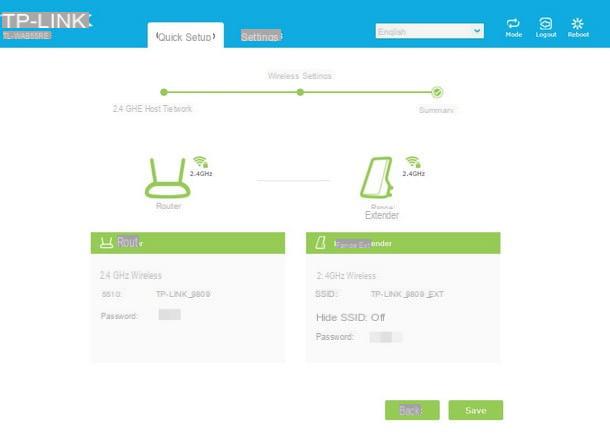
Once you have completed the changes, click on the button Next / Next to access the summary screen of the defined settings; if the result is to your liking, you just have to save everything by pressing the button Save / Save and that's it: your Wi-Fi repeater is operational!
Connect devices to the Wi-Fi repeater
Now that the repeater is correctly configured, you can connect all the devices you want to it without any "strange" operation whatsoever, acting exactly as you would for a normal Wi-Fi network.
So, to proceed, access the area dedicated to wireless connections of your device, select the Wi-Fi network created by the repeater (eg CasaMia_EXT) and enter the access password to finalize everything (if it has not been changed manually, this coincides with the network key used in the "main ").
Alternatively, if you use Windows o Android, you can also take advantage of the WPS button of the repeater, so as to avoid entering the password manually, using the same technology I told you about previously: then press the aforementioned button and, depending on the operating system to be connected, proceed using one of the following two methods.
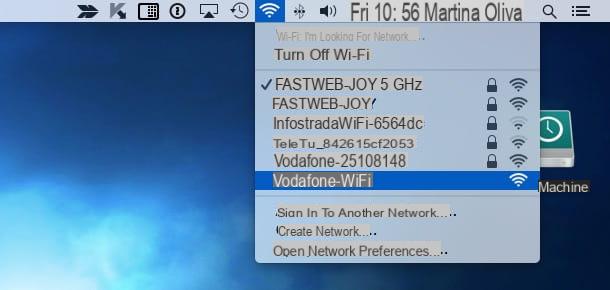
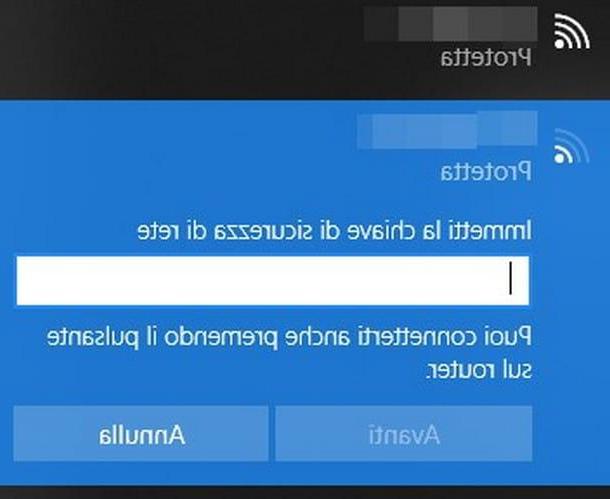
- Windows - click on the network icon located at the bottom right (in the shape of where or computer), presses on the name of the network created by the extender and wait a few seconds after opening the field Password: the connection is made automatically.
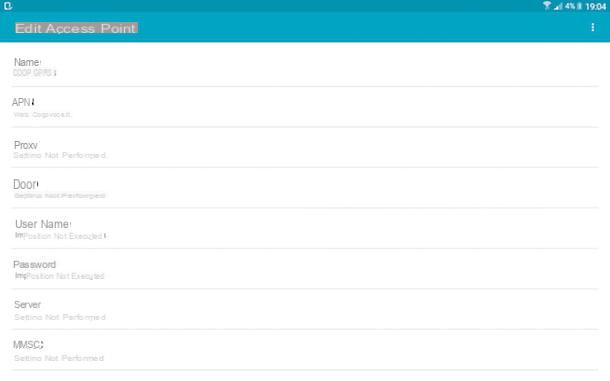
- Android - start the Settings of the operating system, presses on the voice Wireless / Wi-Fi and recati nella sezione Advanced Settings usually located at the bottom of the proposed screen. At this point, press the button connect WPS and wait a few seconds for the connection to be successful.
For security and corporate policy reasons, macOS and iOS do not offer support for WPS technology.
Additional configuration options
The ones I've shown you so far are all the useful steps for configure WiFi repeater extremely quickly, so you can use it in a matter of minutes. In the following sections, however, I will show you how to intervene also on some advanced settings located in the configuration panel, so that you can adapt the network to your needs and modify, if necessary, the parameters set initially. The first move you need to do, in this sense, is to access the repeater panel: I explained how to do it in the initial configuration section.
Change the name of the extended network
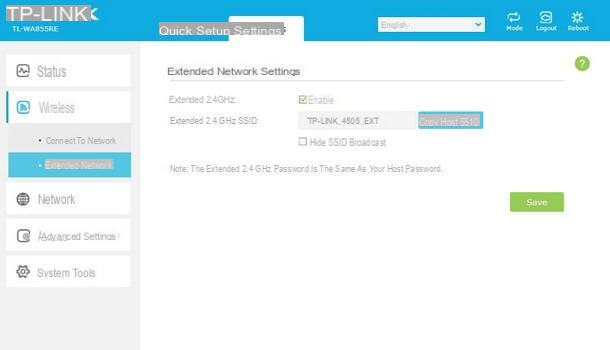
If you intend to change the name (in jargon SSID) of the extended network, i.e. the one created by the repeater, all you have to do is access the appropriate section, type in the new name and save the settings.
To do this, click on the menu wireless placed in the navigation menu, then presses on the item Extended Network / Extended Network and enter the new name that you intend to score to the latter, always keeping in mind of do not use the same name as the main network. If your repeater supports the dual-band, you can change both the 2.4 GHz network name and the 5 GHz network name at the same time, but remember not to use identical SSIDs.
Some models of Wi-Fi repeaters also allow you to change the password for accessing the extended network, so as to make it different from that of the original router: all you have to do is type it in the appropriate box, if available.
Once you have made the desired changes, press the button Save resident at the bottom of the page and wait a few seconds for the "old extended network" to disappear, to make room for the new one.
Change main Wi-Fi connection
If you have changed your home router and have already configured it for wireless connectivity, you can make the repeater "forget" the old network it was connected to and extend the signal of the new one.
In this sense, you can proceed in two different ways: the first is to repeat the initial configuration procedure that I showed you in the previous sections of this guide, the second, instead, is to take advantage of the manual configuration panel of the router.
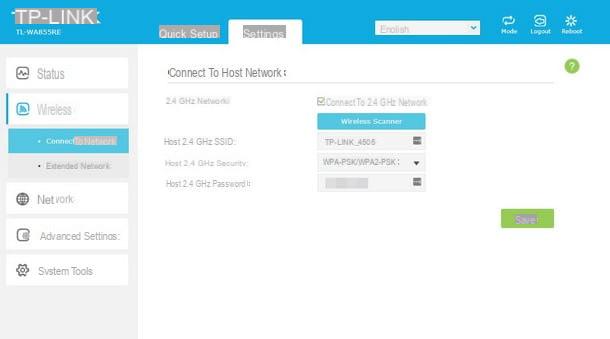
To proceed, access the latter, click on the item wireless and then presses on the option Connect to Network / Connect to a network. At this point, press the button Wireless scanner / Search for networks to detect the available Wi-Fi connections, press the name of the one you want to expand and, when prompted, type in its access key and click on the button Save: after a few seconds, the repeater should connect to the network in question, also automatically modifying the name of the extended network and the relative access key, so as to make them coincide with those just configured.
Change the login password

To prevent someone from changing the repeater settings without permission, I recommend that you change the password to access the configuration panel, in order to gain greater control and security.
To do this, access the panel in question with the old password (usually admin) as I indicated in the previous sections, click on the menu System tools (o System tools) and then presses on the voice Admin Account.
At this point, type the old username and the old password in the required fields, repeat the operation with the new password and, for simplicity, confirm admin as username. When done, click Save to save the settings and exit the configuration panel: to access it again, you will need to use the credentials you just set.
Reset the Wi-Fi repeater
If the repeater suddenly stops working properly (e.g. if the network disappears or the connection is absent), you may try to restart it to bring the situation back to normal. You can do this by pressing the button reboot placed on top of the management panel (if you can access it), or by physically removing the repeater from the power plug and inserting it again after at least 3 seconds.
If this method does not correct its functioning, then it may be necessary to restore it to the factory settings, but losing all the configuration options saved from the beginning: I advise you to repeat the initial settings from the beginning and not to use the integrated backup function, as the error could also be due to an incorrect setting.
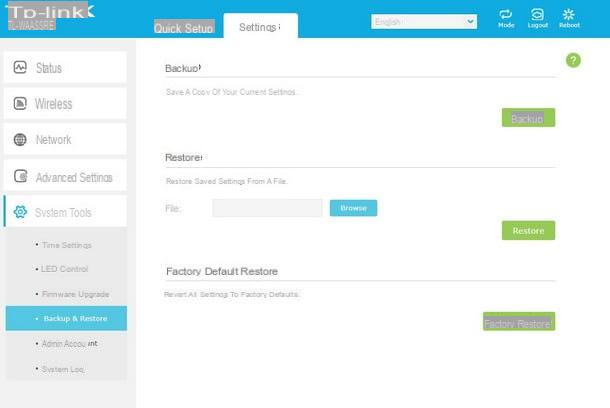
To proceed, go to the configuration panel (if you can access it), click on the menu System Tools, still presses on the voice Backup & Restore and finalize the operation by pressing the button Factory Restore: at this point, wait a few minutes, still keeping the repeater connected to the power supply, and do not unplug it until it starts flashing again, a sign that the reset has been successful and the extender is ready to be set up again.
If the configuration panel is not accessible or is locked, you can always reset the Wi-Fi repeater using the appropriate button Reset present on it: get a needle or a toothpick (in general, a very thin body), identify the "internal" button with the inscription RESET and, with the repeater on, press it gently and keep it pressed for at least 15 seconds. After a few minutes, the repeater is reset to the factory state.
How to configure WiFi repeater