Create a Facebook group

Do you want create a group on Facebook but, not having much familiarity with the social network founded by Mark Zuckerberg, you don't have the faintest idea how to proceed? No fear! Just follow the steps below to complete the feat.
PC
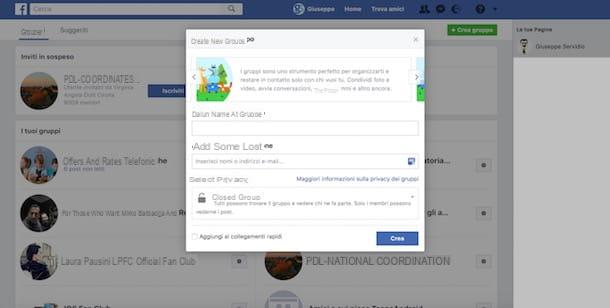
To create a Facebook group from PC, connected from the browser to this page of the social network (naturally after having already logged into your account) and click on the green button Create group which is located at the top right.
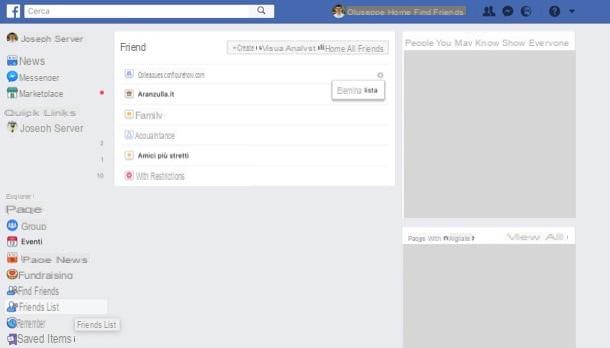
In the box that opens, type the name you want to assign to the group in the text field placed under the entry Name the group, select the users you want to include in the latter by typing their names or their e-mail addresses in the text field placed under the heading Add some people and then select one of the available privacy settings to decide who will be able to view the posted content: Public group, to allow all Facebook users to view the group and the contents posted in it; Closed group, to allow everyone to find the group and see its members, but without being able to view its posts or Secret group, to allow only group members to find it and view its posts.
After choosing the name of the group, the members who will be part of it and the privacy settings, click on the blue button Crea, select an icon that identifies the latter (e.g. the basketball icon, if your new group is dedicated to the world of basketball or the camera icon, if your group talks about photography) and click the blue button OK. If you wish, you can also skip this step by clicking on the entry Salta.
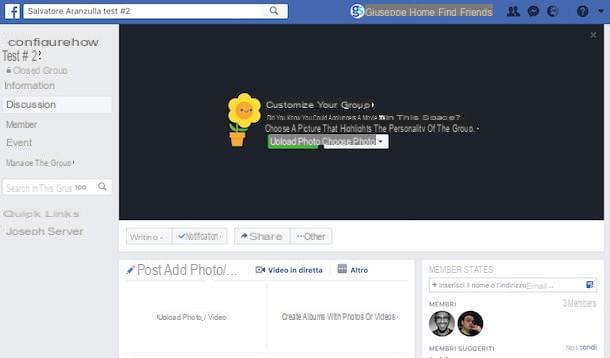
At the end of the procedure, you will be redirected to the main page of your group, which you can customize by inserting a cover image. To do this, click on the green button Upload photos and upload an image saved on your PC, or click on the button Choose photos to use an image that you have already uploaded to your Facebook profile.
To interact with friends who are part of the group, click on the item Post to write a new post, click on the entry Add photos / videos to insert multimedia or voice content Live video to start a live broadcast with other group members.
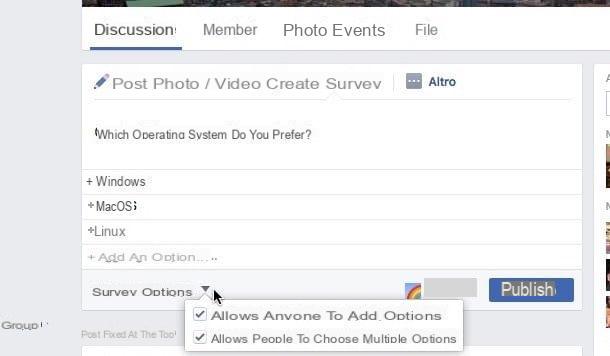
After creating the group, click on the options that are located immediately below the name of the group (top left): Information, to add a description to the group; Discussion, to share content with other members; Members, to view the members who are part of the group and to change their roles; Events, to create an event on the group or Manage the group, to create scheduled posts, accept subscription requests, view the activity of administrators and so on.
To change other settings regarding the new Facebook group you created, click the button Other (after clicking on the option Discussion) and, in the menu that appears, click on one of the options you see: Add members, to add new members to the group or Change group settings, to change its name, select the type of group (i.e. the category relating to the topic dealt with in it), link a page to it, select who can publish a post and so on.
Please note: if you decide to delete the Facebook group you created, you will first have to remove all the participants and then leave and delete the group. If you want more details on how to delete a group on Facebook, read the tutorial I dedicated to the topic.
Android
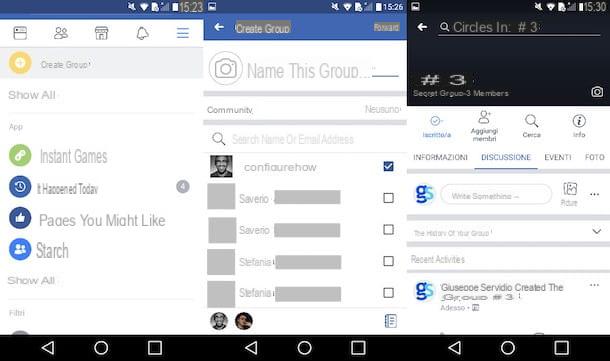
To create a Facebook group from your device Android, first start the official social network app on your smartphone or tablet and log in to your account (if required). Then tap on the symbol (≡) located at the top right, press the button Create group (located under the heading Groups), type the group name in the text field Name this group ... and, if you wish, press the symbol of camera to take or add a photo.
Then add the members to be included in the group by selecting them from the menu located at the bottom of the screen and press the button NEXT. At this point, select the privacy settings by ticking one of the available options: Public, to create a public group and then allow anyone to view its posts and members who are part of it; Closed, to hide the posts published on the group from those who are not members or Private, to make the group "invisible" to those who are not part of it. After indicating the privacy options you prefer the most, press on the item Crea. Et-voila! You have just created your Facebook group!
Even on Android you can add new members, change the group info, create events, post photos, files and so on using the appropriate commands that you find immediately under the name that identifies the group.
Please note: if for one reason or another you decide to delete the Facebook group you created earlier, you must first remove the participants and then leave the group yourself, as I have already explained to you in the guide in which I show in detail how to delete a group on Facebook.
iOS
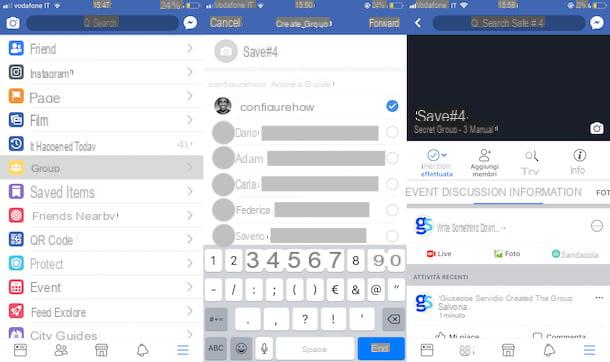
To create a Facebook group from your device iOS, start the Facebook application, log in to your account (if necessary), press the symbol (≡) located at the bottom right and then tap on the item Groups. In the screen that opens, tap on the symbol capacitor positive (+) lead located at the top right, type the group name in the text field Name this group ... and, if you wish, press the symbol of camera to take or add a photo to use as a group cover.
Now, choose the members to add to the group by selecting them from the menu located at the bottom and press the button NEXT. Then select the privacy settings by checking one of the available options: Public, to create a public group; Closed, to hide the posts published on the group from those who are not part of it or Private, to not allow those who are not members of the group to find it, nor to view its posts. Finally, press on the voice Crea to complete the group creation procedure.
Now you can finally customize your new group, add new members, modify its info, post photos and so on using the buttons that you find immediately under the name and photo of the group itself.
Please note: if you want to delete the Facebook group you created earlier, you must first remove all its members and then you must leave the group yourself, as I have already explained to you in the post in which I explain in detail how to delete a group on Facebook.
Create a group chat on Facebook

If your intention is simply to converse with other Facebook users, you probably don't need to create real Facebook groups, but it can be enough to create simple group chat using the special function included in Messenger.
- To create a group chat on PC, log into your Facebook account from your browser, click onmessenger icon (the symbol of cartoon with lightning located at the top), click on the item New group, type the name of the group chat in the text field Name the group, select the users to add to the chat and click the blue button Crea.
- To create a group chat on smartphones and tablets, instead, start the Messenger app on your device, press on the voice Groups, tap on the item New group (your Android) or Crea (on iOS) and, finally, presses on the symbol of arrow (on Android) or on the voice Create group (on iOS) to complete the operation.