Preliminary information

Before taking action, it is good that you acquire some concepts and some knowledge that you need to perfectly understand the instructions I am about to give you.
Until a few years ago, creating a home network could be a really difficult task: it was in fact necessary to make the physical and direct connection between two or more computers, if necessary using auxiliary devices such as hub o Switch (if there are more than two computers), and to carry out more or less complex configurations on each of the machines to be involved in the network.
Thanks to the advent of router (those we use today to connect to the Internet with ADSL or optical fiber, so to speak), all this is no longer necessary: a router, in fact, is a device that, by definition, connects several computers and is able to sort automatically the data from one part to the other, thanks to the sophisticated mechanisms present within it.
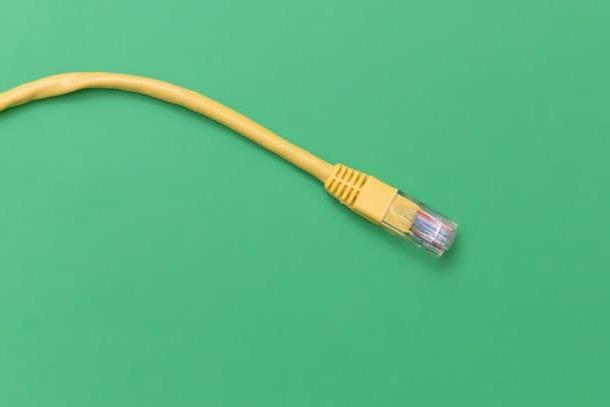
In fact, it is router a create a home network between the connected devices: consequently, to succeed in your intent, it is sufficient that all the computers you intend to involve in the sharing are connected to the same router, by means of Ethernet cable or via the connection Wi-Fi that you are now used to using. Make sure, before proceeding, that this condition is fully satisfied.
Once this is done, your only task will be to intervene on the various operating systems, so as to precisely configure the participating computers and allow them to "see" each other: do not be afraid, as I have already told you, very simple operations and within everyone's reach!
Before continuing, I want to clarify that the networks created in this guide use the SMB protocol as a matter of compatibility, as all major PC operating systems - Windows, MacOS e Linux (the latter via the open source implementation Samba) - they support it: consequently, you will have the possibility to create “mixed” networks, made up of computers with different operating systems.
Create a home network with Windows

Let's start our guide to connecting multiple computers to a network from the operating system Windows, which offers two different options for action: the first concerns the "mixed" sharing, that is the one that allows you to use the home network to share files and folders even with computers equipped with other operating systems, thanks to the network protocol SMB I told you about earlier. The second, however, provides for the involvement of the Home Group, a Windows feature that allows you to easily create file shares between multiple computers equipped with the same operating system.
The HomeGroup, which is certainly easier to create than the "mixed" network, has several limitations: all the computers involved must be equipped with Windows (other operating systems are not able to see the shares created in this way) and, Also, you can't create a Homegroup if you have Windows 7 Starter, Windows 7 Home Basic e Windows RT 8.1 (while it is possible to participate in one of them that already exists).
Below, I explain the steps necessary to proceed in both cases: remember to carefully evaluate the solution that best suits your needs, bearing in mind what has been explained above.
Mixed network
Configure Windows for one mixed network share, which can also include computers with other operating systems, is not complicated: you simply have to tell Windows that you are visible on the network and activate the sharing of files and folders that you intend to show to other devices.
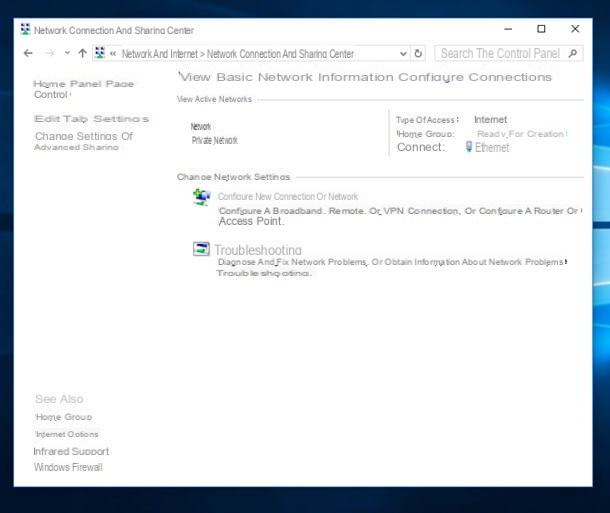
To begin with, connect your computer to the network containing the other devices to share files with, start the Control Panel recalling it from Start menu or from Start Screen (you can access it by clicking on the button in the shape of pennant located in the lower left corner of the screen), then click on the items Rete and Internet e Network and Sharing Center. In Windows 10, you can find the Control Panel inside the folder Windows system of the aforementioned Start menu.
Once in the right section, select the item Modify impostazioni di condivisione Avanzate resident in the left part of the window, click on the freccetta verse il basso at the section Private and check the items Enable network discovery, Activate the automatic configuration of the device connessi alla rete e Enable file and printer sharing.
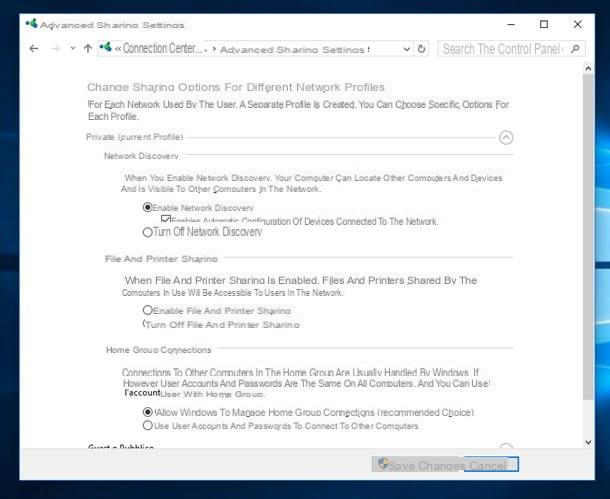
Once this is done, click on the down arrow next to the item networks, and check the boxes Use the 128 bit crittography to protect you from the file condivisione e Disable password protected sharingDopodiché by clicking on the button Save Changes placed at the bottom.
After completing this procedure, if you are using a Wi-Fi network, make sure it is set as private network (This step is not necessary if you are using an Ethernet connection, which is set by definition as a private network). To do this, you can follow the instructions I give you below.
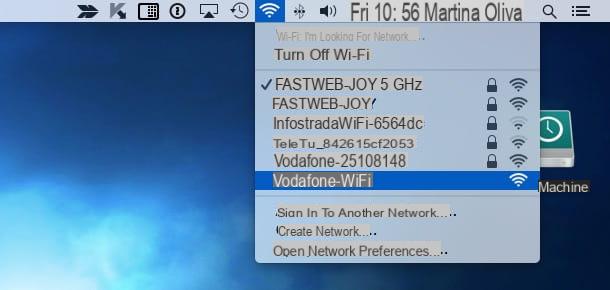
- Windows 10 - click onnetwork icon located at the bottom right, select the WIFI network to which you are connected and presses on the voice Property. Within the proposed panel, put the check mark on the box Private next to the box Network profile.
- Windows 7 e 8.1 - avvia il network and sharing center as shown above, identify the name of the network you are connected to in the box Active networksclick sulla voce Public network located immediately below, then select the option Rete domestica / Rete privata from the proposed panel and click on the button Close. This step is not necessary if the entry already exists at the connection Rete domestica / Rete privata.
Once this is done, all you have to do is proceed to share the files, as I will explain shortly.
Home Group
As I have already mentioned to you earlier, create a home network relying on the Home Group of Windows is really very simple: the creation of the group is carried out from the first computer to be connected to the network, while all the others will be able to access it by carrying out a series of precise steps.
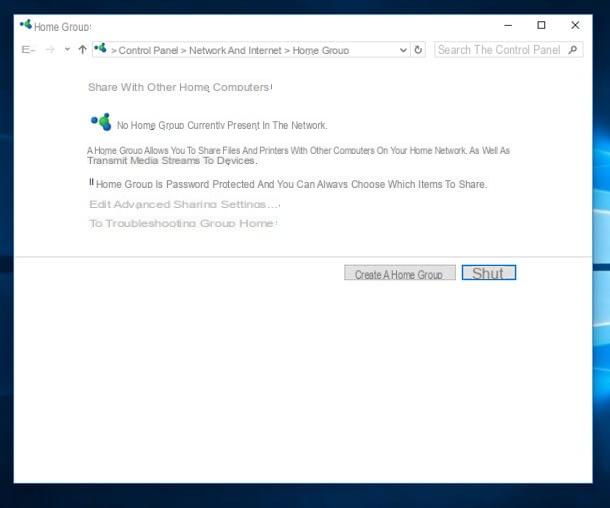
Having made this necessary premise, it's time to take action: to create the HomeGroup on the first computer, start the Control Panel from within the Start menu / Start Screen, presses on the voice Rete and Internet in the proposed window, then click on the item Home Group and then press the button Create a homegroup.
In the configuration window shown, first click on the button NEXT, choose which are the collected to share with other computers (Images, Video, Music, Documents e Printers and devices) using the various drop-down menus proposed, click on the button again NEXT, after that write down the password shown in the central box (taking care to distinguish capital letters from lowercase letters) and presses the button end: the Home Group is ready!

Once the group has been created, you can add as many computers as you wish using the password generated above: always remember that all the devices involved in the group must be connected to the same network.
So, to add a computer to the Homegroup, go to the device involved and enter the section Home Group, via the control panel, as I showed you earlier. Click without hesitation on the button Participate now, then on the button NEXT, select the collections to share using the drop-down menus, click the button again NEXT, type the Password previously obtained in the appropriate field, press the button NEXT and then end: The computer has been added to the Homegroup!

You can manage the shares of the Homegroup collections through the appropriate section of the Control Panel; Furthermore, using the available options, you can leave a Homegroup (the group is deleted when the last computer is excluded).
Share files and folders on the network
Once Windows is prepared for the use of a network, you can proceed to exchange data by simply creating shared folders and moving the files to be shared within them.
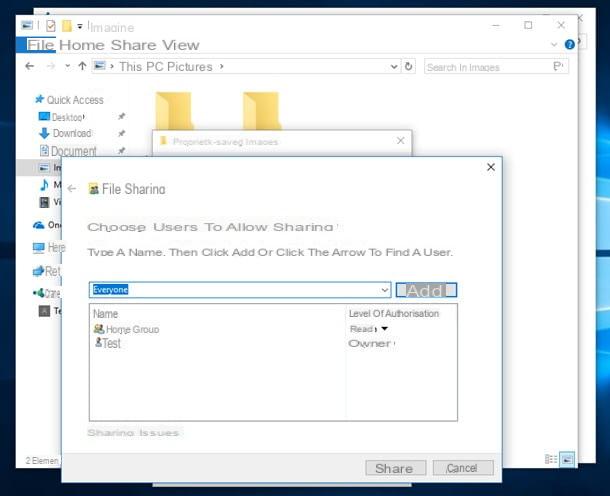
With regard to mixed networks, proceed like this: do click destroy on the folder you want to share, select the item Property from the context menu and go to the tab sharing, placed at the top. At this point, press the button Share… to access the access assignment panel, press the freccetta verse il basso located next to the text box at the top, select the item Everyone e pulsing sul pulsating Add.
By default, computers on the network will only have permission to visualize the files contained in the folder and will not be able to modify or delete them: in other words, the folder is shared in single letter. To activate the write permissions, presses on the item Reading next to the wording Everyone and select the item Lettura / scrittura from the small menu proposed. Once you have set the sharing options you want, press the buttons Share e Close and, if necessary, copy the files you want to share into the folder.
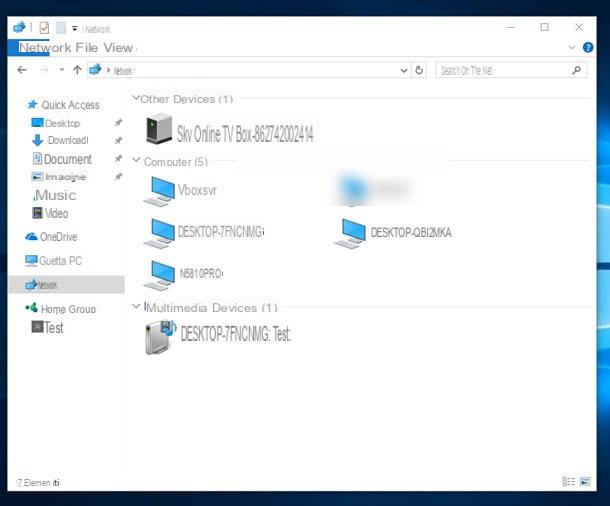
From now on, you can view the shared folder on all computers on the network: open a File Explorer (the yellow folder icon located in the system tray), click on the item Network present in the left panel and do Double-click on the name of the computer that contains the folder whose files you are interested in viewing. With the same steps, you can access shared folders from all the other computers that make up your home network.
As regards the Home GroupInstead, you can access the files shared by the participating computers using the appropriate voice Home Group located on the left side of File Explorer: if you wish, you can share other folders with the entire group, following the procedure I reported to you earlier and taking care to replace the "user" Everyone us Home Group within the access assignment panel.
Create a home network with macOS
As I mentioned to you at the beginning of the article, MacOS natively supports file sharing via SMB- Consequently, you don't need to install additional programs to enable file sharing, you just need to set up your Mac the right way.
Share files and folders on the network
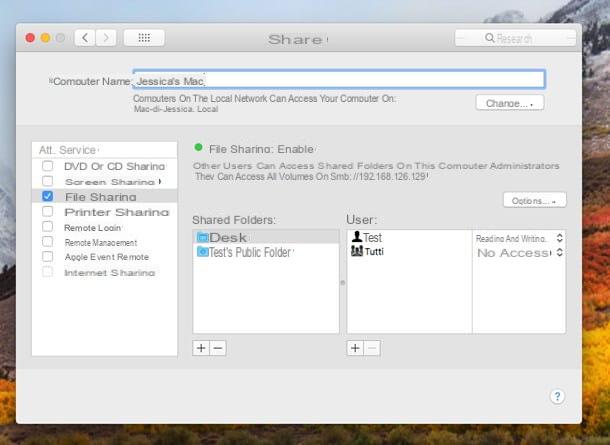
To start, connect your Mac to the same network (Wi-Fi or Ethernet) that the other computers are connected to, click on the icon System preference located in the Dock, select the icon sharing from the window that opens and check the box next to the item File sharing.
At this point, to share the folders and files inside them, press the button capacitor positive (+) lead placed under the box Shared folders, select the folder to share and press the button Add. Once this is done, click on the folder you just added, then on two arrows next to the wording No access, located in correspondence of the entry All, and select the permissions that network users will have on the folder: you can decide to share it in single letter or reading and writing, depending on your preferences.
Finally, press the button options and make sure there is a check mark next to the item Condividi file e cartelle via SMB, then put the check mark next to you don't know, set a Password For access to the file, process the click and click on the button end- You will need to enter the password when attempting to access shared files this way from another computer on the network.
To view files shared on the network, all you have to do is open the Finder and double-click the icon for the computer which contains the material you are interested in, present in the box Shared (in the left part of the window). If necessary, once the computer has been selected, press the button Connect as... resident at the top right, to enter the access credentials.
Create a home network with Linux

Although it may seem strange to you, the most recent Linux distributions have made it super easy to create a home network: the instructions I give you refer to the operating system Ubuntu 17.10, however, you can also use them without problems on other distributions in your possession.
First, launch the terminal recalling it from Activity view or from the program list of your distribution and install the package Samba: to do this, type the command sudo apt install samba e premium pulsating Submit, then enter yours Password and press the button twice more Submit.
Once the procedure is complete, check that the Samba installation was successful: start the browser Firefox, type the text in the address bar at the top smb: // localhost / e premium pulsating Submit. If a page appears containing a box with the wording Index of smb: // localhost, then the procedure was successful and you can go directly to the sharing operation.
Share files and folders on the network
Once the installation and configuration of Samba is complete, the time has come to share the folders on the network: as I have already mentioned, it all comes down to a few simple steps!
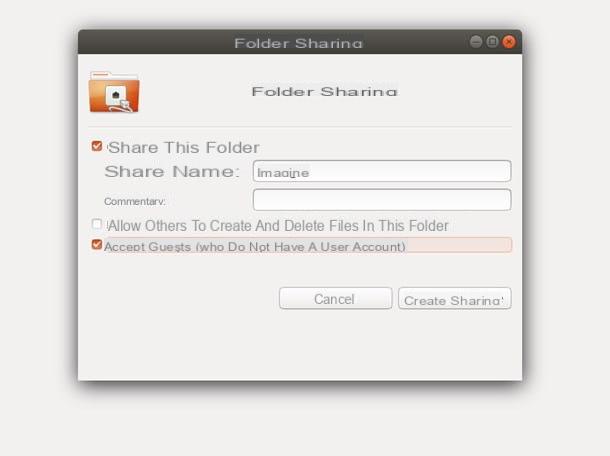
To proceed, do click destroy on the folder you want to share and select the item Local network sharing from the context menu. Finally, check the box Share this folder and, if you want to not be prompted for the Linux username and password when logging in, check the box Accept guests.
To allow changes to the folder by other network users, do the same for the entry Allow others to create and delete files in this folder: completed the necessary changes, press the button Create share to share the folder right away.
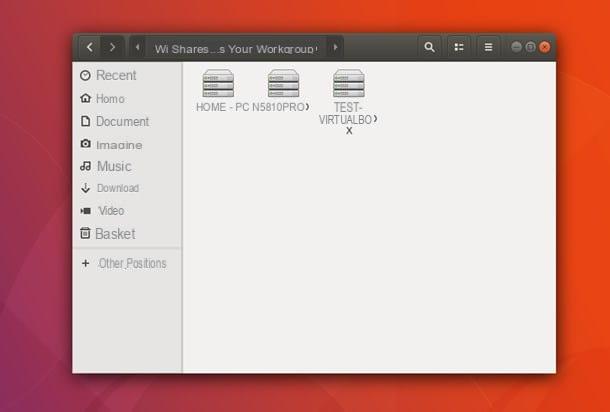
Accessing shared resources on the network, from Ubuntu, is extremely simple: just start the application Filletclick sulla voce Other locations located in the left pane, then on the icons Windows network e Workgroup and, finally, on the name of the computer on which the files you are interested in viewing are saved. It wasn't difficult, was it?
Wait, are you telling me that you really need to create a network "the old way", therefore between just two computers and without connecting through a router, so the instructions I have given you so far are not for you? Don't worry, I think I have what is right for you: I recommend that you rely on my instructions on how to connect two PCs via cross cable (o crossed cable).
How to create a home network