Create a landing page with MailChimp
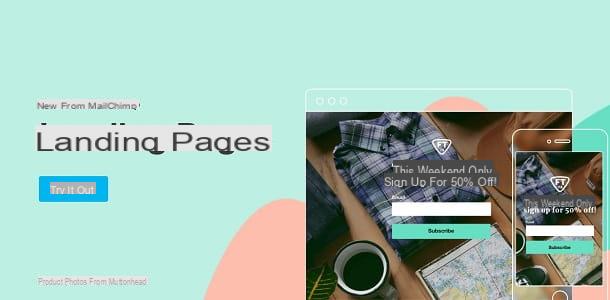
If you need to create a landing page, or a "landing" page that helps you to increase your contact list or to promote the products and services you sell, you can use the free tool made available by the website MailChimp , a famous and advanced email marketing platform that also offers the possibility of creating a landing page for free.
Mailchimp can be used at no cost for the purpose of this tutorial but, optionally, there is the possibility of subscribing to subscription plans with prices starting from 10 $ / month.
To start creating a landing page through MailChimp, connect to the official website of this service, by clicking on the link provided, and you will be sent directly to the section dedicated to the creation of a landing page.
In the screen you see, click on the button Try it out, then log in to the site using your credentials (if you have them) and click on the button Login. If, on the other hand, you still need to create an account, click the link Create an account you see on the screen.
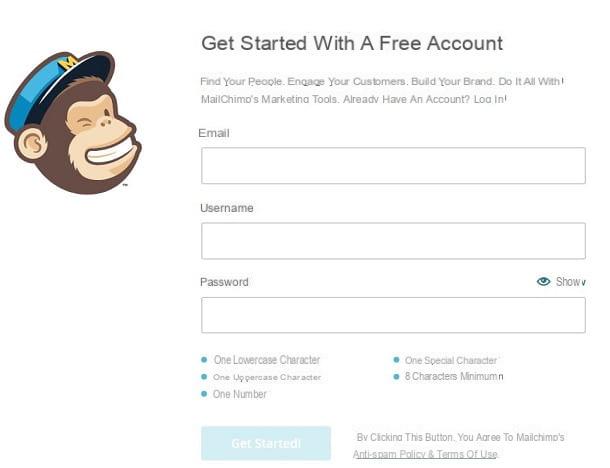
To carry out this procedure, first indicate a email address, an username it's a Password, then click on the item Get Started, confirm the account created by pressing the button Activate Account that you find in the email received at the email address provided and, finally, confirm your identity by pressing the button I'm not a robot you see on the screen.
To complete the account creation process, you must also provide some information about yourself and your company. Then fill in all the following text fields, such as for example First name (first name), Last Name (last name), What's the name of your business (your company name) What's your website (the URL of your website) by clicking on the button Continue for each screen displayed relating to the indication of all the information of your profile.
Once you have finished creating your account, you can optionally skip the initial MailChimp tutorial by clicking on the button Not right now, and then click Let's go to immediately go to the practical part and then to the creation of a landing page.
In the Mailchimp home screen that you now see, you can create a landing page from scratch in a fairly simple way; to do so, click on the button Create located at the top, in the menu bar and presses the button Landing page which you can see in the left sidebar, within the new screen displayed.

Now, choose whether to click on the tab Signup landing page or on the one named Product landing page, depending on the goal you intend to achieve: in the first case, for example, obtaining email addresses in exchange for a free download; in the second case you will instead create a landing page to present a product (or service) to your customers.
In the following lines, by way of example, I'll explain step by step how to create a landing page by clicking on the tab Signup landing page, in order to create one that allows you to obtain email addresses. To continue, type the name of the landing page to be created in the text field you see on the screen and press the button Begin, to go to the next step.

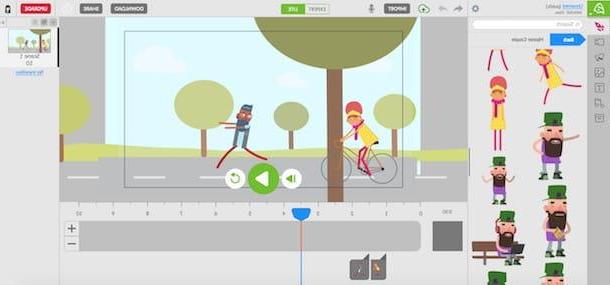
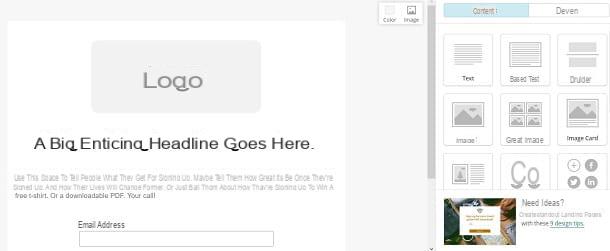
At this point, you have to put your creativity into practice to build the landing page in a personalized way, using the tools in the sections Content e Design. Doing so is not particularly difficult, as you just have to select the various elements available and drag them into the workspace. For example, if you want to add a block with a video inside, drag the box Video located in the tab Content inside the preview page of the landing page you see in the left section and that's it.
As you can see, thanks to this site building tool, each element added to the landing page creation screen is fully customizable. Do you also want to change the style of the created page? No problem: refer to the section Design and the items located within it, such as Home page, Header e Body.
At the end of the creation of the landing page, press the button Save & Close located at the bottom right, fill in the other information required for the publication of the web page (Page Title e URL, or page title e URL), then click the button Publishing. The page you created via MailChimp will be visible at the URL https://mailchi.mp/[xxx]/[xxx].
If you want to learn more about how MailChimp works, in order to also use it for other marketing objectives, such as creating a list of users with consequent sending of newsletters, read my tutorial dedicated to this platform.
Create a landing page with Sendinblue
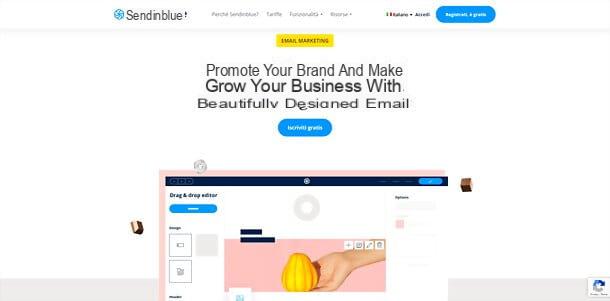
Sendinblue is a very famous email marketing service used daily by 100.000 users in more than 160 countries around the world including marketing professionals, startup, established companies, online stores e NGO.
It allows you to create and manage very effective marketing campaigns, even via SMS and chat, by sending 300 free emails per day. It also allows you to create landing page very attractive, but this function requires the purchase of one of the modular plans of the service: more precisely, you can choose between the plan Lite (from 19 euros / month, for sending 10.000 emails per month without daily ceilings, up to 69 euros / month, for sending 100.000 emails per month) which includes assistance via email in your language and the possibility of unlocking additional functions (eg removal of the Sendinblue logo from messages and A / B tests) and the plan Premium (from 49 euros / month, for sending 20.000 emails per month, up to 499 euros / month, for sending 1 million emails per month without the Sendinblue logo) which includes landing pages, A / B tests, Marketing Automation, Facebook Ads, multi-user access and more. Finally, there is the plan Company with custom email volume, priority sending, 20+ Landing pages, 10+ users, SSO (SAML), Account manager and priority support.
Among the other tools available in Sendinblue, I would like to point out: the CRM (Customer Relationship Management) to manage relationships with customers and future customers, a system of automation of segmentation to send communications addressed to specific audiences, the advanced statistics with geolocation, the transactional emails and retargeting to win back old customers. Full respect for the rules of the GDPR for the processing of personal data and the API and Plugin that allow integration with various products and services, including the main social networks.
To use Sendinblue, connect to the main page of the service and fill in the registration form (alternatively you can click on the button for sign in with Google). Then open theverification email that came to you, press on button to verify your identity and fill out the new form with yours personal data and those of yours company. Once this is done, check the box for accept the General Conditions and the Antispam Policy e check your mobile number, using the special code you receive via SMS.
The Sendinblue dashboard. To import contacts, go to the menu Contacts (above), click the button for import contacts and choose whether to upload a CSV / TXT file or to copy and paste contacts from an Excel file. To create the email campaign, instead, go to the menu Campaigns (always at the top), click on the button for create an email campaign and fill in the fields related to name, object, text preview, e-mail e sender name.
Then choose whether to use thedrag and drop editor (recommended), theadvanced text editor or paste the code HTML of the newsletter e public your newsletter by choosing the list of users and setting day / time of sending.
To create the landing pageFinally, go to the menu + (top), search for the module Landing page, activate it (as already mentioned, the plan is required prefixed to use it) e go to the landing page by pressing on the appropriate item or by selecting the dedicated link from the side menu of the dashboard. For all the details, see my guide on Sendinblue and the official documentation of the service.
Create a landing page with WordPress

If you already own a website created through the use of the popular CMS WordPress, you can take advantage of numerous free or paid tools for the creation of a landing page.
To do this, it is in fact possible to take advantage of plugins that help in the creation of professional landing pages with an attractive graphic style. In this regard, in the next few lines I will talk to you about how to create a landing page with the plugin WordPress Landing Pages, which is completely free.
To use the plugin in question, connected to the administration panel of your website, click on the menu item Plugin located in the left sidebar and then press the button Add new which is visible at the top. At this point, in the search engine named Searching for plugins you see at the top right of the screen, type WordPress Landing Pages; once located, click the button Install now and, at the end of the download and automatic installation, click on activate.

Subsequently, you will be shown the welcome page of the plugin: in order to make the most of all the features of the same, you need a fairly in-depth knowledge of the WordPress CMS. Furthermore, for the creation of the landing page, it would be better to have specific Web marketing skills, in order to be able to build a successful landing page that is able to convert, that is, to reach the goal for which you intend to achieve it.
If you do not have marketing knowledge, but still want to create a landing page, as you have basic needs, before starting, I suggest you take a look at the video Creating Your First Landing Page with WordPress Landing Pages that you find in correspondence of the card Quick Starter guide on the welcome page.
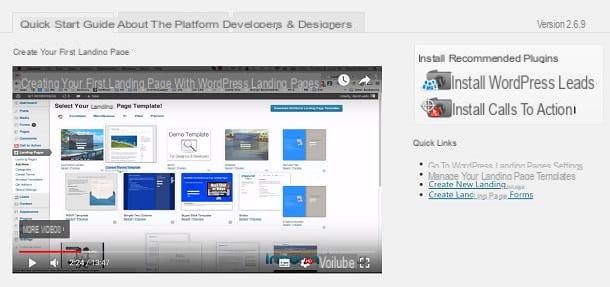
Additionally, WordPress Landing Pages integrates best with complementary tools WordPress Calls to Action e WordPress Leads, advanced plugins that allow you to create A kind request and Lead generation.
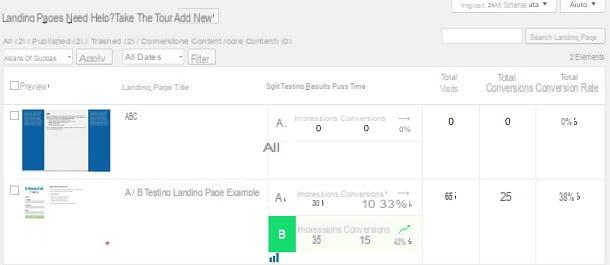
That said, to start building a landing page via WordPress Landing Pages, click on the menu item Landing Page located in the left sidebar, so you can see on the screen a first example of a page that can be created through the use of this plugin.
As I will explain shortly, one of the most useful tools is the possibility of creating A / B Test, so you can try multiple versions of the same landing page and analyze the one that gets the most conversations.
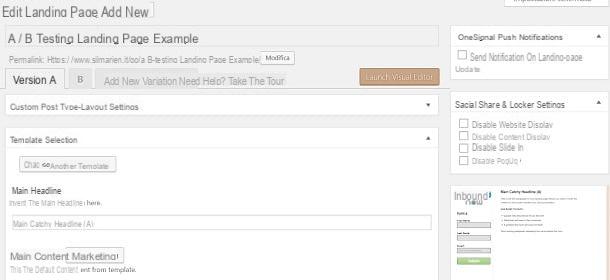
Then start by clicking the button Add new located at the top, choose the landing page template you want to create (for example, I recommend clicking on the button Responsive you see on the screen, in order to create a landing page suitable for viewing on mobile devices) and then, once you have identified the theme, press on the item Select.
In the next screen, give a name to the page to be created using the text field Name Your New Landing Page located at the top, then click on the button Create Landing Page.
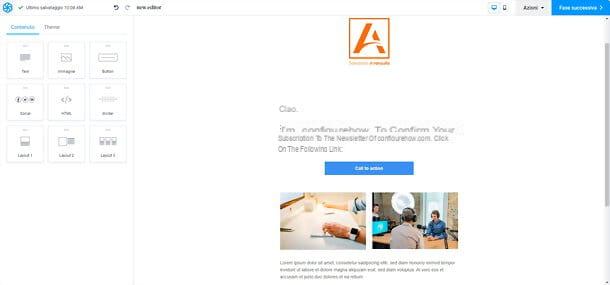
You are almost there: you can finally customize the content of the page. To do this, refer to the editor you see on the screen and fill in all the text fields you want to customize, such as the one relating to the Main Headline (the main title), al Middle Content (the textual content of the landing page) e Conversion Area (section where the A kind request).
If once you have customized the landing page, you want to create an alternative version, in order to make a A / B Test, click here Add new Variant. Once the customization is complete, click on the button Public and then on the button named Launch Visual Editor, to see the final result. Through this screen you can make further changes in real time using the editor tool located in the left column.
If the plugin I recommended doesn't suit you, you can opt for paid professional tools, including Optimize Press (prices starting from $ 97), Lead Pages (prices starting from $ 25 / year), Visual Composer (free with optional subscription starting at $ 59) and ClickFunnels (paid starting at $ 97 / month with free 14-day trial).
How to create a landing page on Facebook

The concept of landing page on Facebook it is a little different from the traditional one; this is because the social network of Mark Zuckeberg provides only some preconfigured tools for the creation of the same.
In any case, creating a landing page on Facebook is possible, as there is the possibility of creating a free "landing page" designed specifically for mobile devices. This is accomplished through a tool called Canvas which does not require special technical skills. This tool is also available for free, as it is enough to act directly from a Facebook page created previously: in the next few lines I will explain how to use it.
To start creating a landing page on Facebook via the tool Canvas, log in to the social network and, in the left sidebar, click on Facebook page name you have administrative permissions. Now, press the button Publishing tools that you can find in the top bar and scroll down the next screen, until you find the item Canvas located at the bottom of the left sidebar. Then click on it and then hit the button Crea you see above to get started, in order to view the welcome section.
Before starting, you can view the section dedicated toQuick, so read some tips and best practices as well as view some Examplesby pressing the appropriate buttons. Also, you can press on the button Take a guided tour to start Facebook's step-by-step guide that explains the basic operation of landing pages created via Canvas.
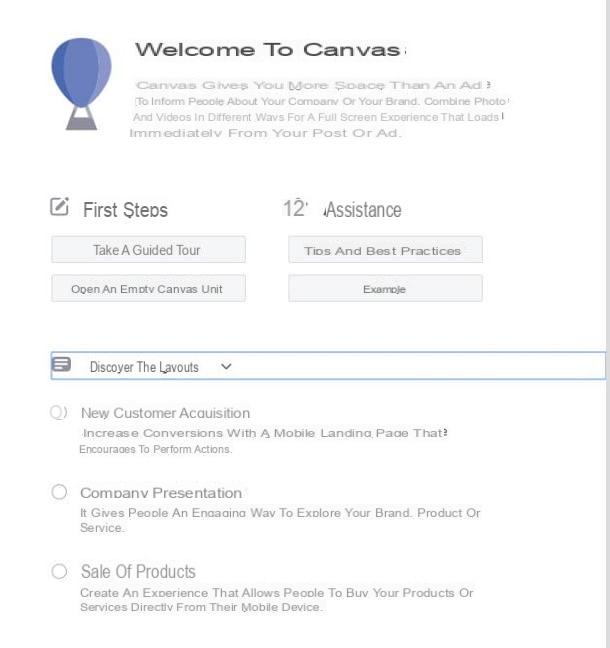
That said, to get started, hit the button Open an empty Canvas drive or click on one of the items you find next to the wording Discover the layouts. In particular, if you are new to using this tool, I recommend starting from a predefined template. To do this, first click on the goal you want to achieve (Acquisition of new customers, Presentation of the company o Sale of products) and then press the button Use the layout.
Now that you've gotten to this point, you can start customizing your landing page. If, for example, you have chosen to use the layout dedicated to company presentation, refer to the sections Image o Cover video to load multimedia content. In addition, to present your brand, your product or your service, you can also create a presentation including up to 10 photos.
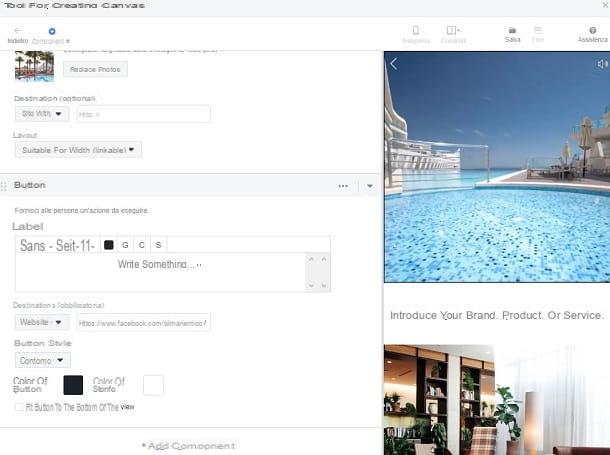
The section Text, on the other hand, is the one dedicated to the presentation of the company or product and can be customized using the most classic formatting tools (Bold [G], Italic [C] e Underlined [S], for example), and by setting a background color.
Furthermore, to present your company, you can use the following boxes dedicated to inserting testi e images o video. Do you want people to take an action within the landing page, in such a way, for example, that they link back to your website? In this case, use the tools inside the section Button.
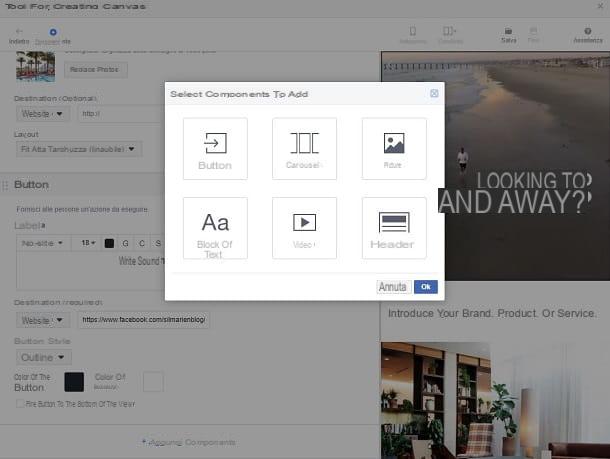
To customize the landing page you are creating in a more advanced way, click on the button Add Component that you find below, in order to insert other elements such as those named Button, Carousel, Photo, Text Block, Video or Header.
Once you've finished customizing, click the button Save located at the top. Then, to see a preview on mobile devices, click on the menu item Preview that you always find located in the top bar.
In this way, within the Facebook application for Android and iOS devices you will be notified of the ability to preview the landing page created by clicking on the appropriate notification.
Once you have made all the customizations you need, press the button end that you find in the bar at the top, within the tool you used to create the landing page. Then press on Complete in such a way as to be able to publish it on the Facebook page and as a post or use it for the creation of a paid advertising campaign for Facebook.
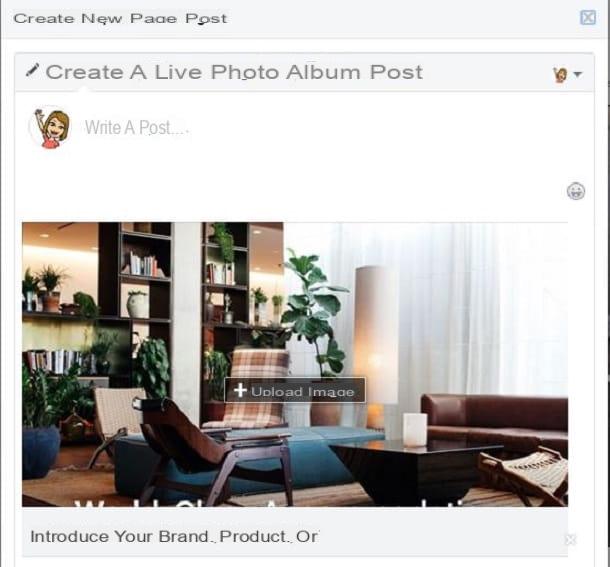
In the first case, click the button Page post that you always find in the menu bar, while if you want to use it for a paid advertising campaign, click on the button Get URL.
Other solutions to create a landing page

Are the solutions proposed in the previous chapters not right for you? Is your intent to create a fully customized landing page? In this case, if you know the programming language such as theHTML or do you know how to use another CMS other than WordPress, as Joomla, I can recommend you some useful solutions in this regard.
Specifically, in the case of Joomla, I recommend reading this tutorial of mine in which I explain how to create a site with this CMS. Also, for more information, I can recommend the purchase of some more technical books, so that you can succeed in your intention of creating a landing page with this tool.
Vedi offers your AmazonOn the other hand, if you have technical skills regarding the programming language in HTML, you can contact the service Jekyll, famous platform that allows you to create static Internet pages. By connecting to its official website you can take advantage of some tutorials and guides in English that explain in detail how to use it.
Would you like to create a landing page, but you don't know HTML programming language? Don't worry: refer to my tutorial on how to create a site in HTML or learn more by reading the manuals, such as those listed below.
See offer on Amazon See offer on AmazonFurthermore, if this were not enough, you can deepen the topic related to landing pages through some technical books on web marketing, such as the one I propose below.
See offer on Amazon See offer on Amazon How to create a landing page