Preliminary information

A mailing list, as the name suggests, is a more or less long list of email addresses that are used as recipients of an email that the sender composes. There are several ways to manage a mailing list: locally, through an e-mail program, or online, through a dedicated service.
As for the latter, I will talk to you about services that integrate within them not only a mailing list, but also a suite of tools dedicated to the professional use of data, especially in the marketing and business fields.
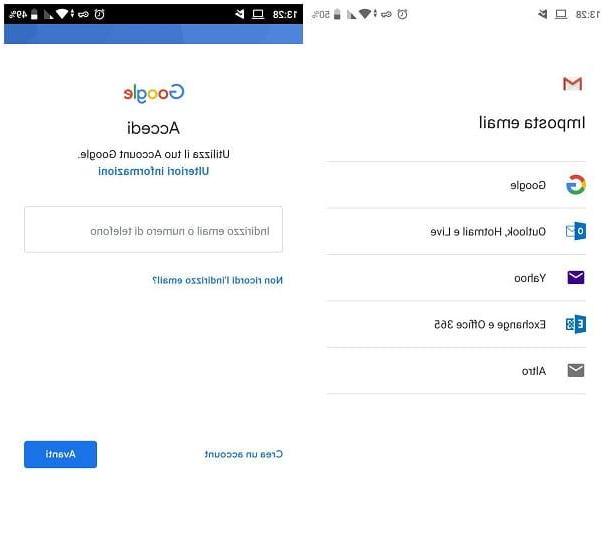
It was used gmail for your e-mail, however, you must know that your Google mailbox offers you the possibility to create, in an easy and fast way, a group of email addresses, assigning it a name of your choice, to be typed instead of individual recipients. If you would like to have your own Gmail account too, I invite you to consult my guide on how to create a Gmail account.
If your mailbox relies on another provider and you use the client Outlook to manage your email, you can use the functions of the latter to create a list of recipients to send your emails to. If you need help adding your email account to Outlook, feel free to check out my guide on how to set up Outlook. But now let's get to the heart of all the solutions just mentioned.
Create a mailing list with Sendinblue
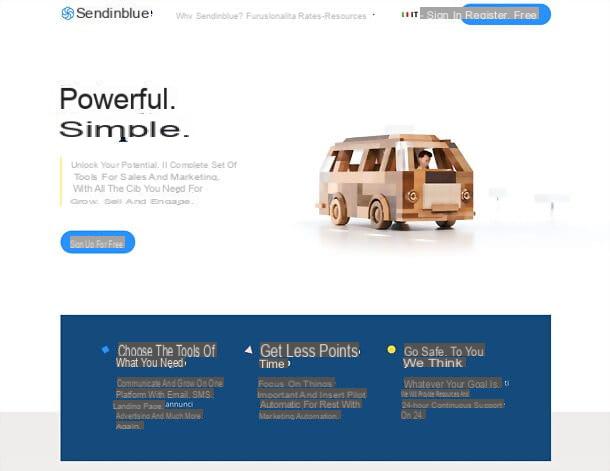
Sendinblue is an excellent service that allows you to create, program and manage the sending of email campaigns in a very simple way, using a special graphic editor. It can be used for free without any restrictions and supports many interesting functions, such as sending transactional emails and SMS, sending automatic emails related to certain events (eg the purchase of a product) and much more. It complies with the GDPR (the General Regulation on Data Protection and their free circulation within the European Union) and provides support in your language.
In addition to the free plan, which provides up to 300 emails per day and unlimited contacts, the plan is available Lite with prices starting from 19 euros / month for sending 10.000 monthly emails without daily caps (you can customize up to 69 euros / month for 100.000 emails per month), with email assistance and extra paid functions, such as removal the SendinBlue logo from the messages sent and the possibility of carrying out A / B tests; plan Premium which has prices starting from 49 euros / month for 20.000 emails per month (reaches 499 euros / month for sending 1 million emails per month, without the SendinBlue logo), includes Marketing Automation, Facebook Ads, A / B testing, Landing page, multi-user access, advanced reports and telephone support; finally there is the plan Company with custom email volume, priority sending, 20+ Landing pages, 10+ users, SSO (SAML), Account manager and priority support.
Create an account on Sendinblue

To create your account on Sendinblue free, connected to the home page of the service and fill out the form that is proposed to you with name of your company e Password you want to use to access the service, then click on the button Start now.
Once this is done, log in to your inbox, open the message received from Sendinblue and click on the button for confirm your email present in it. You will be directed to a form to fill out with personal data e company data: after completing the form, check the box to accept General conditions and anti-spam policy and press pulsating Close my subscription (at the bottom of the page), to verify your mobile number and thus complete the Sendinblue subscription.
Use Sendinblue

Once the registration is complete, all you have to do is connect to the Sendinblue login page, log in with the account you just created and start setting up your email campaigns.
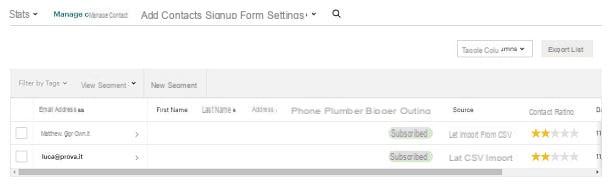
The service dashboard will give you useful tips on how to take your first steps; for example it will ask you to set one contact list: to do this, click on the tab Contacts, at the top, and proceed to import a list in .csv, .xlsx or .txt format or manually add contacts, using the appropriate buttons at the top right.
Afterwards, you will have to divide the contacts into appropriate ones list, to which you can then target your campaigns. You can add a contact to a list either during creation, using the appropriate item located at the bottom of the insertion form, or at a later time.
Once the contacts have been imported, you can move on to creating the actual email campaign. Then go to the card Campaigns, select the voice Email from the left sidebar and click on the button for create an email campaign. On the next page, fill out the form that is proposed to you with campaign name, object, text preview, email and name of the sender; click on the button Next phase (top right) and choose whether to proceed via Drag & drop editor (recommended, if you want to create your email campaigns in the simplest way possible), Advanced text editor o pasting the code.
In case you have chosen the drag & drop Editor, you will find yourself in the presence of a very intuitive scheme with, on the left, the list of elements that you can add to your email (title, text, image block and so on) and, in the center, the preview of the email. On the right, however, there are the properties of the currently selected element.
To add the various elements to your email, just drag them from the left bar to the point of the document you prefer. Instead, to modify them and adjust all their characteristics, just click on them instead. Then clicking on the icons of computer, smartphone e tablet that you find at the top left you can see a preview of the final result on the various devices.
When you are satisfied with the result, click on the button Save and exit, at the top right, take a look at the preview that is shown to you and, if everything is in order, switch to next phase by clicking on the appropriate button (always located at the top right). Then select the contact list to which to direct the campaign, click on Next phase, check the summary of the work done and, if everything is OK, program sending your emails by pressing the appropriate button.
As you can see, it's all very intuitive. If you want advice on optimizing and cleaning the contact list to improve the email delivery rate, consult the appropriate tutorial on the official website of the service. If, on the other hand, you want more information on the general functioning of Sendinblue, consult my dedicated guide.
Create a mailing list with Gmail
As I told you earlier, if you have an account gmail, creating a mailing list is truly a breeze - you're pretty much halfway there. To create the mailing list, in fact, you can proceed in a very simple way: first of all, you need to create alabel in yours Google contacts (in which to enter the addresses of all recipients). You can then write your email by typing the name of the label in the field dedicated to entering recipients. Here is all explained in detail.
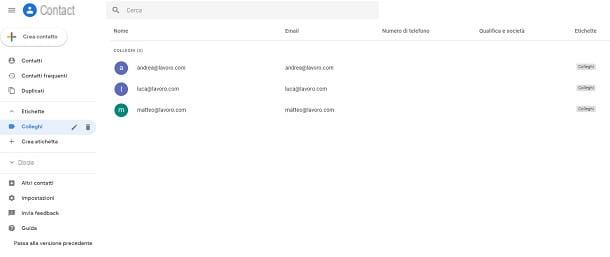
First, use your favorite web browser to open Contacts and log in with the Google account you want to use for your mailing list. Once this is done, in the menu you find in the left sidebar, click on labels, then up Create label. At this point, enter the name you prefer and press the button Save to confirm.
Now you need to add the recipients' email addresses to the newly created label. To do this, go back to the left side menu again and click on the button that reports the label name you just created. You'll notice right away that the label will still be blank - to add email addresses, click the button Create contact top left.
Immediately, a small mask dedicated to entering contact information appears on the screen: the only data that, considering your goal, you are obliged to enter is theemail address. You can then decide, at your discretion, if and which other fields of the form to fill in. You can repeat this operation until you have entered all the recipients.
Once you have finished entering the recipients, you can devote yourself to drafting the email to send them. Now I'll explain how to act both from a computer and from a smartphone and tablet.
PC
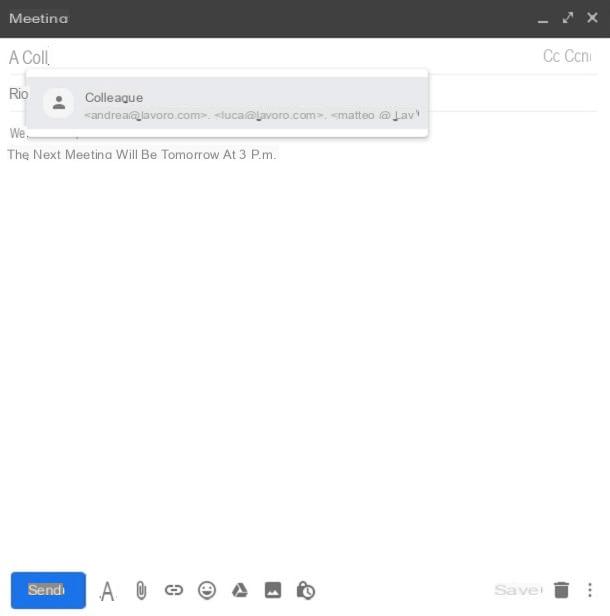
If you want to act as a PC, all you have to do is use your web browser to open gmail, taking care to log in to the same account you used in the previous step. To compose your message, click the button Write top left. In the lower right corner of the screen, the box dedicated to the drafting of the email to be sent will appear: fill in the field Subject and the body of the message as if it were any email.
Before sending the message, select thelabel previously created as a recipient by typing, in the field A, the name of the label in question and clicking on the automatic suggestion that appears below. You'll notice right away that, in one go, the recipients field is populated with all the email addresses that are part of the label. If you want to make sure that recipients can't know which other email addresses the message was sent to, remove the recipients from the To field and enter them in the field Ccn (blind carbon copy), using the label exactly as you just did.
When your email is ready, send it using the blue button Send. If you want to add or remove some recipients from your label, all you have to do is return to the Contacts, select thelabel and then click the button Create contact, to add a new recipient, or, to delete a recipient, locate the row corresponding to the latter, click the button Other actions at the bottom of the line and select Remove from tag. This way, the next email you send to this mailing list, the recipients will be updated with the changes you just made.
Smartphones and tablets
Unfortunately, at the moment, it is possible to use the mailing list only from the Web version of Gmail but not through the official Gmail application, which can be downloaded for free from the Android Play Store or from the iPhone and iPad App Store.
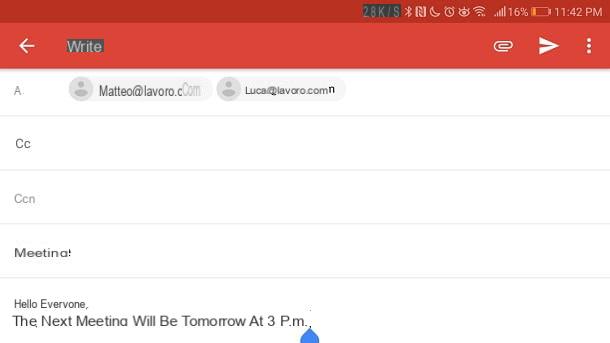
If you need to send emails from the application, you must proceed as if it were a traditional email: you take care of manually entering all the recipients in the field A or, possibly, in the field Ccn, if you don't want recipients to be able to see everyone else's email addresses. If you want more details on how to email multiple people via the Gmail app, read my dedicated tutorial.
Create a mailing list with Outlook
Also Outlook, the famous e-mail client for Windows, macOS and mobile devices, provides very simple tools for creating the mailing list. Let's see how to act both from a computer and from a smartphone and tablet.
PC
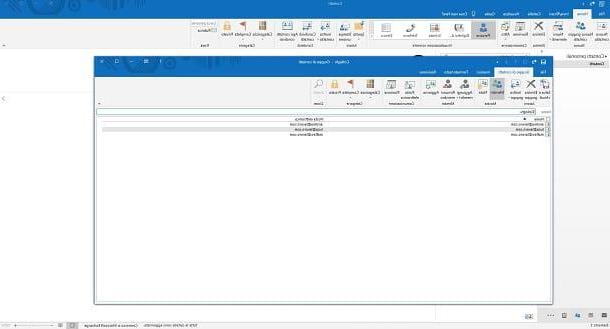
If you want to act from PC, first open Outlook (if you have not yet installed it, find out how to do it by following my dedicated tutorial) and, at the bottom left, click on the button whose icon depicts two silhouettes of people side by side. In the screen that opens, you will find the button at the top right New contact group: Click on it and enter the name you prefer in the field Your name of the window you just opened.
Still staying in this new window, click on the button Add members and then on New email contact, in the drop-down menu that appears on the screen, to add new email addresses to your mailing list. Now another small window opens on the screen, in which you have to enter the Visualized name and the address of Email of the recipient: If you do not want to assign the name, simply use the email address in both fields. To confirm the entry, press OK. Follow these steps again to add any other email addresses you want to send your messages to. When you've completed your entry, click the button Save and Close, top right.
Stai using a Mac, the procedure is very similar: after selecting people, in the navigation pane, click the button New contact list, at the top right, and enter the name you want to give to the group. At this point, click on the button Add + and type the email address you want to add to the list; when done, click Save and Close.
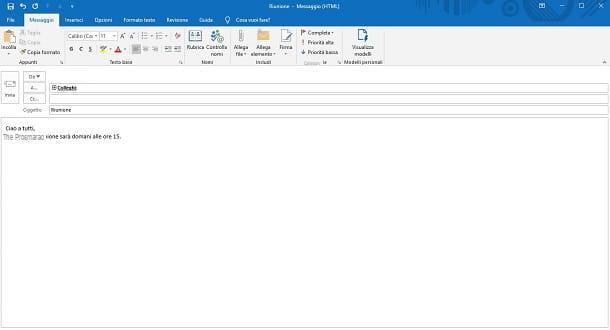
To start sending emails to the list of recipients you just created, return to the main Outlook screen and select, at the bottom left, the button whose icon looks like a closed envelope. To compose your message, then click the button New email message, top left.
Now, fill in the subject and body of the text in the traditional way and, as for the recipients, type, in the field A, the name of the group created earlier: just enter the initials, then click on the suggestion that appears below. In this case, the group name is added to the recipients. To actually see what email addresses are included in it, click the button +, immediately to the left of the group name and confirm the operation by replying OK to the warning that appears on the screen.
If you want to prevent recipients of your message from seeing the information of other recipients, press Cc, place the cursor in the field Ccn of the window that appears and double-click on the name of the group you just created. To confirm, press OK and when everything is ready, click on the button Send.
To update your mailing list, return to the contacts through the appropriate button depicting the two people side by side and double click on the group name: a window will open identical to the one you saw when you created the list: from here you can follow the steps I showed you earlier. To add new recipients or to delete someone, you can select them, from the box below, and then click on Remove member. Every next email you send to the mailing list will have the recipients updated with your latest changes.
Smartphones and tablets
Unfortunately, at the moment, the Outlook mobile application, downloadable for free from the Play Store, for Android smartphones and tablets, and the App Store, for iPhone and iPad, does not integrate a mailing list function or a group dynamic similar to what I have shown for the PC version, as a similar function, called its own Groups, is only available to holders of a corporate subscription a Office 365.
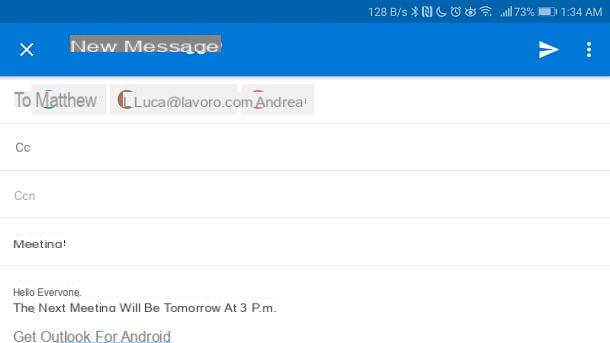
As already seen in the case of Gmail mobile, you can solve the problem by manually entering the recipients of your email: tap the button with the icon of a pencil, bottom right. Now, normally compose the subject and body of your email, then, enter all the recipients in the field A or in the field Ccn if you want them not to be visible to other people involved in the conversation. When you're ready, send the message by tapping the arrow located at the top right.
Create a mailing list with MailChimp
MailChimp is a professional service for managing the mailing list through which it is possible to send newsletters or promotional emails using predefined and attractive templates. Using MailChimp, you can manage mailing list users centrally, importing recipients' email addresses and adding a button to your website that allows new users to subscribe.
The messages to be sent can be embellished using advanced graphic elements, also scheduling the sending of emails in order to integrate this tool into your marketing strategy. MailChimp is a service offered for free, which however includes some premium plans necessary to unlock the most advanced features.
Create MailChimp account
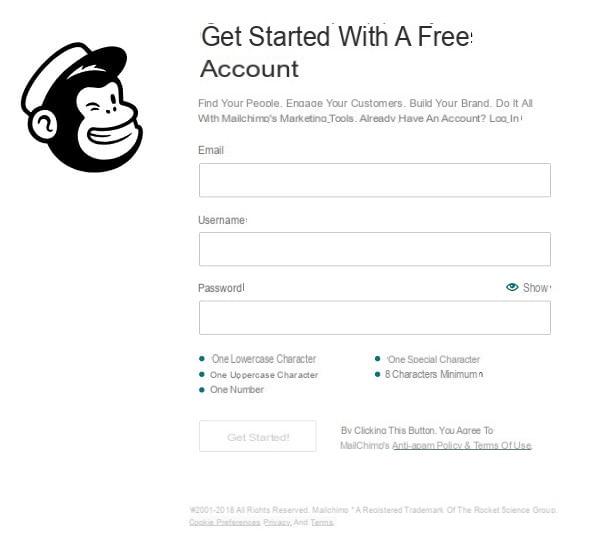
To start using MailChimp you must, first of all, create an account: to do this, go to the official website of the service and click on the button Sign Up Free, top right. Registration is quite simple and the required data are few: a email address, an username (which can also be your email address) and a Password.
Once you have entered the data, proceed with a click on the button Get Started!. At this point, check the e-mail box you indicated during registration, open the confirmation email you just received from MailChimp and click on the button Activate Account that you find immediately under your username. In some cases, after clicking the button, you are redirected to a web page that requires further verification: if so, click on the button I'm Not A Robot.
Now the guided configuration procedure of your MailChimp account begins. In fields First Name e Last Name you have to enter, respectively, your name and your surname, then you have to press the button Continue. Next, answer the questions What's the name of your business?, entering the name of your personal or professional business, e What's your website?, by entering the URL of the website of your business or, possibly, the link to your page on social networks; confirm by clicking on the button again Continue.
Once this is done, you must enter the address of your business: this is a necessary data to comply with the international rules on spam. Enter the requested data and proceed using the button Continue. To answer the next question, Do you have a list of email subscribers?, you have to think about your current email campaigns: if you already have a list of addresses of people who have subscribed to a mailing list that you currently use, reply Yes; if not, reply No, then, once again, advance by clicking the button Continue.
At this point, you can choose to link your accounts if you wish Facebook e Twitter. Then proceed using the button Continue. To finish, click on the button twice Not right now: in this way, you will avoid answering other questions and will keep your free subscription to the service. Finally, before finishing the procedure by clicking on the button Let's Go!, choose whether or not to subscribe to MailChimp's bi-weekly newsletter using the appropriate text box.
Create recipient list
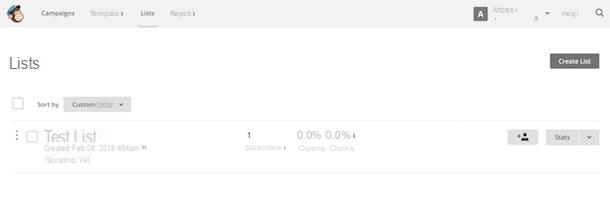
Now that the setup is complete, you can start using MailChimp. First, you need to create a list of recipients to send your emails to: then click the button Lists, in the top bar of the page, then on the button Create List, top right and finally up again Create List, in the gray background information box that appears on the screen.
Now you need to enter some information about the list: List name, that is the name of the list that will be displayed by the recipients; Default from email address, the email address from which the email must come and to which the recipients will reply; Default From name, the sender's displayed name, contact information and a number of settings that you can manage at your choice, including the confirmation of registration for recipients, the inclusion of fields GDPR Compliance (European legislation on the protection of personal data) and the possibility of receiving a daily summary of activities or one single notification when someone subscribes to or unsubscribes from the list.
When you're done, click the button Save to confirm. To import the first email addresses to send your mailing list to, click on the button Import contacts, immediately under the heading You have no contacts. You can choose to import contacts from a file or from your Google address book and other partner services - the easiest way is to create a small TXT file with the very common Notepad and make a copy-and-paste of all the email addresses, with the only care to have them one under the other.
Once you have your file, select the first of the proposed options, press the button Next at the bottom right, then click the button KATEGORIEN and navigate to locate the document you created earlier, then confirm by clicking again Next, bottom right. To complete the entry, click the button Import, bottom right.
Write and send emails
Now it's time to send your first email to the created list: then click on the button Create, at the top right, select Email, enter the name to give to your email in the text box and proceed by clicking on Begin, down. Now, follow the scheme that the web page offers you: to select the recipients, click on the button Add Recipients, then select the list you created earlier, from the drop-down list and press Save to confirm. The sender field will now be automatically filled in with the data you indicated when configuring the list.
The third required field is related to the subject of your email: click on the button Add Subject, then enter the subject in the text box immediately below Subject and confirm with the button Save. Finally, to proceed with the actual drafting of your email, click on the button Email design.
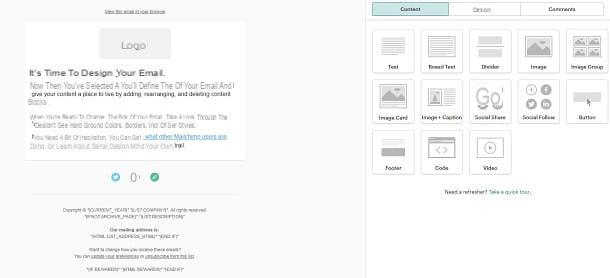
The page dedicated to the choice of the model: find the one that best suits the content you are about to write and click on it. To change the layout of your email, drag the objects you find in the panel on the right: you can choose between texts, images, videos and interactive buttons. To remove a block from your email, move the mouse cursor over it, locate the del icon basket and click, first on it, then on the button Delete to confirm.
If, on the other hand, you just want to change the content of a block, use its icon pen, make your changes through the right panel and click on the button Save & Close, still inside the right panel, to confirm the changes. The text boxes open directly in the panel, you can then format the text as if you were working in Word. For images, however, after dragging the block, click KATEGORIEN, in the right panel, then up Upload, at the top right, and select the image you want to upload.
When you are satisfied with the result, click on the button Save & Close, bottom right. All you have to do now is click on the button Send, at the top right, and then on the button Send Now, to send the email immediately, or on the button Schedule, in the same position, to set the sending date and time.
Obviously, I have shown you only a small part of the functions that MailChimp offers you: if you want to try this service in more depth, consult my guide on how MailChimp works to find out, in detail, how to manage users and how to send your newsletters.
Article created in collaboration with Sendinblue.
How to create a mailing list