How to create a test with Google Forms
If you agree, I would immediately start with the practice, seeing how to create a test with Google Forms: the procedure is quite intuitive and in the next lines I will expose you every single step, in order to make this activity even easier.
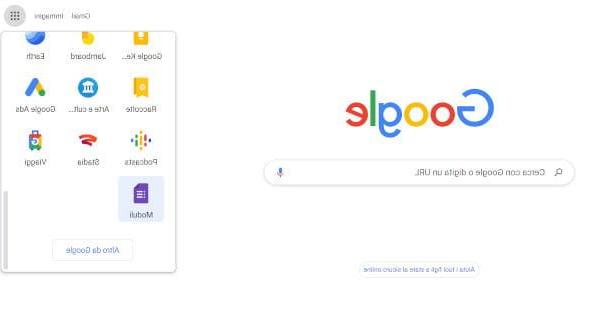
First, open your favorite browser and connect to the main page of Google Forms (which you can also access by pressing the square icon with 9 dots located at the top right of the main page of the search engine). If you are not logged in, you will be shown an authentication screen to log in or create a Google account.
It is already time to create the first module - click on the box with the button [+] on the left and you will be returned to the compose screen. You will be prompted to take a demo tour on the new version of Google Forms - click the button No thanks, to immediately start creating the quiz.
Let's immediately make a brief overview of the interface that is made available to you. You will notice that in the central area there is the editing screen questions, while on the right you will have the toolbar, useful to modify and integrate the questionnaire with additional elements, such as images or videos.
At the top, finally, there is a menu through which it is possible move from the composition of the questions to the evaluation of the answers and some buttons to define the settings of the quiz, display apreview e send the test at the end of the preparation.
Start by giving the module a name - then click on the entry Untitled module and type the header you want to set. By clicking in the space below you can add one in the same way Description.
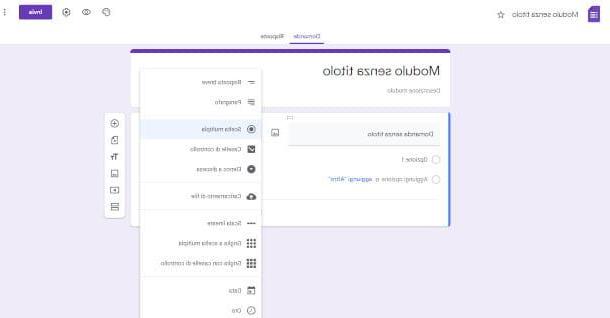
Now press on the box at the bottom with written on it Untitled question and enter the first question. Then decide how this will be displayed to users by pressing on the side menu that shows the default choice Multiple Selection: You will be shown different modes, which are summarized below.
- Short answer. Through this option, people will be able to write free answers consisting of a few words.
- Paragraph. In this case the participants will be able to elaborate longer free answers, consisting of one or more paragraphs.
- Multiple choice. It allows you to choose just one of several predefined options.
- Check box. It allows you to choose one or more predefined options by placing a check mark in the relevant boxes.
- Drop-down list. Attendees will see a drop-down menu with more options.
- Cartoon of file. It allows you to provide the answer by uploading a file that, please note, will occupy the storage space of Google Drive of the owner of the survey.
- Linear scale. The possibility is given to select the answer in a range of values shown on a horizontal line.
- Multiple choice grid. With this option it is possible to create a grid, therefore developed on rows and columns, in which the participants can select only one answer per row.
- Grid with checkboxes. The grid, in this case, allows you to provide more answers per row.
- Data. Allows the insertion of a date through the appropriate fields.
- Time. Allows you to enter a time using the appropriate fields.

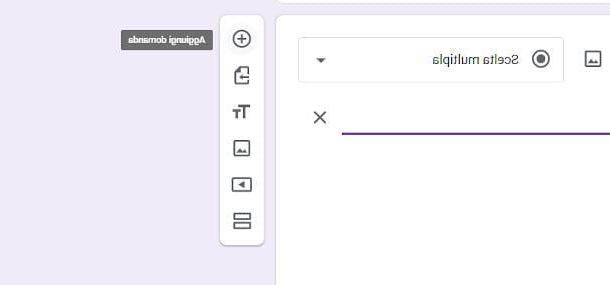
Let's now see, by way of example, the operation of the first option present by default, that is Multiple Selection. Click, therefore, in the space containing the writing 1 option and type the first answer. If you wish, you can add an image specifically linked to this option by pressing onicon with mountains located to the right of the relevant line: a screen will open for uploading the file, which can be run in different modes that I will show you below, by pressing on the preferred one from the tabs at the top.
Through functionality Chargeby clicking on the button Shop by Department you can browse the folders on your PC and choose the document to attach. You can also opt for Camera (access to your device's webcam / camera will be required), Via URL (you need to insert the link of an external resource), Gallery (to access Google Photos), Google Drive e Google Image Search.
To enter the subsequent answers, click on the button Add option, then follow the instructions above for filling out the first option. By clicking on the item instead Add More, a named field will be proposed in the form Other (can be entered only once) which allows the participant to provide a short free answer.
In the menu below, inside the first question, you have the buttons for duplicate the question itself (icon with two overlapping sheets), delete it (trash can icon) or make the answer mandatory using the appropriate selector Obligatory: the latter allows you to advance through the questionnaire only if an answer is provided.
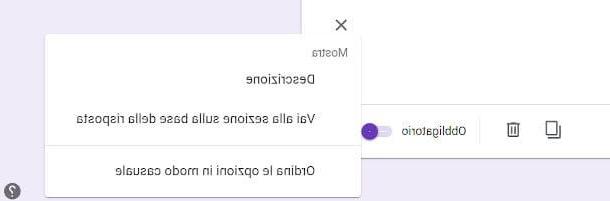
By clicking on the three dotsFinally, other options will be made available to display a field Description additional, reorder options randomly or add a command which, based on the answer, directs the user to a specific section of the questionnaire. In the next paragraphs, in fact, I will also show you how to create more sections within the module.
Using the toolbar on the right, however, you can insert new elements to the questionnaire. The first button allows you to add a new question: a scheme identical to the one just illustrated will therefore be proposed below, to allow for the composition of the following question.
You can also enter aimage (the procedure is the same as above for attaching images to options) or the link to a video from YouTube. In the latter case you will be redirected to a page where it will be possible to search for a movie on YouTube through the relevant search engine, or by clicking on the tab URL, enter the link to a video from the aforementioned platform.
Another important button is to import of questions (shows the symbol of an arrow inside a sheet), which allows you to transfer the questions to other modules. By clicking on it, you will be shown a screen where the list of all the modules created will be shown. Once the destination one has been selected, press the button Select, in order to complete the procedure.
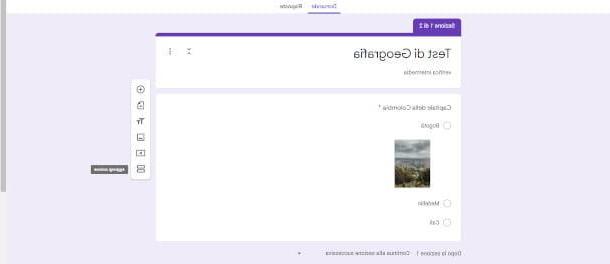
The last button on the toolbar, which reports two rectangles, allows add a Section to allow you to logically sort the questionnaire into several parts. By pressing the above button, the first part of the questionnaire already written will be renamed as Section 1 and at the bottom will be added the box for preparing the Section 2.
Again with a view to better organization of the questionnaire, it is possible to arrange the various elements in this way: the questions can be moved by clicking on the button with six dotsat the top by holding down the left mouse button and dragging the pointer up or down. As for the sections, however, you have to click on the icon with three dots, on the right, and press the item Move Section, then act on the arrows down or up to change its position.
Once the questionnaire has been defined, at the top right you will find some very useful and interesting options: via the button with the symbol of a palette you can customize the look of the questionnaire, adding an image or a background color and defining the font; by clicking on the button with the symbol of a eye you will be able to preview the test, while with the one that shows the icon of a gear you will be able to define some optional settings (in particular, in the General Information you can choose to collect email addresses of participants by selecting the appropriate item).
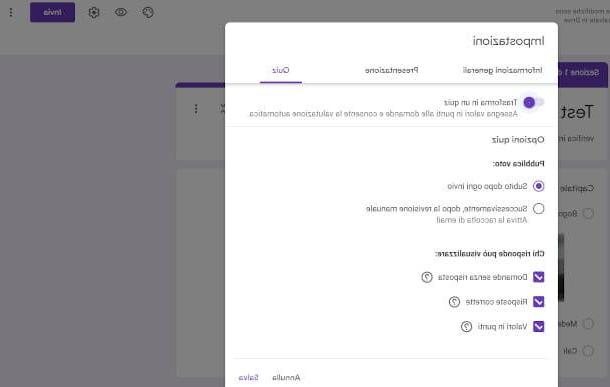
The last card of the Settings, called Quiz, it is very important, as it allows you to convert the form using the appropriate button Turn into quiz. In this way it is possible score questions, enabling the automatic evaluation. In the same tab you can also define the response display options by the users.
After registering the above setting, by pressing the button Save, an additional button with the wording will be added under each question Answer key: by clicking on it, two additional fields will be made available, in which you will have to indicate the correct answer. In the case of Select Multiple, taken as a reference for this guide, you will have to click on the correct option, while for other types of question you may have to type it in a specific field). Then enter the score value (to the right of the question) to allow automatic evaluation.
All that remains is to share the questionnaire with potential participants: click on the button Send, at the top right, and in the screen that is proposed to you, decide whether to send it by email (in this case, fill in the fields below Subject, E-mail address e Message and his bottone award Send), generate a link or HTML code to be shared independently via alternative channels of your choice (in this case you will have to press on the option Copy), or publish it on social networks, by clicking on the icons of Facebook e Twitter (in this case you will be redirected to the relevant Internet sites).
How to evaluate a Google Forms test
Let's see now how to evaluate a test on Google Forms. By accessing the main screen of the service again, at the bottom you will find the list of the various documents created: by clicking on the one you are interested in, you will return to the form composition screen.
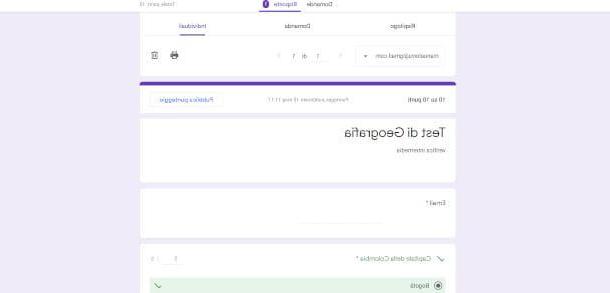
The results will be visible as users respond by clicking on the tab Risposte, next to the item Questions: here you will have three viewing modes available, namely Riepilogo (where you can have a general and schematic view of the progress of the quiz), Application (you will be able to consult the results of the individual questions) e Individuals (to individually check the answers of the various participants).
We saw in the previous chapter how this is possible convert a questionnaire into a quiz and enable it automatic evaluation. In this case, you do not have to assign the vote and you can also consult the relative score acquired by the individual participants.
Not only that: always on the card Individuals, you will be able to insert a direct comment to the interested party by clicking the button Add single feedback, present under each question and typing it in the text field that will be proposed to you at the same time.
How to share results on Google Forms
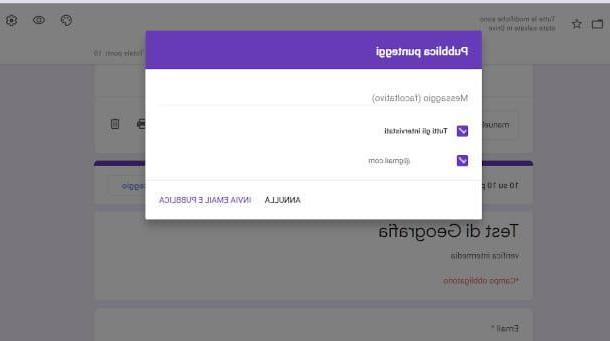
Even learning how to share results on Google Forms it is absolutely not difficult. In case you have transformed the questionnaire into a quiz, following the steps set out in the previous chapter and then accessing the form Individuals in the section Risposte, you will also find the button Publish Score.
By clicking on the latter you will be shown a screen in which it is possible enter an optional message and define, by clicking on the relevant box, whether to send the feedback to all respondents or only to single participant. Press, then, on the button Send email and publish: in this way an e-mail message will be sent to the selected recipients where there will be a special button for the consultation of the results.
How to create a test with Google Forms on smartphones and tablets

You would like to know how to create tests with Google Forms on smartphones and tablets? Unfortunately, I must inform you that, at the time this guide is written, there is no dedicated app: it is therefore necessary to follow the same instructions indicated in the previous paragraphs, proceeding through the browser of your mobile device (eg Chrome on Android and Safari on iOS / iPadOS).
I sincerely hope this guide has been of support to you in your business or profession. If you are a teacher who has a Google Workspace for Education account, I recommend that you also consult my guide on how to use Google Forms, in which I also illustrate the integration of this service on Google Classroom.
How to create a test with Google Forms