Plans and pricing
Before explaining yourself in detail how Vidra works, let me illustrate the various Piani of the service, their characteristics and their prices.
Vidra allows you to try all its most important functions for free for 14 days (those of the Standard profile), after which you have to choose between one of the following plans.
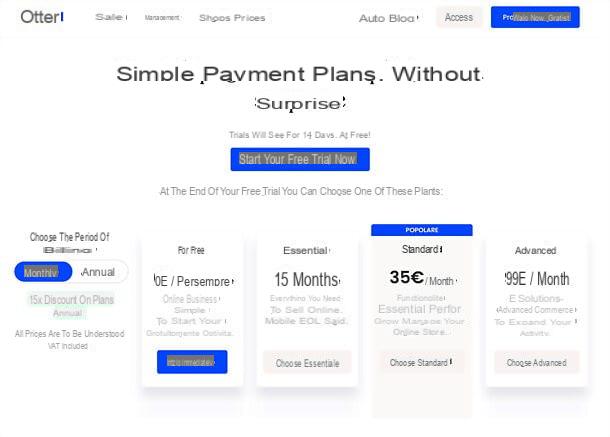
- Free (0 euro forever) - the ideal plan to create a simple online store, for those who need to start their own business for free. Includes ecommerce site and blog; product catalog with 10 products and inventory management; the ability to compare and purchase shipments without contracts with couriers, create and print waybills and track shipments; purchases without registration for customers; support for payment by card (with commissions of 2% + 0,25 euros), PayPal or manual methods (eg bank transfer) with commission of 2% and assistance via chat.
- Essential (15 euros / month or 12,50 euros / month with the annual subscription) - includes all the benefits of the Free plan, to which it adds an unlimited product catalog; in-store pickup with local delivery and telephone support.
- Standard (35 euros / month or 29,50 euros / month with the annual subscription) - includes the benefits of the Essential plan, plus the ability to connect a custom domain to your site; the filter products; the possibility of inserting different variants of the products in the catalog; the option to ship products with your own couriers; the ability to improve sales with discount codes, advanced SEO tools, traffic analysis and live chat with customers on Facebook Messenger.
- Advanced (99 euros / month or 82,50 euros / month with the annual subscription) - includes the benefits of the Standard plan, plus the possibility of login for customers and reduced commissions (1,60% + 0,25 euros for card payments and 1% for manual and PayPal payments).
How Vidra works
The procedure for creating a “virtual showcase” with Otter it is extremely simple: just connect to the official website of the service, register, choose one of the predefined graphic solutions that the platform makes available and upload the photos and information relating to the products to be sold. The system will thus create a site, perfectly optimized for mobile browsing and search engines, through which customers can make their purchases in comfort. The site, if the chosen plan allows it, can also be linked to a custom domain.
Sales are managed in real time and warehouse and stock data are automatically updated accordingly. As for payments and shipments, there are no contracts to stipulate: it takes care of the whole platform. Customers can pay by card, PayPal or manual methods (eg bank transfer) and the shipment can be done directly by the seller or can be entrusted to the main national couriers, selecting them on the platform and having the ability to follow the status of shipments in real time. . Interesting, right? So let's get to the practical side of the matter and see how to open an e-commerce with Vidra.
Create the shop

The first step you need to take for open a free online shop with Vidra is to connect to the home page of the service, type yours email address in the appropriate text field and click on the button Try it now, for free!. On the next page, fill out the form that is proposed to you with E-mail address, Name and surname, Name of your shop e Password to use for login and click on the button Create your shop, to move forward. If prompted, also complete the captcha.
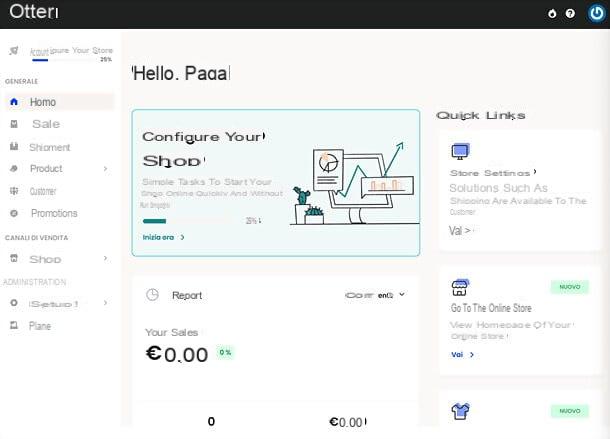
Mission accomplished! Now your subscription is complete and you are in the Vidra dashboard, through which you can manage every aspect of your store. On the left you will find the menu to access all sections of the service: Home, which is the main section of your ecommerce; Sales, to manage orders; Shipping, to create and manage shipments; Products, to add and manage products and insert them in the collections; Clients, to manage the customer list; Promotions, to set discount codes; Shop, to customize the appearance and pages of the store; Settings, to configure payment methods, billing information and your location; and finally Piani, to select a subscription plan from those available.
The first thing you need to do, at this point, is configure the store by clicking on the appropriate box at the top. This will open a page with a series of essential activities to be completed to start your e-commerce: Enter your business data (to enter your company data); Create your online store (to choose the graphic style of your e-commerce); Create your products (to start creating your products, adding names, descriptions, images and quantities) and finally Enable payments (to choose the methods by which your customers will pay you).

Then click on the item Enter your business data, fill out the form you see on the screen with yours billing information and click on the button Save, up. Then select the tab Payments located on the left and activate the payment methods you prefer between PayPal, Payments by Stripe (for card payments) e Manual (for bank transfers and other manual payments, for example at the physical point of sale) by clicking on the appropriate buttons and following the instructions that are proposed to you. Finally, select the tab Locations from the left menu, click on the button Add location (above), fill in the form that is proposed to you with the details of your office and click on Save, to save it all.
Now, go back to Home on the dashboard (by clicking on the appropriate icon in the side menu), select the box relating to the store configuration i went his Create your online store. Enter, therefore, name e indirizzo web of the store and click on the button Create the shop, to confirm. At this point, choose whether the site should already be visible to customers (using the appropriate lever), move to the next boxes and type title e Description of the site e contact email to offer to visitors of the same. When you have finished making changes, click on the button Save located at the top right.
Finally, go back to Home dashboard, select the tile again store configuration i went his Create your products to start adding products to your store.
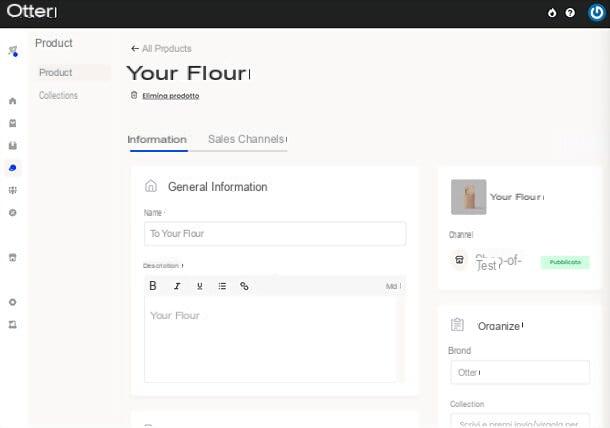
Creating a product is very simple: in the tab Information the fields relating to name, description, brand, prices, images, quantity in stock, shipping information etc. must be filled in. while in the card Sales channels you have to indicate the store in which to make the product visible (with the possibility of customizing URLs and metatags for SEO).
Once the initial store setup is complete, you are ready to manage products, payments and orders as you see fit. For more details, keep reading, you will find all the relevant information in the next chapter of the guide.
Manage products, payments and orders
As already mentioned, the management of products, payments and orders with Vidra is extremely simple.
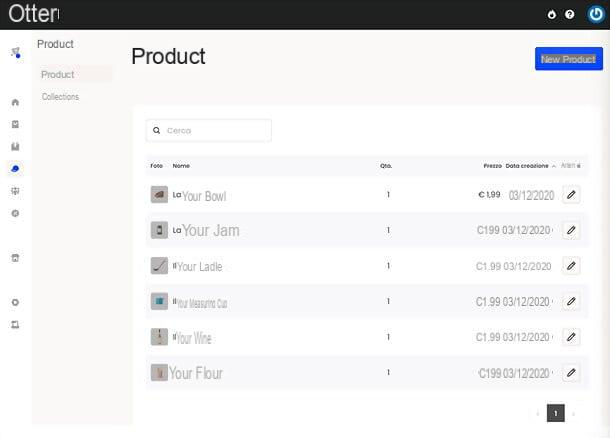
As regards the products, all you have to do is select the appropriate item from the side menu: you will find yourself in front of the list of products already included in your shop; to modify one, all you have to do is select the corresponding icon of the pencil and use the fields displayed on the screen (as also explained a few lines above).
You will then be able to edit name, Description, brand e prices product (by setting current price e original price and activating, if your plan allows it, personalized prices for purchase volume e quantity increases); you can also add images, sku, quantity in stock, Information about shipping (weight, depth, height, width, etc.) and any variants of the article (always if your plan allows it).
To add a new productInstead, all you have to do is press the appropriate button at the top right and fill in the same fields mentioned above with the data of the item to be added to the shop. Easy, right?
If you want, you can also create collections of products, by going to the section Products> Collections of the dashboard and pressing the button New collection (top right). This will open a page to enter name, Description e main picture of the collection, which you can then associate with the products for sale on your store via the field Collection located on the right of the product creation / modification page.
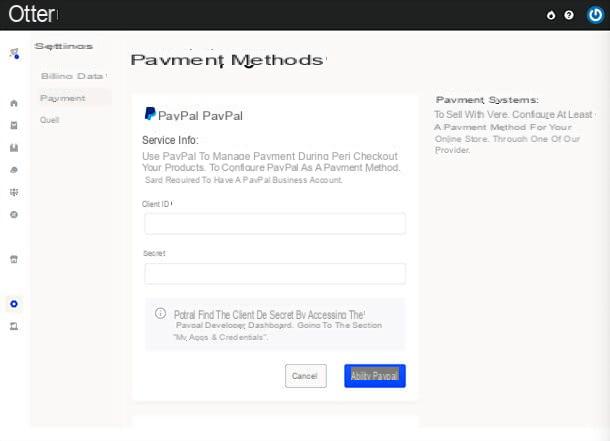
As for the payments, you can manage the payment methods accepted by your store by selecting the items Settings> Payments from the side menu of the dashboard. You will then have access to the screen, which I told you about before, which allows you to activate PayPal, Payments by Stripe (for card payments) and the Manual payment (for wire transfers and other manual payments) as payment methods accepted on the store.
To activate a payment method, just click on the relevant button The activation procedure begins and follow the on-screen instructions. For example, for PayPal you will have to enter the codes client e ID Secret (to be retrieved from the Paypal Developer dashboard, by going to the section My Apps & Credentials), while for the manual payment method you will need to specify details e instructions of the desired payment method.
Vidra also makes managing the orders e shipments. After you have sold products through your shop, you will be able to find the related orders in the section Sales dashboard.
By clicking on each order you can view its status (eg. Work in Progress), and data of payment and details like products included, amount e price. Also, on the right you will find details about the also information who made the purchase. In this regard, I would like to point out that you can easily manage your customer list by selecting the item Clients from the side menu of the dashboard.
If you want, you can also create a new order manually by clicking on the button New order located at the top right and filling in the fields that are shown to you with product, also information, type and price of the shipment e Payment details.

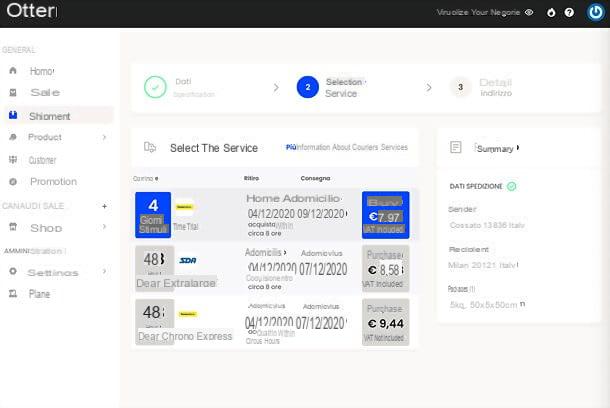
When you are ready to ship your products, select the item Shipping Policy from the dashboard menu and press the button New shipment; alternatively select a order from the orders menu and click on the button related to shipment.
Therefore, fill out the form that is proposed to you with the location of departure e destinazione and data of necks (weight, length, width and height), then click the button to go forward.
Next, choose the courier to rely on, specify the addresses of sender and recipient, press the button Pay and start shipping and follow the instructions on the screen to complete the transaction and confirm the shipment.
To set the shipping rates to be offered to customers, go to the section Shop> Shipping rates of the dashboard and click on the icon pencil to change the current rates, or click on the button
(top right) to add new ones.
In any case, remember that it is up to you to choose how to manage your shipping strategy: you can personally take care of local shipments or rely on a courier. Vidra currently allows you to ship with DHL, Post e SDA (without having to sign contracts or deal with tedious paperwork, Vidra think of everything!), but other couriers will soon be available. More info here.
Change the appearance and pages of the site
Even in an e-commerce the eye wants its part: this means that you have to choose some captivating photos to represent the products for sale in your store, but also that you must carefully take care of the graphics of your site.
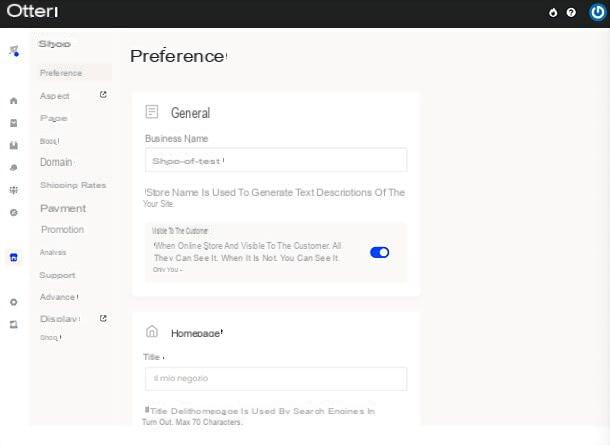
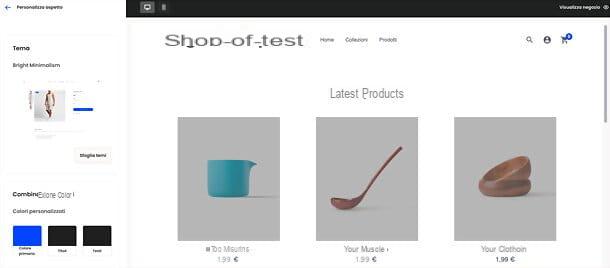
In this regard, I would like to point out that by going to the section Shop> Appearance of the Vidra dashboard you can customize the appearance of your e-commerce in a very simple way, thanks to the editor offered by the service.
The editor is divided into two parts: on the left there is the menu to access all the editing tools; on the right, instead, there is a live preview of the site with the changes applied in real time (by clicking on the icons of the computer and the smartphone present at the top you can view the desktop and mobile versions of the site).
Select, though, the voice Customize appearance from the left menu to choose the graphic theme to use for your e-commerce, change the color combination to use in the pages and choose which one variant layout use.
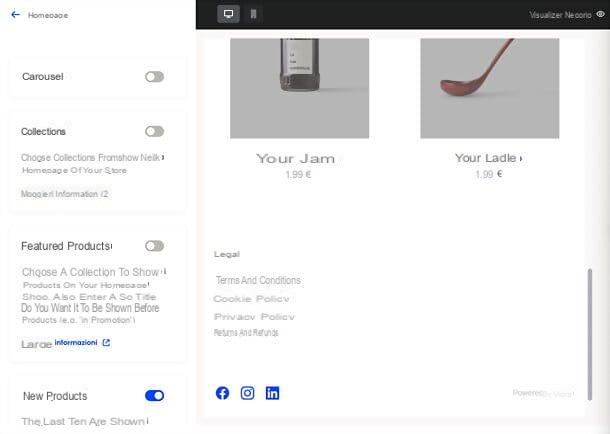
Going into the sections Header, Homepage e Footer, as easily understood, you can instead customize the characteristics of these parts of your site (eg choose the logo and links to be displayed in the header and footer, or which sections to display on the homepage among carousel, collections, featured products and new products). The section Social network finally, it allows you to choose which links to your social pages to display on the site.
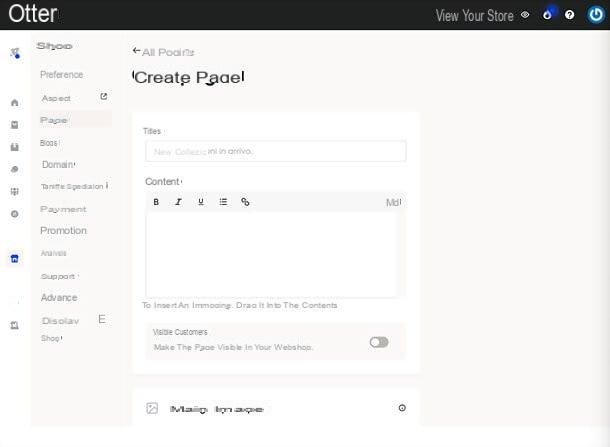
In addition to appearance, of course, you also need to take care of the content on your site. I therefore invite you to return to the section Shop dashboard and select items Pages e Blog from the left menu, which allow, respectively, to manage the pages of the site and the blog posts included in the latter.
Explaining how pages and posts are created seems superfluous to me, given the extreme simplicity of the Vidra interface: just click on the appropriate buttons (above) and use the text editor to set title, content, main picture and other aspects of the page or post to be published.
To view your shop as it appears to the public, simply click on the item View your store located at the top right of the dashboard.
Finally, I point out that through the section Shop> Analytics you can associate your site with services such as Google Analytics e Facebook, to obtain advanced statistics on visits.
For more information
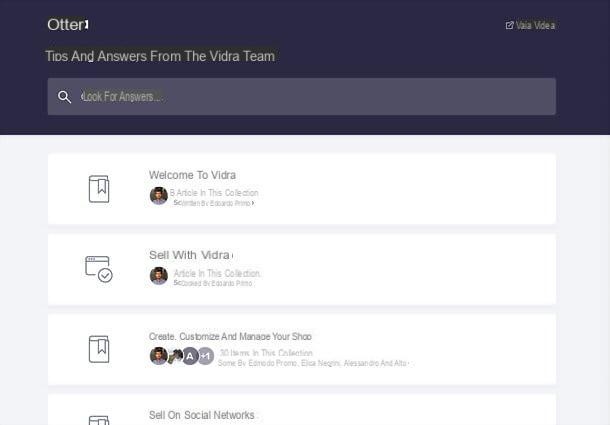
If you need more information on how Vidra works and how to manage your online store with it, I suggest you visit the official Help Center, where you can find lots of advice and answers from the Vidra team.
Furthermore, I remind you that you can consult the official Vidra blog, with news, curiosities and reflections on the e-commerce universe, and contact the support team directly via chat.
Article created in collaboration with Vidra.
How to create an e-commerce with Vidra