How to build an online course

There are numerous elements to consider in order to understand how to build an online course well structured and at the same time engaging and rich in content. Of course, your first task will be to determine thetopic which will be the theme of your lessons, which in turn will have to be organized in such a way as to make the explanations more fluid and easily assimilated by those who will assist you. In the next paragraphs, therefore, I will show you all the equipment and software tools necessary to carry out this task in the best way.
Type
Determine the typology course you intend to offer to your students is extremely important. You can decide, for example, to create a course freeby, which consists of a free resource, not particularly in-depth, made available to users to introduce them to a certain topic or to bring them closer to your business.
If, on the other hand, you intend to propose yourself in the numerous e-learning platforms that are becoming popular on the Web through a paid online course, I advise you to evaluate in advance the existence of similar contents, in order not to create duplicates that would be more difficult to bring out.
Finally, in case you simply want to propose ad hoc topics for the students of your school in Distance Learning (DAD) or in Integrated digital education (Ddi), or again for the training and updating of your company's employees, there are several opportunities available to you, even free, that you can take advantage of (such as Google Classroom, which I will tell you more about in a dedicated chapter).
Structure
La structure of the course is a fundamental element to make it as understandable and linear as possible, equipping it with logical sense. It is skeleton which supports all of its development, and its incorrect design could lead to a quick disaffection on the part of the students, also leading them to abandon the intent or leaving negative impressions and unenthusiastic judgments.
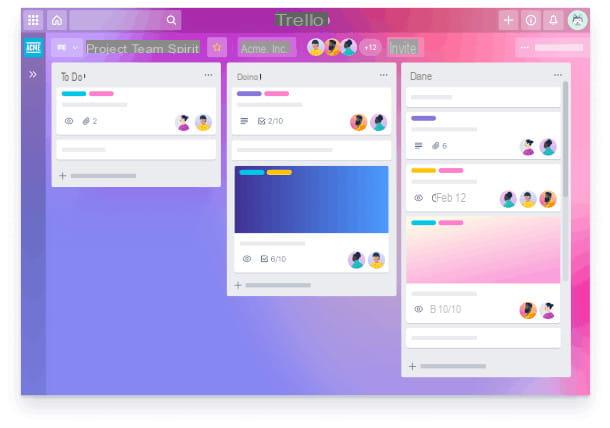
There are many online tools, even free, that help you to map a project. One of the best known is certainly Trello, an online resource that allows you to organize ideas in a simple and intuitive way, so as not to overlook any detail. I have prepared a special guide on how to use Trello, if you want to learn more about the subject.
Gingko is another very useful software for the purpose, with which it is possible to create maps, diagrams and lists organized in card to keep all the design under control, and is a great support even in the phase of writing of texts. Up to 100 cards or 10 documents are free.
You are a “traditionalist” and you love to apply i Sticky on a blackboard to organize your ideas? Stormboard is a utility with an interface that you might like a lot for creating the training sequence of your course. In fact, it recreates an environment in which you can apply sticky notes and group them by color in different areas of the screen.
Instruments
The quality of the course is certainly closely linked to that of the content you intend to disseminate and the way in which you expose it, but its visual impact should not be underestimated. Blurry, low-resolution videos, or an uncertain and difficult to understand audio are absolutely to be avoided, so it is advisable to equip yourself with special instruments useful to improve its appearance and presentation.
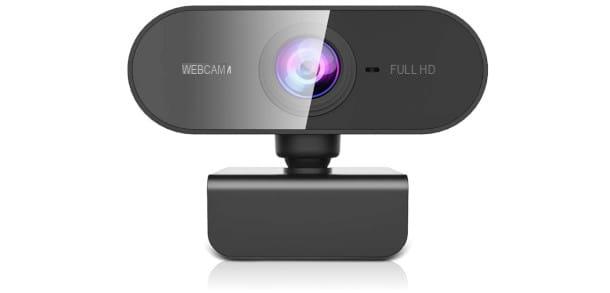
La video camera it is essential when you intend to produce videos to represent the lessons. You can look for the best webcams if your budget is tight, but I recommend that you prefer video cameras, which are ideal for producing high-resolution movies for posting on the Internet. If you don't know how to connect the camera to the PC, read my guide dedicated to the purpose.
See offer on Amazon See offer on Amazon See offer on Amazoneven the microphone it is very important: it is in fact advisable to have an instrument with a good sensitivity that makes the voice clear and understandable. How do you say? Don't you know much about these things and don't know what to choose? Do not worry, I have prepared a list of the best microphones for streaming, in order to make the task even easier for you.
See offer on Amazon See offer on Amazon See offer on AmazonDon't forget these devices need special supports to statically shoot the scene without jolts and from the right angle. Microphones must also be equipped with anti-pop filters to eliminate some annoying sounds produced by the lips during speech.
See offer on Amazon See offer on Amazon See offer on Amazon
If your course is oriented to the explanation of some software and Web tools and therefore requires the use of desktop recording, I have prepared both a specific guide on how to record the PC screen, and a list of the best programs to record the desktop that you can find on the Net.
even the mounting of movies and audio is essential, so I suggest you download a program suitable for the purpose. In this article I propose a list of free programs to edit videos, while to understand how to carry out this operation in practice, I suggest you read my dedicated guide.
Supplementary materials
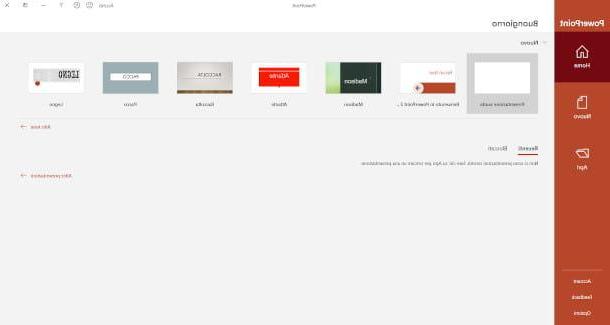
Enrich the course with supplementary materials such as handouts, PDFs, slides or slides helps the end user to better relate to the contents. I have prepared an article to help you find your way around the sites to create presentations, to add immediately to your favorites if you plan to create your own additional materials online.
You may also find this guide on how to slide, using programs such as Power point for Windows o Keynote for macOS, with an explanation of all the steps to help you make your presentations better on your computer, smartphone or tablet.
Platforms for the distribution of a paid online course
In this chapter I will explain the main ones platforms for the creation and distribution of a paid online course if your intent, in addition to creating the training offer, is also to promote its distribution to earn a little something.
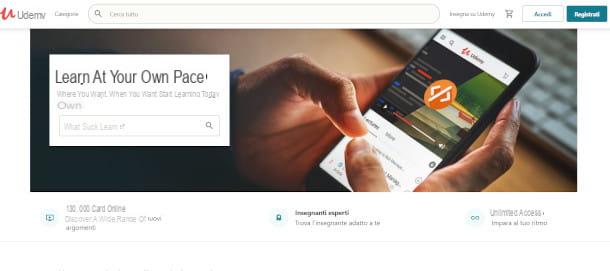
- Udemy. It is one of the main platforms in this sector, offering a huge selection of courses in all areas. Becoming a teacher on Udemy allows you to join a support community that will help you through the course creation process.
- LifeLearning. This is another important reality that enjoys an excellent reputation and that has attracted the attention of numerous your language students. Here too you have a tutoring that will follow you in the creation and publication of the course according to precise and functional standards.
- Teachable. Thanks to Teachable, you have the possibility to create a virtual school in which to insert all your courses, using extremely intuitive tools that allow a total personalization of your space. It is paid, with different subscription plans, but you have a free trial period of 14 days to experience its effectiveness.
- Thinkific. With Thinkific, in addition to creating your online course, you can also manage customer contacts, keeping track of their progress and implementing effective after-sales policies. Here, too, the platform is completely customizable and offers the possibility to register for free to test its features on a limited number of courses.
How to create a course on Google Classroom
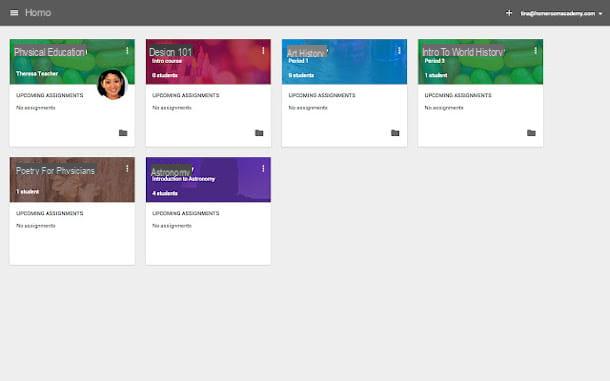
Google Classroom is the now famous free platform developed by Google, accessible both via a web browser interface and as an app for smartphones and tablets. The service is now open to everyone and allows any user with a Gmail account to create courses and lessons, but with some differences: if a teacher works for a school and intends to use Classroom to teach in DAD, it is necessary that the institution in question is enrolled in Google Workspace for Education (formerly known as G Suite for Education).
From PC

If you want to use Classroom from PC, first of all connected to the main page and click on the button Go to Classroom. You will be asked to authenticate to your Google profile, if not already done: then use your personal account or that Google Workspace for Education (formerly G Suite for Education) that was provided to you by your institution. On the page that appears you will have access to the various features of the Classroom interface.
To create a course, click on the button + located at the top right and select the item Create Course. If you are using an account other than the Google Workspace for Education / G Suite for Education account you will need to enter the checkmark in the box next to the wording I have read and understood the above notice and declare that I will not use Classroom at a school with students, then you will need to click on the button Continue to proceed with the creation. In the form that will be proposed to you, you will then have to enter the information course name, section, matter e room, then you will need to click on the button Crea.
In a few seconds, a dedicated instance will be created where you can find the course code, present under the name of the course, to be shared with participants to allow them access.
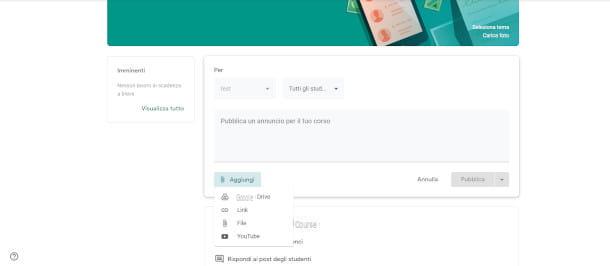
From the top menu you will then be able to access the four course control modes, that is Stream, Course work, People e Votes. Under Stream you can upload content by clicking on Post an ad for your course. In the window that opens, you need to enter a description of the content while clicking on the button Add you can select an attachment from Google Drive, specify the link of a site, upload a fillet from the computer in mode File Explorer or a link to a video of Youtube. Once the announcement has been edited, you can proceed directly to publication via the button Public.
Once published, always from the screen of Stream, a window is enabled at the bottom for communicating with students: here you can write other contents and messages and answer students' questions. In the section Work in progress you can upload homework to assign to students. The board People instead it serves to invite students to your course (they must always have a Google account), while at the last item Votes it is possible to monitor the progress of the class.
If you have a Google Workspace for Education (formerly G Suite for Education) account, you can also take advantage of integration with Google Meet. To do this, enter an already published course and open the settings by clicking on thegear located at the top right.
In the new window that appears, then go to the section Generali and click on Generate Meet Links. Confirm the operation by clicking on the button Save. The permanent link generated will be visible in the Stream screen, top left, just below the course name.
Da smartphone or tablet
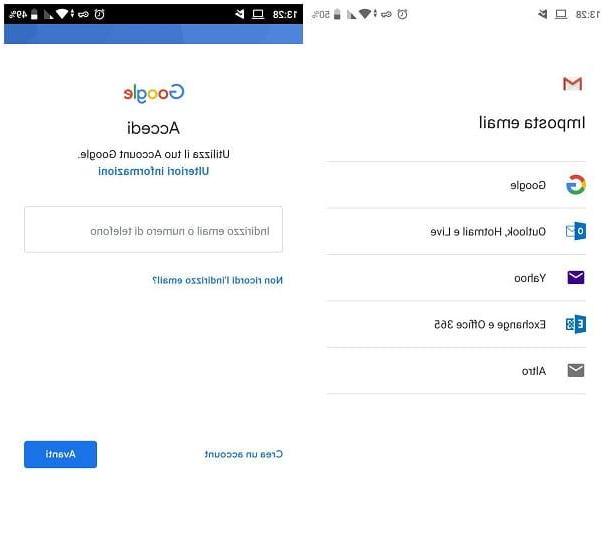
If you are more used to using mobile devices, Google Classroom is also available as an app for Android and iPhone and iPad (if you don't know how to download it, read my guide on the subject). After downloading and installing the app, you can start it by tapping on its icon. If you have already stored your Google account on your device, it will be recognized automatically. Always remember, however, that if you work at a school registered with the service you will have to change your account and switch from your personal one to that one G Suite for Education that was provided to you by the institution.
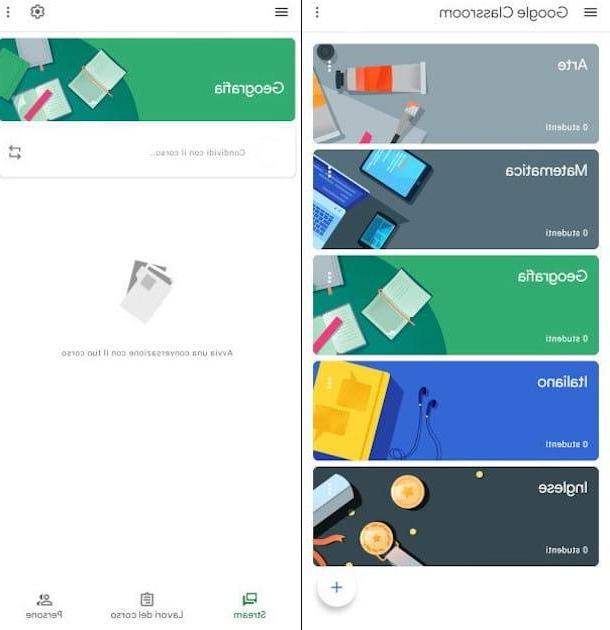
To create a course, tap on the icon + at the bottom right, then tap on the item again Create Course. At this point, fill in the required field Course name and, if you want, the optional fields Section, Stanza e Subject, then tap the option Crea.
From the main course screen you have the same features as the desktop version: from the menu below you can access the sections with a tap Stream for publishing content and exchanging information with students, while giving Work in progress you can easily create and assign tasks, even attaching external documentation or videos. To the item People you can instead invite all students with a Google account to your course.
How to create a course on Moodle
Moodle (acronym for Modular Object-Oriented Dynamic Learning Environment) is one of the most widespread e-learning platforms in the world and consists of a didactic tool accessible from the Web that allows the teacher to publish the material of the lessons, to insert communications and additional information on the course, as well as to assign tasks and exercises of various kinds.
In the next paragraphs I will show you how to create a course on Moodle: you will be able to deal with a very advanced system (even if a little less intuitive than Classroom) that allows you to create very efficient and well-structured learning projects.
Registration
First of all, you need to register in order to take advantage of the various features that this extremely advanced platform offers. Connect, therefore, to the main page of Moodle and click on the button Get Started located in the center of the screen.
Moodle is a paid service, so you will be offered some subscription plans: once you have chosen the one you are interested in (starting from 97 euros / year), click on the button Buy Now and on the next screen click Create a new account. You can also choose to take advantage of a 45-day trial period of the product MoodleCloud (a version without customizations and programmatic additions) that can be activated from this page by clicking on the button Try for Free. Now tick the four boxes in which you declare to be of age and to accept the terms of service and privacy, then click on the button Next.
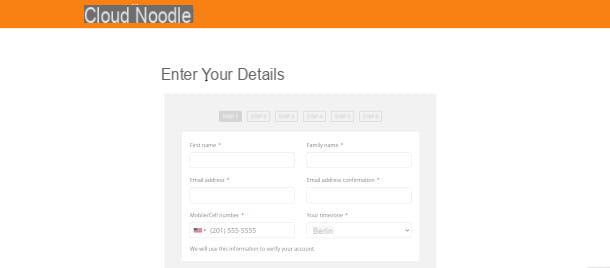
In the first of 6 step useful for registration, you must enter all the mandatory personal data (First Name, Family name, Email Address, Mobile number e Timezone), then in the box below the optional ones (Organization Name, Organization Type, S, City, State, Postal Code, Your role and the only mandatory Country). Click on the button Next.
In the second step, then enter the name of the site you want to create with a domain moodlecloud.com and which will be published to distribute your courses. Select, therefore, in the field at the bottom the location where you want the site to be hosted, choosing the closest one among Ireland, Australia e United States; finally, indicate in the appropriate drop-down menu the use you intend to make of Moodle and click on the button Next.
In the third registration step you simply need to enter the code which has been sent via email (to the email account indicated in step 1) or via SMS (to the mobile number indicated in step 1), then click again on the button Next.
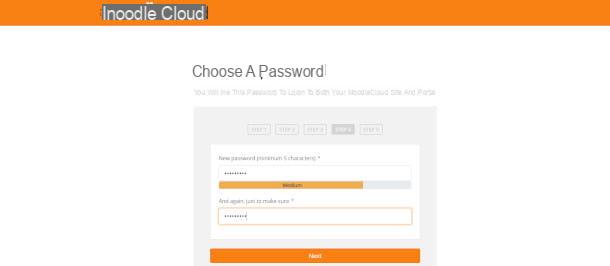
On the next screen, type the Password of your new account, with at least 5 characters, and repeat it to confirm in the box below. In the fifth step you will have to provide details of the payment method: if you have used the trial version this step is skipped and you will be able to define this information, if you are satisfied, at the end of the evaluation period. In the last step click on the button Thanks, take me to my Moodle site now!.
Course creation
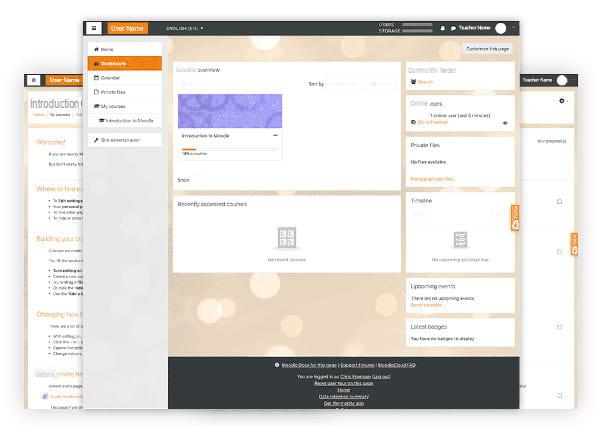
After logging in from the main page of the site you will see the dashboards of your Moodle site. If you wish, you can immediately change the language settings in your language using the appropriate button at the top left, next to the item Your School.
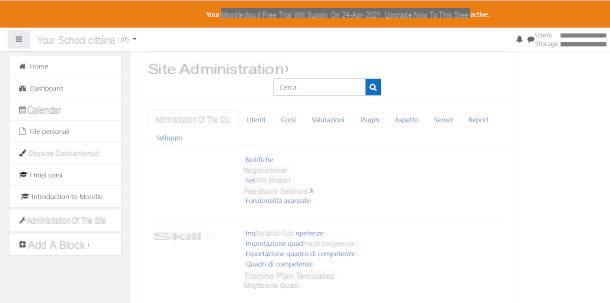
To create a course, click on the button from the menu on the left Site administration. On the next page, click on the tab Courses and then click on the button Add course. In the form that is proposed to you, you must fill in the required fields Course title e Short title, with which to identify the main theme. Then decide the start date of the course and, if you want, also the end date, by filling in the fields also through the use of the calendar function which can be activated from the appropriate button on the side.
On the field Description you can enter an explanation of the purpose of the course and provide other information at your discretion while in the field Image below you can upload a representative image of the same in GIF, JPEG or PNG. In the following sections you can indicate the format of the course (specifying for example whether the lessons will be weekly or will be carried out in a single activity), the language, determine the maximum size of the files that can be uploaded and other customizations that will allow you to better manage the lessons. Once done, click on the button Save and View.
Your course is now also visible on the Dashboard and clicking on his name you will be able to access the management interface where you will find the settings you defined during creation. In this guide, I'll show you how to create an element Lesson and inside it one Contents page, which are essential elements for building a course and will help you understand the operating logic of this platform. In fact, the possibilities are many and the best thing, once you understand the procedure, is to experiment with them to find the solutions that best suit your needs.
To make changes, click on the button Enable Changes: you will see the new buttons appear Modification e Add an activity or resource. By clicking on the latter you can insert a large variety of elements such as Lesson, Tasks, Quiz, Polls o Workshop, for example, each of which is customizable in many ways.
Click now on Lesson and complete the mandatory field on the next page Your name. If you want, also fill in the numerous optional fields that are proposed by scrolling the page and that help you customize their development. You can, for example, enter a description of the lesson, implement particular conditions of access for students, or even enter dates in which the lesson is available for consultation. When finished, click on the button Save and View.
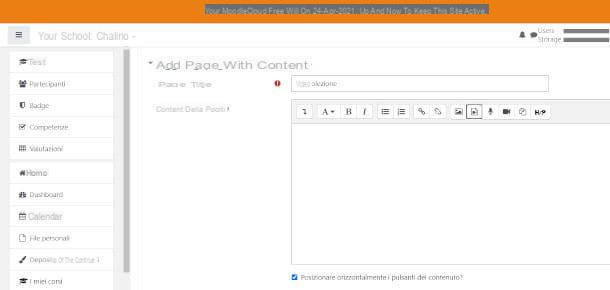
In the screen that is generated you have, among other things, the possibility to insert a page Contents. Clicca dunque sul pulsating Add page with content and in the next screen fill in the required field Your name. In the next field, named Page content, you can, through the relative buttons, respectively edit text, insert a link, add an image, a video, directly record audio and video o import any type of document via the file manager.
Once you have finished composing the page, Contents click on your button Save page And that's it.
How to create an online course