Banner snack
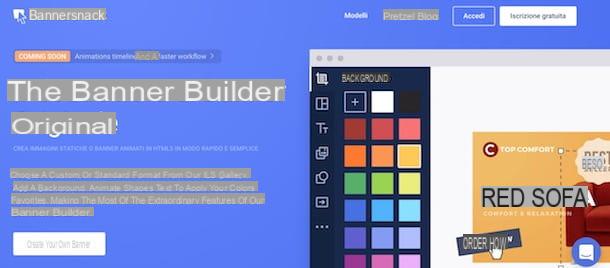
Banner snack is an online tool for create banners for free. It allows you to choose from over 1000 predefined layouts and to save the banner created as a JPG, PNG and GIF file. It also allows you to embed it directly on your website with the ability to monitor its statistics. In the free version it allows you to create up to 10 banners, to which watermarks are added, after which it is necessary to subscribe to a monthly subscription.
To create banners with Bannersnack, connect to the service's website and click on the item free subscription at the top right, then presses the buttons Facebook o Google to connect to Bannersnack via your social media accounts or, if you prefer the classic registration via email, enter your data in the fields Your name, Email address e Password and click sul pulsating free subscription. Within a few moments you will receive an email containing a verification link: click on it to confirm your account and complete the registration.
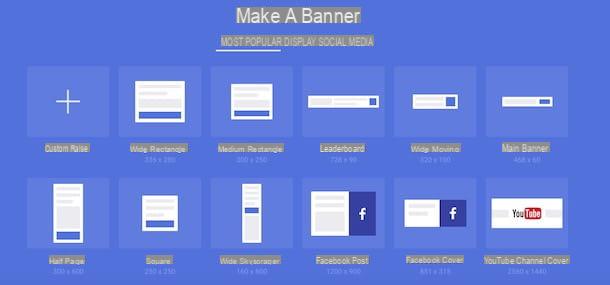
Adesso, click on the button Continue e seleziona l'opzione Make a Banner to create a single banner (the Banner set is available for subscribed users), then choose the type of banner you want to create by clicking on one of the options available among Large Rectangle, Leaderboard, Large Mobile, Square, Facebook post, YouTube Channel cover etc. Alternatively, you can create a custom banner by clicking on the option Custom size and entering the measures in the fields Width e Height.
Once you have chosen the type of banner to create, you can move on to customization via the new open screen. You can enter the banner name in the field Untitled banner (above), while pressing the button Add image you can upload an image to insert on your banner with the ability to apply filters, transitions and add links to it. Using the sidebar on the left, you can customize your banner by clicking on one of the available features.
- template: if available for the chosen banner, it allows you to apply a predefined layout.
- background: to set the background color of the banner and, if necessary, modify its measures.
- Add text: to insert text fields in the banner, then choosing the font, size, color and having the possibility to add links.
- Image: to insert an image by choosing it from the rich Bannersnack archive or by uploading it from your computer.
- Add shape: allows you to add figures (square, circle, lines, etc.) and logos.
- Add button: to insert a clickable button with the possibility to choose the action to be performed on the click.
- More: To take advantage of other features, such as adding videos.
Finally, through the sidebar on the right, you can manage the various levels of the banner, add slides and thus make the banner animated. Once you have finished creating your banner, you can press the ▶ ︎ button to see a preview or press the button Save to save it.

In the newly opened window, enter the banner name in the field Banner name (if you haven't done so previously). If you wish, enter the URL that should be opened upon clicking the banner in the field URL banner and press on the item Set border and quality to set banner borders and image quality, then click the button Save And that's it.
To view the banners created, click on the item My banners present at the top and locate the banner of your interest: pause over its preview image with the mouse pointer and press the buttons views to view it or Edit to start the editor and apply new changes, otherwise click on the icon freccia rivolta verse il basso and choose one of the formats available from PNG, JPG e GIF to download the banner to your computer.
If you want to embed the banner on your website without first downloading it, click on the i icon three dots e seleziona l'opzione Embed, then copy the code by pressing the button Copy embed code and paste it in the section of your site where you intend to view it.
If you think Bannersnack is a good solution to create banners and you want to subscribe to the service, you can choose one of the available plans.
- Starter ($ 12 / month or $ 84 / year): allows you to create 30 static banners monthly.
- For (32 $ / month or 216 $ / year): it has no limitations in the creation of banners, it also allows the creation of animated banners and to download them in HTML5 format. It also allows you to upload custom fonts and have access to features such as the banner generator.
- Team ($ 69 a month or $ 576 a year): in addition to having the features of the Pro plan, it allows access for up to 10 users and allows access to banner analytics for one year.
To subscribe to Bannersnack, click the button Go Premium present at the top right, presses the button Buy now for the chosen plan, enter the details of a payment method between credit card e PayPal e pulsing sul pulsating Complete Purchase but I will complete the acquisto.
My Banner Maker
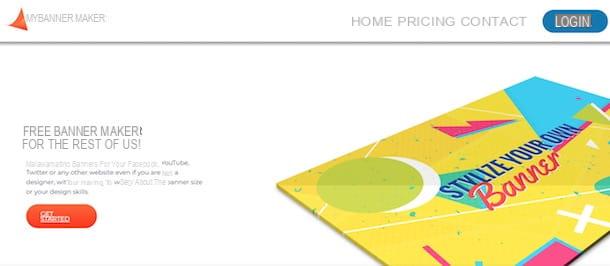
My Banner Maker is another free solution to consider when creating banners. It is a powerful online tool that allows you to create customized banners, with the possibility of accessing a rich library of templates and images to be used without limitations. Requires free registration.
To create banners with My Banner Maker, connected to the main page of the service, click on the item Pricing (top) and presses the button Sign up relative to the box Free. Then enter your data in the fields Email e Password, remove the check mark next to the item Sign Up for the Design My Banner Newsletter if you do not wish to subscribe to the My Banner Maker newsletter and click on the button Sign up free but I will complete the registration.
Now you can create banners without limitations! Then click the button Get started, then choose the type of banner you want to create by choosing one of the categories available from Most popular, Social media, Banner ads e Ranges and click on the banner of your interest (for example 300 × 600, 728 × 90 etc. in case of Banner ads) to go to the next step. Alternatively, click on the item Custom Size to create a custom banner, enter the pixel dimensions in the fields Banner width e Banner height and click sul pulsating Continue.
Now, press the button Use template to view one of the free layouts available on My Banner Maker. Then click on the item Preview to see a preview or on the button Use this image to use it. If no template is available for the type of banner chosen or you prefer to create a custom banner, click on the item Use image to choose one of the numerous images available in the media archive of My Banner Maker or your voice Upload your own photo to upload an image from your computer.
If your choice fell on a My Banner Maker template, the Design Studio: it is a tool in which you can customize the banner like a professional, with the ability to manage layers, add text, effects and much more to it.
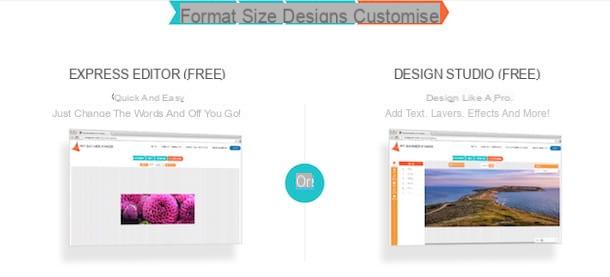
If, on the other hand, you have chosen to use an image, you can choose whether to customize the banner through the Design Studio or through theExpress Editor, a much simpler tool to use but which leaves less freedom for the user. Then choose how to proceed by clicking on one of the available items among Edit in Express Editor o Edit in Design Studio and proceed as follows.
In the first case, click the button Add text to add text, choose the color using the field where the code appears # FFFFFF and the font via the drop-down menu in which the item appears Arial. Once the customization is complete, click the button Save & Continue and wait for the banner to be generated, then press the buttons download it e Download to download it to your computer.
If you have chosen to customize the banner through the Design Studio, on the other hand, you can view and manage the levels that make it up through the box Layers (present at the top right), while you can click on the button Upload more images to upload additional images from your PC. Also, you can apply changes using the commands on the left sidebar.
- Basics: allows you to rotate, resize or cut the banner.
- Text: allows you to add text to the banner, choosing color, position, size and font.
- Drawing: allows you to draw freehand on the banner.
- Filters: Apply filters such as Noise, Sepia, gradient, Invert, Blur and many others.
- Shapes: allows you to add figures by choosing from Circle, Rectangle, Triangle, Polygon e Ellipse.
- Stickers: allows you to apply one or more stickers to the banner.
To save the banner created, press the button Save & Continue and wait a few minutes for it to be generated, then click on the item download it on your pulse Download to download the final result in PNG format.
You must know that on My Banner Maker you can also take out a subscription Premium which, at a cost of $ 4,95 / month, gives you access to the library with Premium templates and the ability to receive immediate assistance.
To subscribe to the Premium subscription, click on the entry Pricing in the top menu and on the option Sign Up relative to the box Premium, then put the check mark next to the payment method you prefer between credit card e PayPal and presses the button Sign up. In the next step, enter the details of the chosen payment method, click the button Submit And that's it.
WebBanner24
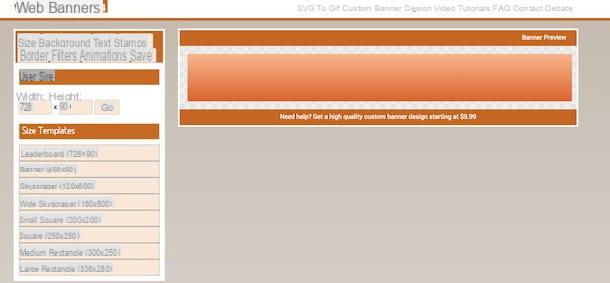
Among the solutions to consider to create free banners there is also WebBanner24, an online tool that does not require registration. It allows you to create banners of various sizes, with the ability to apply images, text, stickers and animations and save the final result as a PNG, JPG and SVG file (without watermaker).
If you think WebBanner24 is the ideal solution for you, connect to the service's website and start customizing your banner right away. First, manually set its size in the fields Width e Height e pulsing sul pulsating Go, otherwise choose one of the available templates by pressing on one of the options between Square, Small teams, Banner, Leaderboard, skyscraper etc.
After choosing the type of banner to create, click on the tab Backgroud to set its background color. Then choose the type of shading from the available options, set the transparency by moving the slider under the item Offset and set the colors by clicking in the fields Color 1 e Color 2 and choosing them using the cursors displayed on the screen.
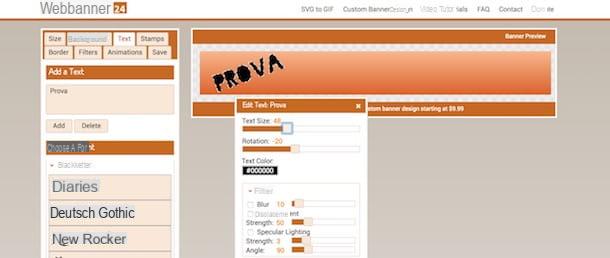
Now, you can click on the entry Text and add text to the banner. Then enter the text in the field Put your text in here, choose the font by selecting one of those available and press the button Add, then make the changes you want by moving the slider under the items Text size e Rotation, choosing the color through the voice Text colors and applying filters via the box Filter.
Instead, press on the voice Stamps to apply one of the available stickers (they are divided into various categories, such as Aliens, Insects, Pole dancers, Skull etc.) and select the tab Border to choose whether to give a rounded shape to the banner and whether to insert borders in the latter by setting its color and size. Finally, click on the item Filters to apply filters to the banner, such as the sepia effect or the black and white effect.
To save and export the banner created, click on the item Save, put the check mark next to one of the formats available between PNG, JPG e SVG e pulsing sul pulsating Download. You can also generate a code to embed directly on your website, but in this case a watermaker will be applied: to proceed, click the button Get codes and wait for the code to be generated, then enter the banner URL in the field Linked Website and copy one of the codes visible under the heading Embed Codes.
Other solutions to create free banners

Did the solutions proposed above not completely satisfy your needs? No problem, there are other online services and free programs that can be right for you. Here is a list of other solutions to create free banners that you can consider for your projects.
- Creabanner.com: allows you to create a banner in a few minutes and without registration, with the possibility of saving it on your computer or obtaining the embed code to embed it directly on your site. It allows you to choose from numerous banner formats, apply text, insert images, borders and effects. The negative note? Apply a watermaker, but with a donation of 3 euros you have access to the Premium service, which allows you to remove it.
- BannerFans: a free online solution to create custom banners. It allows you to choose between various banner formats, to add text, images, borders and effects and to save the banner on your computer in PNG, JPG and GIF format. It does not apply watermaker and also allows you to get the code to embed the banner directly on your site.
- Banner generator: another online service that allows you to create free banners of various sizes by choosing one of the over 1000 templates available and with the possibility of adding text. You can export the final result in JPG, PNG or SVG format.
- GIMP: it is not an online service, but a powerful free software to install on your computer. It is one of the best alternatives to expensive Photoshop and allows you to create custom banners from scratch: undoubtedly one of the solutions to consider for those who have practice with image processing software.