How to create HDR on smartphones and tablets
Do you want to apply theHDR effect with your smartphone or tablet? In this case you can choose between two different "ways": access the camera settings of your device to enable HDR mode or edit the photos in post-production through ad hoc apps.
Camera App (Android / iOS)
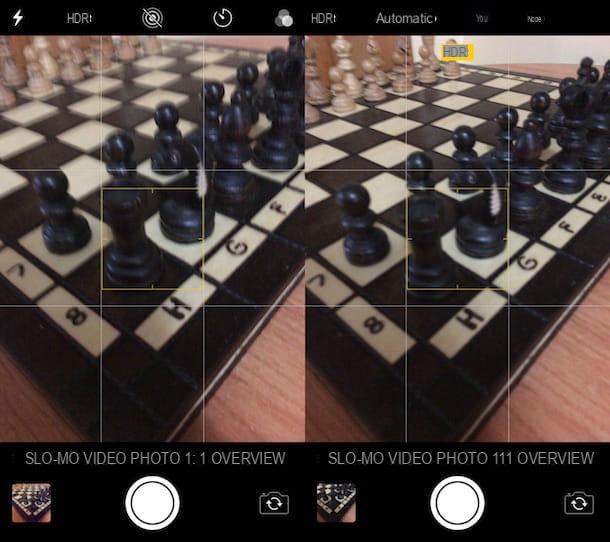
To take HDR photos on Android, avvia l'app Camera of your smartphone and, on its main screen, presses the button in the shape of gear.
In the menu that opens, identify the presence of the wording HDR (o High Dynamic Range) and move up ON the switch lever located next to it, or presses on the voice Yes (The procedure may vary slightly depending on the brand of the device in your possession and the version of Android in use).
It was used iPhone, invece, avvia l'app Camera, tap on the item HDR located at the top and, in the menu that opens, tap on the item Yes. Now you are finally ready to take HDR photos. Did you see how easy it was to activate this mode ?!
As I told you a few moments ago, you can apply the HDR effect also using third-party solutions. Below I describe a couple of apps that you can use for this purpose: make good use of them!
Snapseed (Android / iOS)
Snapseed is one of the best free apps you can turn to to retouch photos on your smartphone or tablet. It is a completely free solution developed by Google, compatible with Android and iOS, which provides users with numerous tools to retouch photos quickly and easily.
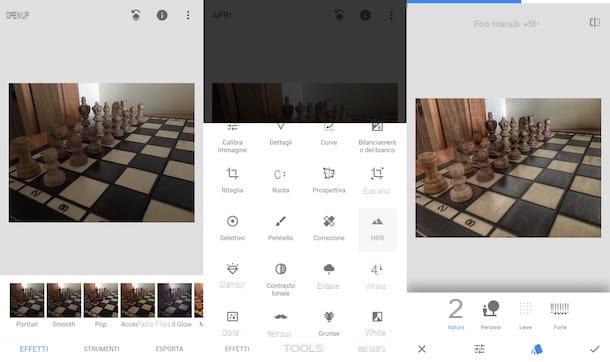
After downloading and starting SnapSeed on your device, touch anywhere on the screen and, in the menu that appears, select the image to which you want to apply the HDR effect. Then presses on the voice Instruments and, in the next screen, presses on the item HDR.
If you wish, change the intensity of the HDR filter by sliding your finger to the right (to increase it) or to the left (to decrease it) and, if necessary, press one of the buttons located at the bottom of the screen to use a filter other than the one set. default: Natura, to optimize the application of the HDR effect to a landscape; People, to optimize the effect taking into account the presence of people in the shot; Lieve, to soften the effect or High, to increase its intensity.
As soon as you are satisfied with the result, press the symbol (✓) located at the bottom right and tap on the item Export also located at the bottom right, then choose one of the export options among those proposed: Share, to share the edited photo; Save, to save it locally; Export, to make a copy with permanent changes, and so on.
Adobe Photoshop Lightroom (Android / iOS)
Another application that allows you to create photos with HDR effect is Adobe Photoshop Lightroom, also available on both Android and iOS. It allows you to process and share images, take photos in the DNG format, import and edit files in the RAW format (feature available for Adobe Creative Cloud Photography plan subscribers), and take photos in HDR mode. This solution, therefore, will not be very useful for you to apply the HDR effect (at least automatically) in post-production.
Before explaining how it works, I would also like to tell you that the possibility of taking pictures in HDR is only accessible if you have a latest generation device (eg Galaxy S8 / S8 + and later, Google Pixel / Pixel XL and later, iPhone 6s / 6s Plus and later, etc.).
After downloading and starting Adobe Photoshop Lightroom on your device, scroll through the information cards that appear when it starts and press the button Start to login and access its tools. Then log into your account by pressing the button Access or, if you prefer, log in with your account Facebook o Google pressing the corresponding buttons.
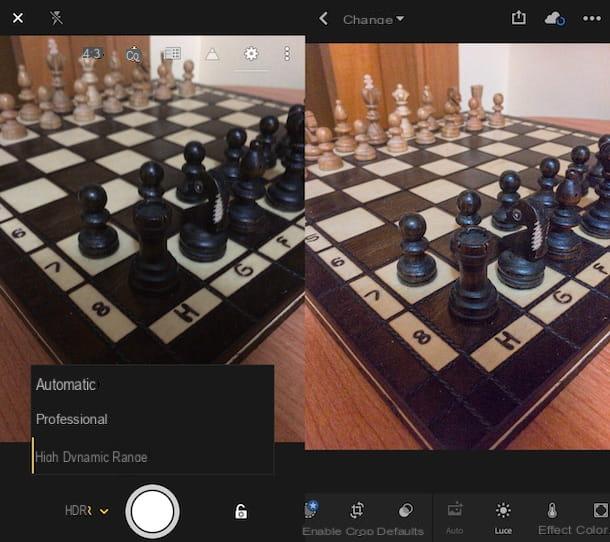
Once logged in, tap on the symbol of camera to take a photo, press the symbol (⌵) located at the bottom left and then select the item High Dynamic Range from the menu that opens. Then take your shot by pressing on the symbol ofanello located in the center of the screen and wait for it to be processed with the application of the HDR effect.
If you want to further modify the photo, open it and retouch it using the tools located below, in order to crop it and correct all the parameters. When finished, tap on the symbol of sharing located at the top and saves the work done by selecting one of the saving options from those proposed.
How to create HDR on PC
Do you want create HDR directly on the PC? Well, then you will find the programs listed below very useful, some of which are completely free. Try them by following the instructions I will give you and you will see that you will not regret it!
Picturenaut (Windows)
One of the first solutions I recommend you to try to apply the HDR effect to your photos is Picturenaut, a free program for Windows PCs that focuses on ease of use and lightness. It supports all major graphic file formats (including RAW files) and allows you to create professional-looking HDR photos from multiple shots that have varying degrees of exposure and brightness.
To download Picturenaut on your PC, connect to the Internet site that hosts the program, and click on one of the download links (eg. English 64-bit, to download the 64-bit English version or English 32-bit, to download the 32-bit English version) which, as you can see, are located inside the box Download (on the right of the page).
A download completo, apri il file . MSI just downloaded and follow the wizard to complete the installation of the program: click on the button Next, check the item I accept the terms in the License Agreement, click the button again Next twice in a row and then press on install, Yes e Finish.
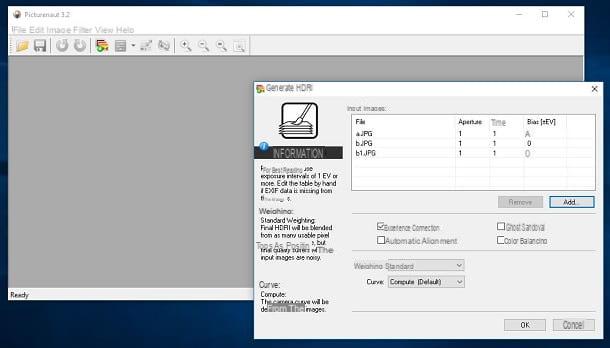
Once you have installed and started Picturenaut, you will find yourself in front of its main window: click on the icon depicting the three photos with the symbol (+) and select the photos which have different exposure to realize the HDR effect. Then click on the button Add located in the window Generate HDRI, select the photos you want to work on and, after possibly changing the settings related to the application of the HDR effect using the buttons located in the window in question, click on the button OK.
If you wish to apply further corrections to your work, click on the icon depicting the three adjustment bars and modify the parameters of the image using the tools made available by the program. As soon as you are satisfied with the result, click on the item Save As from the menu Fillet.
GIMP (Windows / macOS / Linux)
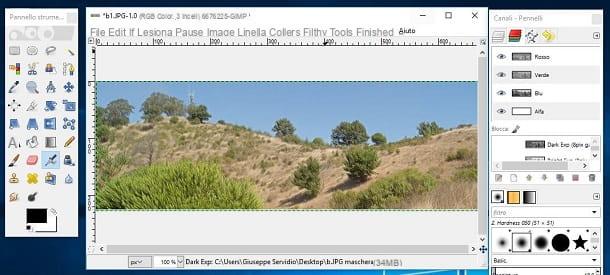
If you are quite familiar with photo editing and want to move on to a more complete solution, I recommend that you turn to GIMP, very famous open source photo editing program, as well as completely free, thanks to which it is possible to add the HDR effect to photos by manually adjusting their parameters.
To download GIMP to your computer, connected to its website, click on the red button Download xxxx and then on the orange button Download GIMP xxxx directly, which is located on the right of the page, under the heading GIMP for [your PC's operating system].
At the end of the download, open the file you just downloaded from the GIMP website and follow the wizard that is shown on the screen to complete its installation: if you use a PC Windowsclick on your button Yes and then OK, Install e end.
If you use a Macinstead, drag the GIMP icon into the folder Applications macOS, right-click the program icon and, from the menu that appears, select the item apri. This procedure is used to "bypass" the restrictions applied by macOS to programs from non-certified developers and must be performed only at the first start of GIMP.
After you have finally installed and started GIMP on your computer, you will need to proceed with the installation of Exposure Blend, an additional plugin that you can on this web page, by clicking on the link for the version of GIMP you use.
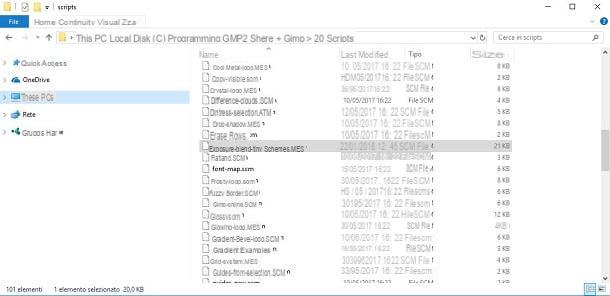
When the download is complete, drag the file .scm you just downloaded into the folder scripts by GIMP. In my case, the path to this folder is C:> Programs> GIMP> share> gimp> xx> scripts. If you have already started GIMP, then remember to go to Filters> Scripts> Update Scripts before using the new plugin you just installed.
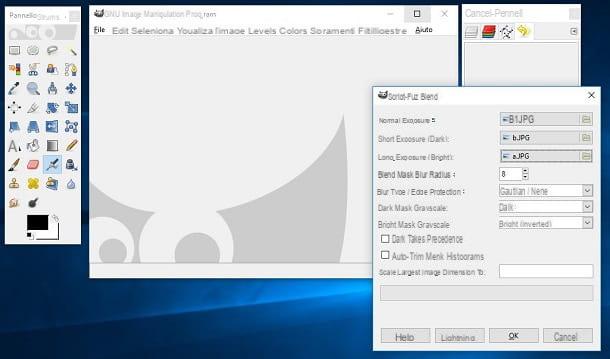
Now you can finally proceed to apply the HDR technique via the Exposure Blend plugin: then click on the menu filters and click on the item first Photography and then Exposure Blend .... In the dialog box that opens, select the three images to use for applying the HDR effect, click on the button folder located at the entry Normal Exposure, to select the normal exposure image, and then repeat this step for dark exposure images as well (Short Exposure Dark) and with light exposure (Short Exposure Bright).
After selecting the three photos to "merge" into a single image (and possibly having customized the parameters related to the Exposure Blend plugin), click on the button OK And that's it.
In case you are not satisfied with the result, you can manually change the contrast, brightness, color balance and all other image parameters using the tools in the menu Colors.
As soon as you are satisfied with the result, save your work by clicking on the item Esporta eats… from the menu Fillet. For more information on how to edit photos with GIMP, please read the tutorial I dedicated to the topic.
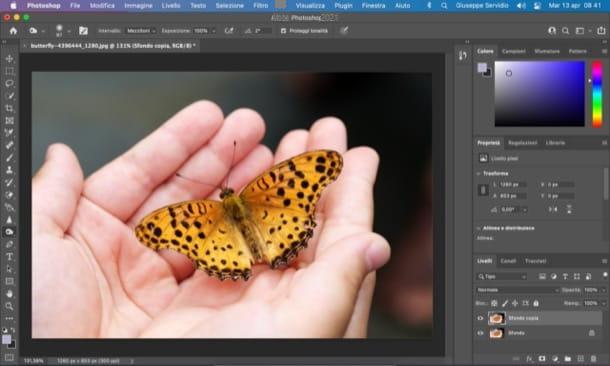
Photoshop (Windows / macOS)

Did the free programs I mentioned in the previous paragraphs not satisfy you? In this case, you could use the most famous photo editing program ever, that is Photoshop. I am sure you have already heard of this professional software, since it is widely appreciated by professionals working in the field of photography and advertising.
Since this is a solution designed especially for professionals, Photoshop is for a fee: to use it you must subscribe to the Adobe Creative Cloud service, whose basic plan starts at € 12,19 per month. If you wish, before proceeding with the subscription, you can try the Photoshop trial for free for 7 days. Once the trial period is over, you can decide whether to subscribe or not to continue using the program.
If you decide to use Photoshop, take a look at the guides in which I explain in depth how to use Photoshop and how to do HDR with Photoshop: there you will find some tips that will be useful for using the tools made available by the program developed by Adobe.
How to create HDR