Animatron (online)
One of the first services that I invite you to try for create talking cartoons è animatronic: allows you to create animations starting from some templates or from your own animations. You can use the service for free, but with some limitations (I would also say quite important): a watermark is applied to your works and you can save a limited number of projects, five to be exact. To remove these limits that characterize the free version of Animatron, you must subscribe to one of the subscription plans for the service, starting from 30 euros per month.
To create animations with Animatron, therefore connected to its home page, press the button Try free located on the right (under the heading Studio), click on the entry Sign up located at the top right and register for the service through yours e-mail or your account Facebook, Google o Twitter. Once logged in, fill in the fields Your name, Email (if you registered with a social account, instead of your email), Password e Industry, and then click the red button Create my free account to complete the registration procedure.
On the page that opens, presses the red button Start creating located at the top right, in order to access the Animatron workspace, press the button Continue that appears on the screen and choose the aspect of the work interface you prefer by selecting the tab Lite (if you want to use the simplified interface) or Expert (if you want to use the advanced one). If you are taking your first steps in the world of animation I recommend that you use, at least for the moment, the simplified interface.
Pray click on your button Animated sets located on the left to access the catalog of templates that you can use for your cartoon. By clicking on the buttons instead Backgrounds e Text you can select the background to apply to the scenes and the text to insert (if necessary) in the cardboard.
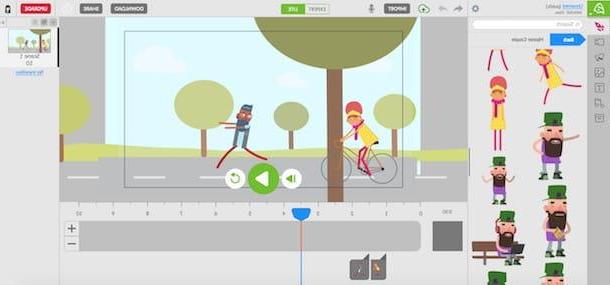
To make your characters talk, press the button microphone located at the top, you consent to the use of the microphone by Animatron by pressing the button Allow and proceed with the dubbing by clicking on the button REC (then press the button STOP to stop recording). I advise you to listen to the recording again by pressing the button Play and, if you are happy with the dubbing, click on the button Add to add audio to your cartoon timeline.
When you have finished your work and are satisfied with the result, click on the button Download to download your cartoon on your PC, or on the button Share to share it with your friends online.
GoAnimate (Online)
Another solution that I recommend you to try to make talking cartoons is GoAnimate: this is an online service that provides numerous templates and characters to create customized animations with speaking characters by recording dialogues.
Before explaining how GoAnimate works, it seems only right to inform you that it is a service that can be used free of charge for only 14 days and with some limitations, such as the inability to export the cartoon and the application of watermarks on the latter. . To remove these limitations, you must subscribe to one of the subscription plans for the service, starting from 39 euros per month. I also remind you that the service requires the activation of the Adobe Flash Player plugin in the browser to work properly.
To create talking cartoons with GoAnimate, connect to its main page and create your account to start the trial of the service: fill in the fields First name (first name), Last name (last name), Company name (name of the company), Job role (task), Work phone (company mobile number), Work email (business email) e Password. Then presses the orange button SING UP FOR A FREE TRIAL, in order to create your account and activate the 14-day trial. Within a few seconds you will receive a message to the email address you have just indicated: click on the link inside to confirm your registration on the site and that's it.
On the page that opens, presses the orange button MAKE A VIDEOclick on your bottone SELECT attached to the wording Business Friendly, so as to access the GoAnimate work area; then presses on square located inside the bubble that appeared on the screen and, finally, click on the button Skip to close the video tutorial.
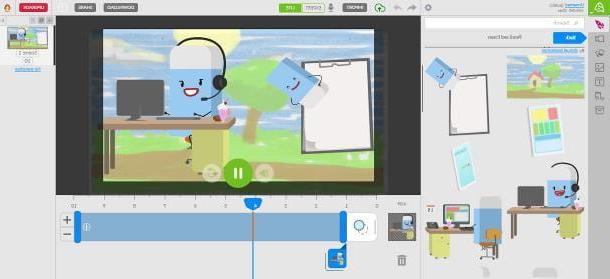
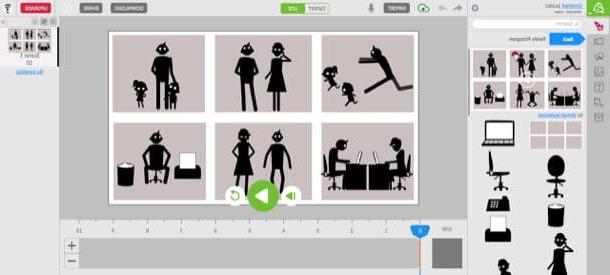
Now you can finally give space to your creativity and start creating the cartoon scenes: click on the icon depicting the two hills and the sun (top left), select one of the many template categories among those available (eg. Home, Space, Pirate, etc.) and then select the preset you prefer.
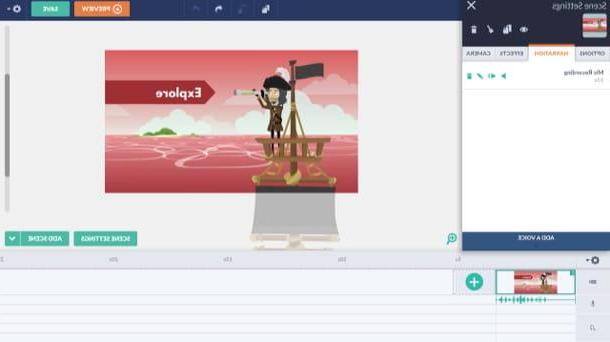
To change the current scene, press on it and select the change you want to make by selecting one of the tabs located on the left: Option, to change the duration of the scene, the background colors and so on; Narration, to insert the dialogues and the narration of the story by recording from the microphone or by loading an audio track from the PC; Effects, to insert effects and transitions or Camera, to insert effects that simulate the movement of a video camera. To change the characteristics of the characters or individual elements in the scene, click on one of the latter and then on the tabs Action, Dialogue e Enter / Exit to act, respectively, on the actions, dialogues and the entry and exit effects of the various characters.
After completing the changes on a scene, press the button Preview and, if you are satisfied with the result, move on to the next one. To do this, press the green button Add scene located at the bottom right, then click on the newly added scene and select the item Clear (if you wish to have an empty scene).
When you've finished making all the scenes in your cartoon, click the button once more Preview in order to preview the movie and make sure everything is okay; then press the button Save to save the project.
FlipaClip (Android / iOS)
Would you like to make a cartoon directly on your Android or iOS device? FlipaClip could be the right solution for you: it is a free application that allows you to draw single frames, transforming your device into a sort of flip-book 2.0. While being able to download FlipaClip for free, it is necessary to make in-app purchases starting from € 0,99 on Android and € 1,09 on iOS to remove the limitations of the free version of the app (first of all the watermark applied to your works). The iOS version also does not have the function of adding audio to the cartoon.
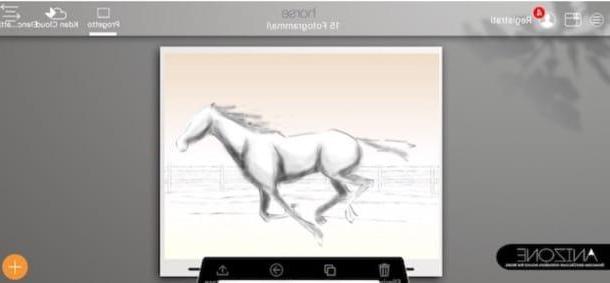
After installing and starting FlipaClip on your Android or iOS device, press the button capacitor positive (+) lead, insertion il cartoon name in the appropriate text field, select it background, format and quality video using the menus offered on the app's home screen.
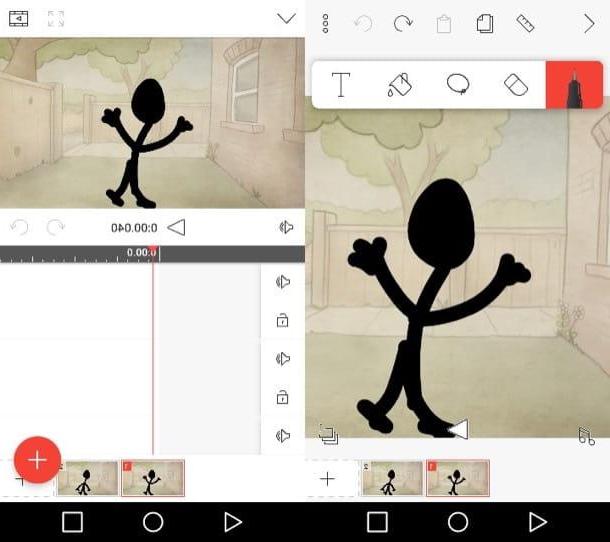
After defining the settings for the cartoon you are about to make, press the button Create project and create your cartoon using the tools present in the toolbar located at the top: press, therefore, on the symbol of the pen to draw on the sheet; on the symbol of rubber to erase the mistakes made; on the symbol of T to add text and so on.
Then tap on the symbol of music note located at the bottom left (present only on Android), presses the red button capacitor positive (+) lead and then press on the icon microphone to record the audio to add to the cartoon, or on the symbol of themusic album to load an audio track from the device. After inserting the audio in the FlipaClip timeline, press the button (⌵) located at the top left, in order to close the menu for adding multimedia files.
To add a new scene to the cartoon, press the number 2 located at the bottom to add the second scene and proceed as you did for the first: draw the character using the tools in the toolbar at the top, add the audio and continue the work until you finish the cartoon.
When you have made all the scenes of your cartoon, press the button Play located in the center of the screen (below), so as to preview your work and, if you are satisfied with the final result, first press the symbol of three dots (top right) and then on the item Create montage and on the red button Create montage to start movie processing. Once the operation is complete, you can share the video on YouTube, Facebook or on one of the other platforms supported by the service.
Animation Desk (Android / iOS)
Another app that I suggest you try to make cartoons is Animation Desk for Android and iOS. It allows you to create cartoons by drawing "by hand" every detail of the various characters and settings. It's free, but to unlock all the drawing tools integrated within it, you need to make in-app purchases starting at € 1,09. Compared to the solutions I mentioned in the previous paragraphs, moreover, at the moment it does not integrate a feature that allows you to perform audio dubbing, but simply insert background music to the videos made.
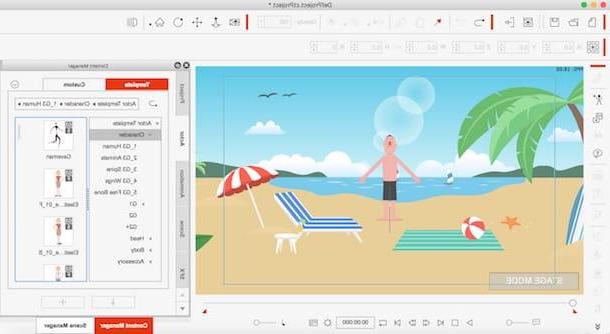
After downloading and starting Animation Desk on your device, close the welcome messages that appear at the first start of the app and create your drawing by pressing the yellow button capacitor positive (+) lead. At this point, press the item first Empty project (if you use an iOS device), then fill out the form that you see on the screen indicating the project name and other video settings and press on the item Crea to access the Animation Desk editor.
In the screen that opens, take a look at the short tutorial in which the features of the application are shown to you and then start making the cartoon: from the right toolbar, select the pencils and brushes you need to create the various characters and setting and, when you have finished making the first frame, presses on arrow facing right to go to the next one and repeat for all remaining frames of the cartoon. Then press the ▶ ︎ button to preview the final result.
To export the cartoon, do the following: up Android, presses the icon of drawers located at the top left, make a long tap on the preview of the cartoon, presses on the symbol Share at the top right and tap on the item Share video. Then presses on the voice NEXTselect il format where to export the cartoon, press on the item Done and select one of the sharing options among those proposed. Up iOSInstead, press the icon of the house located at the top left, tap on the item Export located under the preview of the cartoon and select the option you prefer to export the movie (ex. Gallery, Email, Etc.).
How to create talking cartoons