How to create Android widgets
Android it is a very well known operating system also because of its wide possibilities of customization. Think that some people used widgets to customize their Home screen even before 2010. In fact, in 2009 an SDK (software development kit) was released containing a series of tools to create widgets for the 1.5 Cupcake version of Android. Android 1.0 and 1.1 already had some widgets, but the real potential of this element came to light with the aforementioned release of the SDK to developers. That said, let's go back to the present day and see how to create widgets even if you don't have developer skills.
How to create custom widgets
Android is a huge world of myriads of learning solutions how to create widgets. For this reason, I will focus only on some solutions that I have had the opportunity to try firsthand and I believe are more valid, in terms of ease of use and guaranteed results.
Starting with the most basic solution, widgets are often already implemented by default when you start your smartphone for the first time. I think, for example, of the widget ofclock, now inevitable in the Home screen virtually any Android device.
To use the default functionality, you just need press and hold on an empty area on the main screen and tap on the item widget. Of course, there are myriads of software customizations, so the rumors may vary depending on the device you have, but generally the procedure is more or less the same.
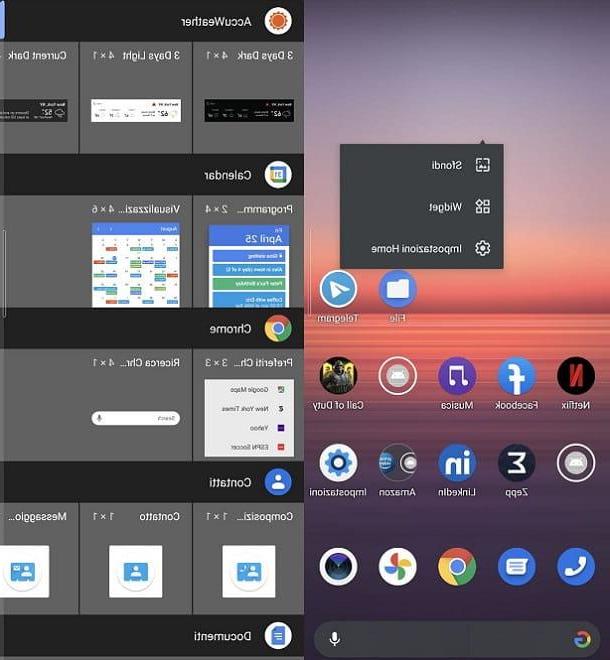
Reached the page relating to widget, you will notice that there are already applications that use it. For example, the Google Chrome browser typically implements a search bar to be positioned at will on the Home screen.
To place a widget, you just need to hold down on its frame and drag it where do you want. can scale back widgets holding down on them and dragging the appropriate ones shot surrounding its "window".
In short, using the basic widget functionality is very simple. Instead, going a little deeper in terms of Customization, you might be interested in using the application KWGT Kustom Widget Maker, downloadable for free but containing advertisements (not in widgets, but within the app) and in-app purchases (to hide advertising and activate features such as exporting and sharing presets).
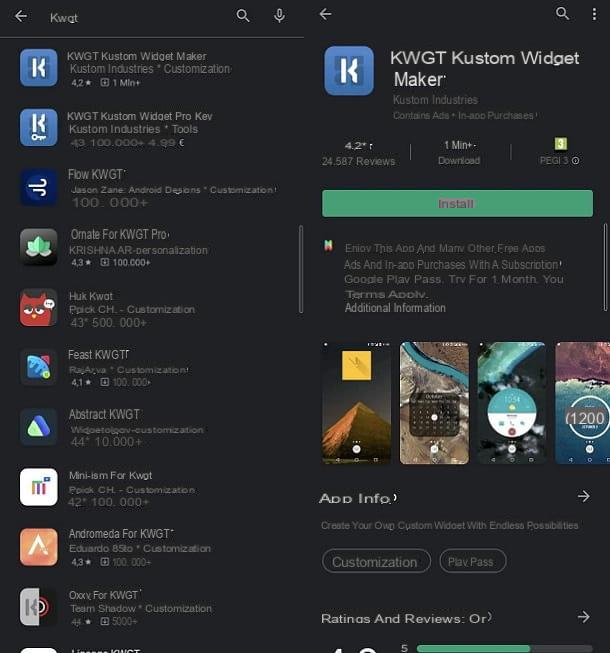
To download the latter, just open the Play Store, search "Kwgt", press onicona dell'app (a white “K” on a blue background) and tap the Install button. In this way, the download and installation will start automatically. If you use an Android terminal without the Play Store, you can rely on alternative app stores.
Once the application is open, read the initial indications and press pulsating Next. You will be prompted to provide the Permissions related to Location e SD memory, which will be used for weather related widgets or to save presets, fonts and images to memory. You can also decide not to provide these permissions, but the mentioned features will not work correctly.
Premium, though, your pulse Close and go back to Home screen of your smartphone. At this point, press and hold on an empty area screen, tap on the item widget and place one of those proposed by on the main page KWGT.
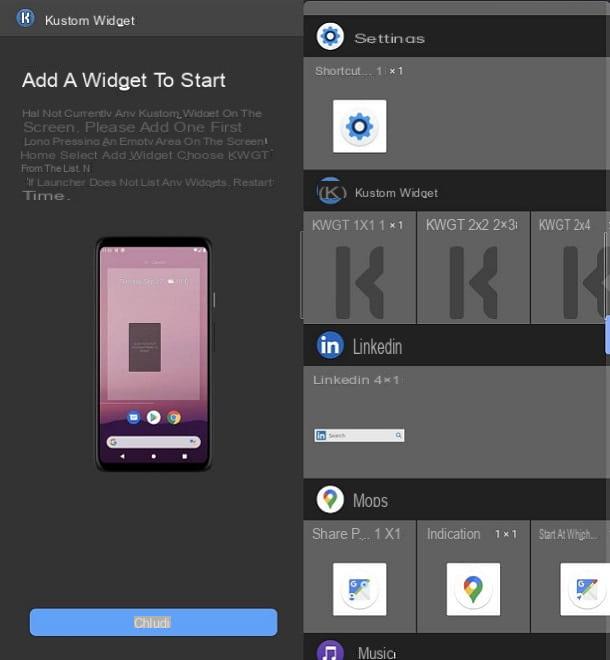
Now you can unleash your creativity! You can choose to create widgets of various sizes, from 1 × 1 up to 4 × 4. You will then scale back the widget holding down on it and using the appropriate shot. In any case, once you have positioned the element, tap on it and select the package from which you want to start to create your custom widget.
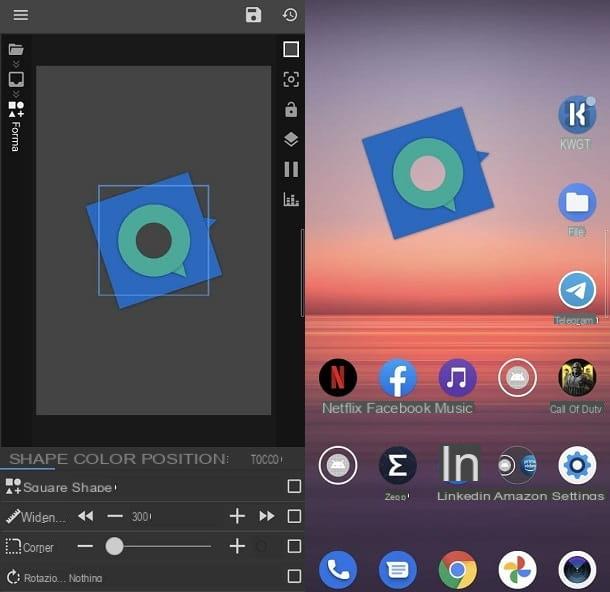
By doing so, theeditor related to the widget you selected. For example, choosing a clock, you will be able to modify them crafts, background and so on. In my case, I modified the outer part of a circular clock making it square, just to make you understand the degree of customization that can be achieved.
Obviously, it is impossible to explain all the customizations here, as it depends on your needs and the preset chosen. However, several can be created types of widgets. Among them, you can find music players, Calendar e news aggregators.
This is just to name a few possibilities, but in reality you can get others by switching to the Pro plan and you can import your own creations or those made by the community. In any case, once you have finished editing the widget, just press on thesave icon, present at the top right, and that's it: you can go back to home page to find your creation.
In short, now you know how to quickly and easily create a custom widget on Android.
How to create photo widgets

How do you say? Would you like to make a widget containing your photos? No problem I'll tell you how to do it right away!
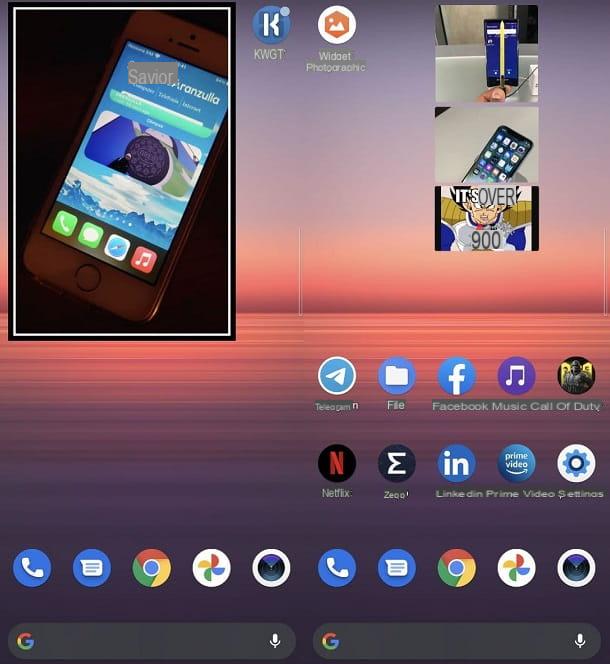
In this case, my advice is to go through the app Photo widget, downloadable for free from the Play Store and from alternative stores for Android. The latter includes advertisements, which however do not spoil its use.
Once the app is installed, go to the Home screen, press and hold on an empty area, select the option widget and drag the box of Photo widget where do you want.
Press, therefore, on the element, guarantee the app the permesso related to memory access and select theimage you want to set as a widget. The game is done!
Other solutions to create widgets on Android
Clearly, as mentioned above, there are myriads of possibilities on Android related to creating widgets. Below, therefore, I list some applications suitable for the purpose that may interest you.
- Simple Photo Widget: A very popular application that allows you to place your photos on the Home screen through various shapes. The possibility of inserting multiple photos at the same time is also very welcome. The application is free.
- Data Counter Widget - use of data: a simple as well as useful widget to take into account the data consumed both under data connection and via Wi-Fi network. The app is free, but to unlock some advanced features, such as widget placement in the status bar, you need to go through in-app purchases.
- UCCW - Ultimate custom widget: for those who want to go down to a higher degree of customization, this application allows you to install myriads of widgets, both free and paid. There is also the option to import .uzip files created by you or the community. The application, which is free but contains ads and in-app purchases, welcomes the user with a handy quick guide explaining how to get started.
How to create widgets on iPhone
If you are wondering how to create widgets on iOS 14 (the version that introduced the ability to insert widgets on the Home screen on iPhone), this part of the guide is for you. In fact, below you can find all the relevant information accessible directly from your iPhone.
How to create custom widgets
Released on September 16, 2020, iOS 14 brought with it the possibility of using widgets on the Home screen (before they were relegated to a special screen).
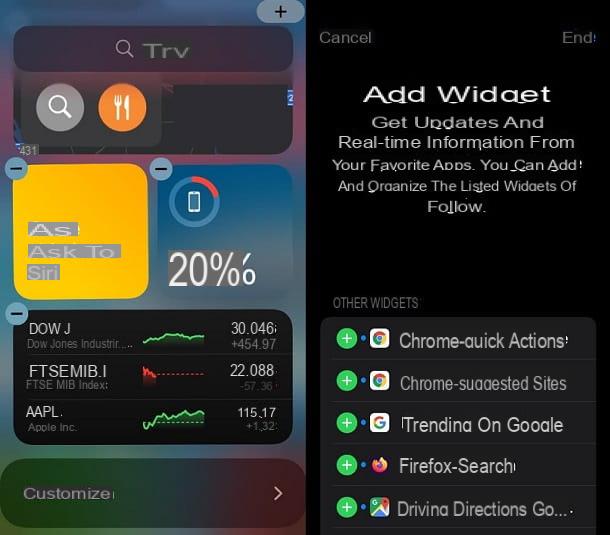
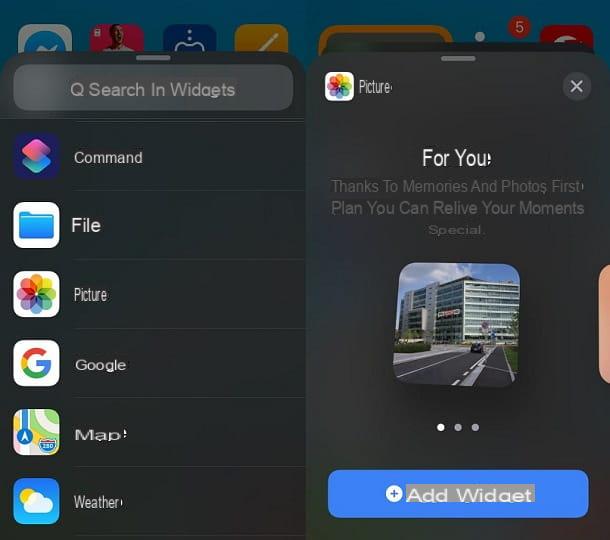
If you haven't fully explored this feature yet, I recommend you press and hold on an empty area screen and tap on the icon + which appears at the top right.
Here you will find many predefined widgets already at your disposal: just press the widget pane you want to use, optionally choose the format and tap the button Add widget. The latter will appear on the Home screen: you can drag it wherever you want. For remove it, just click on the icon - and tap the button Remove.
These widgets can also be added and used using the Today screen, that is the one that appears by performing one swipe from left to right starting from the main page of the iPhone. To customize the Today screen, just swipe down and tap the button first Modification e poi quello Customize.
Now that you've learned how to use the basic widgets offered by iOS, I'd say it's time to move on to creation of custom widgets, the real theme of this tutorial. Well, you should know that the addition of this feature by Apple has indulged fans, so much so that an application has been created, called widgetsmith, which allows you to create your own custom widgets.
This app has become quite popular and is free to download (there are in-app purchases that allow you to get certain exclusive themes and more). To proceed, just open the App Store, go to the tab Search, search for "Widgetsmith", To tap on 'icona dell'app (a sort of blue “Home button”) and press the button Get, then verifying yours identity via Face ID, Touch ID or Apple ID password.
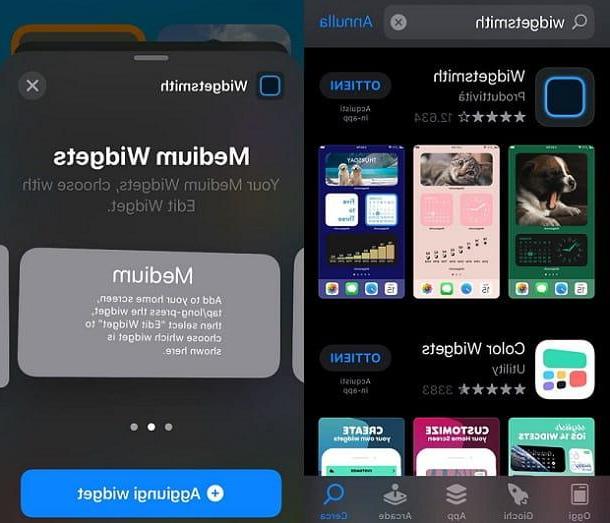
Once you open the application, you will notice the presence of a subdivision by dimensions widget: Small, Medium e Large. So make your choice (by pressing, for example, on the box Small # 1) and you can start configuring your custom widget. You can also change the widget nameby pressing on the appropriate section at the top.
You will notice that the default widget is for the day: just click on the box Default widget to choose one style different. For example, just scroll down to find other types of widgets, such as those relating to the battery, program and at moon phases.
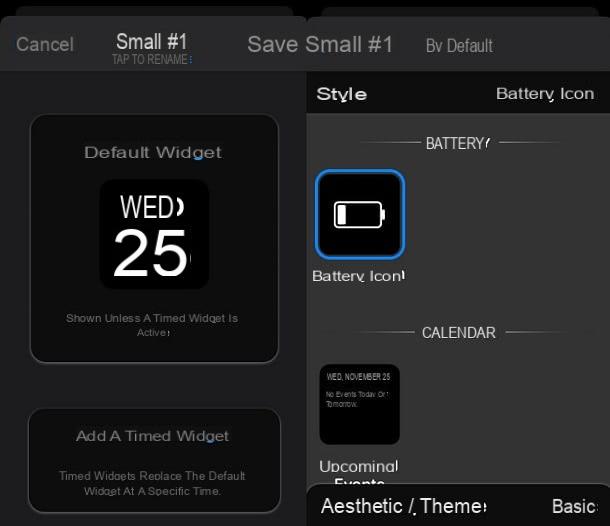
So, tap on widget pane that you want to create (for example, Battery Icon) and its voice Aesthetic / Theme to continue. Here you can choose the theme you like best for this widget. There is often a lot of choice - just scroll down to find other themes (the ones with the lock require you to go through in-app purchases).
Once you have selected the theme to start from, click on the button Customize Theme, which is located at the bottom, and you will be taken to the theme editing screen. Here you can choose, for example, the colour of the icon inside the widget, of the background and of the border andartwork.
Once you have finished editing, just press the button Save present at the top right and choose whether to apply this theme to a widget only or if extend it to everyone. If, on the other hand, you want return to the initial situation, or how the theme was before customization, just press on the item Reset, which is located at the top.
Once you've created your custom widget, you can add it to the Home screen by pressing and holding on an empty area, by tapping the button + and selecting the option widgetsmith. Dopodiché, premium pulsating Add widget and place it where you want.
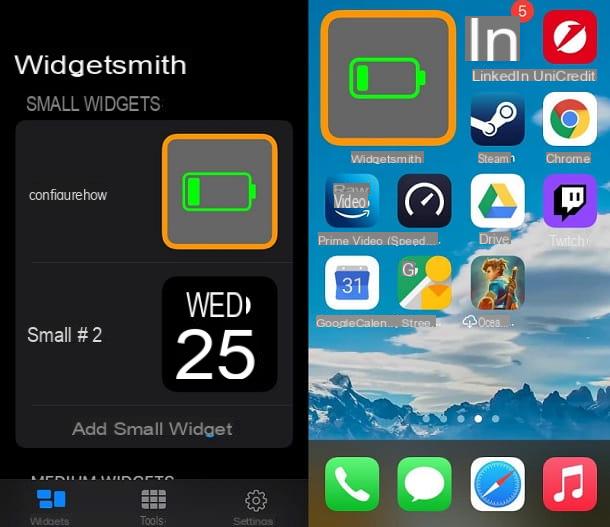
To set up your custom widget, just hold down on the box you have just placed, tap on the option Modify widget, click on the box widget and select the one you created earlier.
Perfect, now you have your own custom widget right on your Home screen. Of course, you can indulge yourself with widgets.
How to create iOS widgets with photos
Just to give you a concrete example of what you can do with the solutions that I illustrated in the previous chapter, I will make a practical example relating to the creation of a widget that includes your photos.
In this case there are two possibilities: go through the default widget offered by iOS or create your own through apps like Widgetsmith. The choice is up to you, but below you will find the indications for both solutions.
Starting from the default widget, it's all very simple: that's enough for you press and hold on an empty area area of Home screen, tap the button +, scroll down, tap on the box Gallery e premere sul pulsating Add widget.
By doing so, you will have the widget with your photos placed directly in the Home screen. In short, you shouldn't have any particular problems with this procedure.
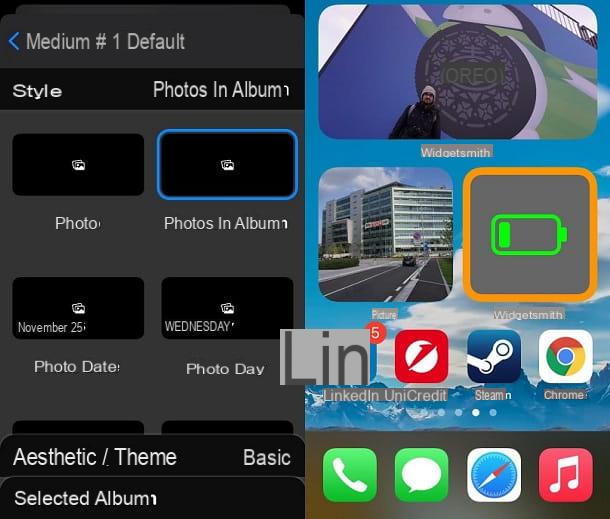
As regards, however, the custom widget, just open it widgetsmith, choose the size of the widget you want to create (by pressing, for example, on the Medium # 1 box), tap the button Default widget and choose one style related to photos (for example, Photos in Album).
Once you have chosen thealbum or the photo to insert in the widget and customize the style, save I modified it and go back to Home screen. At this point, press and hold on an empty area, tap on the icon +, select widgetsmith, choose the format of the widget you created and press the button Add widget.
Now everything should already be configured correctly. If that's not true, you can press and hold on the widget you just entered, tap on the option Modify widget and select the one you just created.
Great, now you know everything there is to know about making widgets with photos on iOS.
Other solutions to create widgets on iPhone
The arrival of the ability to insert widgets on iOS has clearly given birth to different applications that allow you to customize the Home screen. Below you can find what I believe to be the most interesting alternatives.
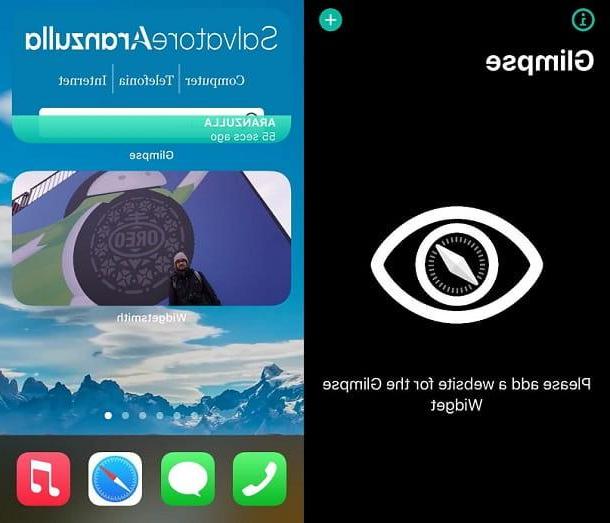
- Glimpse 2: if you are looking for something different than the classic personalization apps, this solution allows you to insert web pages as a widget, so that you always have them at your fingertips. The application is free to use, but has the option of supporting creators through in-app purchases if you wish.
- Widgeridoo: an application that allows you to customize the widgets to be inserted in iOS. There are several themes available for free, but to create unlimited and import other creations you have to go through in-app purchases.
- Photo Widget: Simple: if you are not satisfied with the solutions to make photo widgets that I explained in the previous chapter, this application may interest you. It is, in fact, a solution that offers various possibilities with this focus. Simple to use and completely free.
Perfect, now you are aware of the best apps to create widgets. I just have to wish you a lot of fun playing around with these customizations!
How to create widgets on PC

How do you say? You want to create widgets to use via the PC? No problem: you can do this too!
In fact, there are several solutions that allow you to reach your goal. In this case, I can only advise you to follow my guides on how to put the clock on the desktop and how to put the weather on the desktop. In these tutorials I have explained how to use solutions for both Windows that for MacOS. Good fun!
How to create widgets