How to make a nice birthday video

If you are actually going to understand how to make a nice birthday video to give to your dearest loved ones, know that the most "difficult" part, beyond what you might think, consists in choosing the photos, videos and songs that are most meaningful for the person who is celebrating birthday or, if the video is dedicated to your partner, the most significant images and sounds for your relationship.
It is precisely the apparently more obvious and banal elements, such as the choice of the order of the contents, together with a good background music (even better if with a vocal dedication), to establish the good quality of the resulting video!
So, before you even install any program, download any app or go to any online service, make sure you have everything you need at hand: therefore, collect the Photos, the video and music that you want to insert in the movie in a single folder on your PC, smartphone / tablet or your cloud space, define a common thread on which to base the movie and, with a small mental scheme, organize the elements on a timeline imaginary.
Once you have completed this small planning phase, you just have to arm yourself with patience and free time and, thanks to a good software or a well-made online service, give life to the idea of the movie you have created in your mind. In the following sections of this tutorial I will show you how to make a birthday video using your computer, smartphone / tablet or via an online service, in order to quickly publish it on social networks.
How to make a birthday video on PC
One of the best software for create a birthday video on PC is definitely Wondershare filmora. If you had never heard of it, it is a program, available for both Windows and macOS, which allows you to assemble a movie composed of music, photos and video clips, in an extremely simple way.
Characteristic of this software is its intuitive interface, which makes it suitable for both beginners and more experienced users, and the presence of numerous filters, effects and transitions, to be applied to the elements of the movie. Filmora is available in both free and paid versions: in the first case, a watermark to the videos made, but there are no time limitations in the use of the software.
To get the program, then connected to its main web page, click on the button try free and wait for the setup file to be completely downloaded to your computer. Once the download is complete, launch the .exe file just got it and, if you employ Windowsclick on your button Install and wait for the installation process to be completed automatically; at the end of it, click on the button Sign up now, to launch the program.
If, on the other hand, yours is a Mac, april il .ZIP file downloaded, start theexecutable inside, click on the buttons apri e Install and wait for the setup to be completed automatically; finally, press the button Sign up now to start the software.
From now on, the procedures are the same on both operating systems: click the button several times NEXT, to view the initial tutorial, press the button Ends and click your bottone Free trial, to take advantage of the free version of the software (or on Buy it now, to obtain a paid license).
Once this is complete, you are finally ready to create your birthday video. Then select the format that you prefer among those proposed (eg. PM16:9) and click on the button for create a new project, to display the Filmora workspace; alternatively, use the menu File> New Project and choose the resolution from the displayed submenu.
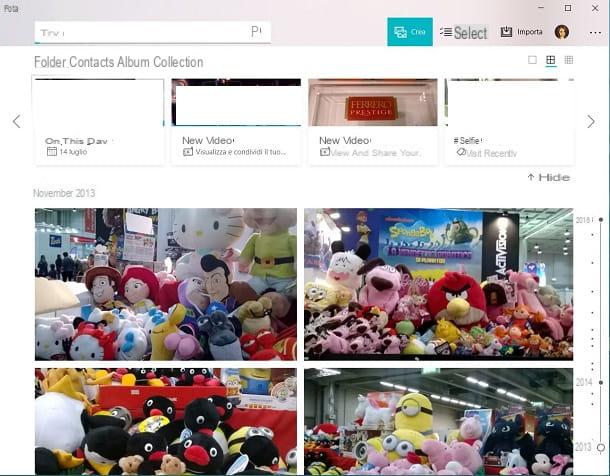
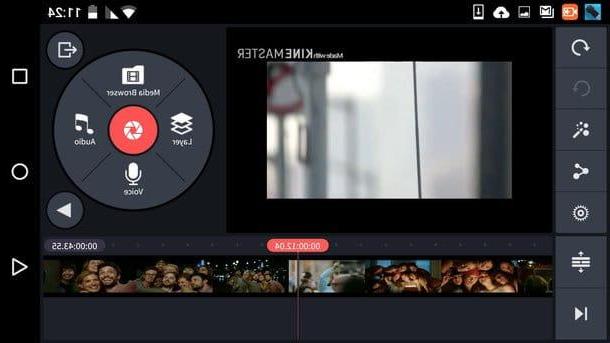
At this point, you need to import the files to insert in your movie (photos, audio clips and video clips): to do this, you can drag them inside the box Import media files, or use the menu File> Import Media Files located at the top left and choose whether to import single files, entire folders or files from smartphones / tablets connected to the PC.
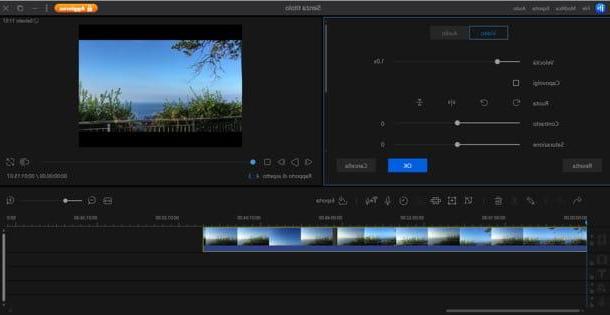
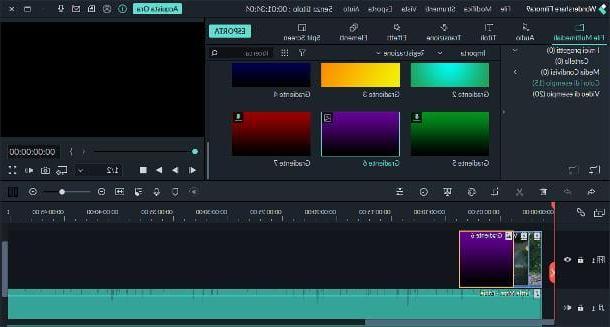
Once the import is complete, drag the items you want to use onto the time line of the project, ordering them as you prefer; the available contents are divided into categories (multimedia files, audio, titles, transitions, effects, special items and filters split screen), and can be selected using the buttons located at the top of the program window.
To change the duration of an element, drag the edges of its preview to the right (to increase it) or to the left (to decrease it); to crop, color or edit an element, select its preview with a mouse click and use the editing toolbar, located on the left just above the timeline.
To play the movie, use i control buttons placed immediately below the video preview box, on the right; in the toolbar still below, on the other hand, there are the tools to display apre-rendering preview, add gods markers to the movie, record a voiceover, adjust the volumes of the tracks using the audio mixer and adapt the duration of the selected item to the timeline.
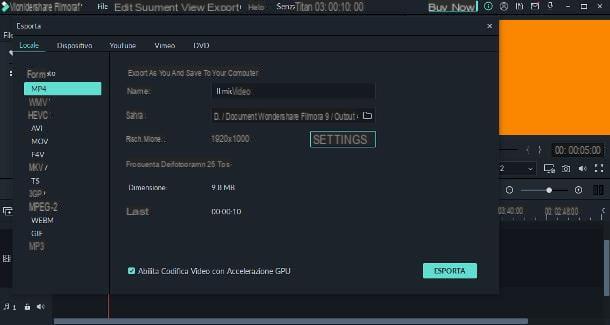
Anyway, once you get a satisfactory result, click on the button Export and, if you have chosen to use the free version of the software, click on the button Sign in to export with watermark and enter the required data (e-mail, Password, name e last name) to create a new Wondershare ID. You only need to do this the first time.
When you are done, click on the button Subscribe to access the file saving screen: using the items located at the top, indicates the device / platform on which you intend to play the video (eg. Local, YouTube o DVD), then use the sidebar to choose the format export (eg. MP4) and insert, in the text fields on the right, the name of the video and the save folder. If necessary, you can change its resolution by clicking on the button Settings.
When you are done, click on the button Export and wait patiently for the resulting movie to be exported to the chosen folder; I remind you again that the free version of Filmora affixes a watermark to the works created.
If you feel that the solution I told you about does not suit your needs perfectly, you can give an opportunity to a series of equally valid alternative software, even free, such as EaseUS Video Editor or SmartSHOW3D for Windows, or iMovie and macOS, which I told you about in my tutorials dedicated to programs for creating videos with photos and those for making movies with photos and music.
How to create a birthday video on smartphones and tablets
Contrary to what one might think, create a birthday video on smartphones and tablets can be very easy: just go to the right app and the result is guaranteed! In this regard, I advise you to consider Quik, the simple and functional editing app created by GoPro and available for Android (available on Play Store and alternative stores), iPhone and iPad.
After obtaining it (just look for it in the store, press on its icon and then on the button Installa / Ottieni), start it and, if you use a device animated by Android, fai tap sul pulsating Create a new video to start working immediately; if necessary, granted to the app to access the photos and, in general, the multimedia elements of the device.
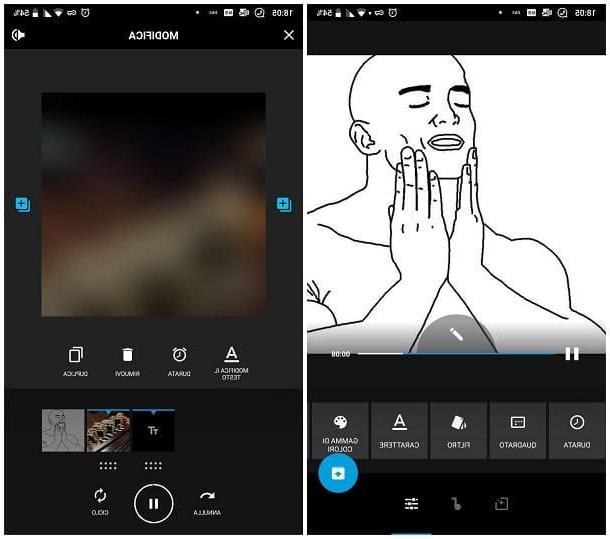
At this point, using the tabs located at the top, locate and select with a tap the photos and videos to be included in the movie; when you're done, tap the button with a checkmark, add an introduction title to the movie and tap the button NEXT.
If, on the other hand, yours is a iPhone or iPad, tocca il pulsating To start, allow access to photos by touching the appropriate button and, if requested, refuse the activation of the option weekly video souvenirs. Now, tap the button capacitor positive (+) lead located at the bottom, select the items to include in the movie and, when done, tap the button Add.
As of now, the steps for Android, iOS, and iPadOS are quite similar: to change the captions, focus and duration of the image (Android only), tap the pencil, located in the center of the screen; if, on the other hand, you want to change the order of the photos, make a long tap on each of the images and drag it where you prefer, if you use Android, or touch the symbol of overlapping rectangles, if you use an iPhone or iPad instead.
To apply additional filters and effects on video elements, tap the button depicting a series of regulators, your Android, or a wrench, on iPhone and iPad. Finally, to change the audio of the movie, touch the symbol of music note and select one of the available songs by tapping on the relevant preview box; to use a custom song, tap the box instead My music.
Keep in mind that Quik adds a watermark to the finished work, in the form of a final frame; to delete it, scroll the sequence of images to the end, locate theanother di quik and tap on the icon in the shape of basket, residing on the same.
When you are satisfied with your work, tap the button Save (hey, your Android, has the way I gave a down arrow) and indicates whether to share the video on social networks, or to save it in the device memory.
In addition to Quik, there are numerous other apps, such as Google Photos or iMovie, which allow you to obtain equally valid results: to learn more, I refer you to reading my tutorial dedicated to apps for making videos with photos and music.
How to create a birthday video on Facebook
The simplest method for create a birthday video on Facebook undoubtedly consists in making the movie using an online editor and then pasting the link to the video directly on the birthday boy's Facebook wall.
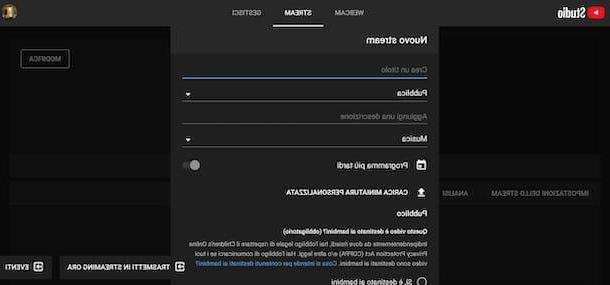
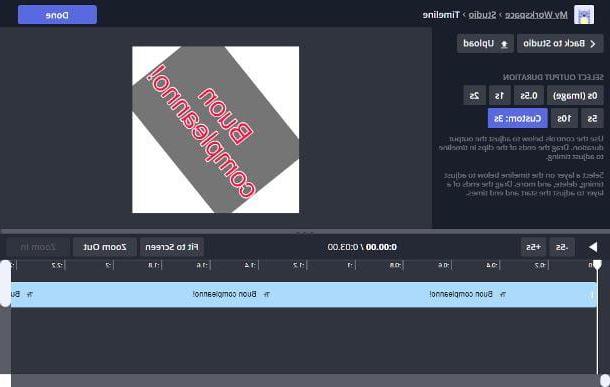
In this regard, I suggest you use Kapwing, a simple and practical online video editor, which can be used via any browser for PC, smartphone and tablet. Once you reach the home page of the service, use the box Click to upload to upload photos and / or clips to add to your movie.
Once you have added the necessary elements, use the menu items at the top to bring the movie to life: Text, to add text to elements; Timeline, to change the order of the elements; Scenes, to define the frame of the movie, the background image and the ratio; Audio, to add background music to the video (from file, from link or by recording a voiceover); subtitles, to add subtitles to any video clips; and Elements, to insert shapes or other “special” objects. Remember to confirm each change by pressing the button Done which, depending on the section, resides at the top, or at the bottom right.
Once you are satisfied with your work, press the button Export video placed at the top, log in to your Facebook or Google profile and wait for the video to be rendered; now, locate the section Share located in the new page displayed, click on the button dedicated to Facebook and wait for the social sharing window to load.
When this happens, set the top drop-down menu to Share on a friend's diary, insertion il friend's name in the appropriate field, select the outcome of your interest and, if you wish, comment the video using the box below. To conclude, click on the button Post to Facebook And that's it!
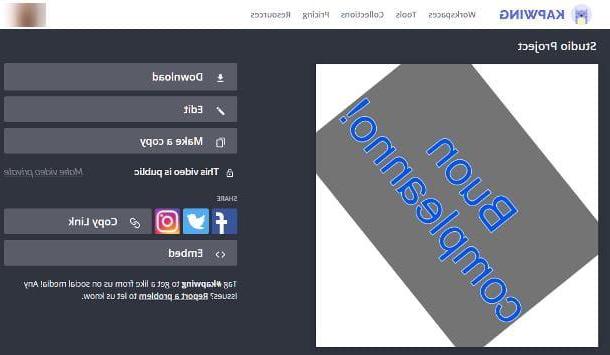
Please note that, in the video export screen, you can also download it to the device as a file (Download), share it on Twitter o Instagram, generate a sharing link direct (Copy link) or a embed code (Embed), to be placed on a web page.
The videos, in the free version of the service, are kept for two days and can last a maximum of 7 minutes. To remove the limitations, you need to upgrade to the paid version ($ 20 / month).
How to make a birthday video