Necessary

If you're interested record your first song using the computer, it is good that you have the right tools at your disposal to be able to work in complete tranquility. Clearly, the need or not of them varies according to what your needs are: for example, if you need to make an amateur song to share with friends, you will certainly not need a personal microphone!
If, on the other hand, you are thinking of recording a demo to send to a music label, you should pay attention to the quality of the song generated and use, at least for the voice, a high-performance microphone. In any case, I always advise you to choose hardware that can be connected through cable: Wireless solutions, such as Bluetooth microphones and headphones, are not very suitable for what you are about to accomplish.
Audio card
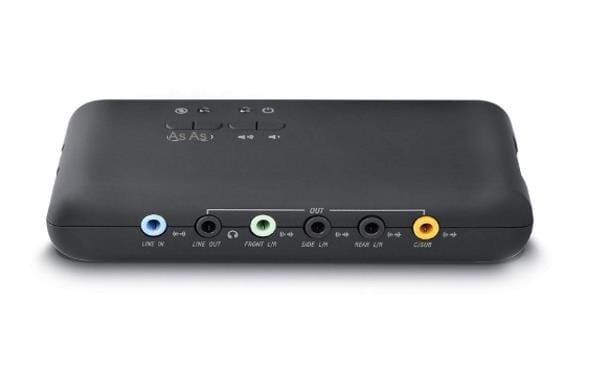
The first component to pay attention to is certainly the audio card: it deals with processing the sounds in transit to and from the computer and coordinating the operation of the various peripherals.
Most of the sound cards integrated in PCs allow you to connect at least one microphone and a pair of headphones, which can be configured using simple virtual equalizers; if, on the other hand, you need something more advanced (for connecting MIDI devices, guitars, basses, for optical audio output or, again, for hardware equalization or the dedicated DAC system), you may want to consider buying a discreet external sound card, better if of good quality, to be connected to the computer via USB input.
See offer on Amazon See offer on Amazon See offer on AmazonMicrophone

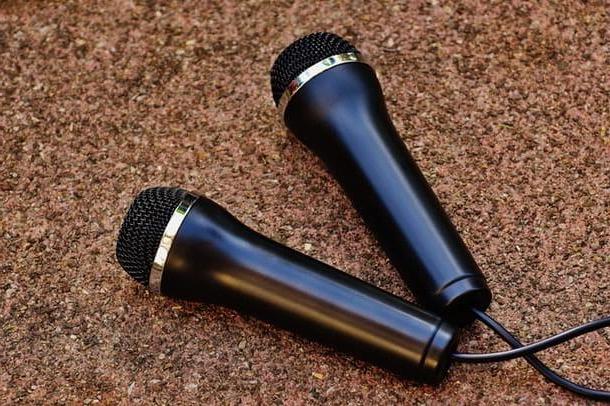
If it is your intention to make a song that contains your voice, it is essential to have a microphone available that can offer an at least acceptable result. In portable PCs, as well as in some desktop PC webcams, a microphone is integrated that can record voices and sounds from the outside, more than enough for amateur work.
If, on the other hand, you need to make a slightly higher quality song, you may want to consider purchasing a dedicated microphone, to be connected to the integrated sound card of the computer, to the external one (via USB port) or, if you use it, to the mixer.
Clearly, the microphones are not all the same and each of them has very specific characteristics (reduction of external noise / breaths, presence or absence of condenser, integrated effects, equalization / active amplification and so on): therefore, make sure to buy a component that suits your needs.
See offer on Amazon See offer on AmazonHeadphones
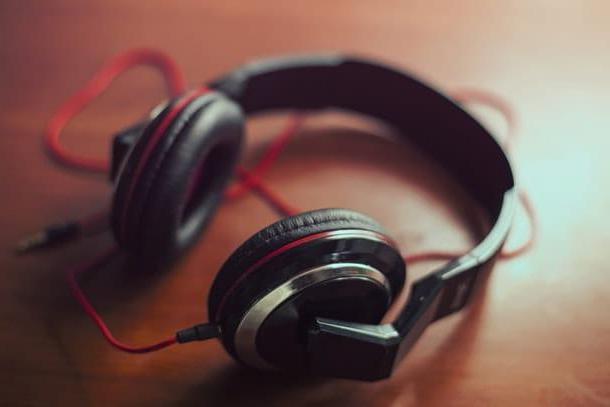
Generally, audio editing requires a good dose of silence, concentration and ear, all aspects that, put together, allow you to listen carefully to the result of your work and correct even the smallest imperfections.
To achieve such a result, I advise you to work using a couple of over-ear headphones, to be connected to the computer (to carry out the actual manipulation of the audio) or to the mixer (to manage several input tracks separately).
There are really a lot of headphones in circulation, each with its own characteristics and strengths: as I have already mentioned above, I do not recommend using wireless devices, as the audio could be distorted or very slightly delayed, due to small, but inevitable, interference.
Vedi offers your AmazonIf you are interested in learning more about headphones, I invite you to read carefully my buying guide that I have dedicated to them, in which I have indicated, in detail, all the aspects to pay attention to during the choice of electronic devices of this type.
mixer

Il mix it can be crucial if you plan to record your song by combining multiple input / output instruments at the same time. So, if the idea of mixing pre-packaged samples with each other doesn't drive you crazy and you would like to record everything live, acquiring the microphone and instruments at the same time, you can evaluate the purchase of a multichannel mixer, to be connected to the audio input of the computer ( or discrete sound card).
See offer on Amazon See offer on Amazon See offer on AmazonClearly, in this case, the volume balance of the instruments, the primary equalization, the gain and so on will have to be managed directly by the mixer.
How to record a song from your PC
After purchasing, if necessary, the dedicated instrumentation, the time has come to get to the heart of this guide and to explain to you, in practice, how to record a song from your PC.
First, be sure to connect all instruments to your computer and configure them, if necessary, according to their respective user manuals. Once this is done, you just have to install a specific software dedicated to the acquisition and manipulation of audio: below I list the ones that, in my opinion, are the best on the square.
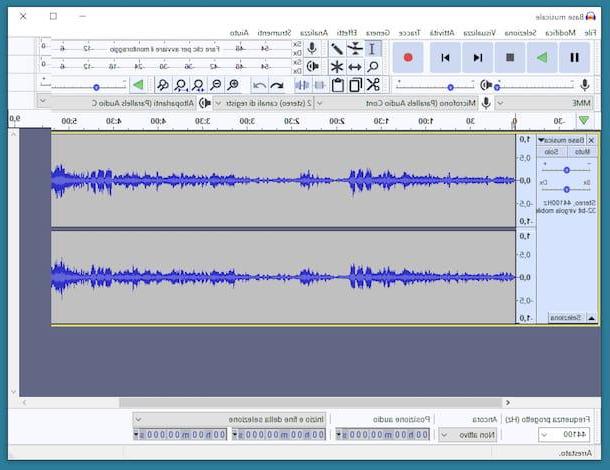
Audacity (Windows / macOS / Linux)
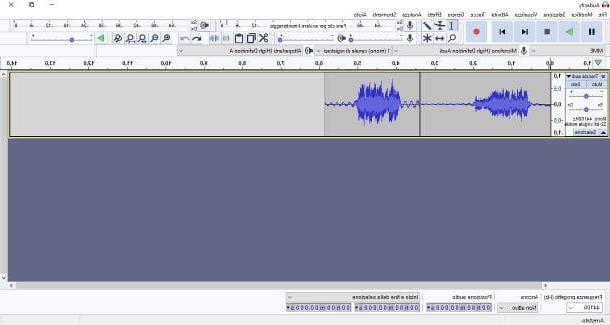
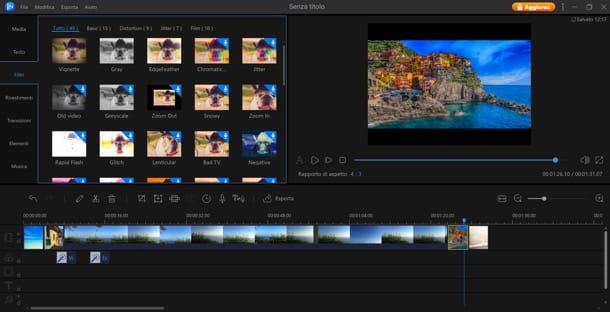
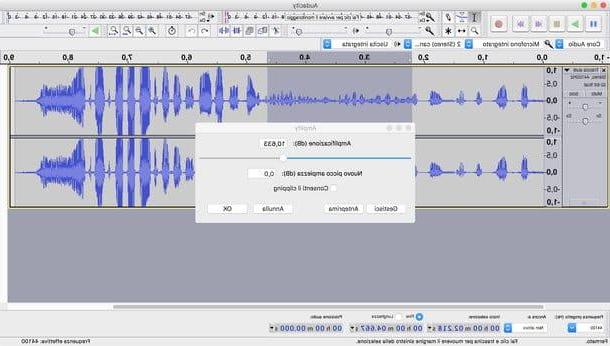
If you need a program that allows you to record a song making use of the computer, you can not ignore Audacity. If you have never heard of it, this is a great audio editor, free and open source, which includes tons of filters and tools to optimize your recordings.
In detail, Audacity allows you to capture audio from any source configured in your computer (microphone, internal card, external card, mixer, and so on) and combine it with other pre-existing audio tracks, or created later.
To use it, connect to this web page and click on the link that best suits your operating system (eg. Audacity Windows Installer or Audacity macOS DMG), in order to start the download of the setup file.
When the download is complete, start the file obtained and, if you are using Windows, click in sequence on the buttons Yes, OK, Next for four consecutive times e Install. Finally, tap on again NEXT and click on the button end, to start the program immediately.
If, on the other hand, you are using a Mac, drag theAudacity icon in the folder Applications macOS and, to start the program, right-click on its icon and press on apri twice in a row, in order to bypass the limitations of macOS relating to software from non-certified developers (an operation that must be performed only at the first start).
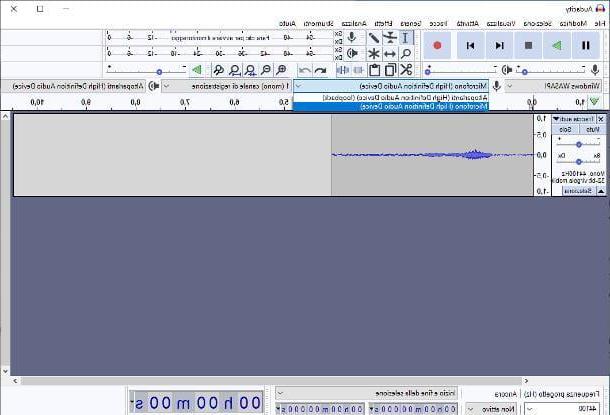
Now, you should find yourself in front of the main Audacity window, which consists mainly of three parts: in the upper left you can find the playback controls, in the upper right the controls for the active track and, in the central part of the window, the actual editor. Finally, the menus located at the top allow you to access the specific functions of the program.
To immediately start a new recording, do this: using the second drop-down menu on the left, choose the source from which to record the audio (the microphone, the PC sound card or other connected audio devices) and, having made your selection, press the button Rec, to start recording right away. To stop capturing audio, click on the button Stop.
To add new tracks, use the menu Tracks> Add New; to add dynamically generated sounds or effects, use the menus Generates ed Effects.
As you can see, the interface of Audacity is not very aesthetically appealing, however its absence of frills allows for quick access to useful functions. Don't be scared of this: a little practice will allow you to get completely acceptable results!
However, once you're done, you can export your song via the menu File> Export. If you are interested in learning more about Audacity, you can take a look at the in-depth guide I have dedicated to the program.
LMMS (Windows / macOS / Linux)
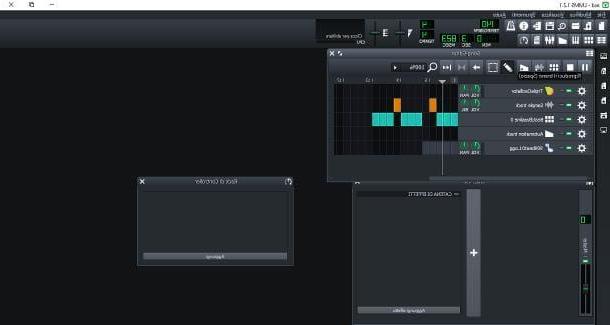
LMMS is a program dedicated to the recording and production of songs completely free and open source, available for the major desktop platforms (Windows, macOS and Linux) and full of tools, features and ready-to-use contents.
The program's many features include support for 64-bit VST instruments (with 32-bit VST bridges if needed), native support for multisamples in SF2, GIG and GUS formats, and the ability to import MIDI files and Hydrogen files .
To download LMMS, connected to its website, click on the button related to operating system you are using and, if necessary, indicate whether to download the program a 32 o 64 bit.
When the download is complete, launch the file obtained and, if you are using Windows, click on the buttons Yes, NEXT, Accept, NEXT, Install e end to conclude the program setup. To start it, you can use the icon that was created in the Windows Start menu.
If, on the other hand, you are using the Mac, trascina l 'LMMS icon in the folder Applications, then right-click on it and press twice in a row apri to overcome the restrictions of the operating system (you only have to do this the first time you start the program).
Now, answer in the affirmative to the request to create the workbook personal and click on the button OK (even several times if necessary), to accept the default program settings.
If everything went well, you should now find yourself in front of the main LMMS interface: at the top there is the toolbar, which includes the buttons for managing files (opening, saving and so on); immediately on the left, there is the bar dedicated to sounds, projects and instrumental plugins; in the center, on the other hand, is the actual editor responsible for positioning tracks, beats and bass lines. A virtual mixer is also inevitable.
To add a song or record a new track, click on the icon Instrumental plugin located on the left and, after identifying the most suitable plugin for your case, drag it to the center of the screen (in the box Song Editor) and, using the displayed instruments, set the beat and any equalization. Similarly, you can add to the songboard preset, samples and other program elements.
When finished, use the menu File> Export (top left) to export your creation in wav, mp3 or ogg format.
GarageBand (macOS)
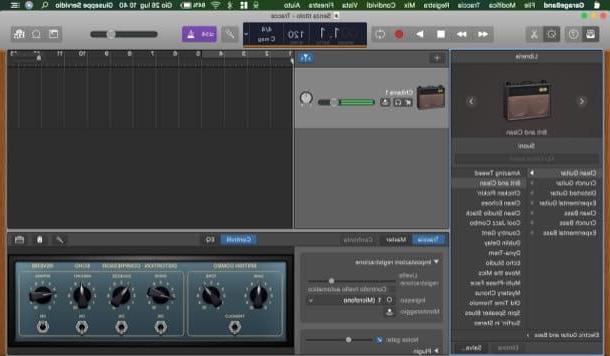
It was used MacOS, I strongly advise you to try GarageBand: if you had never heard of it, it is a program (with app for iPhone and iPad) developed and distributed directly by Apple, through which it is possible to create songs using various instruments, effects and multiple tracks, with the possibility of record from a large number of audio sources.
The program is pre-installed on all Macs but, if removed, you can still get it for free from the Mac App Store.
Using GarageBand is not difficult: first, call the program using the icon you find in the Launchpad macOS (the rocket located in the Dock bar). Once started, click several times on Continue to skip the first use tutorial and, once in the main screen, click on the tab New project, to start creating a new song.
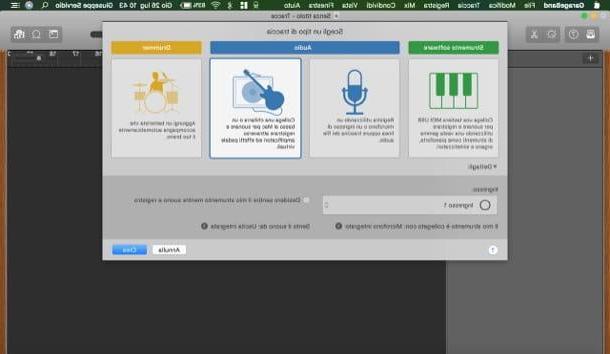
Now, using the buttons offered to you, select the type of project you want to make (eg. Blank project, keyboards collection, amplifiers collection, voice and so on) and, after clicking on the button Choose, define the track type that you intend to create, to be chosen from those proposed: Software tool, to play / record a series of instruments already present; Audio, to record sounds through the microphone or a guitar connected to the Mac, or Drummer, to add a backing drum.
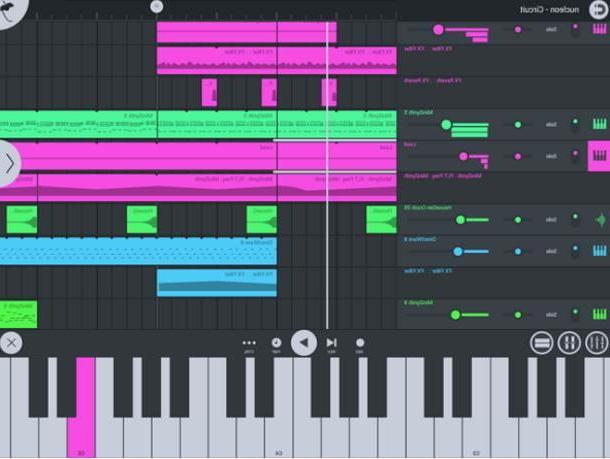
When you are done, click on the button Crea, to access the GarageBand editor, through which you can start the creation of the song: in the upper part of the window, there are the tools for playing, recording and mixing the songs; in the lower one, there are controls for volumes and equalization; using the left block, on the other hand, you can access the library of integrated sounds and instruments.
To select the recording audio source, you can use the menu GarageBand> Audio Preferences> Devices (top left) and select the type of input you are interested in using. The remaining menus (Fillet, Modification, Track and so on), allow you to access specific functions of the program.
Once you have finished recording the song, go to the menu Share> Export Song to Disc and, using the proposed panel, indicate the output format of the piece, the quality compression and the folder to save to. For more details on how to use GarageBand, I invite you to take a look at the specific guide I made on the subject.
Other programs to record a song on the PC

Do you think the software I have talked about so far is valid but don't you preclude the opportunity to evaluate alternative programs as well? If so, you'll be pleased to know that the Internet is teeming with programs for recording and composing songs on your computer. Below I list the ones that, in my opinion, are the best.
- GoldWave (Windows) - this is a software dedicated to audio editing, which allows you to record songs with different audio sources, edit existing tracks and, among other things, digitize vinyls into MP3 files. GoldWave is available upon purchase of a commercial license (priced at $ 15 / month or $ 45 forever), but can be tried for free for 30 days.
- Moo0 Voice Recorder (Windows) - is a small program capable of recording, in a few clicks, all the sounds of the PC, the sounds of the PC together with the voice coming from the microphone, or just the voice. It's free.
- Audio Hijack (macOS) - it is a program that allows you to record the audio played by the Mac or coming from a single application, combining it, if necessary, with the audio coming from the microphone, in a simple way and without the need to manually adjust complex system settings. It's free.
App to record a song
Are you wondering if, in addition to the programs to record a song, are there also applications designed with the same goal, through which you can record songs through smartphones and tablets? Well, the answer is yes. Here are some of the best applications of this type.
- FL Studio Mobile (Android / iOS / iPadOS) - this is a semi-professional application, which provides the user with a feature-rich interface and tools dedicated to recording and manipulating songs and audio of any kind. In addition, the app allows you to export music tracks in MP3, WAV and MIDI format. FL Studio Mobile is not available for free: the app, in fact, costs € 14,90 in the Android version and € 14,99 in the iOS / iPadOS version.
- Caustic 3 (Android / iOS / iPadOS) - another great app known for being able to compose and record songs (mainly electronic music) through a simple and fun interface. The app is available for free for Android (but, to export the songs in WAV, OGG or MIDI you need to buy the Unlock Key, which costs € 6,99), while for iOS and iPadOS it has a single cost of 10,99 €.
- G-Stomper Studio (Android) - it is a musical application oriented to the realization of songs and songs from scratch, which has a keyboard, a sampler, a line mixer and many other instruments suitable for the purpose. It costs € 13,99.
- GarageBand (iOS / iPadOS) - this is the “mobile” counterpart, dedicated to iPhone and iPad, of the program seen in one of the previous chapters of this guide. Although the features are almost identical, GarageBand for iOS and iPadOS has a slightly different interface, which makes it easier to use with smartphones and tablets. It's free.
If you are interested in learning more about this topic, I invite you to read my guide dedicated to apps to create music, in which I was able to deal with the subject in great detail.
How to make a song recorded