How to record a lesson on PC for free
The simplest method for record a lesson on PC is to use a screen capture program and set it up to capture the transmitted audio as well. Below I will explain how to proceed.
How to record a lesson on a Windows PC
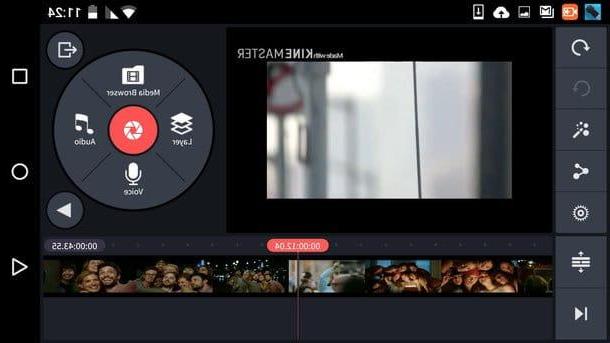
One of the best free programs designed to film the computer screen, together with the audio played through the latter, is Open Broadcaster Software (commonly known as OBS). It is a software available for Windows, MacOS e Linux, which can be downloaded and used completely free of charge. Moreover, it is open source.
To obtain it, connected to the OBS website, click on the button Windows and wait for the program installation package to be downloaded to your computer. Once the download is complete, start the file obtained (eg. OBS-Studio-XX-Full-Installer-x64.exe) and click on the buttons Yes, Next for two consecutive times, then install e Finish, to complete the setup phase.
Once this phase is completed, the program should start automatically and propose the automatic configuration procedure: to avoid it, click on the button No and wait for the main OBS screen to appear on screen.
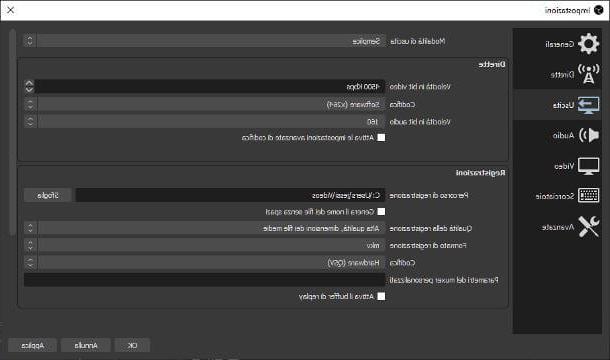
When that happens, click the button Settings located at the bottom right, select the item Exit from the left sidebar (in the window that opened) and set the drop-down menu Exit mode on the option Simple. Now specify the folder in which to save the recorded lessons, using the key Shop by Department corresponding to the field Registration path, then choose the recording quality from the appropriate drop-down menu and conclude everything by indicating the recording format (With art. mkv o mp4) and the type of encoding to be used in the appropriate fields.
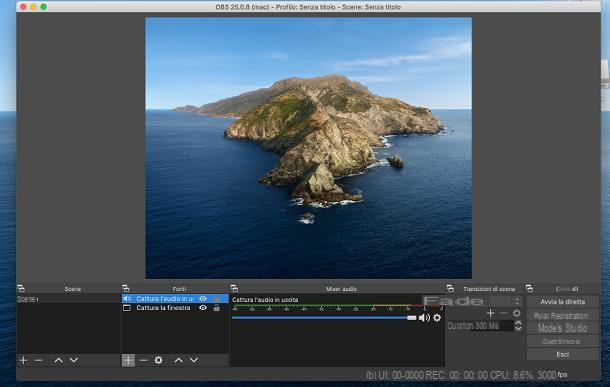
Once you have finished configuring the video parameters, click on the tab Audio which resides in the left sidebar and make sure, at the drop-down menu Desktop Audio, the audio device name installed on your computer or the voice default. To avoid the acquisition (even unintentional) of sounds from other sources, set to Disabled the remaining drop-down menus. To finish configuring the program and return to its main screen, click on the buttons Apply e OK.
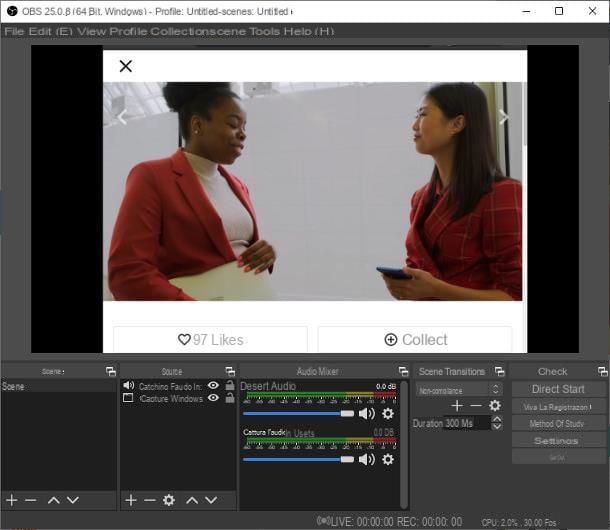
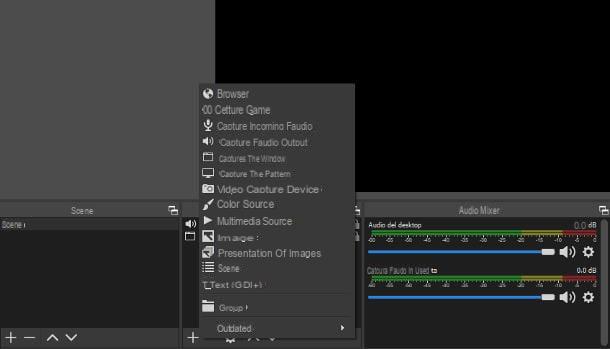
After this step too, you need to proceed with adding the audio and video sources to record from: to do this, locate the box sources located at the bottom, click on the button [+] and select the item Capture the window from the displayed context menu. Then assign a name at the new source (eg “lesson window XX”), click on the button OK and use the menu to tendin Window to select the window to capture (presumably the program on which the lesson is or will be broadcast) and, finally, press the button again OK to add the source to the video. If, on the other hand, you prefer to capture the entire desktop, use the source Capture the screen.
At this point, resize the image inside the box (which contains everything you will see in the final movie) using the squares placed at the edges of the scene just added and, when you are done, use the button again Add source to insert, within the scene, also theaudio output: By doing this, all sounds played by the computer (including the audio of the lesson) will be added to the movie. If you see fit, adjust the volume levels using the box Audio mixer.
Once the appropriate adjustments have been made, you can finally start recording the lesson of your interest: all you have to do is click on the button Start recording to start the acquisition of the chosen content. You can easily minimize OBS to follow your course “live”, the recording will not stop.
At the end of the lesson, bring up the OBS window, if necessary, then click on the button Finish the registration and wait for the movie to be processed (it may take a few minutes): you will find the latter in the folder you specified previously.
For your information, OBS allows, among other things, to record from multiple sources and to acquire, at the same time as the video and audio played on the computer, also contents coming from webcam and microphone: for further information, take a look at the specific guide that I dedicated to the topic. If, on the other hand, you want to know more about other programs to film the PC screen, I suggest you take a look at this other tutorial.
How to record a lesson on Mac
How do you say? You don't have a computer with a Windows operating system but a Mac? Again, my first advice falls on OBS, the video recording software I told you about in the immediately preceding section.
To get it, connect to its official website and click on the button macOS xx.yy + to download the related installation file. Once the download is complete, start the package obtained previously (eg. obs-mac-xx.yy.dmg) and drag theicon of OBS in the folder Applications on your Mac, using the Finder window that appears on your screen.
Once the copy is complete, go to this last folder, double-click the program icon and press the button apri, in order to start it: then click on the buttons No e OK, to avoid running the setup wizard, and proceed in the same way as previously seen to set up and use the software.
The only difference from Windows is that, at some point, you will be asked to give OBS screen recording permissions: to do so, click on the button Apri the system preference attached to the warning screen that appears, click on padlock located at the bottom left to enable the changes and, when prompted, enter the Password from the Mac.
To authorize the program to record your screen, put the check mark next to yours name and click on the button Get out now, to restart it. If necessary, perform the same procedure to allow OBS to access the system audio and / or microphone.
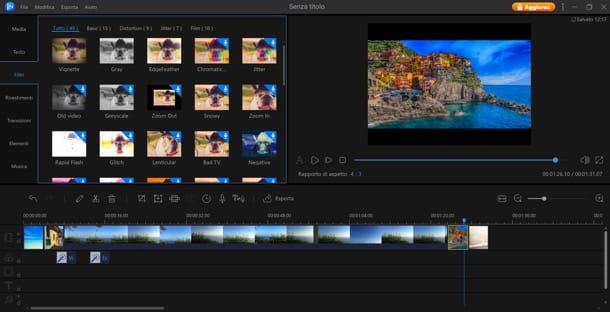
Other software you can consider for record a lesson on Mac è Screenflow, one of the best and most used applications of this type, which includes an editor that allows you to edit and mount recorded files. However, Screenflow is a paid program (the price starts from 129 $), however a free trial version is available which does not have time limits but applies a watermark to the captured recordings.
To get it, connected to this website, click on the button Download free trial and compiles the proposal module with the richieste information: First e Last name (name and surname), e-mail (also to be typed in the field Confirm email), Company (company you work for), Industry (sector of competence of the company) e Country (Country of residence). Finally, put a check mark next to the items I have read the Terms of Service and agree e I certify that I am 16 years of age or older and click on the button Send my download link to start downloading the program installation file.
Once the download is complete, launch the package obtained (eg. ScreenFlow-xyzdmg), push the button Agree and drag theicon program in the folder Applications on your Mac, then double-click it and press the button apri, in order to start ScreenFlow: as a first operation, go to the tab Welcome (left) and remove the check mark from the item Send diagnostic and usage information, in order to prevent the sharing of usage data (however anonymous) with the development team.
Now, to start a new recording, click on the tab New Recording located in the left sidebar and, first, put the check mark next to the item Record computer audio, in order to start the installation of the required add-on. Then click on the button install, Then Continue e InstallI inserted the Password of the Mac in the appropriate field and finish everything by pressing the buttons Install software, Close, OK e Continue.
Next, put the check mark next to the first of the items Record desktop from, then click the button Record to "unblock" the request for system permissions and display the relevant warning window: to allow access, click on the button Open System Preferences, then on padlock located in the lower left corner of the next screen and, when prompted, enter the Password of the Mac. Finally, put a check mark next to the entry Screenflow and press the button Get out now to close the program, applying the necessary permissions.
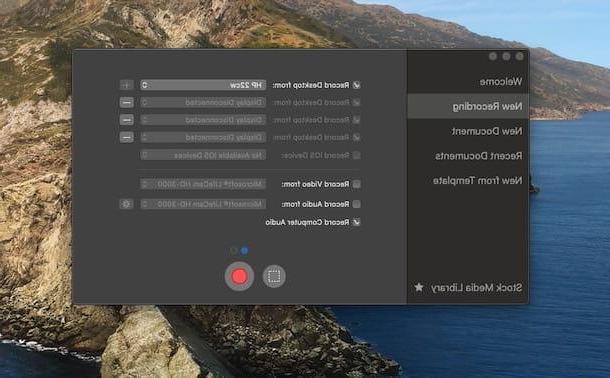
Once this is done, open ScreenFlow again, put the check mark next to the first of the items Record desktop from and option Record computer audio and, if you wish to capture the full screen, click on the button indicating a red circle to start recording; if, on the other hand, you prefer to capture only a portion of the screen, click on the dashed rectangle and “draws” the part of the screen to be acquired.
To stop recording, click on the icon video camera located on the right side of the Mac menu bar (near the clock, so to speak) and select the item Stop Record from the displayed menu; alternatively, you can press the key combination cmd + Shift + 2.
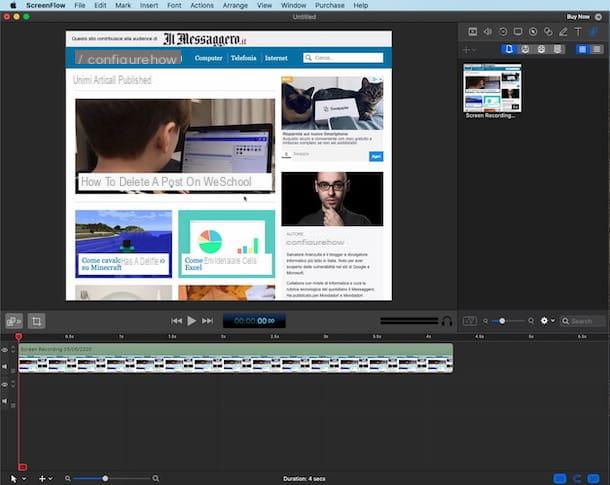
Once the recording is complete, you will automatically see the video editor window, containing a series of tools that allow you to edit the video, applying trims, rotations, audio tracks, text annotations and so on; to save the video, go to the menu File> Export ScreenFlow and, after specifying the file name, rescue path and encoding options (if you don't know how to set them, please leave the default values), click on the button Export, to save the movie.
If you are satisfied with less complete but free solutions, you can record the Mac screen using the solutions integrated into the operating system: for more details, read my tutorial on recording the screen on Mac.
How to record an audio lesson on a PC
Finally, if that's your intention record an audio lesson on a PC, without including the related video, you can take advantage of the software's “loopback” functionality Audacity to capture audio from your computer. If you've never heard of it, Audacity is a free, cross-platform, open source program available for Windows, MacOS e Linux, which allows you to perform multiple types of audio manipulation.
To get it, connected to its official website, move the mouse over the item Download (located at the top) and choose the operating system you have, from the menu that is proposed to you. Now, if you employ Windows, click on the link Audacity xyz Installer and then on the voice Audacity Windows Installer located in the screen that opens later, in order to start downloading the program installation file.
When you have it, launch it, press the button Yes and select l 'cityno from the language drop-down menu, then press the buttons in sequence OK, NEXT for five consecutive times, Install, NEXT e end.
I invented a Mac, click on the link Audacity xyzdmg located on the program download screen and, subsequently, on the item Audacty MacOS DMG; after downloading the file.dmg program, start it and drag theicon program in the folder Applications Mac. Now, go to this last folder, right click onicon Audacity and press the button apri twice in a row, in order to overcome the restrictions imposed by macOS on applications from non-certified developers.
On macOS, in addition to installing Audacity, you must also proceed with the installation of Soundflower, a program that allows you to use, as an input channel, the audio playing on your computer (functionality that, in Windows, is allowed "by default" by the operating system).
To get it, open this web page, click on the link Soundflower-xyzdmg located below, start the package obtained and click on the button apri, to authorize the opening of the file. Afterwards, right click on the file Soundflower.pkg and click the button twice apri, to launch the installation program.
Now, proceed by clicking on the buttons Continue e installa, type the Password of the Mac administration and, when the warning message regarding blocked extensions appears, first click on the button Open Security preferences and then on the button Allow, corresponding to the developer's software MATT INGALLS. Now, click on the buttons Close e Don't movelancia il pacchetto Soundflower.pkg and repeat the above procedure again, which this time should be successful.
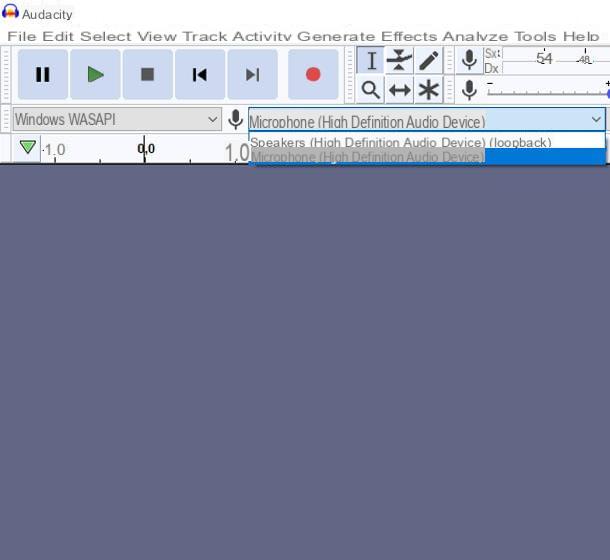
Finally here we are! No matter what operating system you are using, you are ready to record the audio lesson with Audacity. After starting the program, if you employ Windows, set the drop-down menu for the driver to use (top left) to Windows WASAPI and choose the item Speakers / Speaker (loopback) from the drop-down menu for the input device; up MacOSinstead, it uses the driver Core Audio and the input device Soudflower (2ch); when you are ready, you just have to start recording the lesson by clicking on the button Register (the one identified by the red circle).
At the end of the lesson, press the button Ferme (The black square) and save the file by going to the menu File> Export> Export to [format], placed at the top left. Easier than that ?!
If you feel that Audacity is not for you, you can consider using alternative software, such as Screwlab o Moo0 Voice Recorder for Windows and Audio Hijack for macOS, which I told you about in my guide on how to record PC audio.
How to record a lesson on a PC