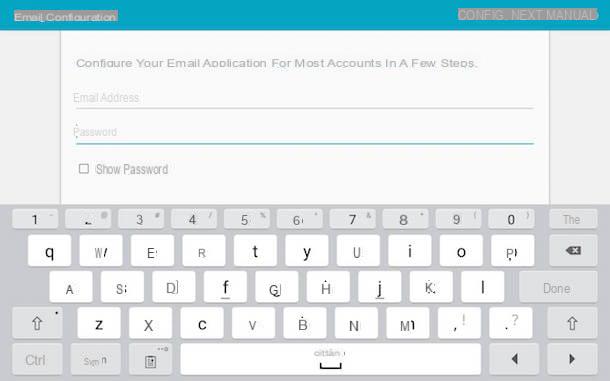
Record iPad screen on Windows
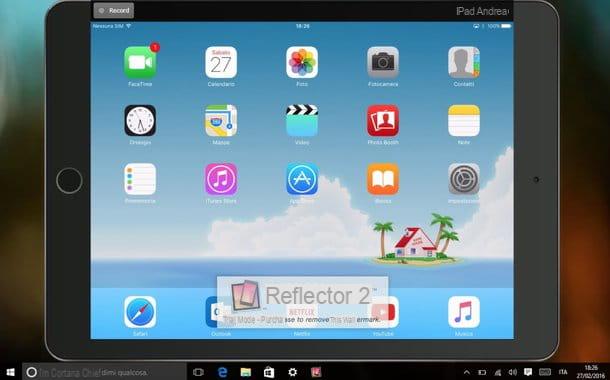
If you want to record the screen of an iPad by intervening from a computer, I cannot help but advise you to contact Reflector. It is a software for Windows (as well as for Mac) that "projects" the screen of iOS devices on the computer and allows you to record everything that happens on the latter. You can use it to register SpringBoard, your favorite apps and games without any kind of problem.
Reflector costs about 15 euros but you can try it for free for 7 days, during which time all recordings are “branded” with a logo. To download the program on your PC, connect to its official website and click on the button Try located at the top right. Then click on the button Download FREE 7-day trial placed under the windows flag (on the page that opens) and choose whether to download the software version a 32 bit o 64 bit depending on the operating system installed on your computer.
When the download is complete, open the installation file you just downloaded on your PC, put the check mark next to the item I accept the terms in the License Agreement in the window that opens and complete the Reflector installation process by first clicking on install and then Yes e Finish.
At this point, start Reflector, choose whether to activate the software (by clicking on the button I have a license key) or whether to start its free trial version (by clicking on the button Reflector Test 2) and grab your iPad. So make sure your tablet is connected to the same Wi-Fi network as your computer and turn on the AirPlay with screen mirroring.
If you do not know how to activate the AirPlay function on your iPad, go to the home screen of the tablet (the one where there are the icons of all the apps installed on the device), swipe your finger from the bottom of the screen upwards and press the icon from AirPlay (the one with the rectangle and the arrow) in the menu of Control Center that opens (if you can't see it, swipe to the left). Next, select the name of your computer and if you are using a version of iOS prior to 11 please also move up ON the relative levetta all'opzione Screen duplication. Once this is done, you will see your iPad screen appear on the Windows desktop.
Now go back to your computer, click on the button Register located at the top left of the Reflector window and records all the activities that are carried out on your iPad. At the end of the operation, click on the button Stop (always located at the top left), wait a few seconds for the movie to be processed and choose the folder in which to save it.
If you think that the watermark imprinted on the registration is too annoying, try viewing the iPad screen on the computer and register the desktop with one of the programs that I recommended in my post on how to register the desktop, in fact. In this way, the watermark will always be present but in a less invasive way (smaller and in the lower part of the screen instead of in the center).
Alternatively, should Reflector not satisfy you, you can try recording the iPad screen with AirServer, another software that allows you to turn your PC into a target device for AirPlay. It costs 13,99 euros but is available in a free 7-day trial version.
Record iPad screen on Mac
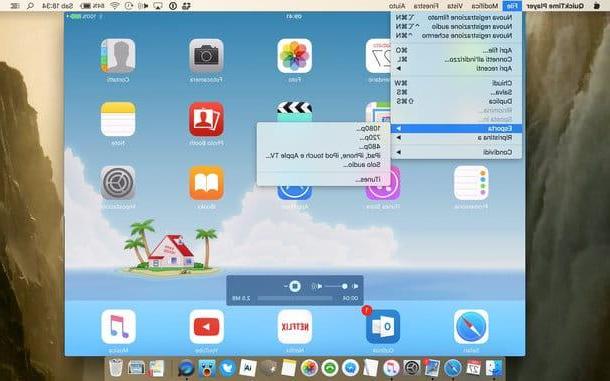
Do you use a Mac? In this case, you only need to record the iPad screen QuickTime Player, the media player included on all Apple-branded computers. To be more precise, all you have to do is connect the iPad to the Mac using the cavo Lightning / Dock of the tablet, launch QuickTime Player from the macOS / OS X LaunchPad (or from Spotlight) and start a new video recording.
If you don't know how to start a new recording in QuickTime, right click on the program icon in the Mac Dock bar and select the item New movie recording from the menu that opens. Then click on arrow located next to the button Rec (the red dot), select the item iPad from the menu Video camera and the tablet screen will be instantly projected on the Mac desktop.
At this point, you have to decide whether to capture audio directly from the iPad or the Mac microphone. Then click on arrow located next to the button Rec QuickTime and select the name of yours iPad or the integrated microphone give the menu check if you press.
Now we are! Click on the button Rec QuickTime, make your recording and when you are satisfied with the result, save the video by clicking on the button Stop and selecting one of the options available in the menu File> Export (Eg. 1080p to save a video in Full HD or 720p to save it in HD ready format).
Would you like to be able to create a more, so to speak, professional video that also includes shooting your face via your computer's webcam? If this is the case, you can project the iPad screen on your Mac via QuickTime Player as seen together above and record the display using Open Broadcaster Software, a free program that, in fact, allows you to record the computer screen and possibly also the shots taken with the webcam. For more information on how to use it, I suggest you take a look at my tutorial on how to register the desktop that I linked to you a few lines above.
Standard function to record iPad screen
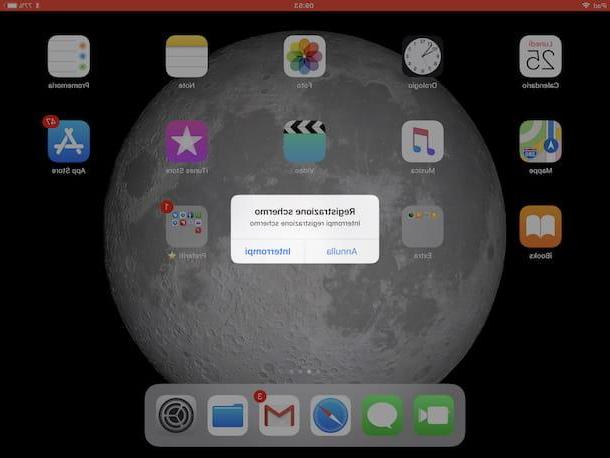
Instead of using the aforementioned computer programs, would you like to record the screen of your iPad by working directly from iOS? Well, as anticipated at the beginning, it can be done by using the appropriate functionality remains available as standard for all mobile devices of the apple starting from version 11 of iOS.
To use it, first of all recall the control center by swiping from bottom to top, then select the icon with the symbol REC. If you don't see it most likely it's because you have yet to add the function to the Control Center. To do this, go to the home screen of the device, press on Settings, then on the voice Control Center which is to the left and then up Customize controls then tap the button + (plus symbol) che trovi in corrispondenza della voce Screen recording.
After activating the function, a short countdown will begin in correspondence with the button previously pressed. After that this will turn colored and your iPad screen recording will finally start.
Then exit the control center by swiping from top to bottom and carry out all the various operations you intend to perform during recording. Meanwhile, you will see a appear at the top of the screen red bar indicating, in fact, the fact that the recording of what happens on the display of your Apple branded tablet is in progress.
Then when you want to stop recording, just tap on the red bar at the top and then on the button Stop in response to the warning you see appear on the screen. Keep in mind that, in addition to as I just indicated, the recording of what happens on the iPad display is also interrupted when the tablet screen freezes or is locked.
Then you will find all your recordings made in the album Video app Gallery of the device. If you want, you can also access it immediately by pressing on the appropriate notification that is shown to you at the top of the screen when registration is complete. All recordings are saved in MP4 format and do not include audio.
IPad screen recording apps and devices
To conclude, I want to point out that in the event that the solutions to record the screen of your Apple branded tablet that I have already proposed were not to your liking and if you have jailbroken your device you can resort to one of the many "tweaks ”That allow you to perform the operation in question directly from iOS, similar to what made possible by the series feature. To get them, open Cydia, select the scheda Search which is at the bottom right and looks for terms like screen recorder o screen record.
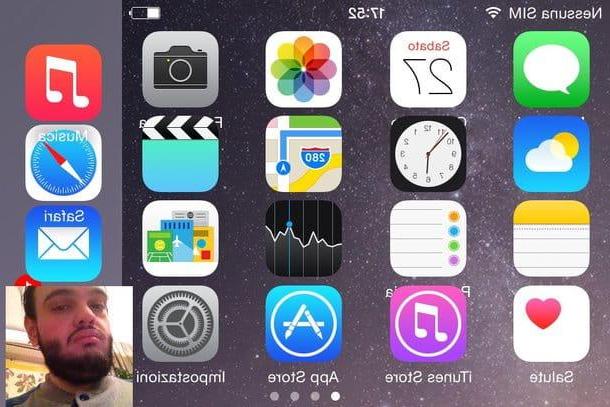
Among the best tweaks in the category I recommend you AntRec which is completely free, supports streaming on Twitch and also allows you to record what the user is doing via the front camera of the iPad. Try it and I'm convinced you won't regret it!
To record the iPad screen with AntRec, start the application, indicate the orientation in which you want to record by choosing an option between portrait, left o right and tap on thegear which is at the top left in order to adjust the resolution of the video, the presence of the front camera and various other settings.
Then assign a name when registering by entering it in the appropriate text field, tap on the button START and choose the item Recording from the menu you see appear to start the screen recording operation. When you're done, start AntRec again and press the button Stop. You will then be able to access the registration directly from the menu that opens by tapping on the icon sheet top right. From the same menu, you can also share the movie in other apps or save it to the iPad roll.
If, on the other hand, you need to record high quality gameplay, I suggest you opt for the purchase of the Elgato Game Capture HD, a “box” that connects to the Lightning / Dock port of the iPad and to the computer and allows you to record any type of video game. Find more information on how to use it on the official Elgato website.
How to Record iPad Screen