Preliminary operation
You have every intention of learning a record with Audacity but you haven't downloaded it to your PC yet? No problem, as downloading and installing Audacity is really very simple.
First, go to the official website of the program, move the mouse cursor over the item Downloads (above) and select the operating system you have from the small menu that is proposed to you.
At this point, if you are using Windows, click on the link Audacity xyz Installer and, to start downloading the file, click on the item Audacity Windows Installer attached to the screen that opens. Once you get the .exe file to install the program, start it and press the button Yesselect l 'cityno in the drop-down menu of available languages, click on the button OK, Then NEXT five consecutive times and, to complete the setup, on Install, NEXT e end.
It was used MacOSinstead, you have to click on the link Audacity xyzdmg attached to the download page of the program and then on the item Audacity macOS DMG located on the next screen. Once you have downloaded the .dmg file Audacity, start it and, using the Finder window that appears on the screen, drag the program icon into the folder Applications on the Mac. Finally, start the program by invoking it from the Launchpad (l'icona a forma di rocket located in the Dock) and press the button apri to overcome the restrictions imposed by macOS on applications from non-certified developers.
How to record with Microphone Audacity

To be able to record your voice or external sounds through the microphone, you must first connect the latter to the PC via the audio jack (or the input provided by the sound card installed in the computer).
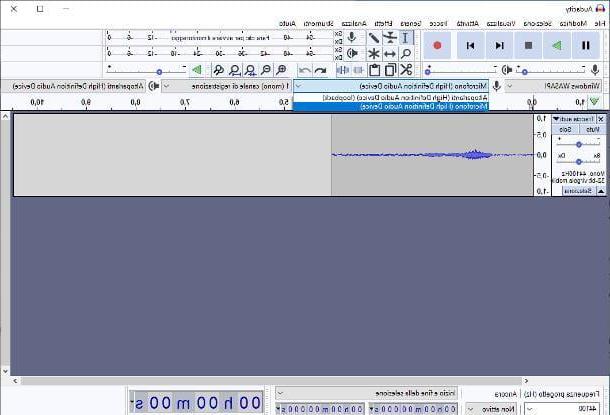
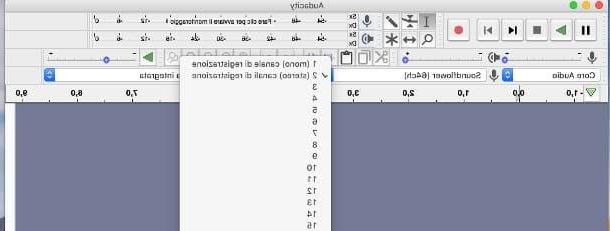
After that, start Audacity and use the drop-down menus available in the program to set microphone recording: if you are on Windows, set the drop-down menu located at the top left to the option Windows WASAPI, adjust the drop-down menu located immediately next to it (the one related to the recording device) on the item Microphone (sound card name) and choose the option 2 (stereo) recording channels in the drop-down menu located immediately next to it.
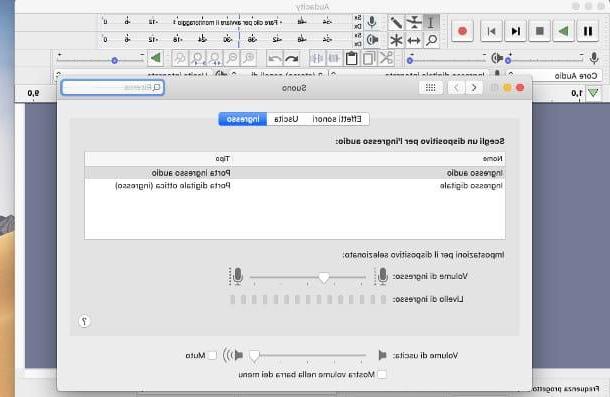
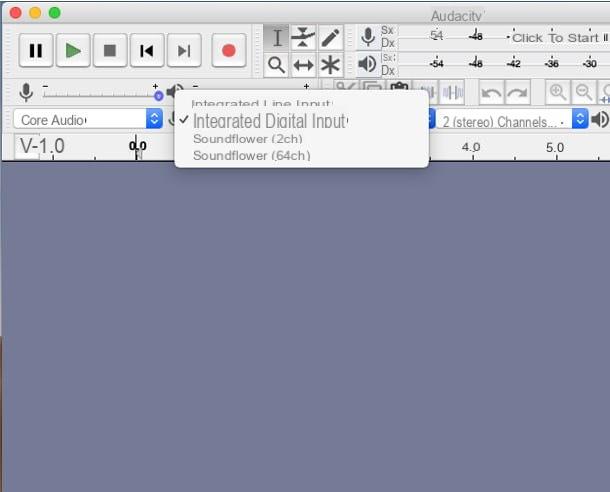
If, on the other hand, you find yourself on MacOS, make sure the drop-down menu located at the top left is set to Core Audio and choose the option Integrated digital input from the drop-down menu located immediately next to it.
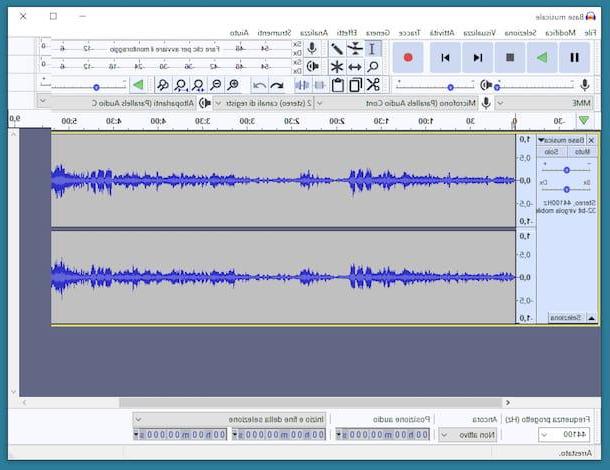
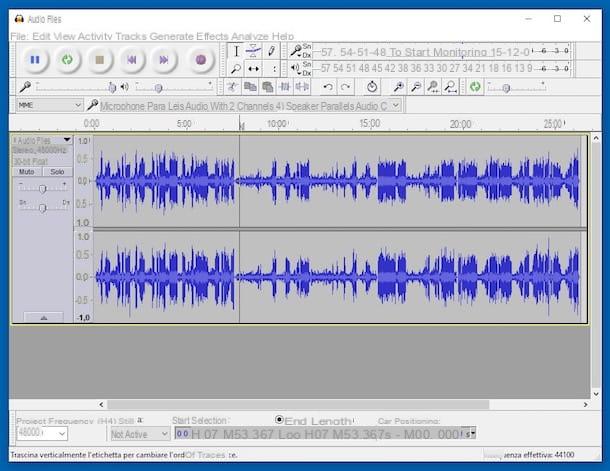
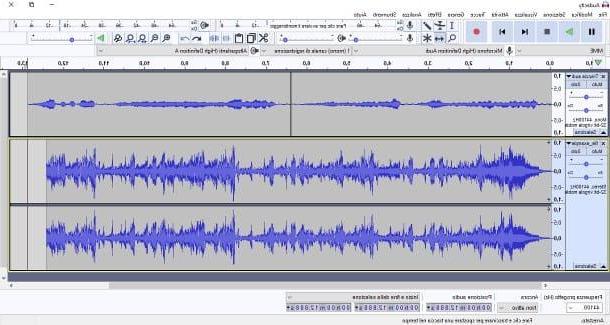
To start the acquisition of sounds through the microphone, click on the button Register (shaped red circle) located in the program button panel. Subsequently, for suspend registration, click on the button Pause (by doing so, however, you will not be able to make changes on the captured audio) or, for stop it, pig sul sul bottone Stop.
To listen to the recording again, simply click on the button Play (Quello forma di triangle) located at the top. If you wish, you can apply effects and enhancements using the buttons and menus available at the top of the screen.
Once you've finished editing, you can save the audio as a file by going to the menu File> Export> Export as [format], located at the top left. Therefore, it specifies the folder in which to save the file and adjust the last settings (e.g. the format and bitrate) using the screen that is proposed to you and, when you are ready, click on the button Export, to complete it all.
How to record with Audacity from mixer
Record with Audacity from a mix external is not complicated at all. However, it is necessary that the latter is properly connected to the PC (or to the sound card) through the appropriate input and correctly recognized by the operating system. For some devices, it may be necessary to install dedicated drivers: I invite you to refer to the user manual of the mixer in your possession to obtain additional information on the matter.
In any case, once you have made the connection between the mixer and the computer, start Audacity and set up the program following the procedure most appropriate for the operating system you are using.
- Windows - set the drop-down menu located at the top left on the option Windows DirectSound and select, from the drop-down menu immediately next to it, the item relating to mix you are using (if it is connected directly to the PC, for example via USB) or to the sound card to which the mixer is connected. Make sure the drop-down menu to the right of the latter is set to 2 recording channels, otherwise you do it.
- MacOS - recati nelle System Preferences clicking on the d-shaped icongear annexed to Dockclicca sull'icona Sound and then on the board Entrance (up). Finally, click on the item related to mix, to set it as the default input device; if it is a USB mixer, you have to choose a voice similar to USB audio codec. Once this is done, go back to the Audacity window, make sure the drop-down menu at the top left is set to Core Audio and choose the items in the two menus located immediately after Integrated digital input e 2 recording channels.
Finally, hit the button Register (The red circle) to start the acquisition of the audio coming from the mixer, which you can suspend or stop at any time using the buttons Pause e Stop. To export the recording to an audio file, all you have to do is access the menu File> Export> Export to [format], top left.
How to record with Audacity from PC
If you need to register theaudio from the computer (e.g. system sounds) and transferring it into a file, Audacity can be extremely useful for you. Up Windows, you can do it in a very simple way: set the drop-down menu for the driver to use (the one at the top left) on Windows WASAPI, choose the item Speakers / Speaker (loopback) from the drop-down menu related to the input device (the second, from the left) and start recording, by pressing the button Register.
On MacHowever, things are slightly different: before you can record from your computer, you need to install Soundflower, a software suitable to "hijack" the audio playing on the computer in the input channel. To get it, connected to this web page and click on the item Soundflower-xyzdmg located at the bottom to start the file download.
Then, start the package you just downloaded, click on the button apri to bypass macOS restrictions on applications from non-certified developers, right-click on the file Soundflower.pkg contained in the package and then click twice on the button apri, to start the installation program.
Then click on the buttons Continue e Install, type the Password of the Mac administration and, when the warning about blocked extensions appears, click on the button Open Security preferences and then on the button Allow corresponding to system software from developer MATT INGALLS. At this point, click on the buttons Close e Don't move, start the package again Soudflower.pkg and repeat the installation procedure again, which, this time, should be successful.
The bulk is practically done! To record internal Mac audio, launch Audacity, select, in the drop-down menu relating to the input sounds (the second from the left), the item Sunflower (2 ch) and press the button Register to start capturing sounds. When you are done, press the button Ferme and save the file by going to the menu File> Export> Export to [format], top left.
How to record with Audacity from the Internet

You need record with Audacity an audio stream from Internet, for example an interview that you would be interested in listening to again later? No problem.
For the first thing, avvia Audacity and set it to record sounds coming from the sound card, as I showed you in the previous chapter of this guide. Then, connect to the website that contains the audio of your interest and, after pressing the button Register of Audacity, launches the multimedia content you are interested in capturing.
When done, press the button Ferme to stop recording and save the file containing the audio just recorded, by going to the menu File> Export> Export to [Format], top left.
How to record multitrack with Audacity
Audacity is software capable of manage multitrack input (i.e. generated by several devices at the same time), however the combination of sounds does not take place, in this case, on the software side, but on the hardware side.
This means, in practice, that Audacity is able to acquire audio from multiple devices at the same time, separating their channels, but, unlike other DAW software, it can only do so as long as there is a precise hardware configuration upstream. For example, you can connect an external mixer to the PC and multiple devices to it: to separate the audio, in this case, you can use the multi-channel offered by the mixer itself.
Once this is done, simply start a recording by setting the mix as an input device and adjusting the number of channels from which to acquire audio using the menu immediately adjacent. When you're done, you can export the audio as usual, using the menu File> Export> Export to [format], top left.
You could, on the other hand, act at the software level in case you want to record from a single source, for example the microphone, then joining the recording to other existing sound tracks (eg MP3s you have saved on your computer), dragging them into the main Audacity window.
How to record a song with Audacity
You need to give vent to your creative streak and you want record a song with Audacity? Don't worry, you can do it very easily. First of all, therefore, start the program and prepare it for microphone recording, following the steps I explained to you in one of the previous chapters of this guide.
Subsequently, if you wish, connect the headphones to the computer (so you can listen to the base at best), run the backing track you prefer and, immediately after, press the button Register Audacity to start the acquisition of your vocals.
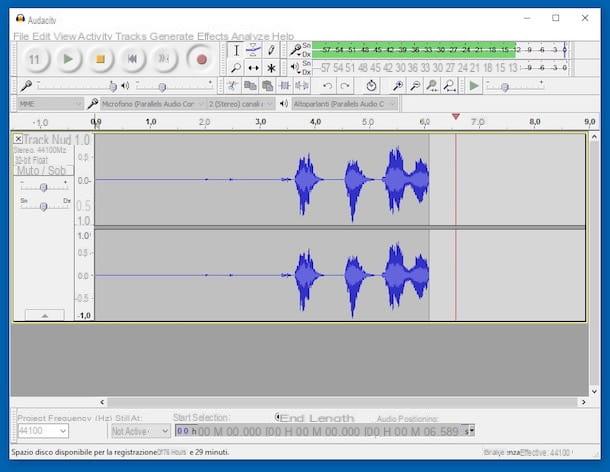
When you are done, press the button Ferme and listen to the result by clicking on the button Play. If you find it satisfactory, you can proceed with adding the track containing the backing track (also MP3), so as to obtain the complete song: to do this, drag the file into the Audacity window and wait a few moments for the audio track to be generated.
Then click on time shift tool (the button with the two side arrows, located in the upper control panel of Audacity) and move the track containing your voice to the right or left, so as to match the vocal with the rhythm of the base. To check if the alignment is valid, you can listen to the resulting song as many times as you want by pressing the button Play.
Once you have achieved a satisfactory result, proceed to adjust the volume audio and vocal track, if necessary, by acting on the appropriate sliders located to the left of each track. When you think the song is finally ready, you can export the audio file using the menu File> Export> Export to [format], top left.
You must know, however, that Audacity is not the only software that allows you to easily record a song: there are many others, equally efficient, of which I told you in my guide to programs for recording songs.
How to record with Audacity