Preliminary operation
Before I can explain how to configure the printer you bought to be able to use it with your computer and possibly also with your mobile devices, there are some preliminary operations that is necessary to make sure that the device is able to function correctly.
First, take the printer out of its sales package and connect it to the mains using the printer power cord. Then press the power button on the front or top of the printer to be able to operate it.
At this point, if what you have bought is a printer that supports connection via Wi-Fi, connect it to your wireless network using the menu visible on the LCD display attached to it.
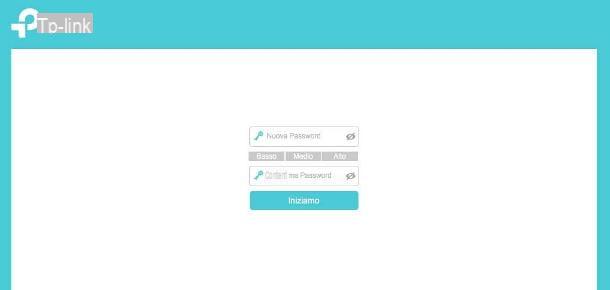
Then go to the menu related to settings, then in the one relating to Wi-Fi configuration, select the network to which you want to connect, type the Password access (if necessary) and follow the guided configuration procedure that is proposed to you on the screen.
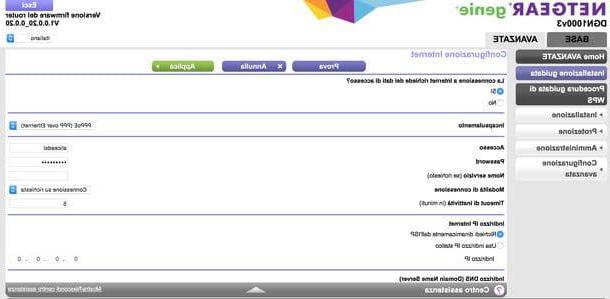
In most cases it is sufficient to always press on OK or on NEXT, while in others you may be required to set a IP address, to specify some DNS server use and the Gateway default.
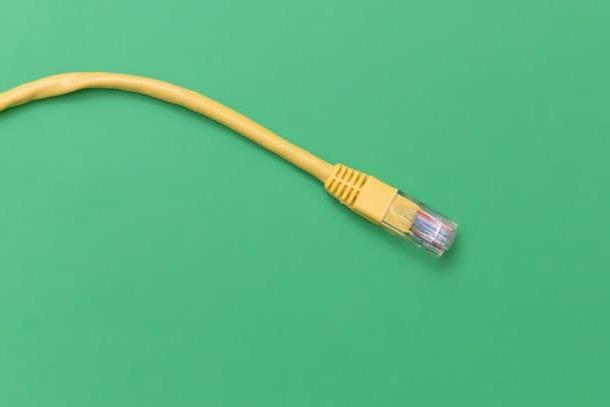
If, on the other hand, what you are using is a printer that only supports connection via Ethernet o USB or in any case if you prefer to take advantage of this type of connections, use the appropriate cables (generally attached to the sales package) to establish the connection between the device and the modem and / or computer. Just insert them into the dedicated ports and you're done.
Another type of connection supported by printers (especially the old ones) foresees the use of the parallel port LPT. It works by means of a cable known as a “tray” with 25 pins. It is generally light gray in color with the part where the pins are blue. In this case, one end must be connected to the printer, the other to the computer.
Configure a printer on Windows
Once you have completed the preliminary operations mentioned above, you are finally ready to take the real action and therefore to go and configure your printer. So let's see how it is necessary to act as regards Windows.
Below you will find instructions on how to proceed to install the printer and set the device as the default for the printing procedure.
Install the printer
If you use a Windows PC and have the Installation CD of the printer (you should have found it in the sales package of the device), insert it into the computer and wait for the appropriate program to start to proceed with the setup wizard.
If the disk does not start by itself, start it yourself by going to Esplora risorse / Esplora file (you can access it by clicking on the gialla poster that is on taskbar) and then double clicking on the relative icon found in the sidebar of the window.
Once the screen for configuring the printer is displayed, always click on NEXT or on Next and follow the onscreen instructions. In a few minutes, your printer should finally be up and running.
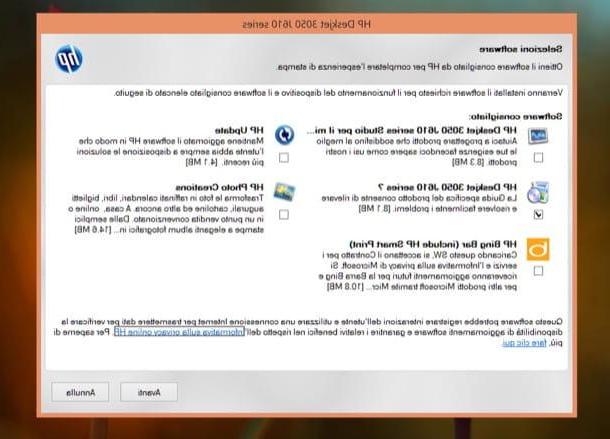
I would like to point out that the installation CD, in addition to allowing you to install the printer correctly, also allows you to install all driver necessary for the device to work properly with your computer.
In most cases, the configuration diskettes also contain all software necessary to make the most of the printer, especially in the case of multifunctional ones. Either way, you should be asked if you want to install them or not. Feel free to choose, for the purposes of the "standard" operation of the printer absolutely nothing changes.
And if you do not have the printer installation disk or in any case if by practicing the steps I have just indicated you are unable to configure your device, you can intervene "Manually", acting from Control Panel of Windows.
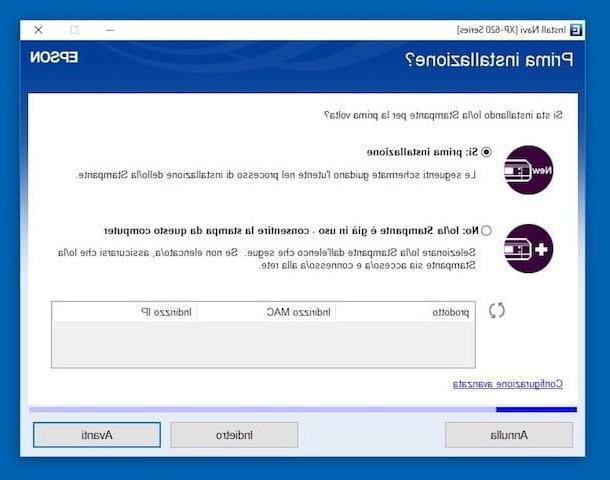
So, open the latter by searching for it in the Start menu, select the item Hardware and sound (if you can't see it, check that in the menu located in the upper right part of the on-screen window the item is selected Category), click your Devices and printers, Then Add printer and wait a few moments for the computer to find the printer.
If the printer is not automatically detected, press the link The printer I want is not listed, choose the configuration option you prefer and press on NEXT. Then follow the wizard that is proposed to you on the screen to complete the configuration.
Set the printer as default
Once the installation process is complete, either via the diskette or via the Control Panel, you can set your printer as the default (so that you don't have to select it every time you need to print).
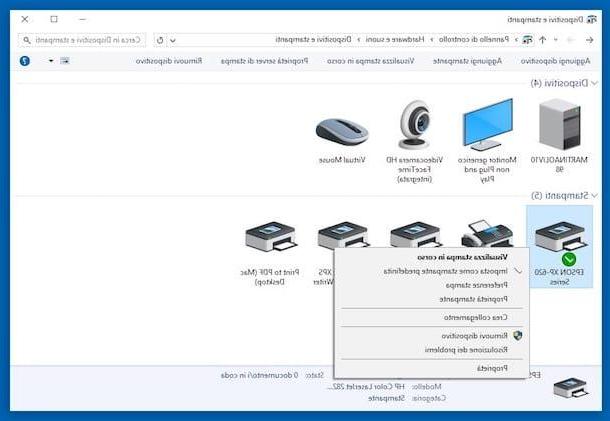
To do this, first log in to the Control Panel looking for it in Start menu, select the item Hardware and sound and click on Devices and printers.
Now, right click on the icon depicting yours printer present nella sezione Printers and select, from the contextual menu that appears, the wording Set as Default Printer. Done!
Set up a printer on Mac
You are interested in understanding how to configure your printer on Mac? Then follow the instructions on what to do that you find right below.
Even in this case, I have explained to you how to install the device and how to configure it as the default on your Apple-branded multimedia station.
Install the printer
As for the Mac side, I am happy to inform you that the procedure to be put into practice to be able to configure a printer is much simpler than the one seen together just now for Windows PCs. To succeed in your intent, you just need to click on the icon System preference (Quella with l 'gear) that is on Dock bar and on the voice Printers and Scanners in the window that appears on the screen.
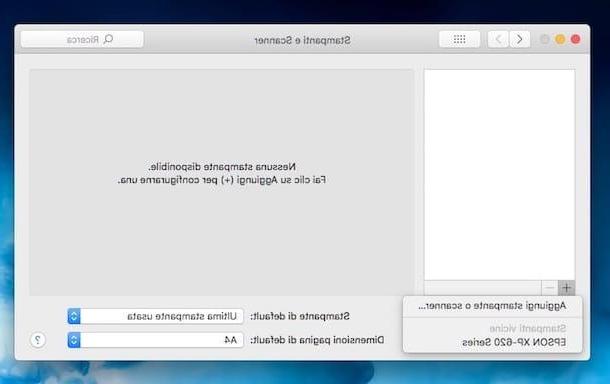
Now, press the button [+] which is at the bottom left and click on the printer name from the menu that opens. Wait a few moments for the selected printer to be connected and configured for use on the Mac and that's it.
If in putting into practice the steps I have just suggested no printer appears, select the item Add printer or scanner ... from the visible menu after clicking on the button [+] and then presses on printer name from the list in the tab Default. Then, if necessary, change the name, location and technology used for printing through the appropriate fields and click on Add.
If the printer you want to configure is connected via Wi-Fi to the same network as the Mac, as an alternative to the procedure just seen together, you can select the tab IP, type theIP clue of the printer in the appropriate field, indicate the protocol to use and provide the other requested info. Press infin on the button Add.
Set the printer as default
After setting up your printer on Mac following the instructions in the previous step, you can set the device as the default so that you don't have to select it every time you need to print.
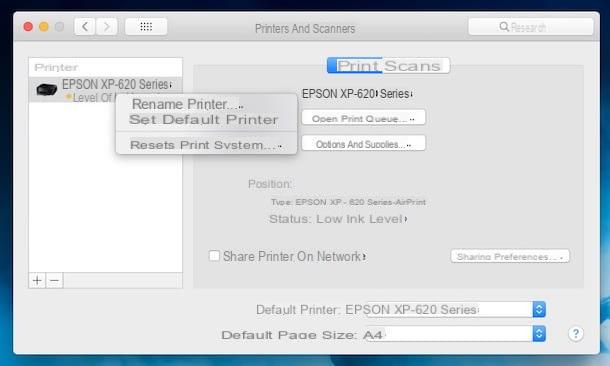
To do this, bearing in the System preference of macOS by clicking on the relative icon attached to the Dock bar, click on Printers and Scanners in the window that appeared on the desktop, right-click on yours printer in the list on the left and choose Set default printer from the menu that appears. Done!
Set up a printer on Android and iOS

You can also configure your printer to use it on smartphones and tablets Android as well as on iPhone e iPad. The procedure to be started to do so is extremely simple. So let's see how to proceed.
If the printer you want to configure supports wireless connectivity, in the case of Android you just need to install the plugin for i printing services correct, while in the case of iOS devices you can use AirPrint.
To be more precise, as far as Android is concerned you can find the specific print plugin for the brand of printer you use by searching on the Play Store. Below you will find those relating to the most popular printers on the market. Once you have found the right one, press on Install and Accept to install it.
- Brother
- Canon
- Epson
- HP
- Lexmark
Later, you can start printing by simply opening documents, Web pages, images and so on from your mobile device, calling up the system menu, selecting the item Print and then yours printer from the list that appears. Finally, adjust the options on screen as you see fit and go ahead with printing.
As for the iPhone and iPad, you just need to open the document or the reference Web page, tap on the icon of sharing (The rectangle with arrow), press the button Print and select the printer in your possession from the list that is shown to you.
Then adjust the options related to printing in the new screen displayed and step on the wording Print at the top right to proceed, in fact, with the printing.
If, on the other hand, the printer you are using does not support connection via Wi-Fi network or if you have an iPhone or iPad but the printer model you bought is not compatible with AirPrint or in any case if you are unable to carry out the above steps , you can take advantage of the proprietary printing service that may be offered by your device or, again, of the service Google Cloud Print.
For more details on this, please refer to my guide on how to print from Android (for Android) and to my post on how to print from iPhone (for iOS, not just the iPhone, as the title, but also the iPad).
In case of dubbi or problem

Despite having followed my instructions in detail, have you not yet managed to configure your printer? Did something go wrong during the installation process and you don't know how to fix? Given the circumstances, the best advice I can give you is to visit the dedicated section al supporto e all'assistenza of the website of the manufacturer of your printer and see if you can find useful information for this purpose.
If this is useful for you, here are links to the appropriate sections of the main websites of printer manufacturers.
- Brother
- Canon
- Epson
- HP
- Lexmark
Once the relevant web page is displayed, look for the printer model in your possession (it should be clearly written on the product packaging or directly on the product) and you will find yourself in front of the relative user manuals and of the various FAQ's.
It also evaluates the hypothesis that any problems with connection, configuration and use of the printer may be attributable to the malfunction of the aforementioned driver, the use of an outdated version of the same or even their lack. For more details on this, please refer to my brand specific guides below.
- How to download Canon drivers
- How to download Epson drivers
- How to download HP drivers
- How to download Samsung drivers