Preliminary information

First, you need to know that the tools for creating a game app fall into two broad categories. On the one hand we find the SDK (Software Development Kit) of each operating system with related application software, such as Android Studio which is the suite that integrates Android SDK and that Google makes available to developers for the production of apps for the Android operating system. Alternatively, there are i independent commercial software, which allow you to develop content within an integrated environment and, based on the license in possession, to export the game in different formats intended for as many operating systems.
These two options have a lot of differences and, of course, both have their positive and negative characteristics. The SDK they allow you to make the most of the potential of the operating system to which they are addressed, to manage every single detail and to make sure that every function is optimized. Furthermore, it is possible to conduct numerous tests, in some cases even through the use of virtually emulated devices.
Independent commercial software, also known as Game Engine, on the other hand, they are characterized by a generally lower level of difficulty, they already have an orientation strongly based on the creation of games and allow you to develop a single project (and all related resources) that can be exported as a package compatible with different platforms (desktop, mobile, Web, console ...), available depending on the license held.
In this article I will focus with you on the second category of tools I told you about: i game engine, as, in fact, easier to use for non-experts. The panorama of game engines is very vast and includes various software, some very simple and useful for novice developers, others more advanced and specifically designed for certain genres of video games, others still very powerful and characterized by the maximum freedom left. to the developer, in terms of graphics and programming, which make them suitable solutions for the development of, potentially, any type of game, even very close, in terms of quality, to those currently on the market.
How to create a game with App Inventor
The first tool I want to introduce to you is called Inventor App, an app development environment Android. It was initially created by Google but, for some years, the project has been carried out by the Massachusetts Institute of Technology, one of the most important universities that does technological research at the US and world level.
Inventor App has a very intuitive interface, which is based on the simple concept of drag-and-drop and remembers a lot Scratch, another visual programming environment. Although it is possible to publish the application on the Play Store, through App Inventor, it is generally possible to create small applications with rather elementary functionality.
To get started, connect to the official App Inventor website and click on the orange button Create apps!, top right. To continue, you need to log in with a Google account: then enter your account credentials and, if requested, authorize access. When you're ready to go, click the button Starting a new project ..., at the top left, and, in the small window that is shown, type the name you want to give to the project and click on the button OK.
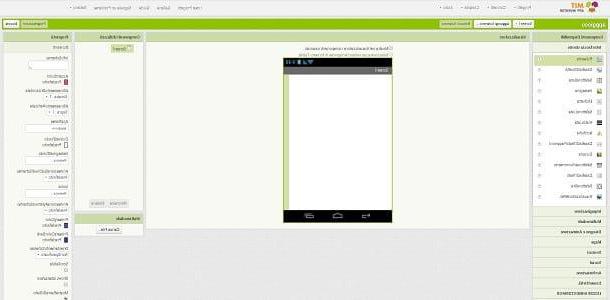
The project will automatically open within the Web page. The environment allows you to perform various operations: the heart of App Inventor is represented by the left sidebar, which, divided into categories, shows several controls that you can add to your application. The options are very varied and range from buttons ai contacts in the address book, passing through images, list, text boxes, cameras, SMS and much more.
The operation of the various components that you can add is very simple: once you have identified the one you are interested in, click on it and physically drag it to the screen visible in the center of the page. Once the component has been added, it will be possible to select it and modify some specific properties, through the right sidebar. In the case of a text boxfor example, you will be able to change the size and font of the text and acceptable values.
To create new screens, click the button Add screen ..., present in the top bar, then, in the window that is shown in the center of the page, enter the name and click on the button OK. You can move from one screen to another by choosing from those in the menu that you find to the left of the button you just used.
When you are satisfied with the result, you can export the application in .APK. To do this, go to the menu at the top of the web page and select the items Compile> App (save the .apk file to my computer). This will start the compilation, a procedure that checks the formal correctness of your entire application, and the .APK file it will be downloaded to your PC. If you have any doubts about how this file works, consult my guide dedicated to installing APK files. I conclude by pointing out the official App Inventor support documentation, useful to deepen the functioning of the platform.
How to make a game with GameMaker

Gamemaker is one of the most popular development environments for 2D games. The program allows you to set up the project based on both visual programming and programming via code, using a proprietary language. Its basic version, to learn programming, is free, but to publish the games you need to purchase a license, with prices starting from 39 $.
To download the free version of GameMaker, visit the official page of YoYo Games (the software company) and click on the green button Get GameMakerat the top right, then locate the panel Trial and click on the green button Free. On the next page, click the green button Login to download, enter your account credentials YoYo and click on the button Login (to create a new YoYo account, you need to click the button Sign up, on the right and fill in the form that is proposed to you). At this point, from the menu that you find along the left sidebar, select the items GameMaker> Download and finally click the button Download, under the logo of Windows or under the logo of MacOS, depending on the operating system you use.
To proceed with the GameMaker installation, open the package . EXE o .PKG you downloaded, click the button Yes (only if you are using Windows), then, in the installation window that appears on the screen, click on the buttons OK, I Agree, Next, Then install and, finally, Next e Finish. Once the installation is finished, on the GameMaker main screen, click the button New and, subsequently, su Drag and Drop. Now, in the save window, type in the name you want to give the project and click the button Save.
Along the right sidebar, you can find different items to create, divided by categories. For example, to add audio content, you can right-click on the item Sound, then selecting the option Create Sound, from the pull-down menu: in this way you can define the properties of the audio file and import the source track.
All the elements present in the panel in question can be dragged inside the work space, which occupies almost the entirety of the GameMaker window and represents, approximately, the result that will be visible in the final game. At any time, you can test the game by selecting the items Build> Run from the top bar. At the end of the compilation, you will be able to see the game in action.
For more information on GameMaker, you can refer to the official website of the program, which I linked to at the beginning of this chapter. In a special section of the same site you can also find the complete software manual.
How to make a game with Unity 3D

Unity is a cross-platform integrated development environment dedicated to the creation of numerous 3D simulations, which embrace not only the videogame field but also, to name a few, those of animation and architecture. With the graphic engine of Unity it is possible to create video games of any genre, the customization is maximum and the quality level that can be reached is equal to that of commercial video games.
You should know that you can download and use the Personal version of Unity for free, but only if the legal entity you represent does not generate any income or fundraising in excess of $ 100.000. If not, you will need to proceed with purchasing a license More o For, starting at $ 25 / month billed annually.
To download Unity, go to the official website and click the button Get Started, top right, then move to the third option, Personnel, and click the button Try Personal. At this point, put a check mark on the box under the heading Accept terms and click on the button Download Installer for Windows, oppure sul pulsating Download Installer for Mac OS X., which will be displayed automatically depending on the computer you are using.
Once the download is complete, you can install the program. If you use Windows, open the file . EXE you downloaded, click the button Yes in the small box that appears, and, to proceed with the installation, click on the button Next. Then put a check mark next to the item I accept the terms of the License Agreement, click on the button three times consecutively Next and finally click the button install.
If, on the other hand, you have a Mac, you can install Unity by double clicking on the file .DMG downloaded and dragging the program icon into the folder Applications, located in the sidebar of the Finder. To start Unity for the first time, you need to right-click on its icon and select the entry apri, twice in a row: in this way you bypass the restrictions that macOS imposes on applications from non-certified developers.
The procedure I have shown you allows you to download the most recent version of Unity and configure it according to the default settings, that is, including the basic modules for development from your PC and, where applicable, the supporting documentation.
Once the installation is complete, start Unity and, in the window that is proposed to you, log in with your Unity account or, if you do not have one, skip this step by clicking on the button Work Offline. At the top right, click the button New, type the name of your project in the first text box proposed and select a template for your project from the drop-down list below, choosing between 2D e 3D, depending on the type of game you want to make. To confirm, click on the button Create project, bottom right.
Unity's default layout organizes the interface into three large main areas, each dedicated to a different component of the workflow: the panel Hierarchy, the panel Inspector and the panel Project. As I told you, knowing these three elements is the key to learning the basics of Unity.
The panel Hierarchy, which in your language would translate as “Hierarchy”, is located on the left of the window and allows you to manage all the elements present on the scene. To create a new element, just click with the right mouse button inside the panel and choose, through the appropriate menu that appears, the category and then the object to create. For example, selecting items 2D Object> Sprite, a sprite will be added, that is a two-dimensional graphic element that can represent a character or an object.
On the right of the window, you will find the panel Inspector, that is, the Inspector panel, which allows you to view and modify the properties of individual items selected in the Hierarchy panel. By selecting the sprite you created earlier, the Inspector panel will allow you to change its size or add different components to it. To give it a try, click the button Add component e seleciona le voci Physics 2D> Box Collider 2D from the menu that opens. Very good: you just added a collision physical condition to your sprite. As you have seen, the configurable add-ons are many and can meet any need.
The last area of the Unity interface that I want to tell you about is at the bottom of the window and is the one that is defined Project Panel, or Project panel. This part is intended for the management of the Assets, ie the materials, the resources that make up the project. Right-clicking inside it and selecting the item Import New Asset ... from the menu that appears, you can add all the materials you need to your project, such as audio sequences, images or decorative motifs. As you add new resources to your project, within this panel you will be able to use the classic functions of New folder, Copy e Paste to keep your library organized.
Finally, to create new Scene, ie new levels or new settings of your game, use the top bar of Unity and select the items File> New Scene. At any time, you can test your game by clicking on the button Play, top: Remember to press it again to exit test mode before making changes to the project.
When you are ready to export, go to the top bar and select the items File> Build Settings…. In the window that appears, choose between Android e iOS, click here Switch Platformat the bottom right, then click the button Build, which is in the same position. Now you just have to assign a name to the file and proceed as if you were making a normal save.
Unfortunately, the PC does not always include everything that is necessary for the export of the application package. In some cases, depending on how your computer is used, some components may be missing, such as libraries, add-on modules or software such as Java, which Unity needs to continue. In this case, unlike what I explained to you in the previous paragraph, the Switch Platform button will not be available but, in its place, the button will be displayed Open Download Page, which, if clicked, will redirect you to the page that provides instructions on the missing modules and the details of their installation.
In conclusion, I suggest you read the official Unity user manual, which allows you to find out in detail how to take advantage of the features of this software.
How to publish game apps

Very well: now that you understand how to create a game app and have taken your first steps in this new world. It is therefore time to think about the publishing phase, when you will make your game public through official channels, such as the Play Store, in the case of Android, and the App Store, in the case of iOS.
Regarding the publication on Google Play Store, the first and only fundamental requirement is to have a developer account, which can be associated with your Google profile at a cost of 25 dollars. You can do what I have just described to you through the Google Play Console registration page.
Once this is done, you will have the option to upload the files .APK of your applications. In this phase, first of all, you have to manage the metadata of the apps you have created, then the versioning and system requirements and, subsequently, think about the commercial part, then the title, description and screenshots. For more information on uploading an app to the Play Store, I invite you to consult the official guide provided by Google and my tutorial on how to create apps for Android.
If your application is geared towards a device iOS, you have to get a Apple developer account (at a cost of $ 99 per year) via this website. Then you have to go through iTunes Connect: log in with your Apple ID and enter the section My apps, then, at the top right, click the buttons + e New app.
You can now change all the parameters of your game, such as name, language, description, category, price, screenshots and finally upload the package .IPA compiled application. Generally, after submission, the application will be pending for review before actual publication: you can follow these steps via the notifications you will receive on the inbox associated with your Apple ID. For more details, feel free to check out my guide on how to create iPhone apps.
How will I create a gioco app