How to access the TP-Link modem

The first thing to do for configure a TP-Link modem consists in accessing, through a browser, its administration panel: a Web interface through which to control all aspects of the appliance (including Internet connection parameters, Wi-Fi settings, and so on).
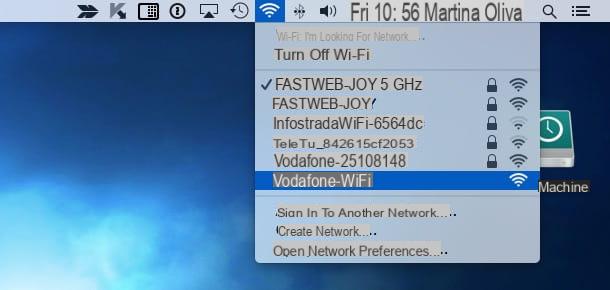
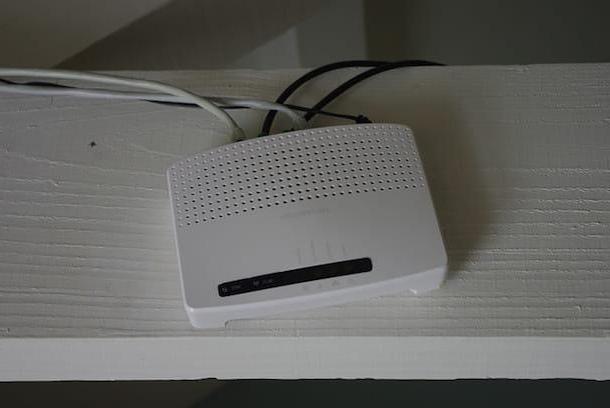
So, if you haven't done so yet, connect the router topower supply and insert the line cord ADSL / Fiber in the hall Internet / WAN of the device. When you're done, connect the router to your computer using a Ethernet cable or, if you don't have the possibility, check for the presence of a possible initial Wi-Fi network (whose name and default password are usually printed on the label affixed to the bottom of the router).
In any case, once the devices are properly connected, start the browser you prefer and connect to the address 192.168.1.1: if everything went smoothly, you should find yourself in front of the login page of the router's administration panel. If you should see an error message instead, try to connect to the address 192.168.0.1; in case of failure, I invite you to take a look at my guide on how to find the IP address of the router, in order to recover the correct address to use.
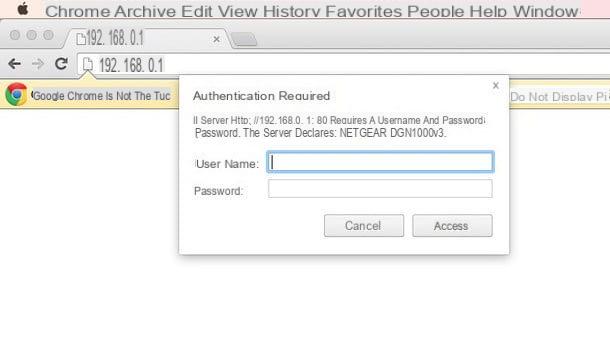
At this point, to enter the administration panel, you must enter the combination of the router's default username and password: generally, it corresponds to admin / admin, or to admin / password. If that doesn't work, try looking for the information on the label printed on the sales package, the one on the router, or the router's sales manual. For further information, I refer you to reading my guide on how to see the modem password.
How to configure the TP-Link modem
Once logged into the device management panel, you can finally take action and configure the TP Link modem according to the settings most congenial to you. In the following lines I intend to explain, in detail, the most important steps of the various procedures.
Initial configuration
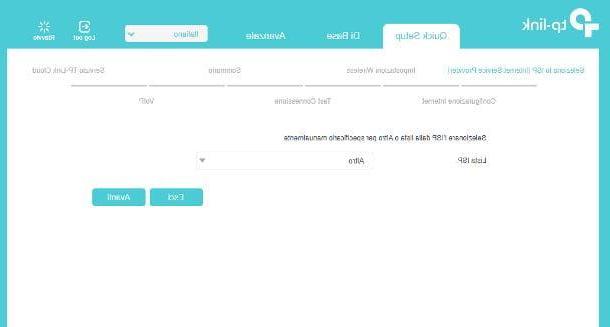
As a rule, after the first access, TP-Link routers offer a convenient procedure of initial configuration, through which to act on the fundamental aspects of their operation: the Internet connection and the Wi-Fi network. If not, click on the tab Quick Setup located at the top left, in order to start the initial setup of the device.
First, specify one custom password to access the router, which must consist of a maximum of 15 alphanumeric characters; when you are done, click on the button let's begin, to confirm the change, and log in again to the router management panel, typing the password set just now.
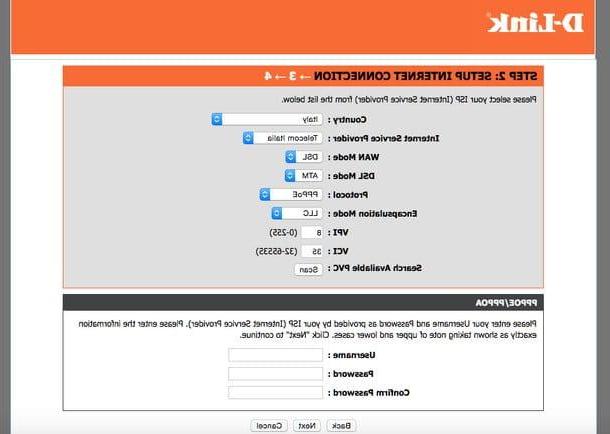
Once logged in, use the drop-down menu located at the top right to select thecityno (if available), then set the nation (Region) And the time zone (time Zone) of membership using the drop-down menus proposed; then click on the button Next / Next and then select the name of yours internet service provider (With art. Telecom city) from the drop-down menu Lista ISP /ISP List.
Now, click the button again Next and type, in the appropriate text fields, username e Password necessary to establish the connection; customize the connection parameters (if necessary) and go ahead by clicking on the button Forward / Next. If the manager does not appear among those listed, select the item Other give menu to tendin ISP List and fill out the next form with the information you are asked for.
For your information, the connection parameters of all the mainoperators can be easily retrieved through a Google search, by typing, for example, the key ADSL / Fiber connection parameters [operator name]. For example, you can find those of TIM on this page, those of Vodafone on this other page, those of Wind / Three on this site and those of Fastweb on its official website.
The next step is to configure the Wifi connection of the router: choose whether or not to enable the 2.4 GHz network and / or the 5 GHZ network by placing the check mark next to the item Enable wireless / Enable wireless radio, specify in the appropriate text fields the network name (SSID) and its Password and when you're ready, click the button again Forward / Next.
We are almost there: after a few moments, an Internet connection test should be started, by means of which you can verify that the connection has been successful. If successful, click on the button NEXT to view the summary screen of the parameters set, press again on NEXT and, if you have chosen to make use of VoIP telephony services, click on the item Add / Add to specify the telephone number, Service provider and any voice parameters. Finally, press the button End / Finish and that's it: from now on, your modem should finally be operational!
Change Wi-Fi settings
Most TP-Link brand routers allow you to change the Wi-Fi settings, such as the network name, password and listening channel, through a specific section accessible from the configuration panel of the device.
To proceed, access the latter as I explained to you in the initial part of this guide, click on the tab Advanced (top right) and select the item wireless located in the sidebar of the page.
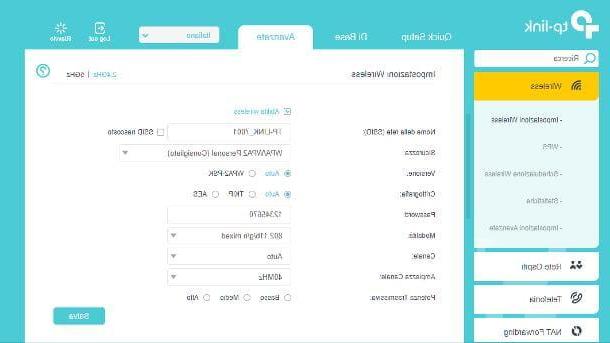
At this point, clicca sulla voce Wireless Settings and, through the voices 2.4GHz e 5GHzselect il network type on which you want to intervene. Once you have made your choice, you should find yourself in front of a form through which to make the necessary adjustments.
- Network name (SSID) - specify here the name to assign to the wireless network.
- Safety - choose, from this drop-down menu, theencryption algorithm to use for network key protection: personally, I recommend you select the option WPA / WPA2 Personal, then leaving the values of Version e Cryptography on the default parameters.
- Password - in this field you have to type the network key.
- modality - this drop-down menu allows you to choose the transmission standard to use. If you don't know what to choose, leave the default value unchanged.
- Channel e Channel width - these two drop-down menus allow you to select, respectively, the channels and l 'bandwidth to be used for data transmission. If you want to know more about the best channels to choose in order to avoid interference, I invite you to read the specific guide I have dedicated to the topic.
- Transmission power - this option is used to select the range of the router signal: the value high allows you to transmit data up to the maximum distance covered by the device.
Once you have made the appropriate adjustments, click on the button Save, to make them effective. Later, if you have made any changes to the network name or password, remember to disconnect and reconnect the connected devices (smartphone, tablet, PC, etc.) using the new settings.
Opening the doors
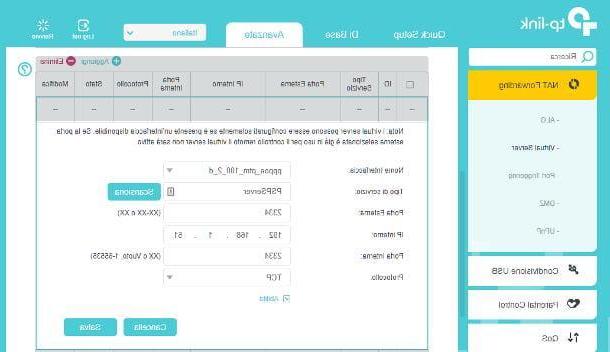
If you need to configure your router to use programs, games or services that require ports to be opened (such as programs for Torrent, eMule, Fortnite, or some PS4 game modes), do this: after connecting At the TP-Link device administration panel, click on the tab Advanced located at the top and then on the items NAT Forwarding e Virtual Server, placed in the left side menu.
Now, click on the item Add located at the top of the list of open doors and fill out the form that is proposed to you following the instructions I provide below.
- Interface name - indicates the network interface configured to connect to the Internet. If you don't know what it is, leave this menu unchanged.
- Type of service - specify the name of the service you are interested in (eg "eMule" or "PS4 Sever").
- External door e Internal door - enter in this field the number of the door to open.
- Internal IP - type the local IP address of the computer or device to which to open the ports. If you don't know which one it is, you can find out by reading my guide on how to view your IP address.
- Protocol - specify the communication protocol of the door to open (TCP, UDP o ALL, for both).
Finally, put a check mark next to the entry Enable, in order to immediately activate the newly created rule, and click on the button Save for the changes to take effect. Repeat this for all the doors you intend to open.
Backup and restore settings
Once you have adjusted the settings that are optimal for you, I recommend that you make a backup that you can restore "on the fly" should it prove necessary, for one reason or another, to reset the router.
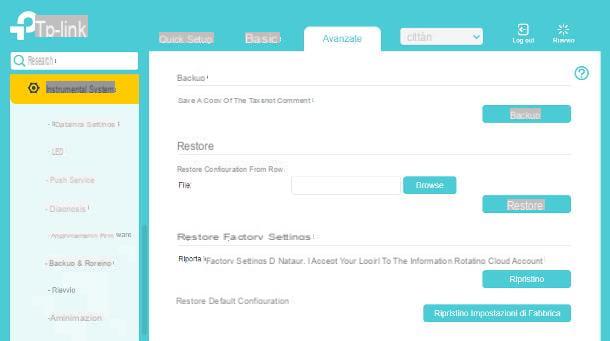
To be able to do this, from the administration panel of the device, go to the card Advanced and then click on the items System tools e Backup & restore. Now, to make a backup of the current settings, click on the button Backup and select il percorso in which to save the file.
The settings file thus created can be easily restored, always from the same section: all you have to do is click on the button KATEGORIEN to select the file in question and then press the buttons Restoration e Yes to confirm the willingness to proceed.
Reboot and reset the router
If, for some reason, you need to restart the router (e.g. in case of sudden slowdowns or errors while connecting some devices), connect to its management panel and click on the button restarting, located at the top right. Finally, confirm your willingness to proceed by pressing the button Yes.
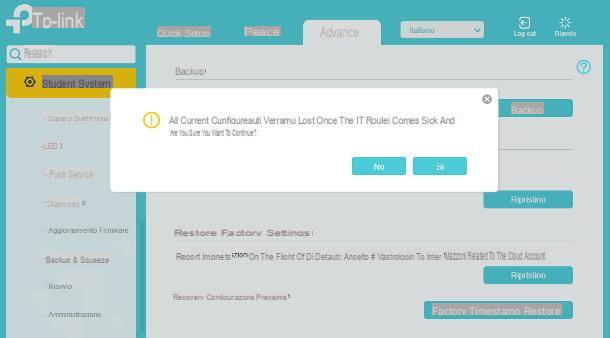
If, on the other hand, the situation turns out to be more serious than expected and, after various "tweaks", you are unable to bring it back to normal, you can reset the router to factory settings and start all over again. How? I'll explain it to you right away. Once in the administration panel, click on the tab Advanced, then on the option System tools (left) and, later, on the voice Backup & Restore.
Now, aware that these operations involve the immediate cancellation of the custom settings of the router, click on the button Restoration, to reset the device while leaving the login data and those relating to any TP-Link Cloud account unchanged.
If, on the other hand, you want to restore the device to its factory state, deleting anything, click on the button Factory Reset and confirm the willingness to proceed by clicking on the button Yes. After a while, the router should reboot and automatically reset settings.
Once the reboot is complete, it will be possible to proceed again with the initial configuration of the device and, if necessary, with the restoration of the settings using any backup files previously created.
For more information
The ones we have just analyzed together are only the most common options that can be changed in a modem / router, such as those produced by TP-Link, but they are certainly not the only ones.
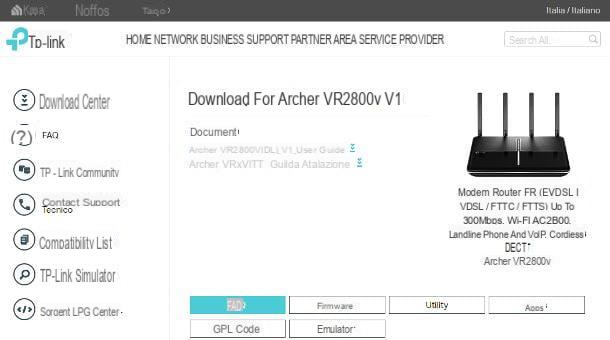
If you need more detailed instructions regarding the configuration of the network equipment produced by the Chinese company, connect to its website and, through the search bar located at the top right, look for the exact model of your router.
Once on the relevant results page, click on the item first Products and then on name of your modem / router. Next, select the tab Support (located at the top right) and, if you wish to download the User Manual of the device, click on the appropriate link placed under the item Document.
If necessary, using the tabs located at the bottom, you can also download the firmware to be installed on the device or, again, the utility and uses to take full advantage of its features.
How to configure TP Link modem