Create newsletters with Sendinblue
If you are looking for a complete and flexible solution to create your newsletters but which is also easy to use, I recommend you take a look at Sendinblue.
With 70 million emails and SMS sent every day, 100.000 users in over 160 countries and the ability to send up to 300 free emails every day, Sendinblue is one of the most interesting platforms to turn to to create and manage your marketing campaigns; also because it has a service of Customer Support in 6 languages (including your language) available via email, chat and phone and is compliant with the GDPR for the processing of personal data, therefore protecting the data of users and customers subscribed to the newsletters.
Sendinblue is intended for a transversal audience: come on marketing professionals established companies, from startup agencies, Up to online stores and NGO. Adopt a modular approach, enabling businesses to build the marketing engine they need and enabling them to expand across all digital channels with minimal effort and at a sensible cost. Moreover, with his API and its Plugin, can be easily integrated into any tool or product.
Among the many tools made available by Sendinblue, I obviously point out those intended foremail marketing, to create effective emails in a few simple clicks; but also those forSMS marketing (ideal for promoting limited-time offers) and the Chat, to stay in touch with your customers as they browse your site.
With Sendinblue, I also brought a CRM (Customer Relationship Management) to manage relationships with customers and potential customers, optimize engagement throughautomation of segmentation and sending specific messages for certain types of public, view advanced statistics and lead test A / B to improve performance, realize transactional emails simple and effective for order confirmation, build landing page e registration forms captivating, create campaigns of retargeting to win back visitors who have left your site, expand your business on Facebook and other social channels and much more.
As mentioned, Sendinblue can be used free with its basic plan that allows you to send up to 300 emails per day (an hourly limit can be applied to transactional emails). To take advantage of the full potential of the service, however, you need to choose one of the paid plans: Lite with prices starting from 19 euros / month for sending 10.000 emails (without daily caps) and up to 69 euros / month for 100.000 emails which also includes email assistance and some optional paid functions, such as the removal of the SendinBlue logo from messages and the possibility of carrying out A / B tests; Premium which has prices starting from 49 euros / month for 20.000 emails and up to 499 euros / month for 1 million emails (without the SendinBlue logo), adds A / B tests, Marketing Automation, Facebook Ads, Landing to the Lite plan functions page, multi-user access, advanced reports and telephone support; then there is the plan Company available in various versions to be agreed with the service staff, which includes personalized email volume, priority sending, 20+ Landing pages, 10+ users, SSO (SAML), Account manager, priority support and more.
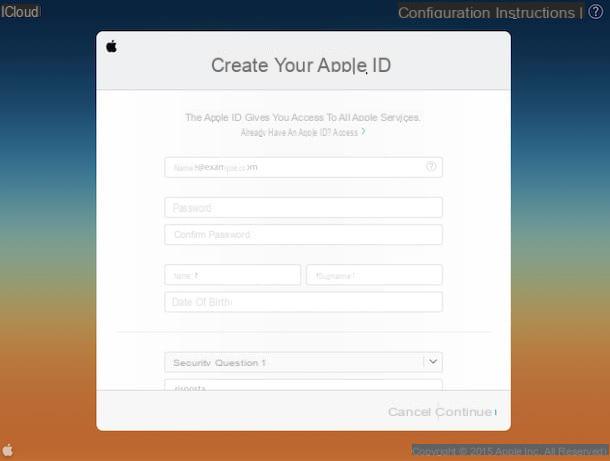
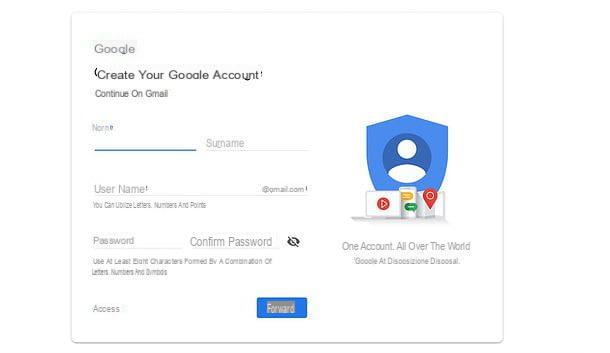
To create your newsletter with Sendinblue, connect to the main page of the service and fill out the form that is proposed to you with the data you want to use for your account. Alternatively, click the button to log in with Google and log in with your Google account.
At this point, confirm your identity via theverification email that came to you and fill out the new form that is shown to you with yours personal data and those ofcompany. Finally, check the box for accept the General Conditions and the Antispam Policy and click sul pulsating Close my subscription, For verify your mobile number (by entering the code you will receive via SMS) and complete the registration.
You will be automatically redirected to the Sendinblue dashboard, through which you can manage all your campaigns. To create your newsletter, however, you must first validate your account: to do so, follow the instructions on the screen and first proceed to import your contacts (via CSV or TXT file or copy and paste). Once the import is complete, you can start your first email campaign.
Select, though, the voice Campaigns from the top bar and press the button for create an email campaign. Well: now you just have to follow the Sendinblue wizard, fill in the initial form with name, object, text preview, e-mail e sender name of the campaign to be carried out and press the button to go to next phase.
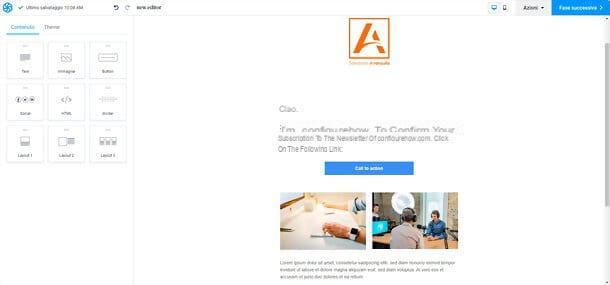
You will thus pass tocreation of the newsletter, having the possibility to choose whether to use thedrag and drop editor (the recommended choice for creating captivating newsletters in a simple way), theadvanced text editor or paste the code HTML of the newsletter. Alternatively you can also select the tab Template gallery and choose a template ready to use or, again, select the tab Import a model and import an external model.
Once the newsletter is complete, all you have to do is select the users (you can manage the contacts via the appropriate Sendinblue dashboard tab) e confirm sending, programming it according to your needs.
Clearly, this is just a small taste of what you can do with Sendinblue. To discover all the potential of the service and use it to the fullest, consult my dedicated tutorial and official documentation.
Create newsletters with MailChimp
If you are wondering how to create a newsletter on your website to retain your readers, MailChimp is the solution for you. This famous platform for sending newsletters allows, in fact, to use free templates, manage subscribed users and schedule the sending of communications.
It will be useful to know that MailChimp is a free service which, in its basic version, allows you to send a maximum number of 12.000 emails per month and to create lists with up to 2.000 subscribers. To increase the monthly emailing and number of subscribers per list, paid plans are available starting at $ 10 / month.
To create your account on MailChimp, connected to the official website of the service, click on the button Sign up free present at the top right, enter your data in the fields Email, Username e Password e pulsing sul pulsating Get started. Within a few moments you will receive a confirmation email: click on the button Activate account to complete the creation of your account.
Nella nuova page aperta, pigia sul pulsating I'm not robot, enter your personal data, the name and address of your website and the data relating to your residence and presses the button Start using MailChimp to start creating your newsletter. On the main screen of your account, click on the items Lists e Create list to create a list of users subscribed to your newsletter.
Now, enter the details of the list to be created in the fields List name (the name to be assigned to the list), Default from name address (the email address to show when sending a newsletter) e Default from name (the name of the sender of the newsletter). After that, in the field Reming people how they signed up to you list, enter the reason why users are receiving the newsletter and press the button Save.
On the main screen of the newly created list, click on the option Add contacts to add new newsletter subscribers (manually or via CSV file) or choose the option Sign up form if you don't have any registered users yet. In the new open page, you can create a subscription form to be inserted later on your website, thus allowing your readers to subscribe to the newsletter.
Once you have created the list and the registration form, click on the entry Campaigns present in the top menu, press the button Create Campaign e scegli l'opzione Email. Then enter the name to be attributed to the newsletter in the field Campaign name e pulsing sul pulsating BeginDopodiché by clicking on the button Add Recipients to choose the list of users created just now and press the button Add from to enter the data to be shown as the sender of the newsletter in the fields Name e Email address (required).
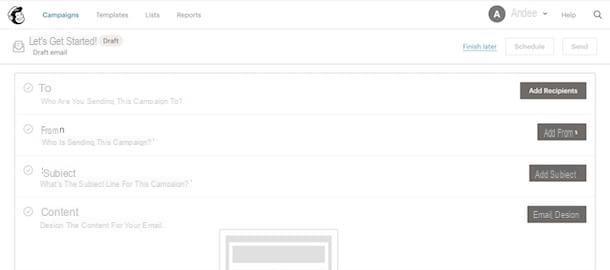
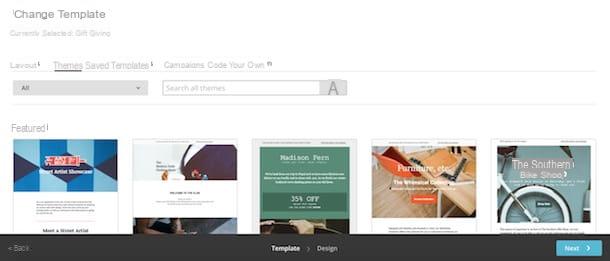
Now, press the button Subject to insert the subject (in the field Subject) and the preview text (in the Preview text) to show in your newsletter email. Finally, click the button Email design to choose and customize the layout to use.
After entering all the data relating to your newsletter and customizing the template, you are ready to send. Press, therefore, on the buttons Send e Send now to send the newsletter immediately, otherwise click on the button Schedule to schedule sending. Then enter the shipping date and time in the fields Delivery date e Delivery time e pulsing sul pulsating Schedule campaign. To learn more about how the service works, you can read my guide on how MailChimp works.
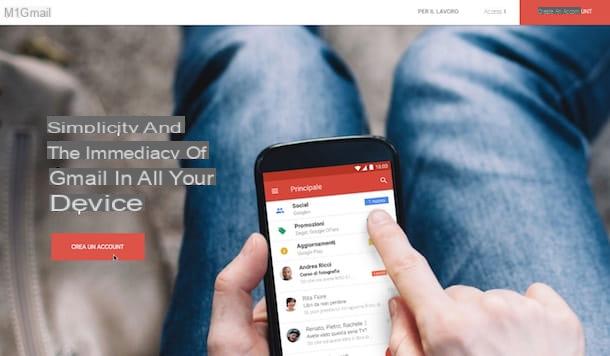
Create newsletters with Gmail
If you don't have a website and you are wondering how to create newsletters with Gmail, in order to send multiple emails to friends and acquaintances, all you have to do is log into your account and create a contact group.
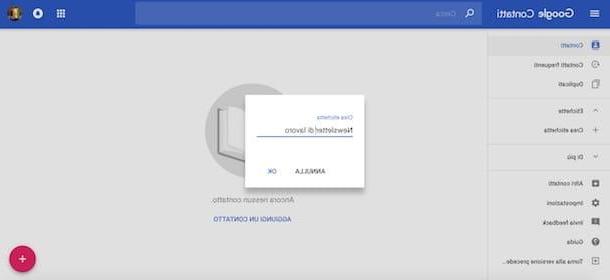
To proceed, connect to the main page of Google Contacts and, if you have not already done so, log in to your Google account, selecting it on the screen Scegli an account. Now, put the check mark next to the contacts to add to your newsletter, click on thelabel present at the top right and choose the option Create label from the menu that appears. Then enter the name to be assigned to the label in the field Create label e pulsing sul pulsating OK to complete its creation.
If the email address of a person you wish to include in your newsletter is not available in your contacts, click the button + present at the bottom right, enter the contact details in the fields Your name, Last name ed Email (if you wish too Telephone, Society, Notes etc.) and presses the button Save to add it to your contact list. To learn more, you can read my guide on how to save contacts on Gmail.
To add a contact to a previously created label, click on the entry Contacts present in the sidebar on the left, put the check mark next to contact of your interest, click on thelabel at the top right and choose the group in which you want to add the contact in question.
After creating the label and adding the contacts to which you want to send your newsletter, connected to the main page of Gmail, click on the button Write present at the top left and compose your message. Then type the name of the label created earlier in the field A, enter the subject of your newsletter in the field Subject and write your message in the text field below using the toolbar to add customizations to the text, links and attachments.
Finally, press the button Send to send the message to all contacts that are part of your label. To learn more, you can read my guide on how to create mailing lists with Gmail.
Create newsletters with Outlook
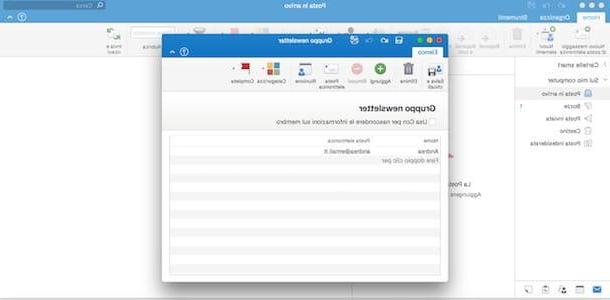
create a newsletter with Outlook, the popular email management software included in the Office suite, click the button New items present in the top menu and choose the option Contact list from the box that appears.
In the newly opened window, enter the group name in the field Untitled list and, if you do not want to show the email addresses of the various contacts when you send the newsletter, put the check mark next to the item Use Bcc to hide member information.
Now, enter the names and email addresses of the contacts to be included in the group in the fields Your name e Email and, when you are done, press the button Save and close. Clicca, quindi, sul pulsating New email message present at the top left, enter the name of the group created earlier in the field A:, specify the email subject in the field Subject and enter the content in the appropriate text field. To send the newsletter, press the button Send And that's it.
If Outlook is not installed on your computer, you can read my guide on how to download Outlook. Alternatively, you can proceed using the web version of Outlook. Then connect to the website of the e-mail service and log in to your account, then click on the icon squares at the top left and select the option People. In the newly opened page, click the icon of freccia rivolta verse il basso present accanto alla voce New contact e scegli l'opzione New contact list, then enter the name to be given to the group in the field Contact list name and add the contacts to be included in the group by writing their name or email address in the field Add people.
Press the button now Crea to create the contact group, then click on the icon squares in alto a sinistra, select the option Outlook and click on the entry New message. Then enter the name of the contact group you just created in the field A, specify the subject of the newsletter in the field Add subject and enter the content in the text field at the center of the page. To send the newsletter, click on the button Send And that's it.
Create newsletters on WordPress
Users who have a need for create newsletters on WordPress, can rely on MailChimp and integrate the newsletter subscription forms on their website, as indicated in the previous paragraphs of this guide. Alternatively, numerous plugins are available that allow you to integrate and manage a newsletter directly from the famous CMS.
Among the best newsletter plugins you can consider is MailPoet Newsletter, a free tool that allows you to create custom templates, manage lists of subscribers and schedule the sending of newsletters.
After you have downloaded and activated the plugin in question, click on the entry MailPoet present in the sidebar on the left and choose the options List e Forms to manage contact lists and create subscription forms for your newsletter. Also, by selecting the item Members, you can add new subscribers manually.
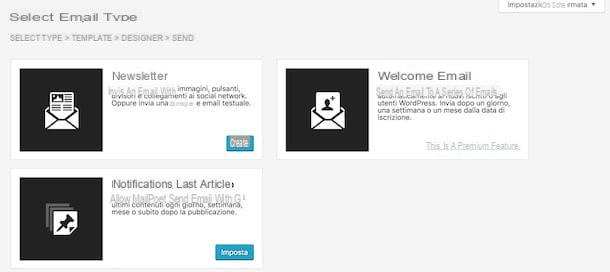
Now, click on the option Email e pigia sui pulsnti Add e Crea to start creating your first newsletter. In the newly opened page, click on the button Select related to the template of your interest and enter the newsletter data in the fields Subject e Text preview, then customize its structure and content using the tools visible in the sections Content, Column layout e Styles.
Once the creation of your newsletter is complete, press the button Next present at the top right, indicates the list of contacts to which you intend to send the newsletter in the field List, specify the sender's name and email address in the fields Sender e Reply to e pulsing sul pulsating Send to send the newsletter. If, on the other hand, you want to schedule the shipment, put the check mark next to the option Program, indicates theclockwise and date send and press the button Program.
Alternatively, you can consider the Sendinblue WordPress plugin, the newsletter creation service I mentioned earlier in a dedicated chapter of this tutorial.
Thanks to the plugin in question, it is possible to create registration forms in line with the image of your brand and easily integrate them into your posts and pages; design, configure and schedule your emails using Sendinblue's SMTP; manage contacts easily from WordPress; create and manage email marketing campaigns; view advanced statistics to improve campaign performance and much more.
To install the plugin, just log into your WordPress control panel, add the Sendinblue plugin as an extension, activate it and configure it by entering your Sendinblue API keys. More info here.
Programs to create newsletters
You prefer the online services and plugins for WordPress that I indicated in the previous paragraphs programs to create newsletters? No problem: here is a list of the ones that might be right for you.
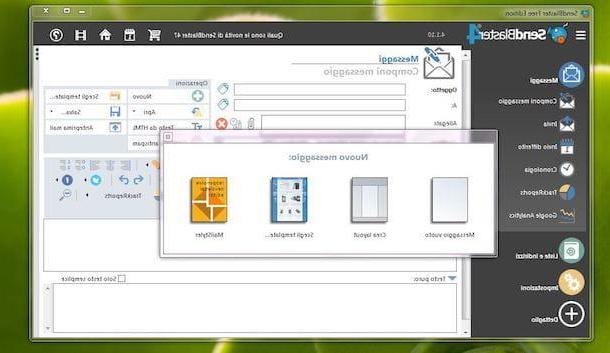
- SendBlaster (Windows): an easy-to-use and completely your language interface make it one of the best newsletter programs. In its free version, it allows you to create two lists and send up to 100 messages for each list: to have no limitations and add attachments to the newsletters, you need to purchase the Pro Edition version, at a cost of 149 euros.
- SmartSerial Free (Windows): allows you to create newsletters both using ready-to-use templates and creating customized layouts using an HTML editor. In the free version it allows the sending of 400 emails per day to 200 different addresses. The version without limitations costs 44,95 euros.
- MaxBulk Mailer (Windows / macOS): it is a paid software (with 30 days free trial) that allows you to create customized newsletters by creating the template manually. It costs from € 49,90.
To learn more about the functioning of the software mentioned above and learn about other newsletter programs, you can read my in-depth guide.
Article created in collaboration with Sendinblue.
How to create newsletters