Index:
- Photo (macOS)
- Adobe Spark Video (Online / iOS)
- PhotoStage Slideshow (Windows / macOS)
- Other tools for making video presentations
Photo (macOS)
If you have a computer with macOS, then you can make your video presentations in a simple way: you only need the app Gallery, already pre-installed on your Apple operating system. This app is very simple, but if you have no particular needs on the final result of your presentation, I'm sure this app could be for you.
As I have already told you, you will find the app already installed on your macOS; it is therefore fully usable free and without having to carry out any kind of additional installation.
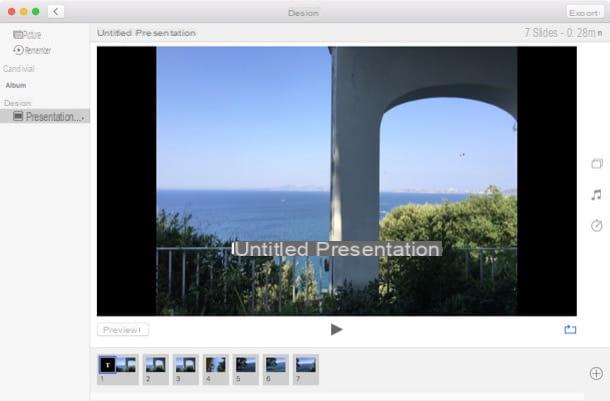
If you've never heard of it and want to know how to use it, then I recommend reaching for the Launchpad and click the app icon Gallery. The Photos app will then open and show you the photos on your computer. From the menu bar at the top, however, click Fillet and then Crea > Presentazione.
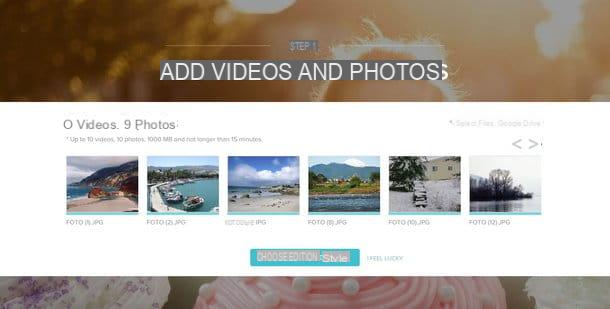
Now enter a name for your project and click Ok. Now you will have to import all the photos to be included in your project; select each photo and then click the button Add. You will be directed to a screen where you can make some customization, such as choosing a theme, adding a background music file or changing the time interval between one slide and another.
When you are satisfied with your work, click the button Export and select an output format; then select the destination folder and click on the button Save.
If you've followed all the steps correctly, you'll have made your video slideshow with the macOS Photos app.
Adobe Spark Video (Online / iOS)

If you want to orient yourself in a solution that does not require any installation, then you can rely on Adobe Spark Video. This web application works with all browsers, completely free. If you also want to use the same service on your Apple devices, you can download the app from the iOS App Store.
Using this web service is really simple: the essential requirement is to have an account free Adobe. To create one, all you have to do is go to the website of the service I have indicated to you and click on the button above Start now for free.
After filling in all the data and then completing the registration, you can start creating your video presentation by clicking on the button with the symbol of a [+], which you can see in the center of the screen. Then click Video, to start the wizard for a new project.
First enter a title for your project by typing it in the text box on the screen. Then click on Next and choose one of the many themes available. To select one you will need to click on the wording Pick this one, which you find in correspondence with each theme. If you want to create a project without any basic theme, click Start from scratch.
You will now be directed to the main screen of the online application and you will also be able to follow a tutorial, to learn the basics of use, which I recommend you to view.
As for the creation of a video presentation, at the bottom of the screen, you will be able to view all the slides available in your project. You can add one by clicking on the slide on the left with a symbol [+] in the center. You can also delete one (Delete) or duplicate it (Duplicate), by clicking on theicon with three dots that you can find on each slide.
By clicking inside a slide, you will also see items to select to choose the content to insert. You will be able to add videos, images or text boxes: the choice of how to customize your video is entirely up to you.
Also keep in mind that Adobe Spark Video has a rich database of images that you can draw on and that you can also add music by clicking on the tab above Music. Also in this case, you can choose whether to upload from your PC or choose one of the many music tracks in the database of this application.
Whenever you want to preview your project, click the button Preview and, if in the end, the project meets your expectations, then it is ready to be shared (Share) or saved on your computer (Download).
PhotoStage Slideshow (Windows / macOS)
If mobile applications and online tools do not meet your needs, then you can rely on more complete and customizable tools, such as PhotoStage Slideshow.
This software is available for free, for all those users who intend to use it for non-commercial purposes. If you want to use it commercially, then you will need to purchase a license, which will also give you the possibility to access some additional features.
If you want to start using it, you can download the version free of this software, by reaching the official website of the manufacturer. After reaching the website link that I have provided, scroll down the page and click on the link for the platform on which you want to install the program. Keep in mind that, in this guide, I will introduce you to the installation on Windows operating systems and then tell you that you will need to click on Download for Windows.
Once you have downloaded the installation file, double click on it and then click the button Yes. Then select the language cityno e scegli l'opzione I accept the license conditions. Then click NEXT, to finish installing the program.
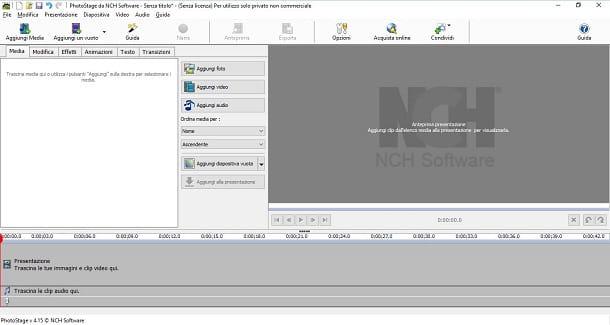
Then open the program via its icon and add the images or videos to your project. Use the buttons Aggiungi photo e Add video to import your media. You can also add audio tracks by clicking on the button Add audio. All these multimedia elements that you will import, will be viewable in the tab Media.
Then drag the imported multimedia elements into the timeline at the bottom and then add all the transition effects and animations, using the tabs Animations, Effects e Transitions. You can also add text by clicking on the tab Text.
Once you have added all the necessary elements to your project, ordered and customized them according to your needs, click the button above Export. This way you can export a copy of the video you just made.
Other tools for making video presentations
- Animoto (Online) - It is a very simple web application to use. However, it is a payment, but you can sign up for an account free for the evaluation of the service. You can then create your video presentations and add photos and videos to the project, you can also insert music tracks and text boxes.
- Kizoa (Online) - It is an online tool for making video projects. You can use it to customize your video presentation using one of the many templates available or use your creativity to the full with a blank template. You can use this online service for free, by registering an account.
- Magisto (Online / Android / iOS) - Magisto is an online service a payment for creating video presentations, but also allows you to use the app free available for Android and iOS operating systems. However, the mobile app has some limitations.