How to create a video lesson with Meet
Let's start this discussion starting from Google Meet, the video conferencing platform of the Mountain View giant, which is simple to use and can be used both as a web application and as an app for mobile devices.
computer
If you intend to use Meet from computer, know that you can do this directly online from the following browsers: Google Chrome, Mozilla Firefox, Microsoft Edge and Safari.
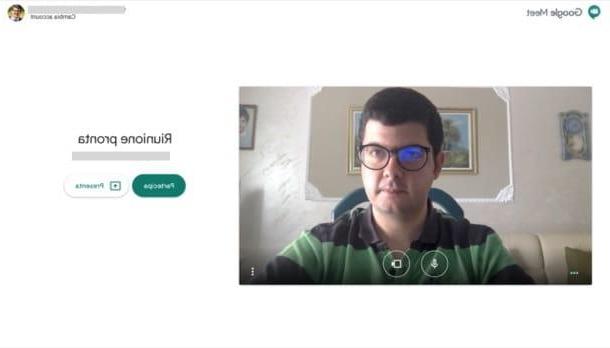
To proceed, go to the main page of Google Meet, click on the link Log in at the top right and log in to your Google account (if you haven't done so yet). Then click on the button New meeting, select the dicitura Start a meeting now and grant the service access to the webcam and microphone of the PC in use.
On the page that opens, click on the tab Meeting details (bottom left) and select the wording Copy info for participation, so as to copy the link to share with the people you want to invite to the video lesson. By clicking on the icon of two men (top right) and then on the button Add people present in the opened menu, you can send the invitation to the video lesson directly via email.
Once the conference has started, you can click on the microphone or of video camera to manage your microphone and webcam. If you want, you can also disable the microphone of one or more participants in the lesson: to do this, just click on the icon two men (top right), select the name of the person of your interest and click on the microphone on the menu if you press.
Since this is a lesson, there may be a need for share the screen. To do this, click on the button Submit now (bottom right), choose the item Your full screen in the opened menu and grant the service the necessary permission to share the screen (which you can revoke at any time by clicking on the button Stop Presentation). Simple, right?
If you need more information on how to start a video conference with Meet, do not hesitate to consult the guide that I have dedicated entirely to the subject.
Smartphones and tablets

If you prefer to use Meet on smartphones and tablets, install the official app of the service on your Android or iOS / iPadOS device. Once this is done, start it, press the button Continue and grant it all the necessary permissions to make it work, that is, those relating to access to the microphone and camera device in use.
Next, tap on the button Log in and log in to your Google account (if necessary). To start a new video conference, tap on the options New meeting e Start a meeting now e Share the link in the box opened with the people you want to invite to the video lesson.
Once the conference has started, you can press on the symbol of microphone or of video camera (tap anywhere on the screen if you don't see them) to manage your microphone. By pressing, instead, on meeting code, at the top, you can access the list of participants: from here, by touching the nominative of one of them, you can (if necessary) also act on their microphones.
Even from mobile it is possible share the screen on Meet. To do this, touch anywhere in the box showing the video of the participants in the videocall, touch the icon of three dots located at the bottom right and tap on the item Share screen e Start presenting/Start transmission. To stop recording, instead, go back to the main screen of the app and press the button Stop sharing.
If you need some more details on how to start a video conference with Meet, I refer you to the guide that I have dedicated entirely to the Google home service.
How to create a video lesson on Zoom
Despite being widely used in the home, Zoom it is a perfect platform for online teaching and, in fact, it is one of the most appreciated by teachers and students. Let me illustrate its use.
computer
If you are going to proceed from computer, all you have to do is log into your Zoom account from its official client and, once the videoconference has started, share the link with your students. If you have not yet created an account and / or you have not downloaded the Zoom client, I refer you to reading the guides that I have just linked to you.
Once this is done, once you have started Zoom, fill in the fields Email e Password and his bottone award Log in, to log in with your account; otherwise log in with your account Google or your account Facebook, by clicking on the appropriate buttons and logging in. More info here.
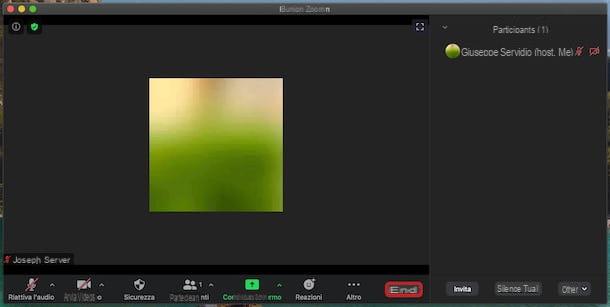
Once logged in, click on the button Continue, click here New meeting (top left), then on the button Access audio (bottom left) and on that Enter with computer audio. Now the videoconference has practically started. To invite other users to the video lesson, click the button Guests and, in the window that appears on the right, click on the button first Invite and then on the board Email located at the top right.
Therefore, decide the method of sending the invitation (eg. gmail, Yahoo Mail, etc.) or click on the item Copy invitation, at the bottom left, and send the link of the video lesson as you prefer (eg via WhatsApp, Telegram, etc.). Then remember to admit incoming users by clicking on the button Admit.
Using the button Silence everyone (bottom right of the panel Guests), you can mute all people attending the conference. By scrolling the mouse over the names of the participants, however, you can silence them individually by clicking on the button Silence.
Do you want to share your PC screen? Then click the button Share screen and, after selecting the window to share, click on the button Share. To stop sharing your screen, click the button instead Stop sharing.
I remind you that Zoom is also available as a free extension for Chrome and Firefox. For more information on how to use Zoom, please take a look at the guide I linked to you. I am sure it will be useful to you.
Smartphones and tablets
If you want to proceed from smartphones and tablets, you must also log in to your Zoom account, this time from the official app of the service for Android (also available on alternative stores) or iOS / iPadOS: if you have not yet installed the app and / or created your account, you will find explained how to do it in this other guide.
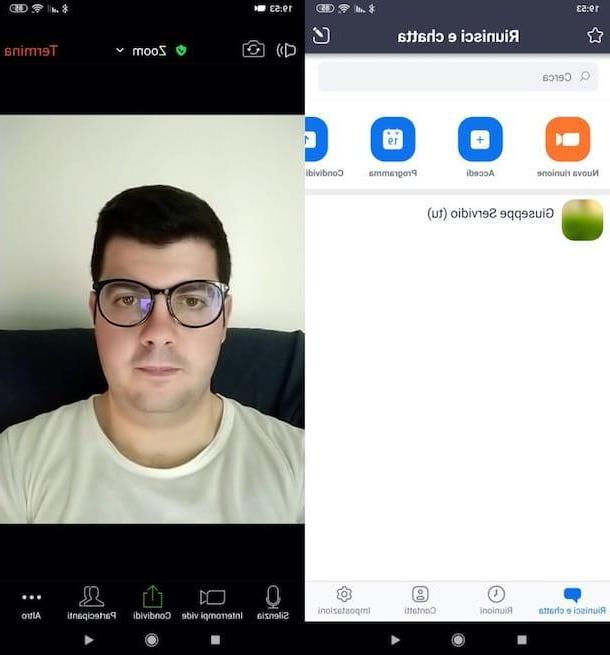
Once logged in, tap the orange button New meeting (top left) and press the button Start a meeting. Next, grant the app the necessary permissions to access the camera and microphone (if you haven't done so yet). Using the buttons Turn off sound e Disable video located at the bottom (if you don't see them, tap anywhere on the screen), you can manage your microphone and camera.
To invite other people to the video lesson, however, you have to press the button Guests (if you don't see it, tap anywhere on the screen), then on those Invite e copy the invitation link and share the link obtained with the people of your interest through the channels you prefer (eg email, chat, etc.). Then remember to accept the people invited by pressing the button Admit which will appear next to their names. By pressing the button Share, located at the bottom, you also have the possibility to share your screen, images, documents, etc.
If you want more information on how to use Zoom, I refer you to reading the article that I dedicated entirely to the topic.
How to create a video lesson with Classroom
If you are wondering if it is possible create a video lesson with Classroom, you must know that the answer is yes, as long as you have an account Google Workspace for Education (formerly called G Suite for Education) and have access as teaching. In this case, for each course created on Classroom, you can generate a link to Google Meet and create a video lesson without having to create a new meeting every time. Find everything explained in detail right below.
computer
To proceed from computer, connect to the main Classroom page and, if you haven't already, log in with the credentials that were provided to you by your school.
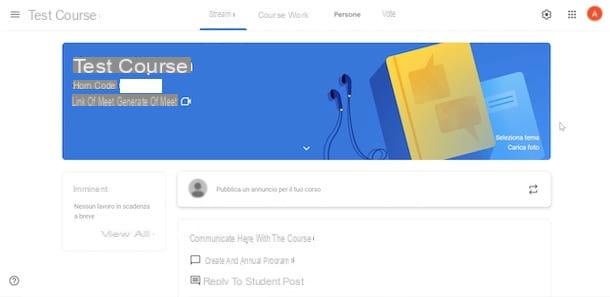
At this point, click on course of your interest and click on the option Generate Meet Links visible next to the name of the course. Alternatively, click on the icon of rotella d'ingranaggio, at the top right, locate the section Generali and press pulsating Generate Meet Links.
In both cases, in the screenshot Add Meet to your course, award-winning Generate Meet Links and make sure that the lever is next to the item Visible to students is set to ON, so that students can view and access the video lesson independently (only if the teacher is already present). Finally, click on the button Save, to generate a Meet link and associate it with the course in question.
At this point, for start a video lesson on Classroom, access the course for which you have generated the link of Meet, click on link visible next to the item Meet link and, on the new page, click on the button Participate, to start the video lesson.
If, however, you are wondering how to record a video lesson on Classroom, after starting a new meeting, click on the icon three dots, at the bottom right, and select the option Record meeting from the menu that opens. On the screen Ask for consent, award-winning Accept, to confirm that you have obtained registration consent from all participants and to start registration.
If you don't see the option to record a video lesson, it means that the admin user who created the Google Workspace for Education account did not activate the option in question from the Google Admin console. For more info on this, you can take a look at my guide on how to register on Meet.
How do you say? You are a student and would like to know how to join a video lesson on Classroom? In this case, all you have to do is access the course of your interest, locate the item Meet link, click on link that generated the teacher and, in the new open page, press the button Participate.
If doing so you see the message The meeting code you entered doesn't work, it means that the teacher has not yet logged in to the video lesson. As soon as it does, you will be able to click on the link available in the course on Classroom again and join the class.
Smartphones and tablets
It was preferred create a video lesson on Classroom da smartphone or tablet, start the service app for Android or iPhone / iPad devices, press the button Start and sign in with your Google Workspace for Education account.
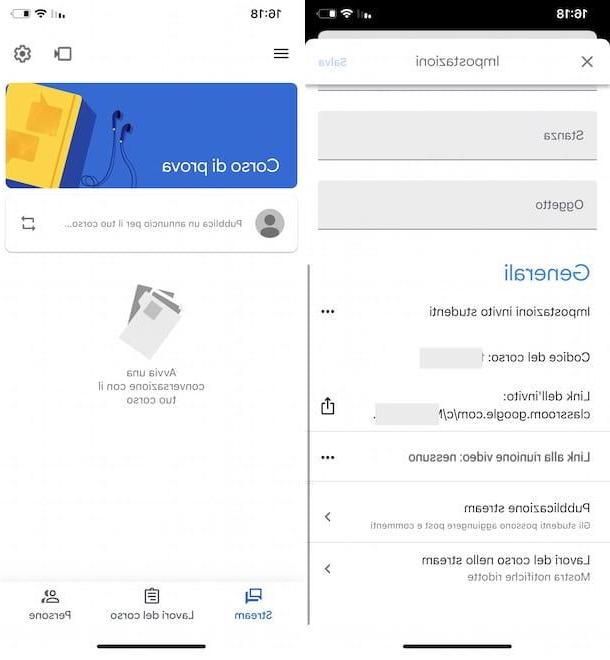
At this point, tap on course of your interest, press the icon of rotella d'ingranaggio, top right, and locate the section Generali. Then press on the icon of three dots related to the item Link to video meeting, fai tap sull'opzione Generate meeting link, make sure the toggle next to the item Visible to students is set to ON (or your OFF if you prefer to hide the link in question) and click on the button Save, to create the link to Meet.
With that done, you're ready to start a Meet video lesson right from Classroom. After starting the app in question, access the course of your interest and, in the new screen displayed, tap on the icon of video camera, at the top right, and press the button Continue, to start the video lesson (or participate if you are a student).
If you want more information on how to use Google Classroom, I refer you to reading the guide that I have dedicated entirely to the service.
How to create a Teams video lesson
Teams is another platform that can be used to create video lessons. Let's see together how.
computer
To use Teams on computer, go to the official website of the service and download its official client by clicking on the buttons Download for the desktop e Download Teams. At the end of the download of the program installation file, open it and follow the instructions that appear on the screen to complete the setup. More info here.
When installation is complete, start the Teamsclick on your button Log in and log in to your account (which you must have previously configured, as I explained to you in this other article). To login, fill in the text fields e-mail e Passwordclick on your bottone Log in and click on the name of your company and then on the buttons Continue (for two consecutive times) e OK.
Once this is done, click on the tab Call on the left and add new contacts to your team by selecting the item Contactsby clicking on the button add contact and filling in the form regarding the contact to be included. To start the video call, after clicking on the tab Call in the menu on the left, click on the button Call, write the names of the people you want to call, click the symbol of video camera located at the bottom and wait for the participants to join the call.
If you want, you can also use Microsoft Teams directly from your browser, by accessing the service from its official website. For more information on how to use Microsoft Teams, I refer you to reading the guide that I have dedicated entirely to the platform.
Smartphones and tablets
If you want to use Teams from smartphones and tablets, after installing and starting the service app on your Android device (also available on alternative stores) or iOS / iPadOS, press the button Log in and log in to the Microsoft Teams account that you must have already created and configured (as I showed you in this other guide). To log in, you must then fill in the fields e-mail e Password e premere sul pulsating Log in.
Once logged in, tap on name of your company, presses on the wording next (twice in a row) and press the button OK. In the new screen that opened, make sure your name is correct, press the button next and tap the button Invite others, so as to invite other people (your students, in fact) to be part of the team.
Therefore, provide thee-mail of the person to be invited in the appropriate text field, presses the button capacitor positive (+) lead and repeat the operation for all the other people you intend to invite. Finally, click on the button (✓) located at the top right.
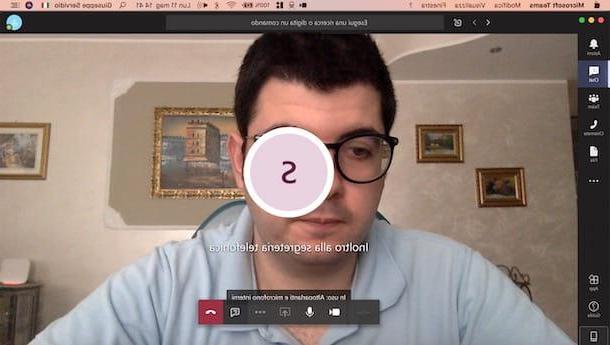
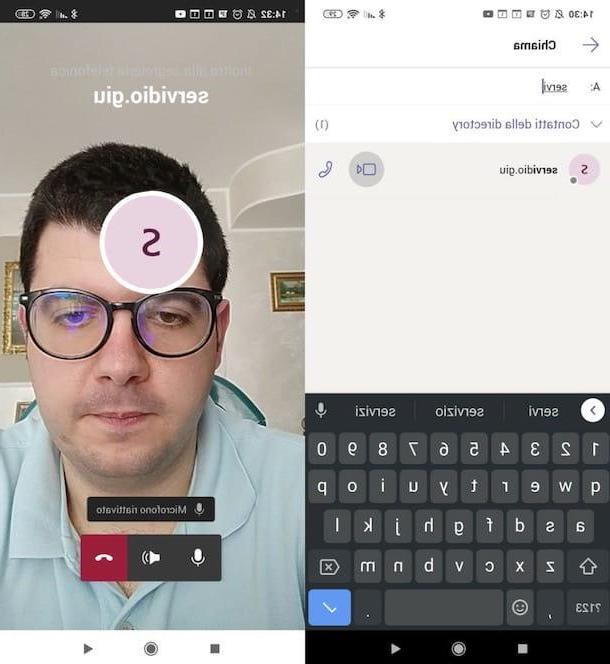
Now, all you have to do is press the button Call (below), press the icon of handset located at the bottom right, provide the names of the contacts to call in the text field A: and press the icon of video camera attached to the name of your interest. If you have not already done so, grant the app access to the camera and microphone of the device in use and wait for the users you called to answer.
For more detailed information on the use of Teams, I refer you to reading the guide I have dedicated to the Microsoft platform.
Practical advice on how to create a video lesson

In addition to following the precautions I told you about in the previous lines, try to put the following into practice practical advice on how to create a video lesson and you will see that you will not regret it.
- Use good equipment - a webcam or, better still, a DSLR connected to the computer and a quality microphone are essential to ensure that the video lesson is enjoyable to follow. If you do not have the necessary equipment, I would say that the time has come to make some small investments in this sense, buying the necessary in electronics stores or online stores, such as Amazon.
- Use a pattern - do not use too many notes and try to write down only the key points of the lesson that you need to give. This will help you to have in mind which topics to cover and at the same time allow you to be natural and not rigid or set (which would happen if you were tied to a manuscript).
- Take care of the location - find a corner of your home or office that is suitable and does not distract those who will participate in the lesson. If possible, find a neutral colored wall that does not have decorations, hanging pictures, etc .; otherwise, consider purchasing a uniform and soft colored towel, which can cover any distracting elements: you can find it in the gift shops in your area or in online stores, such as Amazon.
- Prepare a plan "B" - if the main line were to jump or, in any case, should have some problems, have an emergency line ready, perhaps the one included in the data plan of your smartphone, which you can use in tethering.