Publisher pricing and downloads
Before getting into the tutorial and explaining yourself in detail how to create wedding favor cards with Publisher, I'd like to give you some preliminary information on the software in question.
Publisher is a program dedicated to editorial graphics, but not only that, included in the suite Microsoft Office for Windows (not available for macOS). It allows you to create magazines, brochures, business cards, invitations of various types and so on in a very simple way.
The Office suite, as you well know, is distributed with a commercial license: to have Publisher, you need to subscribe to the service Office 365, with prices starting from 7 € / month for the plan Personnel, which offers the possibility of installing other Office programs (Word, Excel, PowerPoint, Outlook and Access) on a single computer and a single portable device and access to services such as OneDrive (1 TB) e Skype (60 min / month).
Alternatively, there is the plan Office 365 Home which includes the same programs and services seen previously, but with the possibility of installing them on up to 6 computers and portable devices with a price equal to 10 € / month.
In any case, Microsoft offers a trial version of Office 365 that can be used for 1 month completely free of charge. To obtain it, connect to the appropriate section of the Microsoft website and click on the button Try free for 1 month. Then type theemail address of your Microsoft account and its Password login and click on the button Log in for, log in.
If you don't have a Microsoft account to use for the occasion, you can create one right away by following the instructions I gave you in this tutorial.
Once logged in, click on the button NEXT and indicates a valid payment method, to proceed with the download phase, to be chosen between Credit or debit card, Direct debit e PayPal: fear not, as this is a mandatory step to access the Office 365 trial period, but you will not be charged for the first 30 days of using the service.
If you do not want to extend your Office 365 subscription further, you will only have to take care to cancel the automatic renewal, at least 24 before the end of the promotional period (I will explain how to do it in a short time).
In any case, follow the instructions provided on the screen to add the payment information: if you have chosen the credit / debit card, you must indicate the number Expiration date and CVV / CVV2 code; if, on the other hand, you have chosen to pay via PayPal, you must log into your account using the proposed screen and authorize Microsoft to automatically withdraw.
Once you have completed the payment method configuration phase, click on the button Subscribe to activate the free trial of Office 365 Home: if everything went well, you should now have access to the subscription management page.
When this happens, click on the item Install Office and then on the button Install, to proceed with the download of the Office installation file on your computer: once you have obtained the file in question, start it and wait for the automatic setup procedure to be completed (at this stage, all the necessary files will be downloaded and installed to the functioning of the entire suite).
Once the installation is complete, you can recall all the programs included in the package, including Publisher, directly from Start menu Windows; at the first access, remember to enter the data of the Microsoft account previously used to activate the trial period of the software.
However, if you do not wish to extend your Office 365 subscription beyond the promotional period, remember to disable its automatic renewal from this web page at least 24 hours before the trial expires, otherwise you will be charged 10€ for subscription to the service.
For more information on downloading and installing Office, I invite you to take a look at the guide I have entirely dedicated to this topic.
How to create wedding favor cards with Publisher
Finally, the time has come to take action and to understand, in practice, the steps to be carried out in order to create the cards for the favors using Publisher.
I assure you that this is a very simple procedure which, in a nutshell, takes place in three main phases: the creation of the table necessary to arrange the cards on the sheet, the addition of the message and, if necessary, the insertion of a front image. Find everything explained below.
Build the table

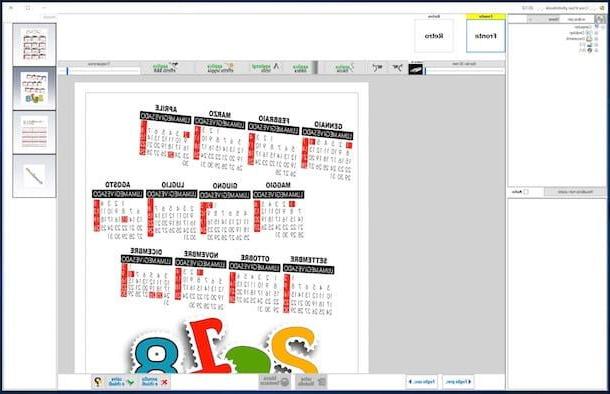
In order to build the table that, in practice, constitutes the scheme of the cards, start Publisher and click on the button Blank (A4)to create a new blank, portrait orientation, A4 size publication.
Next, click on the tab Home, then on the buttons Table e Insert tabetlla ..., enter the value 10 in the field number of lines, then the value 4 in the field number of columns e, infine, click on the button OK, to create the table.
Now, click on the newly created table, go to the tab layout (top) and set the values of Width e Height, respectively, a 27,11 cm e 18,41 cm: in this way, a diagram will be created occupying the entire available sheet. Finally, remove the check mark from the box Fit to text, so that the margins of the cells are not altered by the content inserted within them.
If the size does not suit you, you can adjust the table margins yourself: all you have to do to do this is to "grab" one of the corners with the mouse (the cursor should turn into an oblique double-headed arrow) and " drag it "towards the edge of the sheet, until it reaches the desired size and aspect ratio.
At this point, if you want to create cards that contain only text, you can move on to the next step; if, on the other hand, you intend to make cards containing a design on the front side, right click on the first page of the publication (the list of pages is on the left side of the Publisher window) and select the item Insert duplicate page give the menu that you come purpose.
Add your message

Once you have defined the pattern of the cards, you must fill them with the appropriate announcement (eg [Event] of [name surname] - [date]); if you have chosen to make cards with an image on the front, before making any changes, make sure you are in the second page of the publication (you can select it with a click from the Publisher sidebar).
Before proceeding further, I advise you to apply the zoom to the document, so that you can easily view the contents of the cells you are about to fill: to do this, click on the tab Show Word and use the drop-down menu located next to the icon of the magnifying glass, to specify the zoom level.
Alternatively, you can get the same result by pressing the key Ctrl on the keyboard and scrolling the mouse wheel upwards at the same time, or using the cursor located in the lower right corner of the Publisher screen.
The scheme made previously will allow you to make a total of 20 cards on a single A4 sheet. Since the message will have to be displayed on the inside right side, you will have to work on all the one bet, starting the count from the upper left corner of the sheet: la second fourth sixth and so on, until you get to the Twentieth.
All clear? All right, then let's get started. Click on second cell starting from the top left corner of the sheet and write the message that best suits you; as needed, you can define the alignment of the text, the type of font to use and its format (bold, italic and so on) using the tools available in the areas Character e Paragraph on the Home tab.
Once you have written the first message, the game is practically done: select the entire contents of the cell you have just filled in (and therefore of the note) with the mouse, press the keys Ctrl + C on the keyboard to copy the text to the clipboard, click now on the fourth cell, again starting from the top left corner, and press the button Ctrl + V to paste the copied text. Repeat the same operation for all even-numbered cells, up to the twentieth.
If you have chosen to make cards with text only, then your work is finished and you just have to proceed with printing the file: click on the tab Fillet, by pressing the button Save, specify the path in which to store everything and, once saved, follow the instructions I gave you in the next chapter of this guide to send the file to print.
If, on the other hand, you have decided to add an image to your cards, continue the work by following the instructions below.
Create the opening image

If you have decided to add an "opening" image to your cards, click on first page of the Publisher publication (left) and, to start inserting the first image, first click on the tab Inserisci and then on the button Placeholder for image.
At this point, drag the newly created placeholder onto the second cell starting from the top left corner, move it to the left edge and resize it to fit the edges of the cell correctly. Now, click on the placeholder you just created, select whether to insert the image from a file, from the Internet or from OneDrive, then help yourself with the panels that are proposed to you to choose and add the image of your interest. If necessary, resize the image, dragging the margins as you see fit.
When you're done, select the placeholder you just edited and press the keys Ctrl + C of the keyboard, in order to copy it to the clipboard; then, press the keys Ctrl + V, to paste a new copy of the placeholder containing the chosen image, which you will need to place in the fourth cell of the table, always starting from the top left corner; you can help you with the alignment by following the guides that appear on the screen. Proceed in this way until all the the one bet of the table (la sixth octave decima and so on, up to Twentieth).
After this step too, the cards are finally ready for printing! Before going any further, be sure to save your work by clicking on the tab Fillet and selecting the button Save / Save as.
Print the created cards
If you intend to print the created cards yourself, first check that your printer is compatible with the type of paper you intend to use (e.g. the cardboard) and that it is properly configured for printing from Windows. If not, you can remedy the problem by following the instructions I gave you in my guide on how to print from your computer.
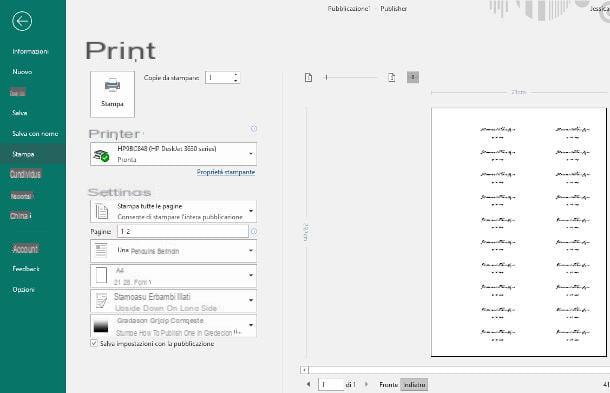
Once you have made the appropriate checks, all you have to do is go to the menu File> Print Publisher (top left) and, if you have created simple, no-image cards, define the number of copies of sheets to print (remember that you will be able to get 20 cards per sheet) and click on the button Print.
If, on the other hand, you had opted for cards with an image, and if your printer is equipped with double-sided printing module, click on the drop-down menu Print on one side and select the item Print on both sides - Flip over on long edge from the proposed list. Finally, enter the number of copies to print and click on the button Print to start the process.
Once this step is completed, you just have to cut out your cards and fold them to give them the characteristic shape!
If the result is not satisfactory for you, or if you do not have a printer for printing on cardboard / paper with a particular watermark, I recommend that you save the Publisher project file on a USB stick and, taking it with you, to go to yours trust typography to request the printing of your cards.
How to make wedding favor cards with Publisher