How to set up a WiFi network
If it is your intention to customize the wireless network coming from your router (name or SSID, network key, channel, band and, if applicable, guest network), this is the most suitable part of the guide for you. In the following sections, in fact, I will explain how to complete this operation on the routers provided by the most well-known fixed telephone operators: TIM, Vodafone, Fastweb etc.
Before proceeding, make sure you have access to the management panel of the router in question: to do this, connect to the same Wi-Fi network as the router (or connect it to the computer via Ethernet cable), start the Internet browser of your choice and try to connect to one of the following addresses, until you see the router username and password screen.
- ** 192.168.1.1 **
- ** 192.168.1.254 **
- ** 192.168.0.1 **
- ** 10.0.0.1 **
Once you have reached the device welcome screen, enter the username and Password access of the modem inside the module that is proposed to you: if you have never modified these values before, the combinations to be entered could be admin / admin or admin / password.
If these do not work, you can get the precise combination to use by consulting your router's access manual or by taking a look at my article dedicated to the most used passwords for routers. Some routers, upon first access, may offer you an automatic password configuration / reset procedure.
For more information on accessing the network device management panel, I invite you to consult my tutorial on how to enter the router page.
TIM WiFi network configuration
To carry out the TIM WiFi network configuration, after entering the router (if necessary, you can consult my tutorial on how to enter the Telecom modem), click on the icon depicting the gears located next to the item wireless, in order to access the wireless network setup screen.
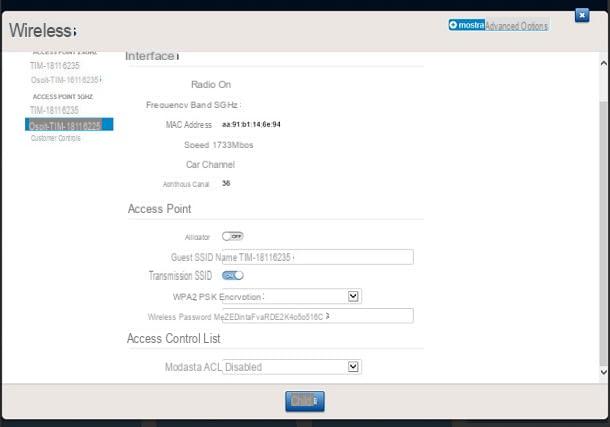
At this point, using the menu on the left, select the WIFI network whose settings you want to change (eg. TIM-XXXXXX): the networks indicated in the box 2.4 GHz Access Point they listen on that frequency, offer greater range but potentially lower data rates, and are more prone to interference. Those at 5 GHz, on the other hand, offer higher data transfer rates but have a shorter physical coverage range.
In any case, after clicking on the name of the network on which to intervene, move the lever On (located just below the box Access Point) on ON, to enable it, and use the fields displayed on the screen to make the customizations you deem most appropriate.
- Channel - use this drop-down menu to specify the network reception channel. Generally, this setting is only needed for 2.4GHz networks, where the most used radio channels are the1, 6 and l '11 (since they are the only ones who do not "overlap"). If you have no idea which one to choose, stick to the instructions I gave you in my guide to choosing the best wireless channel.
- SSID name - specify, in this text box, the name to assign to the Wi-Fi network.
- Cryptography - here you must indicate the safety standard to be applied to the network. If in doubt, I advise you to choose the option WPA2-PSK.
- Wireless password - specify here the network key to use when connecting.
- WPS - by activating this lever, you can take advantage of the quick connection (without entering a password) between the router and other devices compatible with this technology. If you don't use it, you can deactivate quietly this settings, also for security reasons.
When you are done, click on the button OK placed at the bottom of the page and that's it. If necessary, still from the same panel, you can activate or deactivate the guest networks: these are "special" wireless networks dedicated to external people (eg friends who come to visit) which, among other things, allow you to set a password different from that of the main network and inhibit access to the control panel router management, thus preserving the security of the device and the entire network.
To activate the 2.4 GHz or 5 GHz guest network, click on its name (eg. Guests-TIM-XXXX), move the lever On su ON and follow the same instructions seen above, in order to make the most appropriate changes for you.
If you need further explanations regarding the configuration of wireless networks on TIM modems, I invite you to take a look at my tutorial on how to configure the TIM modem, in which I have dealt with this topic in depth.
Configure Vodafone Station WiFi network
Configure the Wi-Fi network on one Vodafone Station it's very simple. After entering the router management panel (if necessary, you can help with the instructions in my guide on how to enter the Vodafone Station), click on the item Wi-Fi located at the top and then choose the option General Settings from the left side menu, to access the wireless network configuration screen.
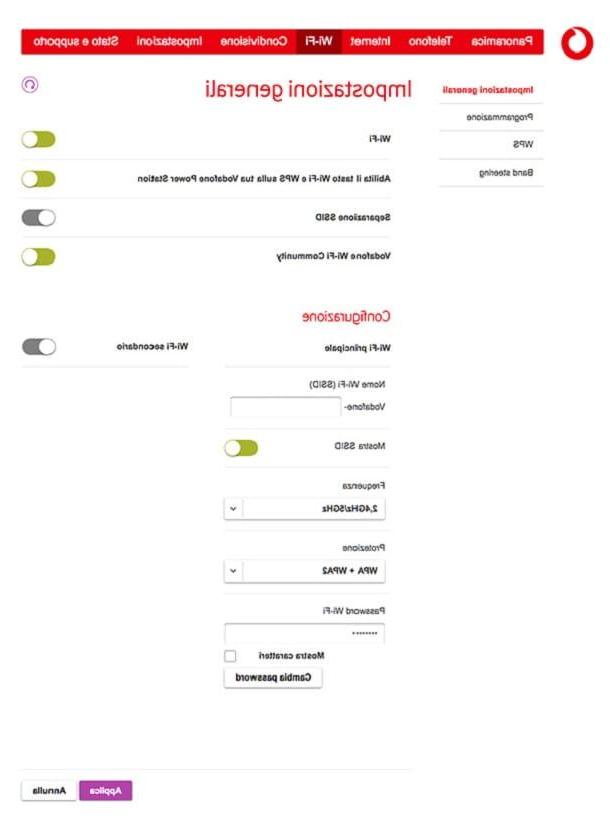
At this point, make sure the toggle Wi-Fi is set to ON and use the box Main Wi-Fi to define the network settings as follows.
- Wi-Fi name (SSID) - indicate here the name to be assigned to your network. The initial word "Vodafone" cannot be omitted.
- Show SSID - activate this lever to make the net visible from the outside (recommended option).
- Frequency - choose whether to make the network in question "listen" on the 2.4 GHz band, the 5 GHz band or both.
- Protection - indicates the type of security to use for the network key. If in doubt, choose the option WPA + WPA2.
- Wi-Fi Password - type in this field the password to use to connect to the wireless network. To see it as you type it, put the check mark next to the item Show characters.
Also, if you want to "separate" the wireless network on the 2.4 GHz frequency from the one on the 5 GHz frequency, activate the switch SSID separation. By doing this, you will be able to act separately on the settings of the two networks.
If you need to activate the guest network, that is the one to dedicate to acquaintances and not very trustworthy people (you can choose a network key other than the main one and, moreover, these people will not be able to easily access the configuration parameters of the router), activate the lever Secondary Wi-Fi and follow the same steps seen above, in order to customize it. When you are done, click on the button Apply, for the settings to take effect.
Keep in mind that you can configure the Wi-Fi network of your Vodafone Station using the app if needed Vodafone Station DSL / Fiber for Android and iOS: After launching it, tap the button Start, do a few swipes to skip the initial presentation and grant it permissions to access microphone, notifications e address book.
Successively, play the voice Launch app located at the bottom right and, immediately after, press the side button of the Vodafone Station to put the two devices in communication. At this point, tap on the ☰ button located at the top left and then on the tab Wi-Fi, to access the settings of the wireless network, through which you can configure the latter in the same way as seen so far.
For more information about configuring the wireless network on Vodafone Station and Vodafone Station Revolution, I suggest you take a look at the tutorials I have dedicated to both devices.
Configure Fastweb WiFi network
If you need to configure the modem Wi-Fi network Fastweb, proceed as follows: after accessing the relevant management area (if you need a hand in this phase, consult my tutorial on how to enter the Fastweb modem), click on the item WiFi located at the top and make sure the toggle at the top of the screen is set to ON.
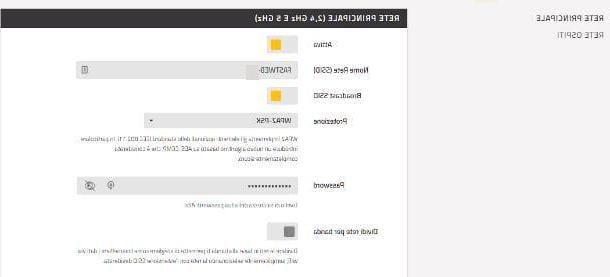
At this point, click on the tab Main network and use the fields that are proposed to you to set the Network name (SSID), the type of protection (if in doubt, leave the option unchanged WPA2-PSK) and the Password to use for connection. Basically, the Fastweb modem uses unique settings for the 2.4 GHz frequency network and for the 5 GHz frequency network.
To change this behavior and have separate settings available for the two networks (with the possibility of deactivating one or the other, as needed), move to ON the levetta Divide network by band and act on the modules attached to the boxes 5 GHz network e 2.4 GHz network.
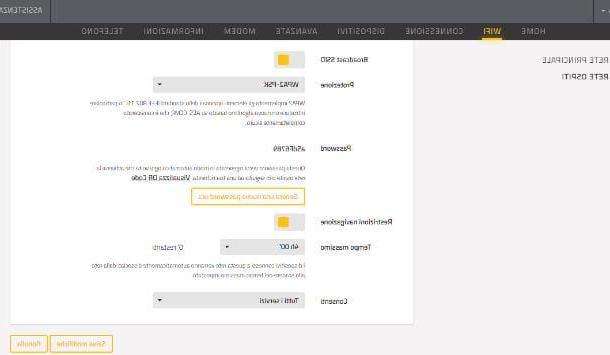
If you want to activate the guest network, click on the tab of the same name (located on the left or top) and move up ON the first lever located at the top of the box: in this case, it is not possible to change the name of the network (which will be of the type GUEST-mainNetworkName) and the password is preset by the router itself. To generate a new one, you can click on the button Generate a new password now.
If needed, you can specify a maximum connection time, after which the connected devices will be automatically disconnected by activating the lever Navigation restrictions; moreover, you can choose to allow guests to use all Internet services (e.g. consultation of emails, social networks, and so on) or to browse the Internet only, by acting on the drop-down menu Allow.
When you are satisfied with the changes, click on the button Save Changes located at the bottom of the page to make the customizations effective.
If you need to modify the channels of the wireless network because, for example, you experience a lot of interference, click on the item Connection (top), locate the box Wi-Fi channel and, after moving on OFF the levetta Automatic best channel search, use the drop-down menus current channel e channel width to define the channel you prefer. For your convenience, you will also see a table containing all the Wi-Fi networks detectable by the router, along with their respective connection channels.
If you have opted for the distinction of network frequencies (2.4 GHz and 5 GHz) and / or activated the guest network, you can individually intervene on the respective channels by placing the check mark next to the box indicating the network of your interest, located in the box WiFi channel (the one that contains the graph). Once you have made the necessary changes, click on the button Save Changes, to confirm them.
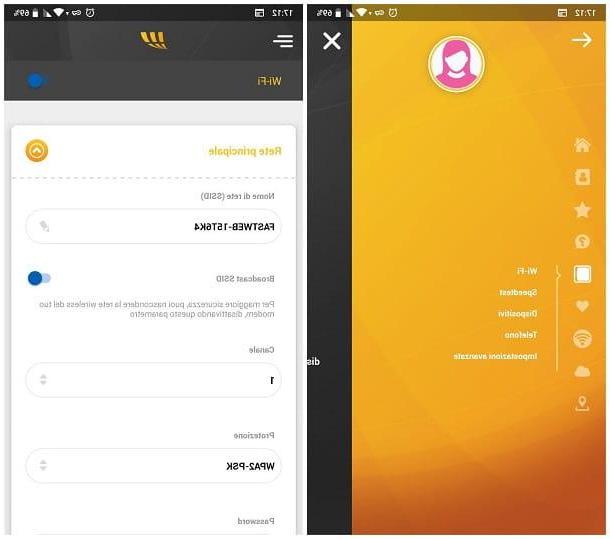
If you don't have a computer, you can customize your wireless network settings using the app MyFastweb, available for Android and iOS. After downloading it, log in using your MyFastPage credentials, then tap the ☰ button located at the top left, tap on the item FASTGate attached to the panel that appears on the screen and, finally, touches the item Wi-Fi. The wireless network configuration panel is very similar to the one seen for computers.
If you need additional instructions on this topic, or if you have a modem other than FASTGate, you can refer to the guide on how to configure Fastweb modem, in which I have been able to deal with this topic in an even more specific way.
Other routers
How do you say? Didn't you find the information I provided earlier useful, since you have a different router from those already analyzed? Don't worry, almost all commercially available devices have a section for configuring the wireless network.
Unfortunately, it is not possible for me to provide you with precise instructions for all router models on the market: the pages of my site would not be enough to analyze them all! Generally speaking, however, you simply need to log in to the management page of the router, enter the section relating to Wi-Fi (o Wireless connection) and use the modules proposed on the screen to define the settings most congenial to you.
At this juncture, my guide on how to configure a router may be useful, in which I have provided you with some tips (including those relating to the creation / modification of wireless networks) useful for correctly configuring the various network devices. In particular, if you own a TP-LINK, Netgear or D-Link branded router, you can take a look at the specific tutorials I have dedicated to the latter.
How to set up WiFi on a device
If you didn't find the information I gave you in the previous chapter helpful, as you need to understand how to connect to a wireless network from a specific device, this is the part of the guide that's right for you. In fact, below I will explain to you in detail how to configure WiFi network on computers with Windows, on Macs, on smartphones and tablets (therefore on Android and iOS) and, finally, on Google's Chromecast.
For completeness of information, I will then explain how to modify the DNS: if you had never heard of it, the DNS servers take care of "translating" the literal addresses that we type in our browsers (eg. www.configurehow.com) into their respective numerical IP addresses, ie the real addresses of sites on the Internet , in order to simplify our life.
It goes without saying, therefore, that using a sufficiently fast DNS server can improve the performance of the Internet connection: in this regard, I suggest you take a look at my guide dedicated to the best DNS, in order to choose the most suited to your needs.
Ready to go? OK, so let's get started: you will find all of this explained in the sections to come.
How to configure WiFi network on PC
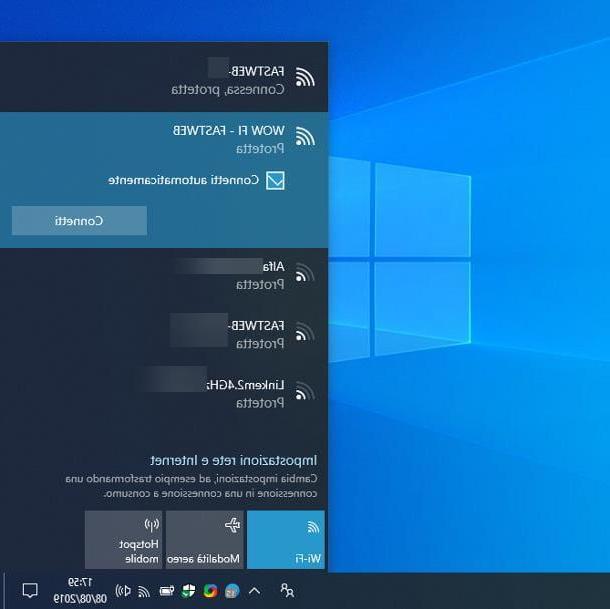
If you are using a computer on which it is installed Windows, you can connect to a wireless network by following a very simple procedure: first, click on thenetwork icon (Quella with him cleats or in the shape of globe) located near the clock, therefore, choose the WIFI network of your interest from the proposed panel and click on the button Connect that appears on the screen.
After a few moments, you should see a screen indicating that you need to specify the Password network: type it in the appropriate field, wait a few moments for the connection to be established and, if requested, specify whether to mark the network you have just connected to as public or private.
Once the connection to the Wi-Fi network is established, you can change the DNS in the following way: calls the Control Panel using the search area of the menu Home (the flag icon located in the lower left corner of the screen), click on the items Rete and Internet e network and sharing center, locate the network you are currently connected to and click the button Property located in its correspondence.
Afterward, double-click on the entry Internet Protocol versione 4 (TCP / IPv4) resident in the box The connection uses the following elements, put the check mark next to the item Use the following DNS server addresses and fill in the corresponding fields with the address of the DNS servers you prefer (eg. 1.1.1.1 e 1.0.0.1, to use Cloudflare servers).
For more information on how to change DNS and the best servers to use, I refer you to reading my guides on how to change DNS on Windows 10 and how to change DNS on Windows 7.
How to set up WiFi network on Mac
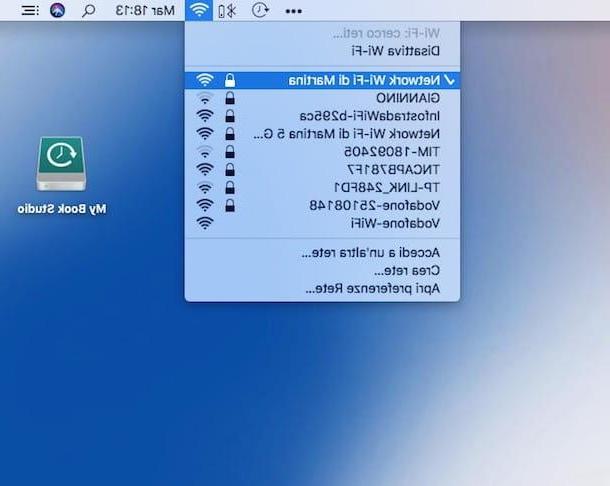
To connect to a wireless network from Mac, click on sull'icona della wireless network (Quella with him cleats) located near the clock, on the top panel of macOS, and click on the name of the network of your interest from the panel that is proposed to you.
Finally, wait for the password request screen to appear, enter the network key in the appropriate field and click on the button Apply, to start the connection.
Once the connection to the Wi-Fi network is established, you can change the DNS in use as follows: start the System preference clicking on the d-shaped icongear located in the bar Dock, tap on the item Network and, in the window that opens, select the connection Wi-Fi from the left bar.
Next, click on your button Go ahead ... (bottom right), open the tab DNS and delete, if present, all the addresses in the box below the item DNS server: to do this, select them with the mouse and click on the button [-], located at the bottom left.
Fatto ciò, click on your button [+], type the address of the primary DNS server (With art. 8.8.8.8, for Google DNS) and press the button Submit keyboard. Next, repeat the same steps to specify the secondary DNS server (With art. 8.8.4.4, again for Google DNS), click on the buttons OK e Apply And that's it!
If you need additional information regarding the steps just seen, you can take a look at my guide on how to change DNS on the Mac, in which I have explained everything to you in great detail.
How to set up WiFi network on Android
For Android, connecting to Wi-Fi networks is really very simple: first, open the Settings operating system by tapping the d-shaped buttongear located in the drawer, select the items Rete and Internet e Wi-Fi, then make sure the toggle at the top of the screen is set to ON, otherwise you do it.
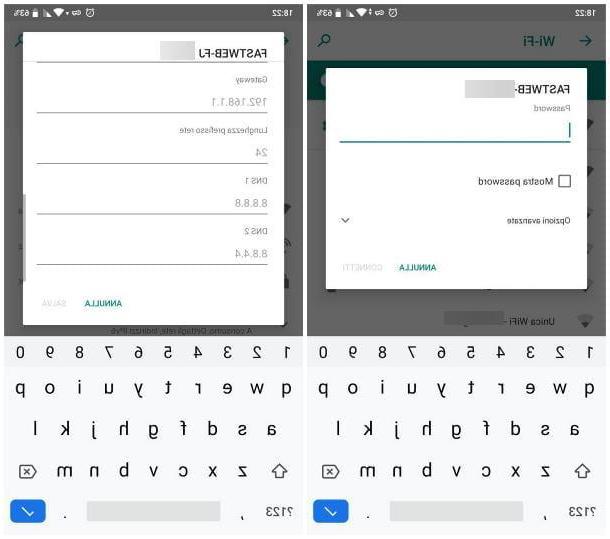
Then, wait for the network of your interest to be shown among those available, tap on his name and, when prompted, enter the network key in the appropriate field and tap the button Connect, to establish the connection. Keep in mind that, as I explained to you in my guide on how to connect your mobile phone to the Wi-Fi network, the names of some menus may differ depending on the version of Android installed on the device.
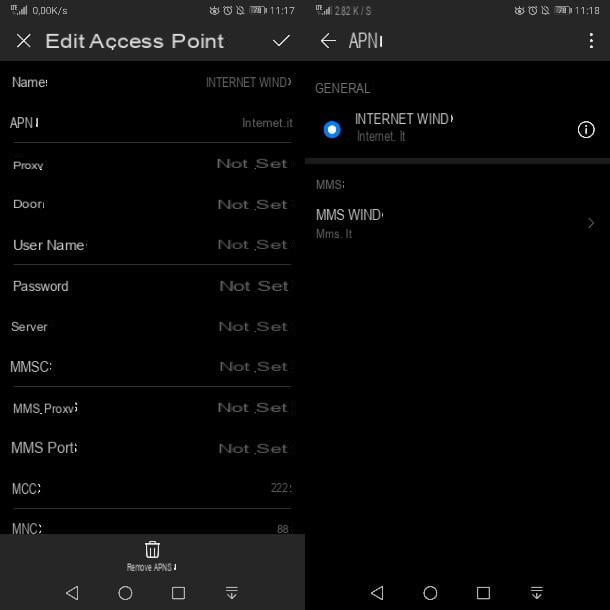
Now, if you want to change the DNS for your Wi-Fi network, tap the button of thegear located in its correspondence, tap the icon of pencil present at the top right and then on the item Advanced options, attached to the panel that is proposed to you.
At this point, move the drop-down menu IP settings su Static and enter the DNS servers you deem appropriate (eg. 208.67.222.222 e 208.67.220.220, for OpenDSN) in the fields DNS 1 e DNS 2.
When you're done, tap the button Save located at the bottom, to save the settings. If necessary, you can find more detailed instructions on changing DNS on Android in the tutorial I dedicated to the topic.
How to set up WiFi network on iPhone
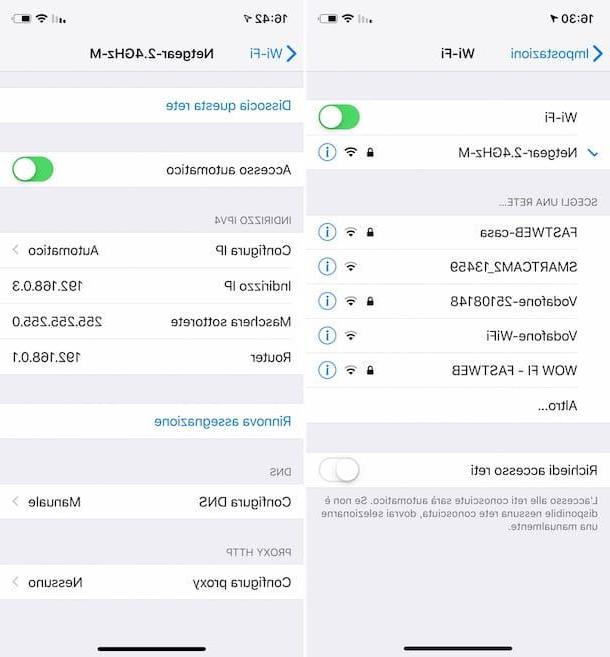
In order to connect theiPhone to the Internet, you have to follow a procedure very similar to that seen for Android: first, go to the Settings of iOS, by tapping on the icon in the shape ofgear located on the home screen of the "iPhone by", then tap on the item Wi-Fi and make sure the toggle at the top of the next screen is set to ON, otherwise you do it.
Next, select the network to which you want to connect from the list of those available, type the relative Password and, to finalize the connection, touch the item Log in located at the top right. If you need an extra hand to complete these steps, you can check out my previous guide on the subject.
Once the connection is established, you can change the DNS servers as follows: always from the area Settings> Wi-Fi, tocca il pulsating (I) located next to the network you connected to, touch the item Configure IP and apponi il segno di spunta accanto alla voce Manual, located in the screen that appears later.
At this point, tap the button (+) Add server and type the address of the primary DNS server you intend to use (eg. 1.1.1.1, for Cloudflare's DNS servers); if you deem it appropriate, repeat the operation to also specify the address of the secondary DNS server (eg. 1.0.0.1, for Cloudflare's DNS servers). When you're done, tap on the item Save, located at the top right, and that's it.
For more information about the procedure just seen, you can refer to the section dedicated to changing the DNS of my guide on how to speed up the Internet on iPhone.
How to set up WiFi network on Chromecast
You want to change the Wi-Fi network that the chromecast, but without completely restoring it? Don't worry, you can do it in an extremely simple way using the Google Home app for Android and iOS (to be clear, the one you used during the first initial configuration of the device).
To begin with, then connect the device you intend to act from (e.g. the smartphone or tablet) to the same Wi-Fi network to which the Chromecast is connected, turn on the latter, then return to the control device and start the app Google Home.
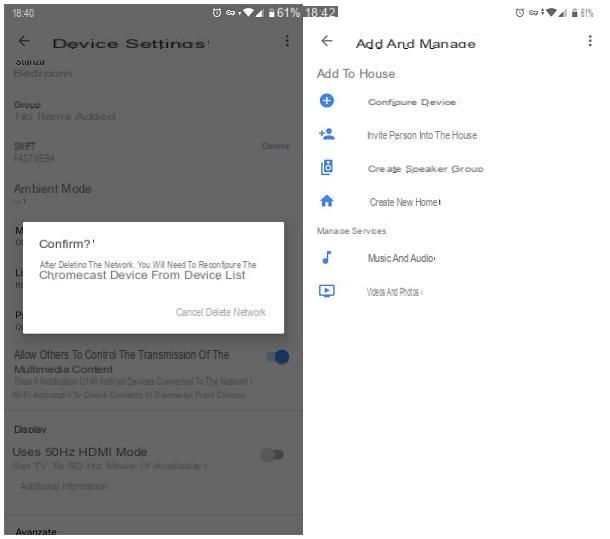
Then, tap on the del icon chromecast located in the virtual room where you set it up, tap the d-shaped buttongear located at the top right and locate the item Wi-Fi present in the panel that is proposed to you. Now, tap on the item Delete mail in his correspondence and confirms the desire to disconnect Chromecast from the network by touching the button Delete network.
Once back to the home screen, tap the Chromecast icon again and, to delete it from the devices already configured, tap the items Remove device e Remove. If you wish, you can now connect your smartphone or tablet to the Wi-Fi network to add to the Chromecast.
Now you are finally ready to configure the new network on the Google device: tap the button capacitor positive (+) lead located on the main Google Home screen, tap the item Configure device, scegli l'opzione New devices and tap on the name of the casa that you previously configured (if you wish, you can add a new virtual house by pressing the button Add another home).
Then, tap the button NEXT, wait for the Google Home app to locate the Chromecast and press the button Yes to start its configuration. After a few seconds, the two devices should be able to connect: check that the code appeared on the TV screen is the same as the one displayed on the smartphone display, touch the button Yes displayed on the latter and specifies whether contribute to the improvement of Chromecast after sending the usage data, using the keys displayed on the screen.
At this point, choose the virtual room to place the Chromecast, tap the button NEXT, tap on the name of the WIFI network to connect the Chromecast to, tap the button NEXT and, when prompted, enter the Password network in question and tap the button Fellow worker.
If the name of the Wi-Fi network is the same as that of the network to which you were previously connected (if, for example, you are carrying out this procedure due to the password change), Chromecast will try to connect using the network key already saved: to change this behavior, tap the item Enter manually located at the bottom left and enter the new network key.
Once connected, tap the button NEXT to proceed, if necessary, with the last aspects of the Chromecast configuration: at the end of the configuration, touch the button Continue twice in a row and that's it.
Are you unable to establish the connection with Chromecast, as the Wi-Fi network with which it was configured is no longer active? In that case, before you can set up your device again, you need to proceed with your device factory data reset.
To be able to do this, turn on the Chromecast, setting the TV to which you connected it to the correct video source and act in the most appropriate way, based on the generation of Chromecast you have.
- 1st generation Chromecast - press and hold the Chromecast button for at least 25 seconds, or until the device's LED light starts flashing. When this happens, the TV screen should go black, a sign that the reset sequence has started.
- Chromecast 2nd generation, 3rd generation and Chromecast Ultra - press and hold the button located on the side of the device: the LED on the device should turn orange and start flashing. Release the button only when the LED light turns white and the TV screen turns black, a sign that the Chromecast reset procedure has been successfully started.
Once the Chromecast reset procedure is complete, you should see the device identification letters on the TV screen; when this happens, you can start the first installation phase of the device (which includes the configuration of the wireless network), through the app Google Home for Android and iOS, as I showed you in my tutorial on how to set up Chromecast.
Clearly, you can follow the same instructions if you are working on a new Chromecast, which you will need to have previously connected to the TV via an HDMI cable and to the power supply, via a free USB port on the TV or a power plug with a USB input.
How to configure WiFi network