How to create iPhone photo video for free
What do you think of creating an original idea by assembling your favorite images together and maybe doing it even without paying a penny? I see that you are interested in it! Below, therefore, I have selected for you some of the best apps suitable for the purpose: if you want to understand how to make iPhone photo video free, you just have to try them all, following the suggestions contained in the next chapters. I am sure that you will be able to give full rein to your creative vein, while also safeguarding your wallet.
Gallery
Did you know the native app Apple photo, in addition to allowing you to retouch and enhance your shots, it offers features to make beautiful montages on iPhone? I'll show you how: to start, start the app by pressing on its icon, characterized by the symbol of a flower with petals of different colors, which you can find on the Home Screen or in the App Library.
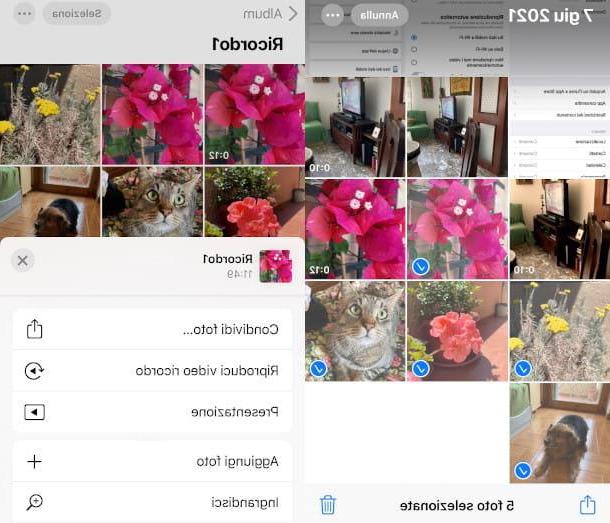
On the main screen, press the icon library, at the bottom left, to access the content stored on your device, then tap on the option All the pictures, at the bottom right, or on the other menu items Anni, Months o Days, if you want to refer to a specific time frame in which the images were produced.
Now, press the voice Select, at the top right, to choose the images that will be part of the montage. In this mode you will only have to press on the various photos (you will see that after the touch a check mark will be shown in the lower corner of the photo).
Once you have chosen all the images, click on the icon of export, bottom left, which shows the symbol of an arrow coming out of a square. In the following screen, tap on the option Add to albumQuindi fai tap sulla voce New Album. Type a title in the text field that will appear and press the button Save.
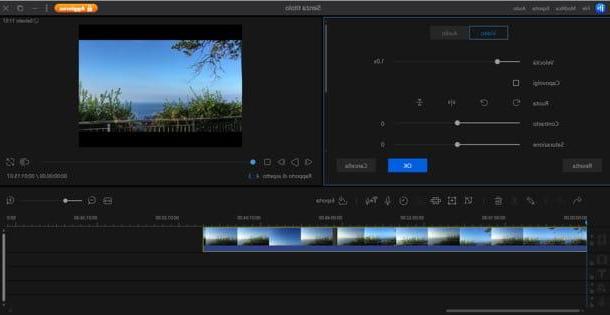
Now, from the main Photos screen, tap on the icon Album e fai tap sull 'album just created. Then he presses on the symbol of gods three dots located at the top right and touch the option Presentazione, to see a preview of your composition. At the end you can make changes by tapping on the item options, bottom right.
Here are two features in particular, namely Temi e Music: by pressing the first you can manage the transition effects, choosing from one of the preset options made available, while with the second you can select a music background different.
Finally, you can choose to have the sequence repeat several times, by pressing the button to the right of the wording Repeat, and change the speed of the passage from one image to another, using the last indicator: by holding down the selector in the center and moving it to the right or left and finally releasing your finger, you can speed up or slow down the presentation, respectively.
Following the pressure of the three dots on the album screen there is also another interesting option, called Play souvenir video: pressing the latter will automatically play a pre-packaged video in which, at the end, you can change the background music by choosing one of the options below. To view it again after replacing the soundtrack, press the ▶ ︎ button.
When you are satisfied, press the button export, bottom left, and choose the option Save to file, then press on the resource in which you want to store the project and press on the item Save, top right, to complete the operation. Easy, right?
iMovie
If you want to personalize your video more, you can use another free app already on your iPhone, that is iMovie, the famous video editor from Apple. If you can't find it on your device, you can download it at any time from the App Store by pressing the button with the nuvola and verifying your identity (if necessary).
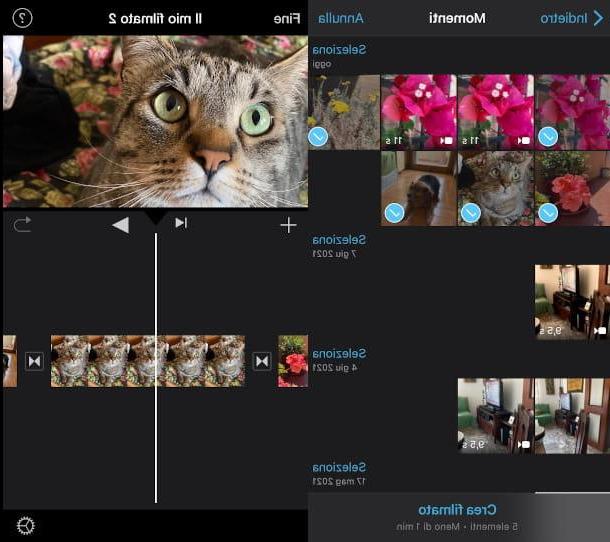
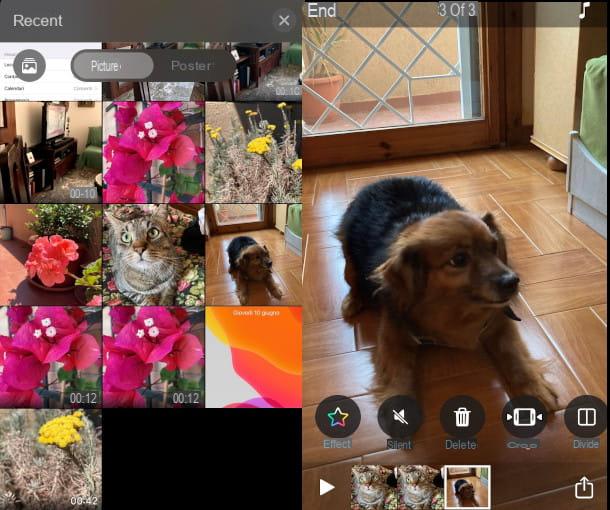
To start the app, tap on his icon (a camera inside a star) present on the Home Screen or in the App Library, then presses on the symbol [+] within the screen Projects e seleziona l'opzione Footage. Now, in the new screen named Moments, choose the photos and videos to be included in your montage, by tapping on each of them individually, then presses on the item below Create film.
Following the importation of the chosen elements you will be redirected to a screen of composition of the video: in the upper part you can view thepreview of the movie, while in the lower part there is the timeline, that is the panel in which the temporal sequence of events is defined and in which it is also possible to make changes to the montage. Here, for example, you can move an image to a different position by holding it down with your finger and dragging it left or right.
To apply an effect to a photo, on the other hand, after having always selected it from the timeline (you will notice that the outline of the same becomes yellow), press the icon with three colored circles located to the right of the menu that appears at the bottom, then press on one of the preset that are contextually shown to you above.
If you want to change the transition effects, presses on the symbol that separates the images (by default there are two mirrored arrows), then press on one of the options below to choose the one you consider most suitable. Also, if you wish to know how to create video with iPhone photos and music, I inform you that on iMovie it is possible to add, for example, also a background music, by pressing on the symbol [+] and selecting the item from the context menu Audio.
Then click on the desired option between Soundtracks, My music o Sound effects, then tap on one of the proposed contents and wait for it to download. Then press on the symbol [+], to apply the selected effect to the video. Once this is done, click on the wording Closeat the top right and play the movie by pressing the ▶ ︎ button.
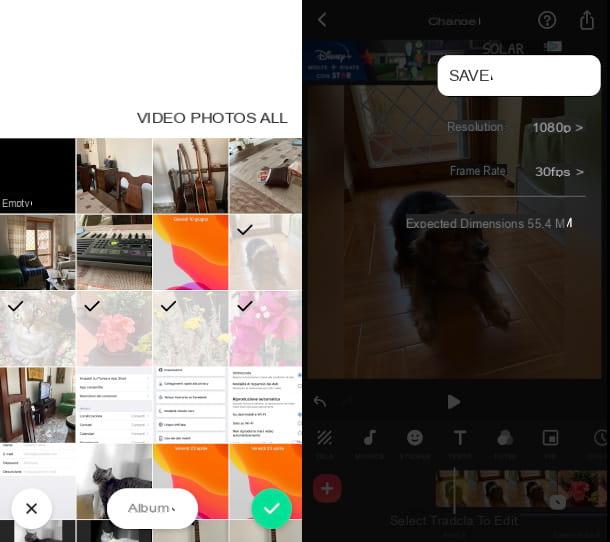
Are you satisfied with the result? Then the time has come export the project: tap the button end, at the top left, then, on the next screen, press the icon with the square and arrow and select the item Save video. Finally, all you have to do is wait for the export process to finish.
If you want more information on how to use iMovie, don't miss the opportunity to read the tutorial I dedicated to the software in question.
Clips
Another extremely useful, functional and intuitive free app for making excellent quality movies is Clips, which is also made by Apple and is aimed at creating short videos to share on social networks. You can download it at no cost from the App Store.
If you want to understand how to create video with iPhone photos and videos, I think Clips is right for you. Then start the app by pressing on his icon (a camera inside a circle) present on the Home Screen or in the App Library and start your editing by pressing the icon with the symbol of several squares in sequence, in high.
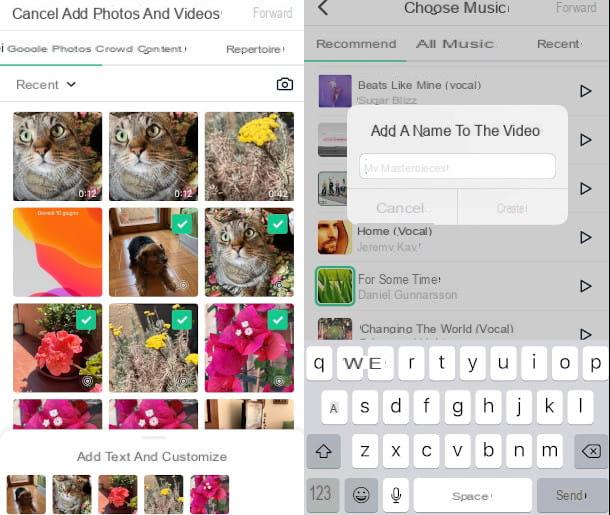
Now tap on the symbol [+] all'interno del riquadro New project, then add the contents you want to assemble in your montage by clicking on the images icon, at the bottom left, and selecting the item Gallery give the menu answer.
Then press onimage you want to include and it will be shown in full screen on the main app screen: press and hold the red button placed at the bottom for the time you deem necessary (you can refer to the seconds indicator that will appear at the top), then release it to add the photo to the montage.
Repeat the operation with all the contents you want to insert and you will see that they will be added in sequence in a special panel at the bottom. From here it is also possible to make changes to the video, by tapping on the single image to select it and bring up the menu of instruments. To apply a filter, for example, press the icon Effects on the left and select one of those proposed in the bar below, then press the button [X] to confirm your choice.
If you want to enter a music in the background, on the other hand, press on the symbol of music note at the top right and tap on the item Soundtracks (to access external content proposed by the app) or on the wording My music (to access your device's music library).
In the first case, for example, you will have to press on a soundtrack to download it and press on it again to select it (a red check mark will appear). At the end press on arrow located at the top left and preview your montage by pressing the ▶ ︎ button. Then confirm the change by pressing on the item end located at the top right, and returns to the main screen of the app.
The time has come to export the project: tap on the symbol of a arrow coming out of a squareat the bottom right, then tap on the item Save Video to store it on your library. You will be able to view it again by pressing once again on the button to create the project, in the upper left corner of the main screen.
Magisto
Magisto It is certainly one of the most complete apps you can rely on to make high quality, yet simple, video montages on your iPhone. You can download it for free from the App Store, but I inform you that they are planned purchases in the app: in particular, during use you will be offered the possibility to access a subscription version a 6,99 per month which removes the watermark from the created videos and gives you access to extra functions.
To proceed, start the app by pressing on its icon (it shows the symbols of a circle and an arrow on a black background) on the Home Screen or in the App Library. On first use, press the button Start, then on the button Continue e seleziona l'opzione Allow access to all photos, to authorize the app to process your images.
On the next screen, you can choose to allow (via the wording Allow) or deny (by pressing on the item Do not allow, recommended) the authorization to send notifications and alerts, useful during the use of the app and to keep track of the activities carried out in the apps and on the websites of other companies, in order to also receive personalized suggestions.
You will then access a screen where you can define the reason why you are using Magisto. Alternatively, you can press the item Salta to directly access a screen where you will be offered the switch to the paid version: press the symbol [X], top left, if you don't want to perform this step.
Then you will access the main screen of the app, where you will immediately have the possibility to select the contents to include in your video, simply by tapping on each of the desired ones (a check mark will appear at the top). At the end, press on the voice NEXT to access a new screen where you can define the style that best suits your project, choosing from a wide range of preset proposed in the various sections indicated above.
Pigia, for example, on the voice Memories, then press one of the options that can be previewed on the central screen and tap the item NEXT, top right. Now, choose the ideal music as the soundtrack of your movie: at the top you will find the sections Recommended, All the music e Recent, which you can select, while below you will be shown the related available contents.
Then press the ▶ ︎ button to select them and listen to a preview at the same time: once the perfect background has been defined, press on the voice NEXT located at the top right. You will be offered a field in which you must type the title of the video: at the end, click on the wording Crea, then wait for the preparation of the video, the conclusion of which will be notified to you by a special application message.
When finished, click on the button Save, to store the video on your device and, if you do not want to make the video public, click on the wording Public and presses on the option Non in cast, in order to share it, in the next step, only in the mode of your choice. Then tap on the button Continue, then select the item Download to have it available on the memory of your device (or, alternatively, use one of the tools available to publish it, for example on some social networks such as Facebook, Instagram o YouTube).
More apps to create iPhone photo video
If none of the solutions provided satisfied you completely and you want to try other apps to create video with iPhone photos, in the list below you can find some good free alternatives to test.
- Inshot. It is one of the most functional apps for photo and video editing. The basic version is free, but offers in-app purchases to unlock more advanced features and remove the watermark, with subscription plans starting at € 3,99 per month.
- WeVideo. With this app you can create videos using preset themes and combining movies, photos and music. WeVideo is also free, but in the basic version it watermarks the movies. You can remove it by subscribing to one of the subscription plans offered, with prices starting at € 4,49 per month.
- PicPlayPost. Another excellent free app for creating video presentations by mixing different types of multimedia files, such as movies, photos, GIFs, music. It is also particularly easy to use and full of transition effects and filters of all kinds. It is possible to remove the watermark that is imprinted in the productions made with the free version by switching to a subscription plan, with different solutions starting from 6,99 euros per month.