Install and / or update VLC
If it is your intention to learn a record with VLC, the first thing you need to do (if you have not already done so) is to install the program on your computer, or update it to the latest version available.
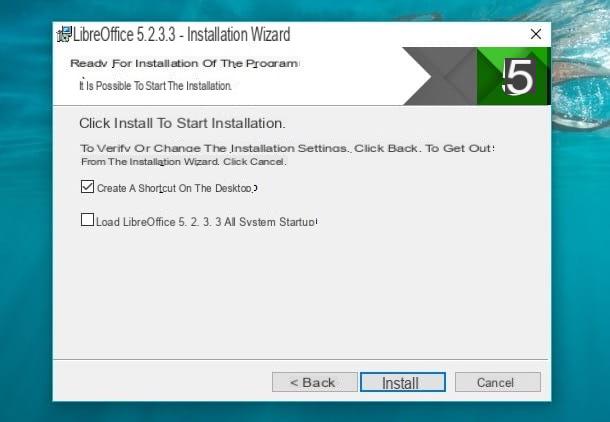
If you do not already have the program, first download it by connecting to its main page and pressing the button Download VLC, located on the right side of the screen. Once this is done, launch the file you just downloaded (eg. VLC-XXX-win64.exe) and, if you are on Windows, sui pulsnti award Yes e OK, then click on the button three times in succession NEXT and, to complete the procedure, on the buttons Install e Close.
If you have already installed the program before, I suggest you update it to the latest version released by clicking on the menu Help placed at the top and then on the item Check the updates…. In case of new updates available, the software will immediately inform you of their presence: to start the download and installation of the update, press the button Download and install.
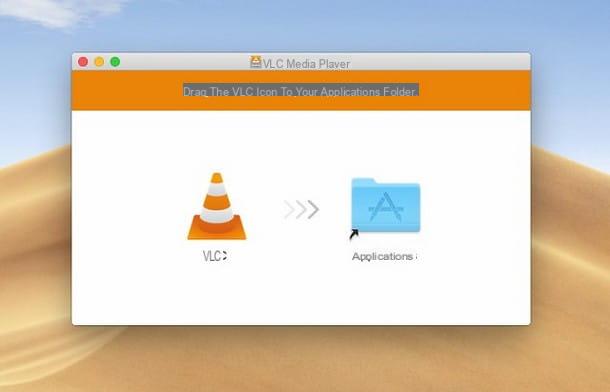
If, on the other hand, you find yourself on Mac, the setup procedure is completely different: after obtaining the installation file (eg. VLC-XXX.dmg) from the official website of the program, launch it without hesitation and, using the Finder shown on the screen, drag the VLC icon into the folder Applications macOS and that's it!
To check for updates, instead, click on the menu VLC located at the top left, select the item Check the updates… From the latter and, if necessary, press the button Download and install to complete the update procedure. If you need more information on the installation procedures of the program, I invite you to take a look at my specific guide on the subject.
How to Record Desktop with VLC
Now that you have finally installed or updated the software, it's time to take the real action and figure out how to record the desktop with VLC, both on Windows and on macOS: although the program is practically the same on both operating systems, the two procedures differ slightly.
Windows
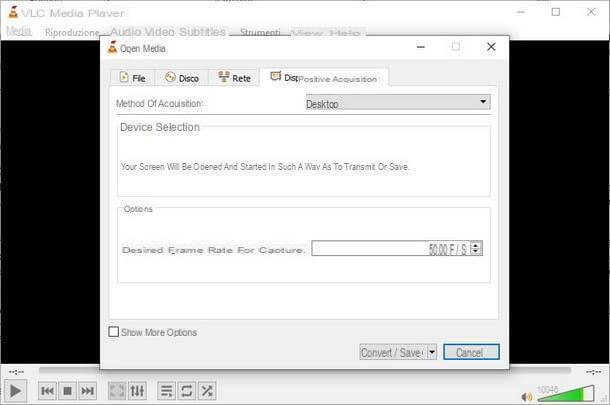
To register the desktop with VLC for Windows, starts the program calling it from the menu Home (l'icona a forma di pennant located in the lower left corner of the screen), click on the menu Media resident at the top left, then tap on the item Convert / Save (or, alternatively, use the key combination Ctrl + R to quickly call up the appropriate section).
At this point, through the new window that appears on the screen, go to the tab Acquisition devices, select the voice desktop from the drop-down menu next to the item Method of acquisition, then adjust the refresh rate for shooting across the field Desired frame rate for capture (personally, I recommend using the setting 50 f / s).
To capture the desktop recording to a video file to save to your PC hard drive, click the button Convert / Save resident at the bottom of the screen: make sure the Source next window is set to the option screen: , check that the item Converted is marked with a check mark (otherwise you do it) and, finally, set the menu Profile on the option Video - H.264 + MP3 (MP4).
To conclude, click on your button Shop by Department placed next to the item Destination file to choose the folder in which to save the new file, indicate his name in the appropriate text field and finalize everything by clicking on the button Save.
Once this is done, you can finally start the actual recording by pressing the button starts, resident at the bottom: VLC will immediately start to acquire the video sequence coming from the desktop, saving it in the file indicated above. The program will continue to record until the acquisition is stopped manually: to do this, you simply have to press the button Stop located in the lower bar of the program. That's all!
Mac

As I mentioned earlier, VLC's desktop capture procedure for Mac is slightly different: first, start the program by calling it from the Launchpad (l'icona a forma di rocket annessa there Dock bar), then click on the menu Fillet placed at the top and, subsequently, on the voice Open capture device.
Once on the next screen, select the option Screen from the drop-down menu at the top, set the value 50 in the field Frames per second, enter the check mark next to the item Flow output and, when you are done, click on the item Settings.
In this window, you must instead set all the parameters related to saving the file on the disk: first, put the check mark next to the item Fillet, then use the key Shop by Department to choose where to save the recording (by default, it is saved in the folder Documents), select how Encapsulation method the voice MPEG 4, put the check mark next to the items Video e Audio and finally, make sure you use the codec righteous (i.e. h264 e mp3) and to correctly set the acquisition parameters (2048 kb / s for video bitrate e 128 kb / s for 2-channel audio bitrate).
When you are done, click on OK to return to the previous window and, to start recording, press the button without delay apriMac screen capture and conversion to the desired file will begin immediately, with no input visible from the interface. To stop recording, even in this case, just press the button Stop, located at the bottom.
How to record streaming with VLC
Is it not your intention to record your computer desktop, but to capture a network stream and save it to a file on disk? Then this is the section of the tutorial for you: below, in fact, I will show you the instructions to carry out this type of acquisition, both on Windows that of MacOS.
Windows
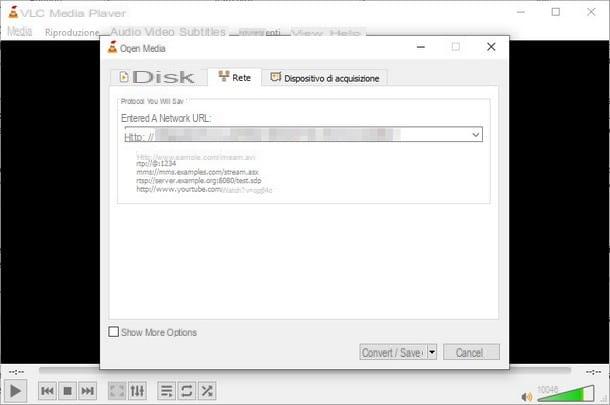
As for Windows, the first thing you need to do is click on the menu Media I will select the voice Convert / Save: once this is done, go to the card Network, insertion il link to network flow to be registered in the appropriate field in the center of the window and click on the button Convert / Save, located at the bottom.
At this point, make sure that in the field Source the same link that you entered previously is indicated, put the check mark on the item Converted and, also in this case, set the drop-down menu Profile on the item Video - H.264 + MP3 (MP4).
Almost there: click on the button Save (present next to the wording Destination file) to choose where to save the video file and, to conclude and immediately start recording the stream, click on the button starts, located at the bottom.
Again, VLC will immediately start recording the stream in the path indicated above, without any visual feedback (the recording is done in the background): to stop capturing the stream, just click on the button Stop present in the program interface.
If, on the other hand, you want to start recording while playing the stream at the same time, you have to follow a slightly different procedure: first, access the menu Media and click on your voice Open Network Stream (You can also use the keyboard shortcut if you like Ctrl + N). Next, enter the link of your interest in the field Stream URL attached to the next window, then click the button Play, located at the bottom, to start playing it on VLC.
While the network stream is playing normally, click on the menu Show placed at the top and press on the item Advanced controls. If everything went well, you should see new buttons appear within the play bar, including the button Register (identified by the classic icon in the shape of red circle). Click on it to start recording immediately, without going through the configuration window.
When you are satisfied and want to stop recording, click the button again Register or press the button Stop: in this case, VLC will save the file in the folder Video computer, using the default conversion settings.
Mac
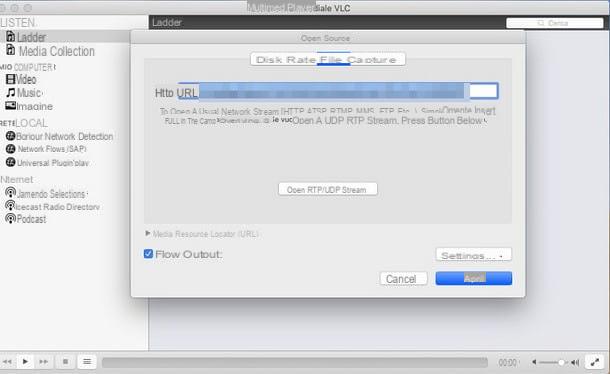
Su Mac, the network flow acquisition procedure is slightly different from the one seen above: after starting the program, click on the menu Fillet placed at the top and, subsequently, on the voice Open network. In the window that appears immediately after, enter the link to the network stream you intend to both play and record, then put the check mark next to the entry Flow output.
At this point, click on your button Settings and adjust the parameters as I have already shown you in the section on desktop registration; when you are done, click on the buttons OK e apri to start recording and save the network stream inside the file specified above, presumably located in the folder Documents from the Mac.
If you intend to record the stream in streaming and play it at the same time, go to the menu Fillet and click on the entry apri Network, then enter theflow address within the field provided, making sure to remove the check mark from the item Flow output.
Fatto ciò, click on your button apri. As soon as the streaming video is playing, presses on the menu Playback and apponi il segno di spunta accanto alla voce Register: VLC will start recording with basic settings, saving the file to your Mac's Documents folder. To stop both playback and stream capture, just click the button Stop.
How to record from webcam with VLC
How do you say? Do you want to “transform” the webcam into a sort of camera and record the images coming from it? No problem, VLC is able to do this quickly and easily, both on Windows that of MacOS.
Windows
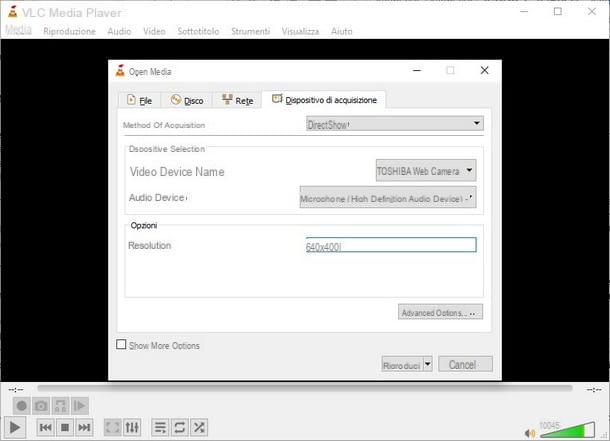
To proceed, after opening VLC for Windows, click on the menu Media and select the item on Open capture device. Arrived in the new window, make sure that in the field Method of acquisition the option is set Directshow (otherwise do it yourself), then select your webcam via the drop-down menu Name of the video device.
If you intend to record audio as well, make sure you select the correct microphone in the drop-down menu Peripheral audio and, finally, enter the resolution of the video you wish to obtain in the appropriate text field; personally, if you don't know what to choose, I recommend using the parameter 640 × 480, suitable for all types of webcams.
When you are done, press the button Play to view everything that the webcam frames on the screen and, once satisfied with the result, prepare VLC for recording the contents: then click on the menu View> Advanced Controls to activate the acquisition controls and, to start recording the webcam stream, press the button Register (The red circle). When you're done, press the buttons Register o Stop to stop capturing the video and save everything as a file (stored, by default, in the folder Video of Windows).
Mac
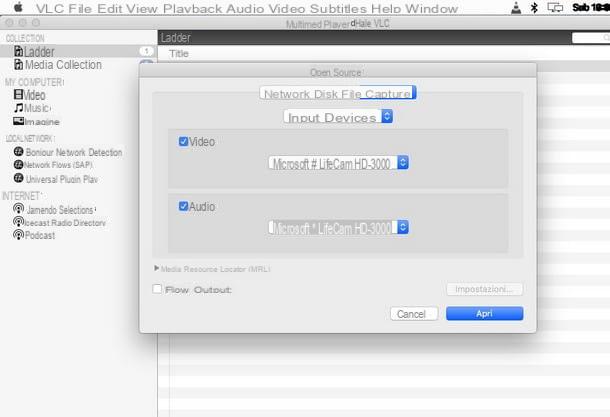
If you want to record a video via the webcam with VLC for Mac, you can act in an equally simple way: after opening the program, click on the menu Fillet and select the item Open capture devices. Make sure that the item is set in the top drop-down menu Input devices, then tick the items Video e Audio, making sure that your Mac's webcam and microphone are selected in the respective fields.
At this point, click on your button apri to see in real time everything that is captured by the webcam and, when you are ready, presses on the menu Playback> Record to start capturing content via the previously selected webcam and microphone. When you are done, click on the button Stop located at the bottom: the resulting video will be automatically saved in the folder Documents from the Mac.
Other useful resources

If you have come this far, it means that you have learned perfectly how to record with VLC using the steps I explained to you throughout this tutorial. Before leaving, however, let me give you some more information about this light but powerful multimedia software: VLC, in fact, is not only able to play almost all existing multimedia formats (both audio and video), without using codecs, or to record content, but it can be used for many other purposes, including rotating and zooming videos, playing damaged movies, and much, much more. I told you about it in detail in my thematic tutorials, which I list below.
- How to slow down a video with VLC
- How to rotate videos with VLC
- How to zoom a video with VLC
- How to trim a video with VLC
- How to restore damaged videos
- How to speed up videos
- How to take a still image of a video
- How to watch IPTV on PC